Harrier GR3 [Kinetic 1/48]

On poste ici les photos de ses modèles pour avoir l'avis des autres ou simplement pour montrer l'évolution.
Your models - Post your own model pics here to get the opinion of Master194 fellow members or just to show your step by step building progress

Modérateur : master194

Répondre
bx19gt
Messages : 4060
Enregistré le : dim. 1 mars 2009 09:49

Harrier GR3 [Kinetic 1/48]

Message par bx19gt »

Bonjour à tous

Apres le Miles Master, j'ai decidé de rester dans le monde briton avec le Harrier GR3

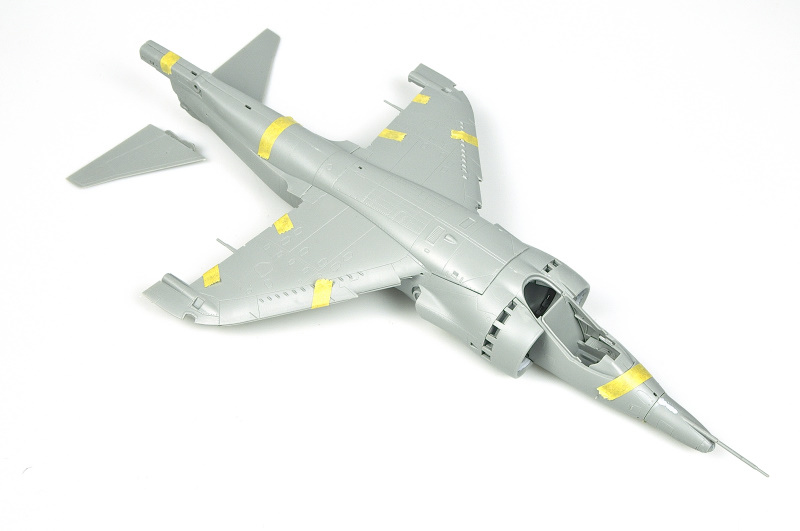
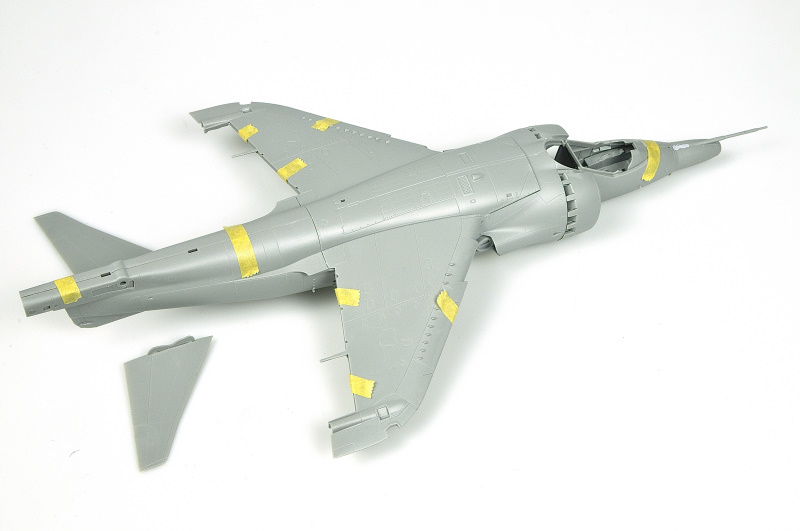
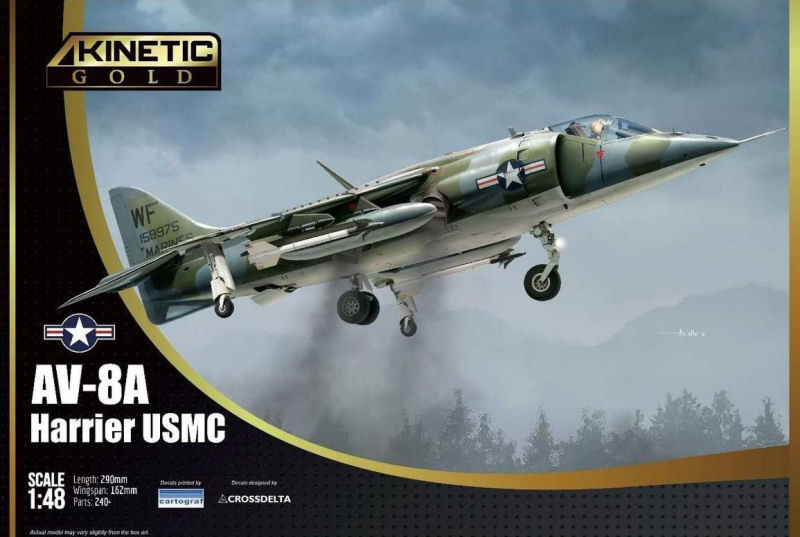
Pour cette maquette, je vais partir de la boite AV-8A de Kinetic
Pourquoi ce choix ? Parceque tout simplement j'ai pu l'avoir à bon prix ce qui m'a permis d'y adjoindre une planche de decalques Xtradecal

Image

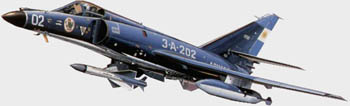
La planche de décalques est la suivante

Image

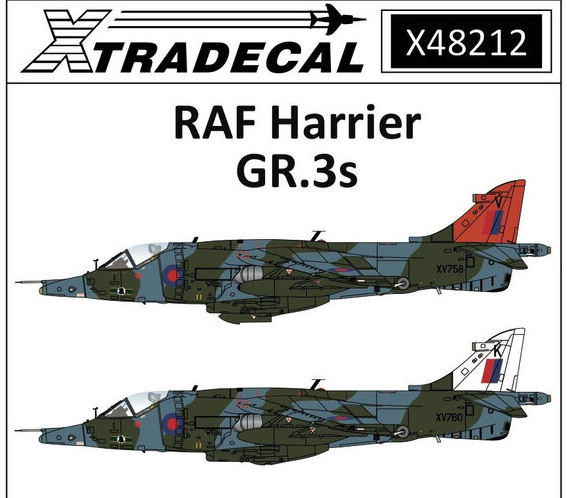
J'hesite encore entre faire celui à la queue blanche ou celui à la queue rouge

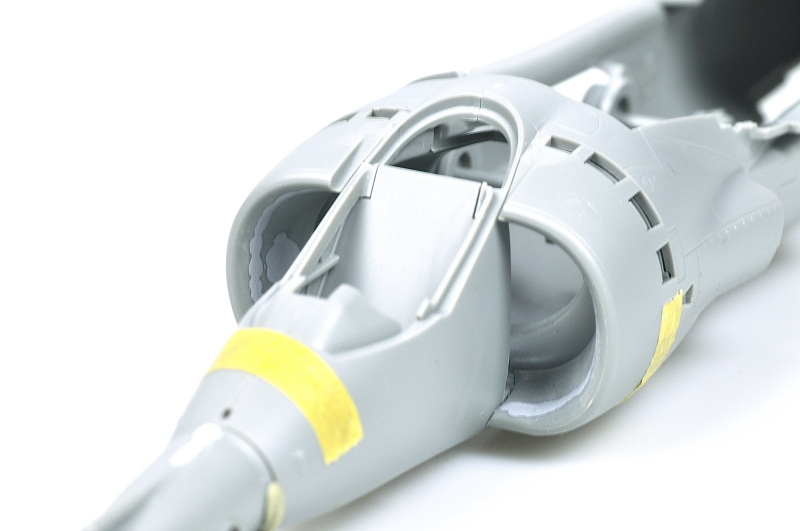
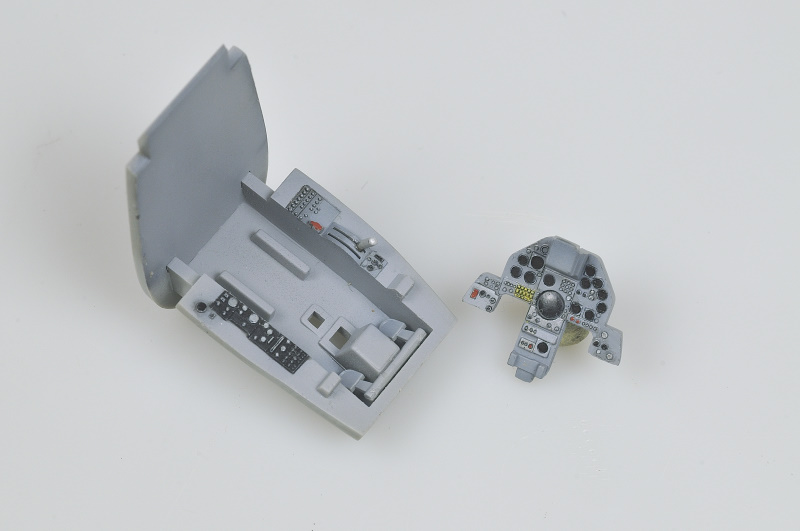
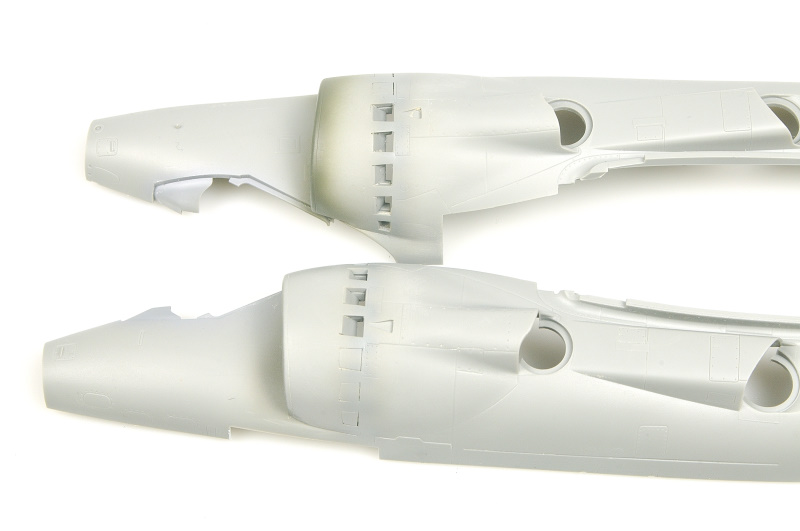
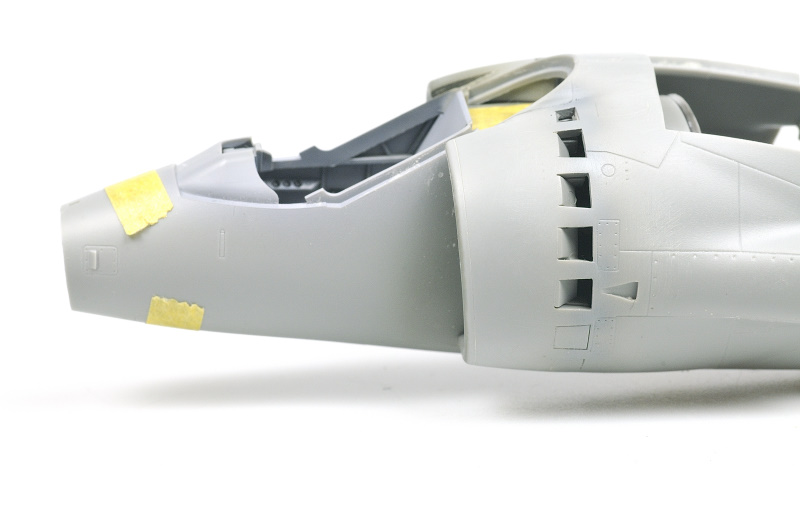
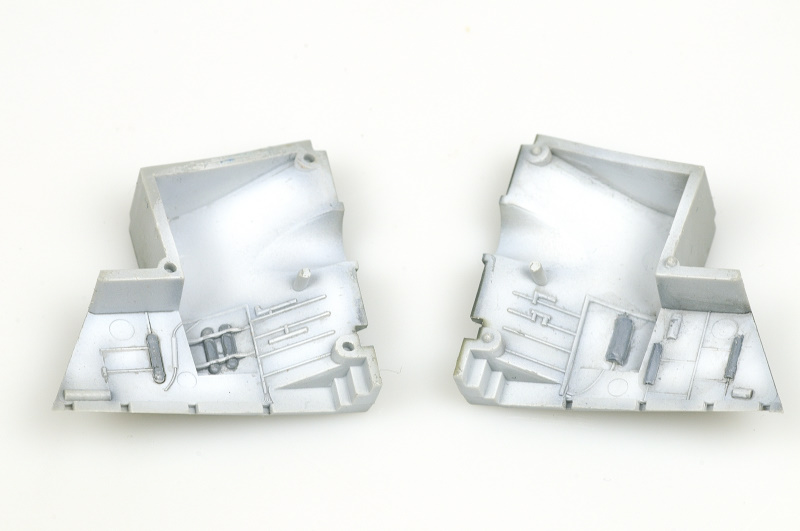
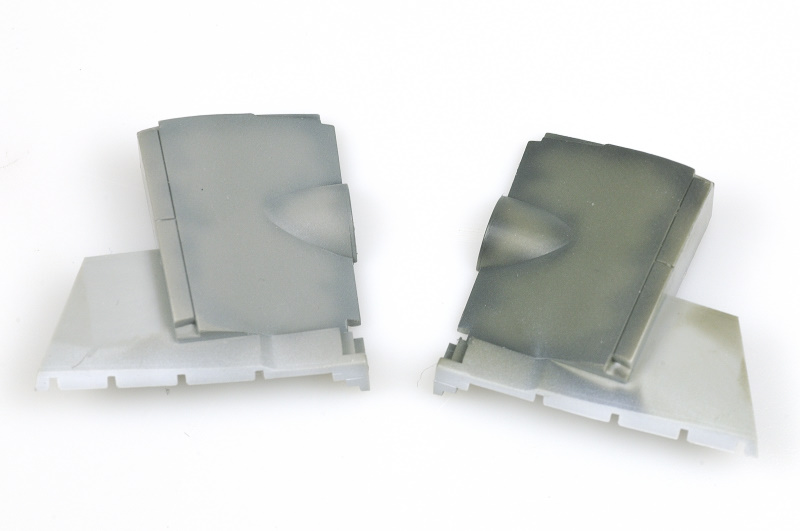
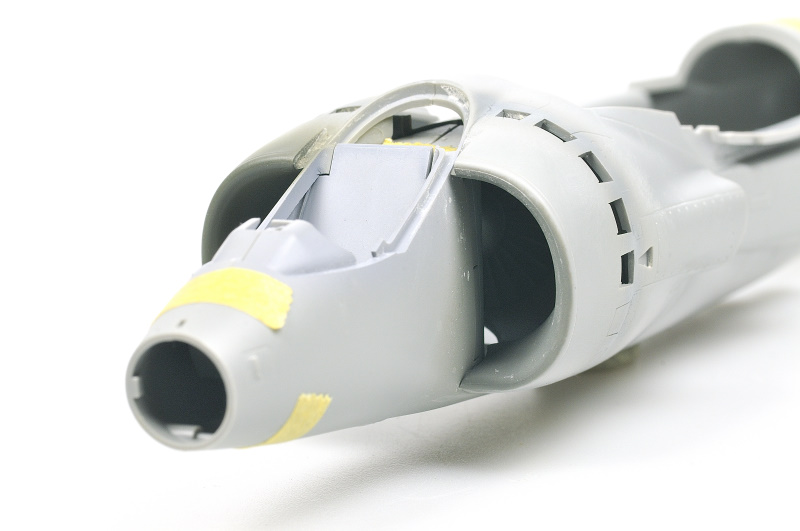
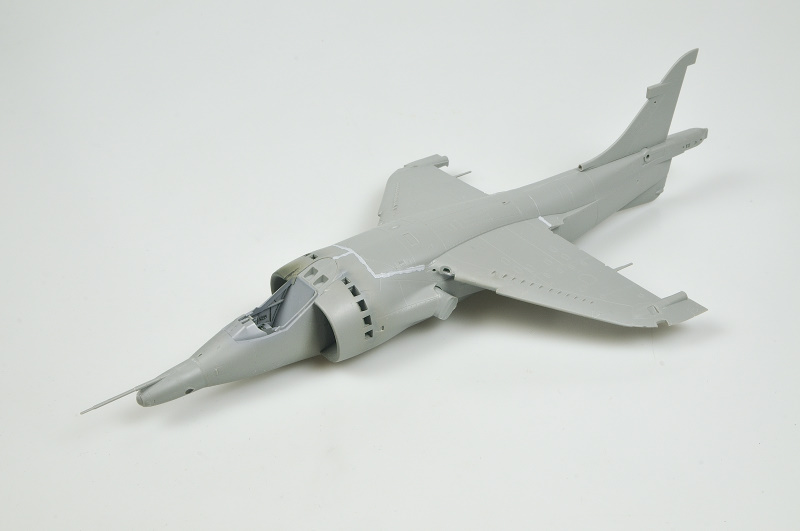
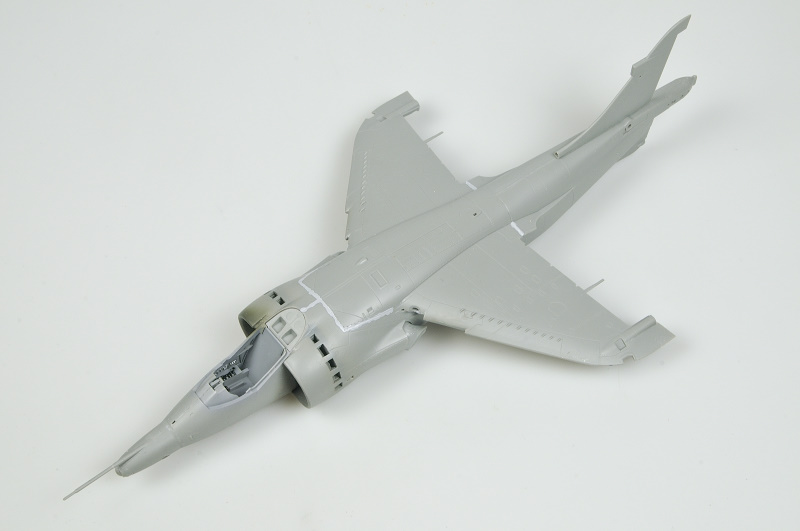
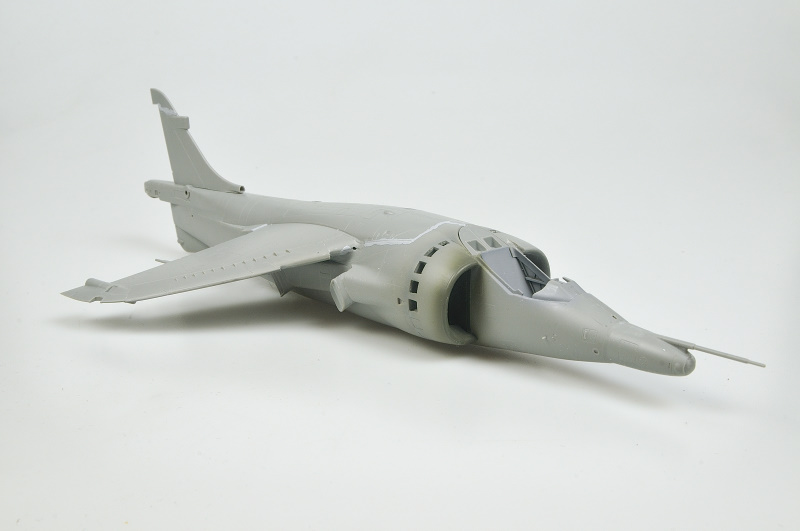
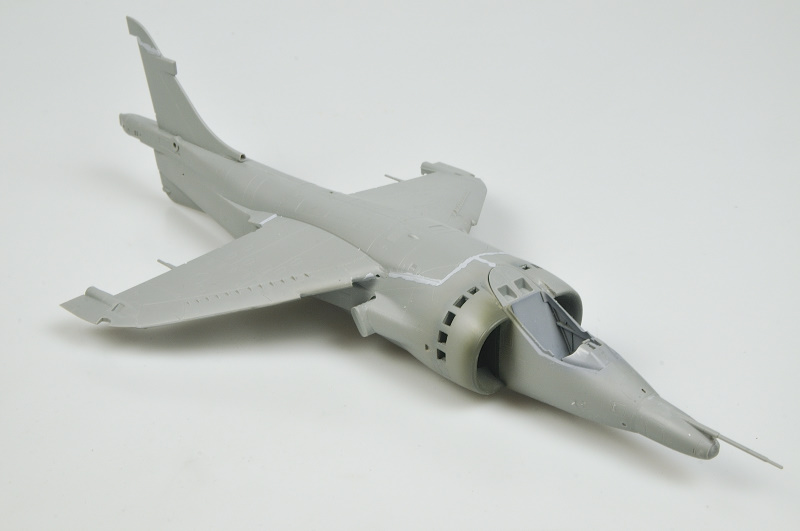
Bien que ce soit un AV-8A, le kit contient le nez specifique du GR3
A noter que Kinetic a revisé le moule entre le GR1/3 paru plus tot et l'AV-8A

Harrier GR3 [Kinetic 1/48]

Publicité

Publicité
 

Avatar du membre
Emmanuel
Messages : 3978
Enregistré le : lun. 31 janv. 2005 00:07
Localisation : Bordeaux

Re: Harrier GR3 [Kinetic 1/48]

Message par Emmanuel »

Beau montage en perspective.
Perso je choisirais la queue blanche...
bx19gt
Messages : 4060
Enregistré le : dim. 1 mars 2009 09:49

Re: Harrier GR3 [Kinetic 1/48]

Message par bx19gt »

J'ai commencé le montage
Pour l'instant j'en suis à verifier les ajustages

Globalement c'est du bon Kinetic en tout cas nettement mieux que le T-45

On voit que des progres ont été accompli

Comme deja vu sur d'autres montages le point delicat est la jonction aile/fuselage

Image

Image

Il y a aussi un endroit sur l'aile superieur qu'il faut couper un peu si on veut que l'aie inferieur prenne sa place.
Pour savoir ce qu'il y a à coupe, j'ai peint la partie visible

Image

Image

Je me suis attaqué aux entrée d'air et j'ai decidé de coller la partie interieur pour traiter le joint

Image

Image
bx19gt
Messages : 4060
Enregistré le : dim. 1 mars 2009 09:49

Re: Harrier GR3 [Kinetic 1/48]

Message par bx19gt »

Un gentil contributeur anglais m'a fourni une riche documentation detaillant les corrections à faire sur le kit
Elles sont nombreuses, entre des corrections sur les ailes (facile à faire pour certaines), sur le fuselage, les canons, la verriere (dont il manque un renfort venant s'encastrer sur l'entree d'air), il y a un peu de boulot.
La peinture proposée pour les consoles est fausse (dommage pour moi je venais de les peindre)

Il manque par exemple deux petites entrées d'air sur le dos du fuselage.

Je ne pense pas pouvoir faire toutes les corrections mais je vais essayé d'en faire le maximum
Avatar du membre
Point-fixe
Messages : 7974
Enregistré le : dim. 24 oct. 2004 12:05
Localisation : Traenheim, 20 km ouest de Strasbourg
Contact :

Re: Harrier GR3 [Kinetic 1/48]

Message par Point-fixe »

bx19gt a écrit : mar. 13 févr. 2024 09:19 Un gentil contributeur anglais m'a fourni une riche documentation detaillant les corrections à faire sur le kit
Interessant !
Alors je vais suivre ton montage (et les corrections) de près car j'ai cette maquette sur ma pile et c'est un avion que j'affectionne particulièrement.
ca me rappelle les meetings aériens d’antan ...

Beau début :x
Avatar du membre
Griffin
Messages : 11390
Enregistré le : mar. 29 mars 2005 17:45
Localisation : Ruffec (16)

Re: Harrier GR3 [Kinetic 1/48]

Message par Griffin »

Ayant aussi un petit faible pour la bestiole, à suivre itou. :)
bx19gt
Messages : 4060
Enregistré le : dim. 1 mars 2009 09:49

Re: Harrier GR3 [Kinetic 1/48]

Message par bx19gt »

Cela avance doucement mais cela avance

J'ai quasiment terminé le cockpit

Image

Image

Image


J'ai peint les entrées d'air

Image


Et j'ai corrigé l'aile en comblant les trous pour les pylones interieur afin de les deplacer de 3mm

Image
mktavion48
Messages : 2030
Enregistré le : sam. 9 janv. 2016 12:50
Localisation : SAINT MARTIN DE SEIGNANX

Re: Harrier GR3 [Kinetic 1/48]

Message par mktavion48 »

Bonjour
Entre tes mains, cette maquette va être comme d'habitude une réussite.
A suivre.
Jean Marie
2 Mirage III C
F-5A et F-5B HAF
1 Mirage III B
Avatar du membre
dirtydm
Messages : 4997
Enregistré le : sam. 28 mai 2011 21:50
Localisation : 59 TOURCOING

Re: Harrier GR3 [Kinetic 1/48]

Message par dirtydm »

un beau démarrage!
YANN
Image
Avatar du membre
JOEL
Messages : 10135
Enregistré le : sam. 27 mars 2004 22:33
Localisation : PAU

Re: Harrier GR3 [Kinetic 1/48]

Message par JOEL »

Salut,

Très joli début de montage, ça promet :super:
En cours: Tu-143 Reys, EC-121 Heller
Avatar du membre
Point-fixe
Messages : 7974
Enregistré le : dim. 24 oct. 2004 12:05
Localisation : Traenheim, 20 km ouest de Strasbourg
Contact :

Re: Harrier GR3 [Kinetic 1/48]

Message par Point-fixe »

bx19gt a écrit : jeu. 15 févr. 2024 00:28
Et j'ai corrigé l'aile en comblant les trous pour les pylones interieur afin de les deplacer de 3mm

Image
Tu pourrais nous dire vers où tu les as déplacé de 3mm ?

Et tu pourrais nous lister la liste des modifs à faire donnée par le contributeur britannique ?
Ca pourra toujours servir :wink:
bx19gt
Messages : 4060
Enregistré le : dim. 1 mars 2009 09:49

Re: Harrier GR3 [Kinetic 1/48]

Message par bx19gt »

Je ne les ai pas encore deplacé
Mais il faut les reculer

Pour les modifications, j'essaye de vous resumer cela
Avatar du membre
olivdelyon
Messages : 2444
Enregistré le : mer. 17 févr. 2016 20:33

Re: Harrier GR3 [Kinetic 1/48]

Message par olivdelyon »

Ouh quel joli sujet, j'ai aussi une faiblesse pour le premier decolleur vertical operationnel ! Je m'installe.
bx19gt
Messages : 4060
Enregistré le : dim. 1 mars 2009 09:49

Re: Harrier GR3 [Kinetic 1/48]

Message par bx19gt »

Voici les corrections à realiser pour le GR3. Je mets à coté si la correction est necessaire en utilisant la boite AV8-A

- Sur les ballancines : supprimer l'anneau d'arrimage des avions n'ayant pas participé aux Malouines. Supprimer le verrou de stabilisateur. Utiliser les pieces N18
- Piece E25 : descendre le RCV derriere les deux events. Utiliser la piece N24
- Corriger les pieces D1 et D4 des pylonnes
- Supprimer le renfort interieur sur l'aile qui gene le montage
- Corriger le details de l'entrée d'air et de la sortie d'air de l'APU
- Corriger la forme de la piece E15 de mise à l'air du reservoir
- ajouter la vitre de la camera laterale (presente sur le kit AV8-A et dans le dernier boitage du GR3)
- Les ballancines sont trop etroites pour un positionnement retracté (à voir avec les ballancines corrigées de l'AV8-A)
- queue courte sur les premieres versions
- queue longue avec systeme RWR utiliser la piece prevu pour le FRS1 du kit AV8-A
- ventilation unique du systeme electrique sur les capot moteur (double sur les GR1)
- sur GR1 uniquement : sur piece E25 pas d'aeration circulaire
- Pas d'event sur le carenage du cone arriere des GR1 et AV8-A
- 1 seul event sur le carenage du cone arriere sur les GR1a
- Carenage arriere ventilé sur les premier GR3 et sur les dernier AV8-A
- Systeùe RWR sur le cone arriere des derniers GR3 (present dans le kit)
- Ajouter la vitre de la camera lateral des GR1-3 avec le nez laser (corrigé dans le kit de l'AV8-A)
- pas de radar altimetrique sur les GR1-3 sur l'aileron ventral
- radar altimetrique UK sur l'aileron ventral des derniers GR3
- Antennes du transpondeur I-Band
- Baignoire et instruments specifiques au GR1 (à voir pour la version que l'on fait)
- Baignoire et instruments specifiques au GR3 (à voir pour la version que l'on fait)
- renfort lateral sur l'arriere de la verriere (piece D20 present sur la N8 prevu pour le AV8-A)
- Utilisation du siege Martin Baker 9A pour tous les GR1-3 et 90 premiers AV8-A
- Panneau derriere l'aerofrein : presence ou non de l'ALE 40 : absent des GR1/1a/3 et present sur les 3 (donc au choix pour le 3)

Voilà en esperant ne pas etre trop nebuleux
Avatar du membre
Point-fixe
Messages : 7974
Enregistré le : dim. 24 oct. 2004 12:05
Localisation : Traenheim, 20 km ouest de Strasbourg
Contact :

Re: Harrier GR3 [Kinetic 1/48]

Message par Point-fixe »

Effectivement il y a du boulot.
Même si il faudra que je lise tout ça à tête reposée, merci pour ce listing.

Et je suis de près ton montage qui semble bien parti :x
bx19gt
Messages : 4060
Enregistré le : dim. 1 mars 2009 09:49

Re: Harrier GR3 [Kinetic 1/48]

Message par bx19gt »

Il faut faire attention au modele que tu souhaites faire car une partie des modifs ne concernent que les GR1
Si tu n'as pas encore acheter de kit, je pense qu'il faut se diriger vers les dernies boitages qui comportent une partie des corrections.
Par exemple le boitage AV-8A comporte pas mal de corrections (entrée d'air, panneaux, verriere)
Avatar du membre
Point-fixe
Messages : 7974
Enregistré le : dim. 24 oct. 2004 12:05
Localisation : Traenheim, 20 km ouest de Strasbourg
Contact :

Re: Harrier GR3 [Kinetic 1/48]

Message par Point-fixe »

J'ai acheté le Gr.3 quand il est sorti.
En fait j'ai craqué pour le boxart.
Et je ferai un Gr.3 de la RAFG, comme je les ai vus à l'époque bénie des journées portes ouvertes dans l'est de la France
Avatar du membre
airte974
Messages : 756
Enregistré le : sam. 18 avr. 2009 20:26
Localisation : Ile de la Réunion

Re: Harrier GR3 [Kinetic 1/48]

Message par airte974 »

Bonjour,
j'avais sauvegardé ça (je ne sais plus d'où par contre).

by Nick Greenall from IPMS (UK) Harrier SIG
Patience rewarded! This new kit of the Harrier GR.1 / GR.3 has been a long time coming. Let’s celebrate that Kinetic have done what no British, or other kit manufacturer has yet done, despite many requests... provided kits for the whole family of first-generation Harriers in this scale, completing the set with the GR.1 / GR.3. Thank you to Raymond Chung, Laurent Stern, David To and all the team at Kinetic and to Daniel Lee at CrossDelta from all model-making Harrier Fans across the globe!
Rather than trying to cram every option into one box, the sensible yet bold decision was made to release separate kits for the Royal Air Force’s GR.1s and GR.3s, the United State Marine Corps’ AV-8A, and the Spanish Navy’s AV-8S; this latter being due for release by AMMO-Mig in the new year with decals to enable all Spanish AV-8S from 1980 when the ARMADA lettering began to be made plus one further USMC AV-8A and a winter-camouflaged (TBC) RAF GR.3 option.
(As I write this work is ongoing with CrossDelta on the AV-8S kit’s markings.) The after-market decal manufacturers have already been busy for the RAF and USMC options and can pick up the markings for the Royal Thai Navy’s AV-8As… Yes, the RTN used the AV-8A designation for the Harriers it acquired from Spain. Equally, the aftermarket teams can have fun producing all the lumps, bumps and lift-improvement devices needed for USMC AV-8Cs. Time to get technical...


How to Identify a Harrier GR.1 From a GR.1A or GR.3… It’s NOT All Nose and Fin Shapes!
The type designation of all 1st generation RAF Harriers has nothing to do with the shape of the airframe’s nose, fin or tail-stings. It was determined solely by the mark of Rolls-Royce Pegasus engine fitted.
• GR.1 - Pegasus 6, Mk.101 of 19,000lbs thrust. Harriers XV738-XV762 and XV776-XV810 were built as GR.1s. The two-seater with the Pegasus Mk.101 was the T.2.
• GR.1A - Pegasus 10, Mk.102 of 20,500lbs thrust fitted from 1971. XW630-XW924 were built as GR.1As. The surviving GR.1s were upgraded in service. The GR.1 and GR.1A had two large electrical system cooling vents on top of the engine covers and no circular mesh vents in the tail-sting. The two-seater with the Pegasus Mk.102 was the T.2A.
• GR.3 - Pegasus 11, Mk.103 of 21,500lbs thrust and an improved electrical system, installed from 1976. Early in-service upgrades retained the original airframe shapes but lost the two vents on the engine covers and acquired seven circular mesh vents in the bullet-shaped tail-sting – two underneath, two each side and one on top offset to port. After a few months a smaller vent for the new electrical system appeared offset to starboard in front of the mesh covered GTS/APU intake, seen subsequently on all GR.3s and Sea Harriers. The two-seater with the Pegasus Mk.103 was the T.4.
Complicating matters and leading to all sorts of confusion about the GR.3 were the Phase 4 Modifications of to early GR.3s which also began in 1976. These added the Ferranti Laser Ranger and Marked-Target Seeker (LRMTS) in a new thimble-shaped nose and the Marconi passive Radar Warning Receiver unit and radomes to the fin and tail-sting; also increasing the fin’s height by 5 inches. XV760 was the first in-service GR.3 to have the LRMTS nose and RWR fitted, with XZ128 being the first new production GR.3 built with those Mods. The last GR.3 built was XZ999, before four Falklands War attrition replacements ZD667-ZD670 finished the line.
In summary… Yes, all Harriers with the LRMTS nose and RWR fittings are GR.3s but, not all GR.3s have the LRMTS nose and RWR fittings. Check the engine cover and tail-sting for vents on Harriers with the original nose, fin and tail-sting shapes to confirm the mark!
Enough Harrier geekery, to the kit!


Highlights
This kit builds on the improvements made by Kinetic to the build-quality of the earlier Sea Harrier kits with the release of the two-seater kit. I have yet to have the plastic in my hands, but I know that those who have built it have said everything goes together very smoothly with minimal filler needed around the wing to fuselage joints.
Seven marking options cover an early GR.1s of 1969-70 to the final RAF GR.3 schemes of 1990, with two early GR.3s deployed to Belize in the mix. The subject of Airfix’s original 1/24 scale GR.1A kit XV788/M of 1(F) Squadron is recognised as a GR.1 in its original gloss colours with three-colour roundels and as a GR.1A in its matt colours with two-colour roundels. Option 7 - GR.3 XZ997/V - is now preserved in the RAF Museum at Cosford in the IV(AC) Squadron colours it wore when it left RAF service in August 1990. If only there had been room to do 3(F) and 20 Squadrons, later 1417 Flight (Belize) and 1453 Flight (Falklands) options too. The schemes chosen were done in the knowledge that the aftermarket decal producers had many RAF schemes already covered, including for those units the kit’s markings do not cover.


BIG Tip
I know this will be heresy to many modellers, but the best advice I can give you is to:
• decide on which mark, and
• markings scheme you are building the model as, referring to photographs, and then
• READ the instructions carefully, highlighting all references to your chosen mark and marking option.
Refer to the instructions throughout the build for guidance on the nose/fin/tail-sting/details combinations needed for each marking option provided. Note also the painting callouts added throughout the instructions.
Why is this a Big Tip? Harriers are complex beasts, with changes to UHF aerial shapes, the addition/removal of lumps and bumps and other detail items to trip up the unwary.


More Tips to Get Your Harrier Looking the Part…
• Fuselage – Some modellers stray from the instruction’s build sequence and do it this way:
• Fit the intake/front wheel-well pieces (P25, P26) into each fuselage half.
• Add the intake interior parts (N11, N12) to the outside of each half, then
• Fit the intake exteriors to each half with open/closed auxiliary doors in place
○ N1 and N2 (open) use these for a parked Harrier on the ground, engine off.
○ N4 and N6 (closed) use these for a Harrier in flight at speed; not hovering or taxying!
○ For a Harrier in the hover or taxying, modify N1 and N2 to show all doors open.
• Fit the cockpit tub in one half before joining the fuselage halves together
• Finish the intakes with parts P34 and C3
• Add the main undercarriage bay and airbrake bay assembly into the rear fuselage
• Replace the nozzle mechanism with a 36mm (approx.) spacer fitted between the nozzle openings to keep the fuselage the correct width for adding the wings to.
• Wingtips – Remove the small raised triangles ahead of the outrigger fairings inside parts I1 and I3. Adjust the shape of both parts to better fit with part I2 along the outer edge of the outrigger fairings.
• Wing Leading Edge – Fill the step under the dog-tooth ahead of the inboard pylons and the step down on the fillet underneath where the wing meets the fuselage.
• Wing trailing edge – Thin down the inside surfaces of the trailing edges to avoid any step down to the ailerons and flaps.
• Flaps – Usually up on parked Harriers, unless the aircraft had hydraulic issues. Pilots were fined for leaving them down so causing extra work for armourers and maintainers! Often seen 8-degrees down in lower speed flight (under 180kts) to provide increased lift.
• Ailerons – Usually level on parked Harriers, occasionally one up, one down. NEVER both down on any first-generation Harrier single-seater GR.1, GR.1A, GR.3, AV-8A, AV-8S or Sea Harrier; or any 1st gen twin-stick. Use aileron hinge parts E4 on both sides. (The ability to drop both ailerons was a Harrier II development i.e. the AV-8B series, GR.5/7/9 and the two seaters - TAV-8B, T.10/12.)
• Tailplanes – Check with photographs to get the correct anhedral and ‘stick-forward cows get bigger’ position of tailplanes on parked Harriers. Fill the step in the port tailplane (C17) underside’s leading edge.
• Outrigger legs – For all GR.1/GR.1As and most GR.3s use parts N18 without the tie-down rings moulded on them. For Falklands War GR.3s, including XZ997/31 in marking option 6, use the outrigger legs from sprue E, parts E28, with the tie-down tings on them. For the later XZ997/V with IV(AC) Squadron use parts N18.
• Pilot’s step – Fit P39 if the model depicts a Harrier with the canopy open, engine running or not. The step was connected to the canopy by a cord - close the canopy and the step retracts.
• Undercarriage door and airbrake positions – Parked 1st generation Harriers front undercarriage bay doors were usually open with the twin main bay doors closed, unless they had been manually opened for inspection. The front doors could be opened/closed manually too on the ground. When the engine was running both front and main doors closed automatically to minimise foreign object damage. The airbrake is usually partially dropped on parked and taxying Harriers; see photographs.
• Inboard pylons – For all GR.1/GR.1A/GR.3s use parts P27, P28, P32 and P33 with their straight leading edges. The instructions call-out the part numbers correctly, but the drawings show the Sea Harrier’s different shaped pylons (D1-D4) - do NOT use those!
• Wing fences – should be fitted perpendicular to the wing leading edge, the longest sections of parts PE2 and PE3 being on the wing upper surface; ease the slots with a razor saw.
• Radar Altimeter Aerials – None of the kit’s marking options need part PE24 fitted; these aerials only being fitted to some Harrier GR.3s in the late 1980s – check photographic references for the GR.3 you are depicting!
• ALE-40 Chaff/Flare Dispenser – Fitted to some GR.3s which served during the Falklands War and then to many of the fleet after the war but not to XZ997! Part D28 left over from the FA.2 kit can be used if the GR.3 you build had ALE-40s; modify part I34 as needed.
• Main nozzle fairing 8-fingered reinforcing plate (PE1) – This was only fitted to some GR.3s from the mid-1980s where the area had been damaged by heat and is only needed on XZ997/V in this kit.
• PE Fret – This item has been expanded to include all Kinetic Harrier PE parts, so some parts are not needed for this kit, e.g. 5, 14, 15, 17, 18, 19 are two-seat Harrier parts; 22, 23 are for the AV-8S and any AV-8A with formation lights. PE25 is for US-style of radar altimeter aerial panel used on the AV-8A and AV-8S.
• Ordnance – We asked for better, but the cost of new tooling is prohibitive when trying to keep the kit sensibly priced, so Raymond is leaving this to the aftermarket people. Eduard and ResKit now produce excellent UK ordnance for all Harriers and Sea Harriers, though a few gaps remain to be plugged. Note: Of the kit’s tank options, RAF Harriers only used 100-gallon tanks, they did not carry the Sea Harrier’s larger 190-gallon tanks.
Pylons - Watch Out! Discovered too late to change… The inboard pylons need their location adjusting backwards because when fitted “as made” they ‘throw’ the 100-gallon tanks 4-5mm too far forward; the tip of the tank’s nose should be level with the rear edge of the small fuel vent E10 when it’s in place. The inboard pylons are also 4mm too long, this needs to be removed from their trailing edges. The outboard pylons need moving 3mm outboard and also need moving back about 2mm. Adjust all pylons’ upper surfaces so they do not carry their stores nose down. Time for some fettlin’…
bx19gt
Messages : 4060
Enregistré le : dim. 1 mars 2009 09:49

Re: Harrier GR3 [Kinetic 1/48]

Message par bx19gt »

Merci

Les documents que j'ai viennent de la meme source
pinceau69
Messages : 204
Enregistré le : mer. 28 nov. 2012 18:11

Re: Harrier GR3 [Kinetic 1/48]

Message par pinceau69 »

Bonsoir,

A priori, les infos proviennent d'ici :
https://www.hyperscale.com/2020/reviews ... ewbg_1.htm

Je mets le lien, parce que la page propose des schémas complétant ce qui est écrit. Ça peut intéresser les amateurs de cette maquette.

Bonne fin de semaine !
bx19gt
Messages : 4060
Enregistré le : dim. 1 mars 2009 09:49

Re: Harrier GR3 [Kinetic 1/48]

Message par bx19gt »

J'ai poursuivi le Harrier

J'ai terminé le manche ce qui fait que le cockpit est prêt àà etre monté

Image

J'ai ensuite mis en place les entrées d'air
J'ai mis un peu de mastic pour qu'elle s'integre bien au niveau des ailettes. Il faut faire attention car il y a des gravures et il ne faut pas les abimer

Image

Image

J'ai peint les puits des trains

Image

Image

Sur le puit avant il ne faut pas oublier de peindre la surface exterieur qui se trouve etre l'entrée d'air

Image

On peut mettre en place tout ce monde pour voir ce que cela donne

Image

Et tester de fermer le fuselage pour voir qu'on ne verra pas grand chose de la peinture des entrées d'air

Image
Avatar du membre
Fafa
Messages : 6763
Enregistré le : sam. 29 janv. 2005 10:20

Re: Harrier GR3 [Kinetic 1/48]

Message par Fafa »

Avant de refermer le fuselage, tu peux rajouter la commande d'orientation des tuyères. :wink:
Image
bx19gt
Messages : 4060
Enregistré le : dim. 1 mars 2009 09:49

Re: Harrier GR3 [Kinetic 1/48]

Message par bx19gt »

J'ai fermé le fuselage

Comme deja vu sur des motages le point delicat et la jonction aile fuselage sur le dos

Image

Image

Image

Image
Répondre

Retourner vers « Vos maquettes »