 by
This kit is starting to show its age a bit… dating back to 2001. I knew it had an excellent reputation, but I had never taken the time to look at it closely… and let me tell you, it’s packed with detail!

Box contents
Time for a closer look at the sprues!


In summary, this is a truly detailed and refined kit, packed with interesting options like dropped slats, an open canopy, and a positionable boarding step. The remarkably fine engraving is outstanding for an early 2000s release. But how does it all fit together? Let’s find out!
Building the F-86D Sabre Dog
Having a Blackbox resin cockpit in my stash, I decided to swap out the kit parts. I used Gunze H317 for the main color. As usual with this manufacturer, the Blackbox resin tub requires almost no modification to the original kit parts for a perfect fit.

While still working on the cockpit, I’m focusing on the ejection seat: the Blackbox resin seat fits perfectly onto the original Revell plastic support, which is remarkably well-engineered.


The rest of the build is a real pleasure: everything fits perfectly! Just a tiny bit of putty for the seam lines, nothing more. It’s a very well-engineered kit.
However, there’s a slight catch in the instructions regarding the drag chute container… It felt strange to leave a gaping hole at the base of the tail. After a quick look at the forums, I found the answer: there are actually two different tail cones for the F-86D. One is ‘streamlined’ (early production) and the other (late production) is what Revell provides here. While some Revell boxings include both versions, this one doesn’t. Therefore, the manual is incorrect here, and you absolutely must use parts 18 and 74.
With the fuselage, wings, and nose assembled (and don’t forget to add nose weight!), it’s time for the paint shop!
The Paint Shop

When it comes to metallic finishes, I always stick with Alclad. After a quick cleaning, I applied a coat of Alclad Gloss Black Primer. Then, the entire model was sprayed with Polished Aluminium. The result is a beautiful metal finish… but a bit too uniform! Time to work on the shading.
I masked off the control surfaces and wing centers to paint them in standard Aluminium (a duller shade). For masking over metallic paint, I use Post-it notes as much as possible, or Tamiya tape that has been ‘de-tacked’ by sticking it several times on a clean surface to reduce its grip. When applied correctly, Alclad is quite durable… but it’s always better to play it safe.


Next, several panels were masked off to be painted in White Aluminium, while the rear section around the engine received a darker shade—a very noticeable effect on many reference photos. The painting session concluded with the radome in black (Gunze H077) and the anti-glare panel in Olive Drab (Gunze H304).

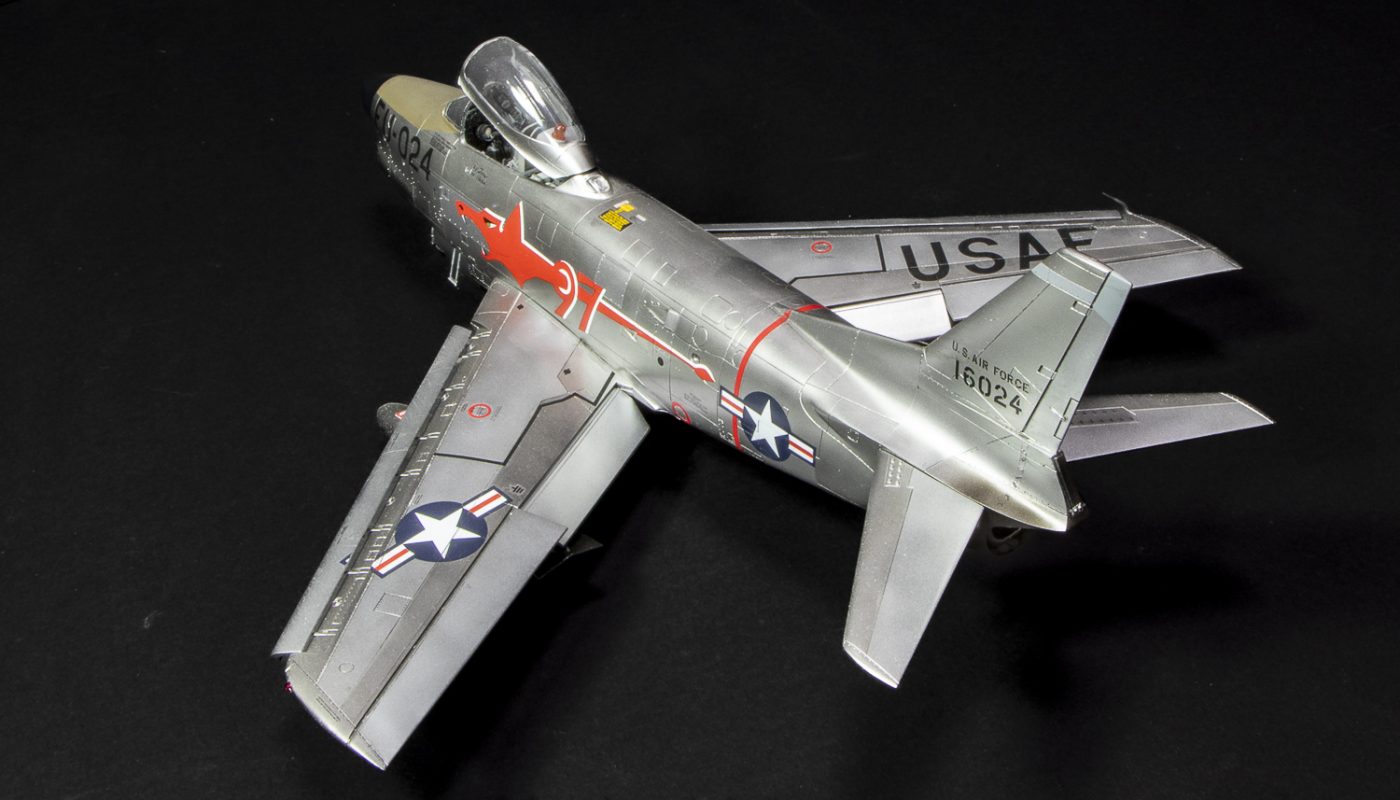
Next, it was time for the decals! For the markings, I chose the Eagle Strike 48070 sheet to avoid the Revell decals as much as possible. I went with the F-86D 16024 FU-024 from the 97th FIS… and started the application with great enthusiasm.
Since the surface was already glossy and smooth, I decided to apply them directly. However, the metallic finish didn’t react well to the water or setting solutions, causing some spotting. To fix this, I applied a coat of Alclad Gloss Varnish, which protected the surface without altering the realistic metal sheen.

And then came a moment of utter clarity… FU-024 has the early production tail cone! After reviewing my complete dictionary of expletives, I began the mental self-flagellation phase: ‘How could you be so stupid? You actually questioned the different tail cones, only to choose a decoration that doesn’t match the kit’s parts?!’… Oh well, let’s just say FU-024 was retrofitted…
Here are the photos of the finished model!