 by
The Aztek: What kind of monster is this? What’s inside?”
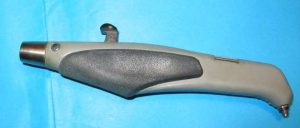
Since there’s a growing wave of questions about how the Aztek A470 works (and yes, it’s “Aztek” with a k—it’s written right on the box!), I decided to show you exactly what’s under the hood: how it’s built, how it operates, and why it sometimes decides to stop working.
[!CAUTION] Warning: Proceed at your own risk! All actions explained below—disassembly, soaking in acetone, etc.—will void your airbrush warranty!
Taking the initiative to dismantle your airbrush or soak it in acetone is entirely your responsibility. Neither the webmaster of this site nor the author of this article can be held liable for any issues, including: inability to reassemble the unit, damage, or broken parts.
Deep Cleaning and Disassembly
I own an A470 model without screws or rivets—the version where the body is simply clipped together. I’ve made it a habit to use a small screwdriver to open the body. There is a notch at the back of the airbrush where I insert the screwdriver; once the two halves of the casing are slightly separated, the rest is easily opened by hand.


Upon opening, the entire internal mechanism usually remains attached to one of the two halves, leaving the other half completely empty. I’ve noticed that the mechanism doesn’t always stick to the same side; instead, it tends to cling to the dirtiest one. And let me tell you, “dirty” is an understatement—just look at those paint stains!


Separating the two main sections of the mechanism is completely straightforward and presents no problems at all.


If you take a closer look, you can see a massive build-up of paint residue almost everywhere. Looking at this, it’s easy to understand why the mechanism eventually gets sticky or jams up entirely.
Everything needs a deep clean. To do this, I place the smaller parts into an old Tamiya paint jar, fill it with acetone, and shake vigorously. This provides a very quick, effortless “rough” cleaning of the components. Once done, I take them out, discard the used acetone (into a recovery container for recycling!), and grab some fresh acetone and a flat brush to clean every single part. This stage usually takes me quite a while, as I often wait until the airbrush is extremely dirty before committing to a full teardown.
I’ll leave it overnight (the camera batteries are dead), and since today is a beautiful sunny day, I can finally show you some daylight photos of the parts.

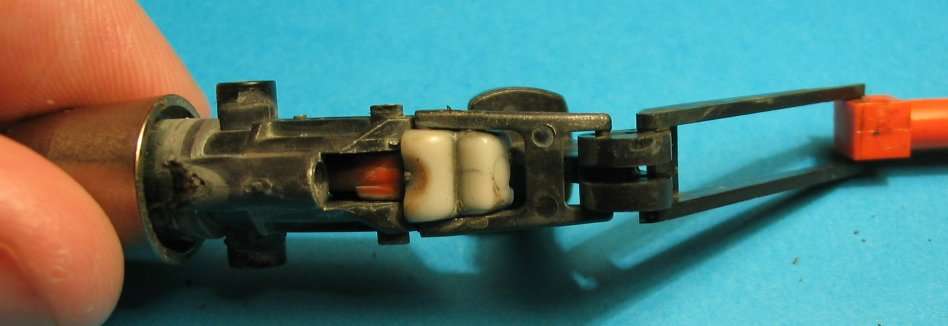
How does this airbrush actually work? There is a small orange part with a metal tip whose sole purpose is to slide through a hole located in the airbrush head. This tip presses against the back of the nozzle (the rear of the needle assembly) and pushes the needle forward or backward within the nozzle (as seen in the photo without the airbrush body).

This tip is placed inside the airbrush head (as shown in the photo) and is held in place by a spring-loaded shoe (shifter) connected to the airbrush trigger. To give you a clearer view, the shoe is not shown in place here. When the trigger is pulled back, the tip moves backward (retracting the needle from the nozzle and allowing paint to flow). When the trigger is released (in double-action mode), the spring-loaded shoe automatically pushes it forward to its maximum position, closing the needle.
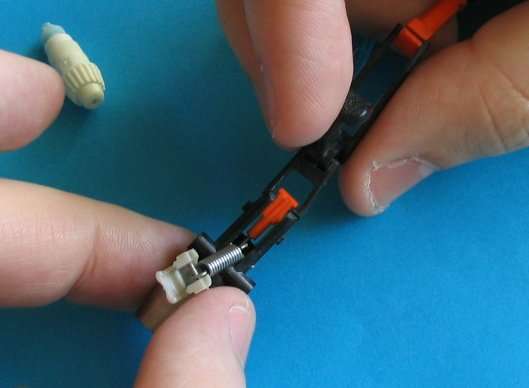
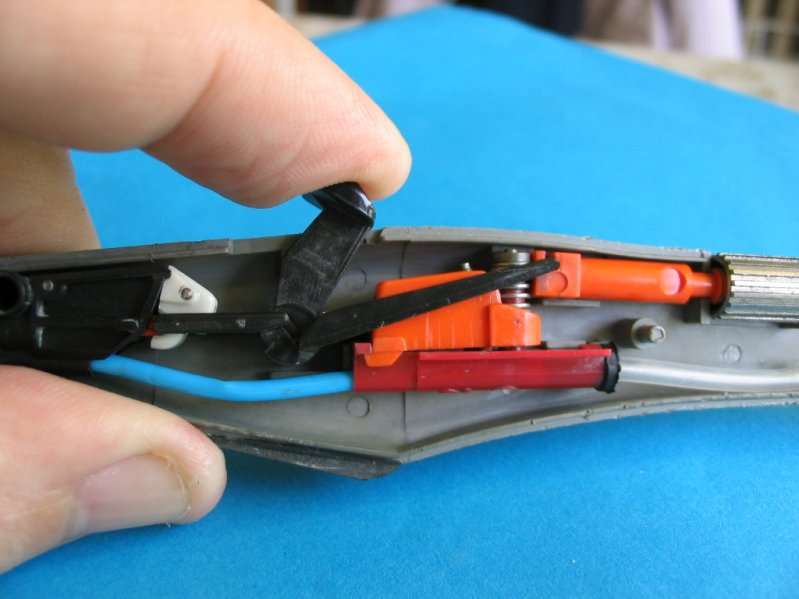
The second vital component of the airbrush is the part shown in the following photo, which controls the air flow. When you press down on the trigger, a plastic piece pushes against the metal pin (just as I am doing with my finger here). The amount of pressure applied determines the air flow.
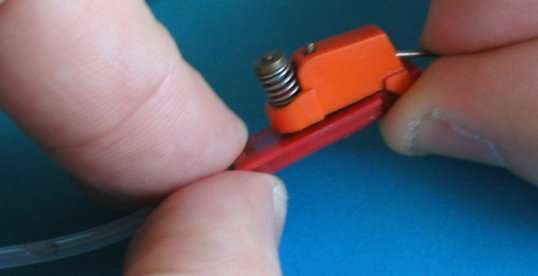
To wrap things up, I’ll show you the reassembled mechanism and how it positions itself in three different conditions.
First, in single-action mode, with the dial turned all the way to the right. In this case, the orange threaded rod (on the right of the photo, passing through the gray dial) slides through the dial, pulling back the black piece that passes over the “air valve.” This essentially pulls back the metal tip at the very front of the assembly, thereby retracting the needle inside the nozzle.
In the following two cases, the airbrush is used in double-action mode. In the first scenario, I simply press down on the trigger without pulling it back: only air flows through the airbrush. In the second, I both press and pull back: the air flows, and the orange tip at the front of the airbrush retracts, allowing the paint to flow (shown here at its maximum setting).


“And there you have it—it’s quite simple!”
Nozzle Maintenance: To clean the airbrush nozzles, I only do one thing: flush them with alcohol or acetone after each painting session (depending on how clogged they are). I strongly advise against dismantling the nozzles—it’s completely unnecessary.
The Emergency “Quick-Fix”: Sometimes you have an urgent need to paint and don’t have time for a full teardown. In this case, I don’t really “clean” it; I just loosen the paint up. I take a container (an empty and clean anchovy olive jar works perfectly!), fill it with acetone, and dip the airbrush head-first halfway up the body. I let it soak for a bit if I have time, or just give it a good shake. This dissolves the dried paint inside without a true cleaning—it’s more about spreading the residue around so the parts can move again.
Why is mine not working? Most of the time, when an Aztek stops working, it’s because the tip can no longer retract. Either it’s glued shut by dried paint residue, or the “shoe” (shifter) is stuck—or both, if it’s really filthy!
These are the only issues I’ve ever had. They aren’t mechanical failures; they are simply a lack of maintenance. The worst “real” damage you can suffer is a dropped or bent needle (which is exactly why you shouldn’t take the nozzles apart!).
Credit where credit is due: Everything I know, I learned from JCVR!!!
By “Francky”