by
Do you know an extremely fine acrylic varnish that can be brushed or airbrushed, smells great, and can be used in a dozen different “recipes” for scale modeling? Of course, you’ve read the title… you cheaters!
Modelers worldwide have been using KLIR for decades for almost everything… except cleaning floors.
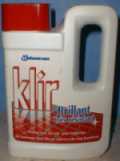
This water-soluble product (until dry) is officially a floor shiner, but for us, it’s simply a high-grade, self-leveling acrylic gloss varnish.
🇫🇷 Français :
🌍 Cet article est désormais disponible en deux langues ! Pour la version française, suivez ce lien :
https://master194.com/2017/02/20/le-klir-de-a-a-z/
Where to find it?
The beauty of it is that you don’t need a hobby shop. A local supermarket or drugstore will do. If you are a “globe-trotting” modeler, you will find it under various aliases:
WIPE AND SHINE (Japan)
FUTURE / PLEDGE (USA, Canada)
KLEAR (UK)
KRISTAL KLEAR (New Zealand)
PARKET PLUS or PRONTO VAX (Netherlands)
ERDAL GLANZER (Germany)
1. Crystal Clear Parts (Canopies)
This is the most famous use. Dipping clear parts in Klir makes them look thinner and more transparent.
- How it works: It fills micro-scratches and levels the surface, reducing light refraction.
- The Method: Clean the canopy with alcohol first. Dip it slowly into a jar of Klir (avoid bubbles!). Let the excess drip onto a paper towel.
- Crucial: Cover it with a Tupperware or a glass while drying to avoid dust. Wait 48 hours before masking or painting.
- Bonus: It protects the plastic from the “fogging” or “crazing” effect caused by Cyanoacrylate (CA) glue vapors.
FIRST ADVANTAGE
You don’t need a hobby shop nearby; a hardware store, a local mini-market, or a good hypermarket will do the trick… (check the floor cleaning aisle). Here’s an idea: rummage through the mess under your sink; you might be surprised to find an old bottle of this miracle product.
If you are a globe-trotting modeler (or an international internet user), our (French-Belgian) KLIR can be found everywhere… under the following disguises: FUTURE (USA, Canada), KLEAR (Great Britain), KRISTAL KLEAR (New Zealand), GLOCOT (Argentina), PARKET PLUS or PRONTO VAX (Netherlands), ERDAL GLANZER (Germany), WIPE AND SHINE (Japan)… you never know, just in case you travel!
FIRST DISCOVERY: CLEAR PARTS
For many years, our kits suffered from poor-quality clear parts that had only a distant relationship with aircraft glazing. Improving the look of “glass” is the first discovered and most used trick (you can find it in industrial quantities on the WEB in build articles from almost every country): by dipping clear parts in KLIR, they appear more transparent and thinner… A miracle, you might say??? No, simply the application of old optical principles: the product fills micro-scratches and imperfections, thus limiting parasitic reflections… Moral of the story: the plastic takes on an unsuspected brilliance.
Consequently, the first thing to do is to eliminate (if necessary) glaring scratches as much as possible (KLIR is effective… but let’s not exaggerate, for consecrated miracles… head to Lourdes instead). You can use all the well-known methods: polishing pastes for plastic (compound), toothpaste (fluoride-free), but also our good friend MICRO-MESH.
Like other parts, windows are potentially greasy, and you’ve handled them with your big dirty fingers… For perfect effectiveness, you must clean them with alcohol without adding dust… All these traces tend to repel the KLIR. A good bath in a (previously cleaned…) paint pot filled with alcohol will do the trick, shaking the pot (closed… see, I think of the distracted modelers). Remove the piece with tweezers: it’s not the time to put back the finger traces you just removed.
Then comes the time for the alcohol to dry. it must be total, otherwise it would interfere with the KLIR’s action… (don’t worry, it’s fast). In a jam jar, gently and slowly dip the parts to be treated, several times… you must of course avoid the formation of bubbles, which are later of the worst effect…
Let the piece drain after coming out of the bath, then set it aside for complete drying on absorbent paper to soak up the excess product on the lower parts. Otherwise, the KLIR forms an extra thickness, less transparent and very unsightly.
At this stage, the anti-dust operation is essential; KLIR perfectly fixes all the dust in the ambient air. You must cover the parts until completely dry… (an old upturned transparent Tupperware works perfectly.. or simply a mustard glass… empty) and let it “infuse” for 48 hours before masking and painting…
Unexpected favorable effect: Often, gluing a canopy with cyano or regular model glue “fogs” the glass and destroys the quality of your kit. Sure, gluing can be done with wood glue or “canopy glues”….. Canopies treated with KLIR are not (or very little) sensitive to the “white fog” caused by aggressive glues. Indeed, the whitening is a surface chemical reaction due to the (toxic) vapors of our favorite glues on the plastic. When a layer of KLIR, insensitive to the vapors, has moved in between them and the plastic, no more “synthetic mists”…. If this fog were to happen anyway… a new bath of KLIR would often make it disappear. Even knowing this benefit, I wouldn’t risk using this trick on a “pricey” kit.
Correction and cleaning: Not happy with the result??? 2 solutions: a new bath of KLIR for the disappointing piece, and if that’s not enough, a one-hour dip in an ammonia-water solution will clean the canopy… It’s marked on the bottle: the solvent for dry KLIR… is ammonia… Have fun, ventilate the workshop, clean in the absence of the lady of the house, and wear an effective mask… Otherwise…
SECOND DISCOVERY: THE FINISH
We told you KLIR is an “acrylic varnish,” right? So why not try replacing those pricey varnishes from our favorite brands? Well, it works beautifully… as a base before decals, and for a high-gloss finish… plus, it doesn’t yellow over time.
It can be sprayed straight from the bottle (it also works with a brush, as its self-leveling properties tend to erase any brush marks). It’s dry to the touch very quickly, and fingerprints don’t tend to stick (unless you’ve just finished a Big Mac or a Pan Bagnat).
Our friend respects panel lines thanks to its fineness, making it a near-perfect gloss varnish, provided you take a few simple precautions:
- First, let the paint dry for 48 hours before applying KLIR (especially with enamels).
- Spray 2 or 3 thin coats at a pressure around 1 bar (), leaving 5 minutes of drying time between each coat. Don’t be surprised if your work looks average at first… give KLIR some time; it becomes superb after a few minutes. () Author’s note… there is no alcoholic connotation in this sentence…
“Small problems in my plantation”:
- Orange peel: Orange peel on a beautiful finish totally ruins the model. If applying KLIR creates this “zest,” it’s because the pressure was too high, causing the KLIR to dry too fast. Hot, dry weather or insufficiently dry paint can also ruin the leveling. Another coat of KLIR will often make the unwanted effect disappear. Otherwise, strip it (send Madam to her mother’s and start the ammonia operation) and go for another round. You can also slow down the drying time by adding 2 drops of dish soap, windshield washer fluid, Polly Scale thinner, or 90° alcohol…
- Snake skin… and fish eye: On enamel paints that haven’t dried enough, a “snake skin” look can appear… the KLIR is “attracted” in some spots and repelled in others… pure horror. It forms unsightly droplets and some areas remain untreated. So, let it dry (the modeler is patient by nature), avoid greasy fingers, and for enamels, a quick clean with Palmolive (or similar) rinsed with warm water, followed by complete drying, won’t hurt.
- The “Fog” effect: Decal softening solutions (DACO, Microsol…) can react with KLIR if it’s not PERFECTLY DRY… A “cloudy” halo then forms… this will disappear with a new application of KLIR… but to avoid this nuisance, let’s respect the 24 to 48-hour rest rule…
A well-dried layer of KLIR is waterproof to almost everything, including fine coats of commercial enamel matte and satin varnishes (Humbrol, Testors…). However, avoid flooding the surface… usual acrylic varnishes won’t degrade your KLIR either.
Heatwave effect: Be careful in extreme temperatures (40°C and up); KLIR drying too fast can cause white traces, especially when brushed (a sort of crystallization)… when it’s TOO hot, choose a nap instead.
THIRD DISCOVERY: GLUING
Did we tell you KLIR sticks as it dries? No? Well, try reopening that paint jar where you store your product…. Not easy, is it! And this property will serve us well…
- Installing windows: If the plastic parts fit perfectly, a bit of KLIR between the two pieces and let dry… The canopy is set without the risk of leaving fingerprints (like with CA glue), messing up the joint, or fogging the glass.
- Applying decals: Some put a small drop of KLIR under decals during application to increase their adhesion and avoid any silvering. Then another layer is applied over the decal, like a softener, to blend the marking with the KLIR base coat. Of course, remove excess liquid with a cotton swab before it starts drying. By shrinking, thanks to its great leveling power, the decal nestles right into the structure lines…
- Photo-etched parts: Small photo-etched pieces can be glued with KLIR, just like with a traditional varnish.
QUATRIEME DECOUVERTE: LES DILLUTIONS
Site / pub
Gem personnalisé
Site / pub said
Voici la suite de la traduction, en conservant ce ton de “vieux loup de mer” de la maquette, ses parenthèses pleines d’humour et ses conseils de “cuisine” bien spécifiques.
SECOND DISCOVERY: THE FINISH
We told you KLIR is an “acrylic varnish,” right? So why not try replacing those pricey varnishes from our favorite brands? Well, it works beautifully… as a base before decals, and for a high-gloss finish… plus, it doesn’t yellow over time.
It can be sprayed straight from the bottle (it also works with a brush, as its self-leveling properties tend to erase any brush marks). It’s dry to the touch very quickly, and fingerprints don’t tend to stick (unless you’ve just finished a Big Mac or a Pan Bagnat).
Our friend respects panel lines thanks to its fineness, making it a near-perfect gloss varnish, provided you take a few simple precautions:
- First, let the paint dry for 48 hours before applying KLIR (especially with enamels).
- Spray 2 or 3 thin coats at a pressure around 1 bar (), leaving 5 minutes of drying time between each coat. Don’t be surprised if your work looks average at first… give KLIR some time; it becomes superb after a few minutes. () Author’s note… there is no alcoholic connotation in this sentence…
“Small problems in my plantation”:
- Orange peel: Orange peel on a beautiful finish totally ruins the model. If applying KLIR creates this “zest,” it’s because the pressure was too high, causing the KLIR to dry too fast. Hot, dry weather or insufficiently dry paint can also ruin the leveling. Another coat of KLIR will often make the unwanted effect disappear. Otherwise, strip it (send Madam to her mother’s and start the ammonia operation) and go for another round. You can also slow down the drying time by adding 2 drops of dish soap, windshield washer fluid, Polly Scale thinner, or 90° alcohol…
- Snake skin… and fish eye: On enamel paints that haven’t dried enough, a “snake skin” look can appear… the KLIR is “attracted” in some spots and repelled in others… pure horror. It forms unsightly droplets and some areas remain untreated. So, let it dry (the modeler is patient by nature), avoid greasy fingers, and for enamels, a quick clean with Palmolive (or similar) rinsed with warm water, followed by complete drying, won’t hurt.
- The “Fog” effect: Decal softening solutions (DACO, Microsol…) can react with KLIR if it’s not PERFECTLY DRY… A “cloudy” halo then forms… this will disappear with a new application of KLIR… but to avoid this nuisance, let’s respect the 24 to 48-hour rest rule…
A well-dried layer of KLIR is waterproof to almost everything, including fine coats of commercial enamel matte and satin varnishes (Humbrol, Testors…). However, avoid flooding the surface… usual acrylic varnishes won’t degrade your KLIR either.
- Heatwave effect: Be careful in extreme temperatures (40°C and up); KLIR drying too fast can cause white traces, especially when brushed (a sort of crystallization)… when it’s TOO hot, choose a nap instead.
THIRD DISCOVERY: GLUING
Did we tell you KLIR sticks as it dries? No? Well, try reopening that paint jar where you store your product…. Not easy, is it! And this property will serve us well…
- Installing windows: If the plastic parts fit perfectly, a bit of KLIR between the two pieces and let dry… The canopy is set without the risk of leaving fingerprints (like with CA glue), messing up the joint, or fogging the glass.
- Applying decals: Some put a small drop of KLIR under decals during application to increase their adhesion and avoid any silvering. Then another layer is applied over the decal, like a softener, to blend the marking with the KLIR base coat. Of course, remove excess liquid with a cotton swab before it starts drying. By shrinking, thanks to its great leveling power, the decal nestles right into the structure lines…
- Photo-etched parts: Small photo-etched pieces can be glued with KLIR, just like with a traditional varnish.
FOURTH DISCOVERY: DILUTIONS
An acrylic product, soluble in water, must surely play well with our acrylic paints—Tamiya, Gunze… A little test was necessary, and some have done it…
Gunze: already looks great with usual techniques. ‘Klir-ing’ this brand doesn’t seem to alter its qualities and, if anything, speeds up the ‘dry-to-the-touch’ time…
Life Color… particularly finicky () to dilute and spray, gives an excellent result with a 2:1 ratio (2 parts KLIR to 1 part LIFE). The result is very fine, with a beautiful matte-satin finish.”**
() Of course, some Life Color experts will tell you that with plain tap water, the result is already excellent.
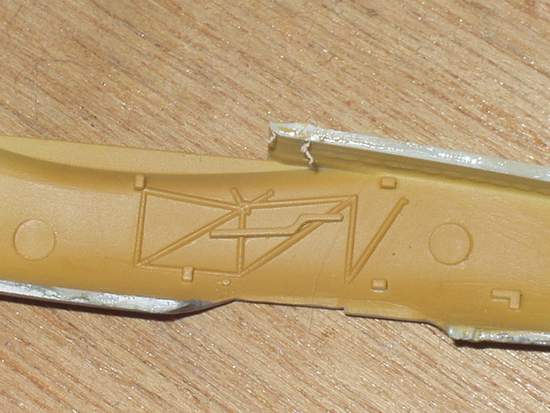
Polly Scale… no issues whatsoever; just like its colleagues, it mixes perfectly. ‘Pschitting’ (spraying) is easy, and the result is a smooth satin finish…
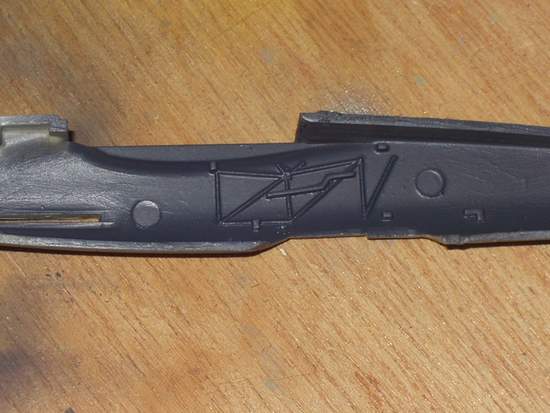
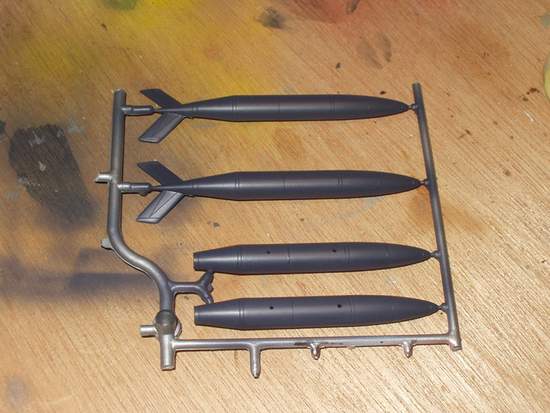
HELLER… those ‘free’ (?) pots. While the consistency reminds me of LIFE COLOR, I haven’t managed, for now, to get anything good out of them with an airbrush… However, with a brush, diluted with KLIR, the stroke is precise on small surfaces… we might finally avoid wasting those little transparent pots.
‘Klir-ing’ can be adapted to other acrylic brands after a preliminary test…
This technique has been used on relatively easy surfaces… trials on difficult camouflages have not yet been undertaken…
Matte and Satin Varnish: KLIR is a gloss varnish… but does a matte KLIR exist? Just mix some Flat Base (Tamiya or Gunze) into the KLIR and spray… matte, satin… it’s up to you to dose:
3 KLIR for 1 FLAT BASE = Dead Flat
10 KLIR for 1 FLAT BASE = Matte
15 KLIR for 1 FLAT BASE = Satin
And all shades of sheen are possible by adjusting the KLIR/FLAT ratio. You can play with various ‘levels of matteness’ to simulate panel wear, replacement panels (cannibalization)… all by working with the light reflections. When added to other techniques like filters, washes, pre-shading, or post-shading, it provides a subtle ‘extra’ comparable to the varying aluminum shades on a natural metal finish aircraft.
Smoke, Exhaust, and Gunpowder traces: Of course, you can dilute Tamiya or Gunze “Smoke” with KLIR, but you can also tint KLIR with various colors to create different shades for weathering. I’m thinking of exhaust stains or oil leaks. Applied with a brush like a wash, or airbrushed for wind-blown oil streaks.
Thinner for acrylics: By replacing water and alcohol with the same amount of KLIR, the “peach skin” effect of Tamiya flat paints is eliminated. The result is an excellent finish and the varnishing step is much simplified. The final look is a soft satin… Of course, the paint holds wash pigments less… making the “total wash” technique harder to use. The weathering becomes more subtle.
FIFTH DISCOVERY: THE MIXTURES
Every modeler has a sleeping MacGyver, a chemist, or a cook lurking in the shadows… And here is the result!
- Diorama materials: KLIR can be used to create mud puddles or stagnant water in dioramas. It’s thinner than epoxy but easier to work with, and the drying time is shorter than transparent resins (plus, it smells much better). Pastel powders or paint pigments can be mixed with KLIR to create mud and dust. It can also be sprayed on a tarmac to simulate a wet area (rain, sea spray…).
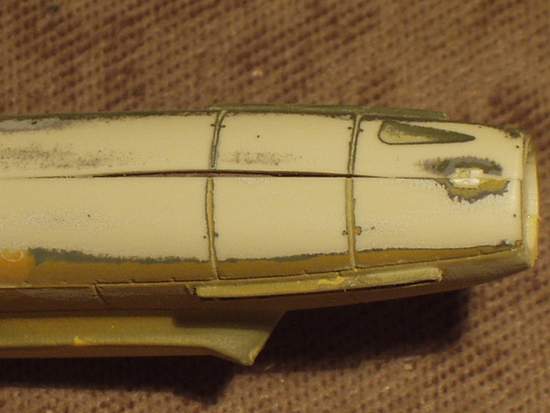
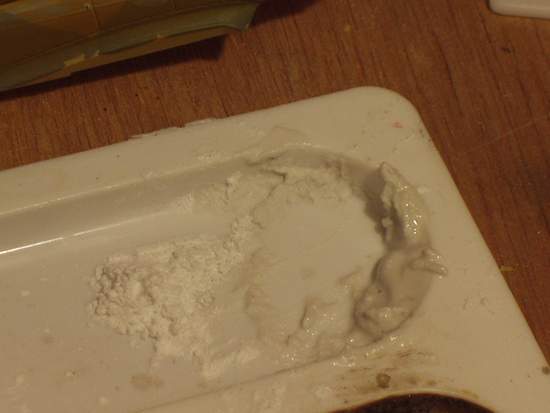
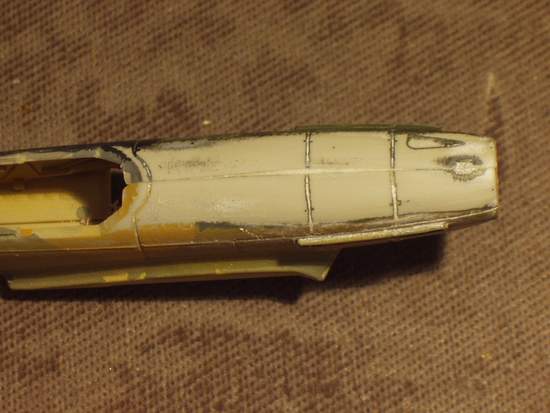
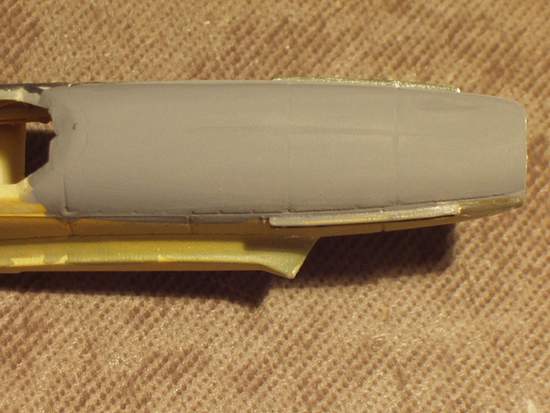
- Filling holes and gaps: Mixed with talcum powder, the paste is flexible and provides a quick-drying putty that is easy to sand.
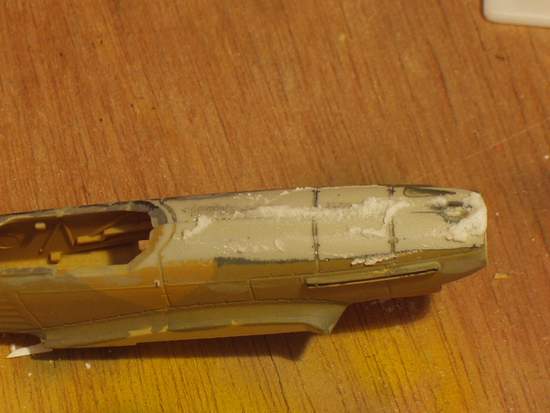
- Do two parts fit poorly? A pipette of KLIR in your palette… a spoonful of talc (the kind from coffee stirrers, no additives), and mix until you get a “satisfying” paste. Spread it with a spatula (a McDonald’s one—cheap and practical), smooth it with water or KLIR… and let dry.
- Once dry… leave it for two hours. Sand with Tamiya sandpaper… no Micro-mesh needed, but why not? A quick dab of “Tamiya grey matte” with a brush “just to see.” The result is convincing.
Tools :
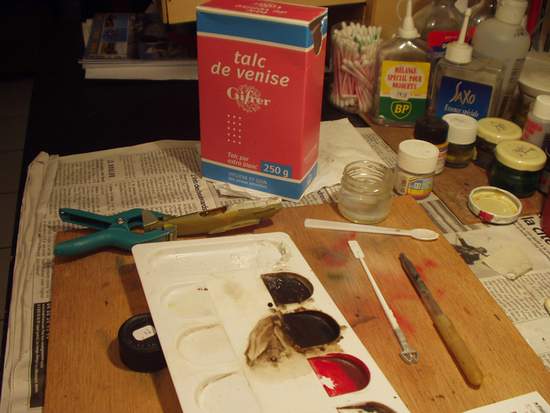
The gap
The paste :
Filling
Smoothing
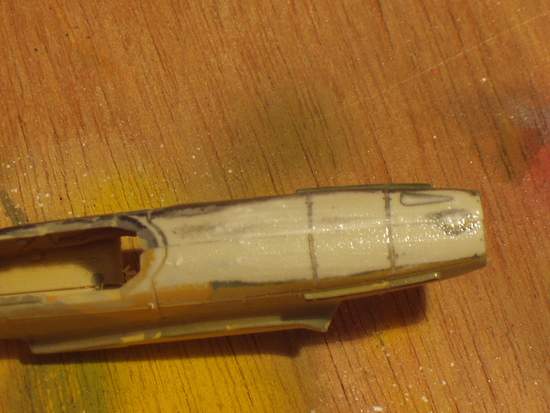
Sanding
Result
Advantages:
- Easy to use.
- Doesn’t stink… our lungs say thank you.
- Sands itself… well, almost, let’s not exaggerate.
- The mixture can be tinted with acrylic paint (to hide the joint or, on the contrary, to see it better while working). PS: In the case of glossy paint, a small dab of KLIR on the worked area (after sanding) gives an extra seal to the joint so the paint doesn’t get sucked into it.
- Metallic paint: By mixing SNJ powder with KLIR, you get a very resistant silver “metallic”… according to the literature.
ONE LAST TRICK
When making your own resin molds… a layer of KLIR inside the mold improves the casting quality… again, according to the literature.
DILUTION AND STRIPPING
Although it can be used as is, diluting KLIR is possible with the products already mentioned to delay its drying. Cleaning is simple—whether on kits, airbrushes, or brushes: window cleaner, ammonia-water, or alcohol.
If you are a distracted modeler and get it all over your hands (or more)… just wash with hot water and Marseille soap before you get stuck to the model or the doorknob.
SAFETY
Most of our products are quite harmful to our lungs. Some products you think are harmless should be used with caution… KLIR is part of that family of hypocrites! Because to make a beautiful coat of varnish, most of us spray it!
This product looks harmless since generations of women have used it on their floors, even in kids’ rooms, and nobody takes any precautions! WRONG, DEAD WRONG. They apply it with a cloth (mop, floor-cloth…). None of them puts it through a spray gun to vaporize it on the floor. While brushing KLIR is “soft and fine,” the aerosol from an airbrush is less pleasant. Let’s think: do we want beautiful, “shiny” lungs with every bronchus standing out under a fine coat of our varnish?
Mediterranean modelers: never pour KLIR into an aperitif glass; its appearance might lead you to confuse it with your glass of Pastis in hot weather… (when you’re focused on a build, you have to limit the risks of inattention).
CONCLUSION
We often have pleasant surprises with products we have right there, under our noses… You just have to think of them and try them out. One last insignificant detail: you can also put two capfuls of KLIR in a bucket of hot water and mop your living room… it will surprise Madam, but it’s also a use… a minority one, for a product that has a very beautiful effect.
PS: This little catalog can be improved and expanded by your experience… or your successful or failed experiments… to help the crowd.
Author: Pierre66