 by
During a visit to a place of temptation for scale modellers, and purely out of the goodness of my heart to support the local hobby shop, there was no way I could leave without buying a kit!
My choice fell on Italeri’s 1/48 Chinook, of course, my favourite scale.
AD
I hadn’t paid much attention to the particular version on offer. I simply fancied building a Chinook. But as someone who enjoys unusual aircraft and markings that stand out from the crowd, it turned out that I had made an excellent choice!
The kit represents the ACH-47A, a heavily armed version of the famous American transport helicopter. An unusual and impressive machine, it deserves a little historical background before we get down to the actual build.
The ACH-47A Chinook: an unconventional gunship
A concept born out of the Vietnam War
In 1965, as American involvement in Vietnam intensified, the US Army was looking for ways to increase the firepower available to its ground forces. Transport helicopters were essential to airmobile operations, but they remained vulnerable when operating close to enemy positions. Lighter escort helicopters, meanwhile, could not offer the same combination of firepower, endurance and payload as a much larger aircraft.
The idea was to transform the CH-47A Chinook, originally designed to carry troops and equipment, into a heavily armed gunship. Its substantial payload capacity made it an attractive platform for combining a powerful weapons fit, a large ammunition supply and additional protection for the crew and vital systems.
Boeing-Vertol converted four production CH-47A airframes to the ACH-47A configuration, the designation standing for Attack Cargo Helicopter. The first aircraft flew in November 1965. Three were subsequently deployed to Vietnam for operational evaluation, while the fourth initially remained in the United States for further testing.
The experimental unit was designated the 53rd Aviation Detachment and soon acquired the nickname Guns-A-Go-Go. These Chinooks were no longer simply troop carriers: they were heavily armed gunships intended to support ground forces and provide fire support during airmobile operations.
An impressive weapons fit
The transformation was substantial. Weapons were installed at various points around the fuselage, allowing the aircraft to engage targets in several directions and deliver sustained fire against enemy positions.
The nose housed a remotely operated 40 mm grenade launcher, while two M24A1 20 mm cannons were fitted on either side of the fuselage. 2.75-inch rocket launchers completed the weapons fit. Additional firing positions accommodated .50-calibre machine guns or 7.62 mm M60 machine guns, depending on the installation.
This combination gave the ACH-47A a formidable mix of direct-fire weapons, grenades and rockets, with a level of firepower unusual for a helicopter of the period.
Protection was also improved. Additional armour plating was installed around the cockpit, selected areas of the fuselage and critical mechanical components. The aim was to improve the aircraft’s ability to withstand small-arms fire while operating at low altitude.
The result was spectacular. With its tandem rotors, bulky fuselage and weapons mounted around the airframe, the ACH-47A looked very different from the Chinook we usually picture.
The “Guns-A-Go-Go” and their four aircraft
The four ACH-47As received suitably unconventional names: Easy Money, Stump Jumper, Birth Control and Co$t of Living.
Their operational careers were relatively short and marked by several dramatic events.
Stump Jumper suffered serious damage following a forced landing in July 1966 after an engine failure. A few weeks later, it was destroyed in a ground collision with another Chinook.
Co$t of Living, initially retained in the United States for testing, subsequently joined the Vietnam deployment. On 5 May 1967, during a combat mission, one of its 20 mm cannons broke loose from its mounting and fired into the forward rotor. The aircraft crashed, killing all eight crew members.
Birth Control was lost in February 1968 during the fighting associated with the Tet Offensive, near Huế. Hit by enemy fire, it had to make an emergency landing. Easy Money then helped cover the evacuation of its crew before returning to base despite sustaining damage itself.
Easy Money was the only one of the four aircraft to survive the Vietnam War. It was later returned to the United States, used as a training aid and eventually restored. Today, it is preserved at Redstone Arsenal, Alabama.
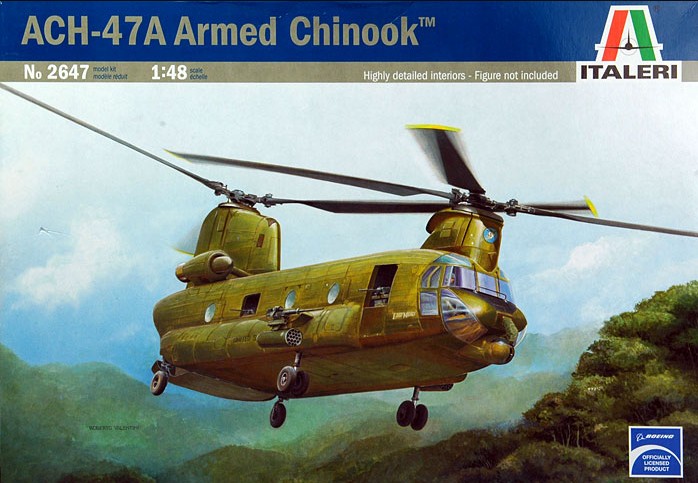
Building the Italeri kit in 1/48 scale ref 2647
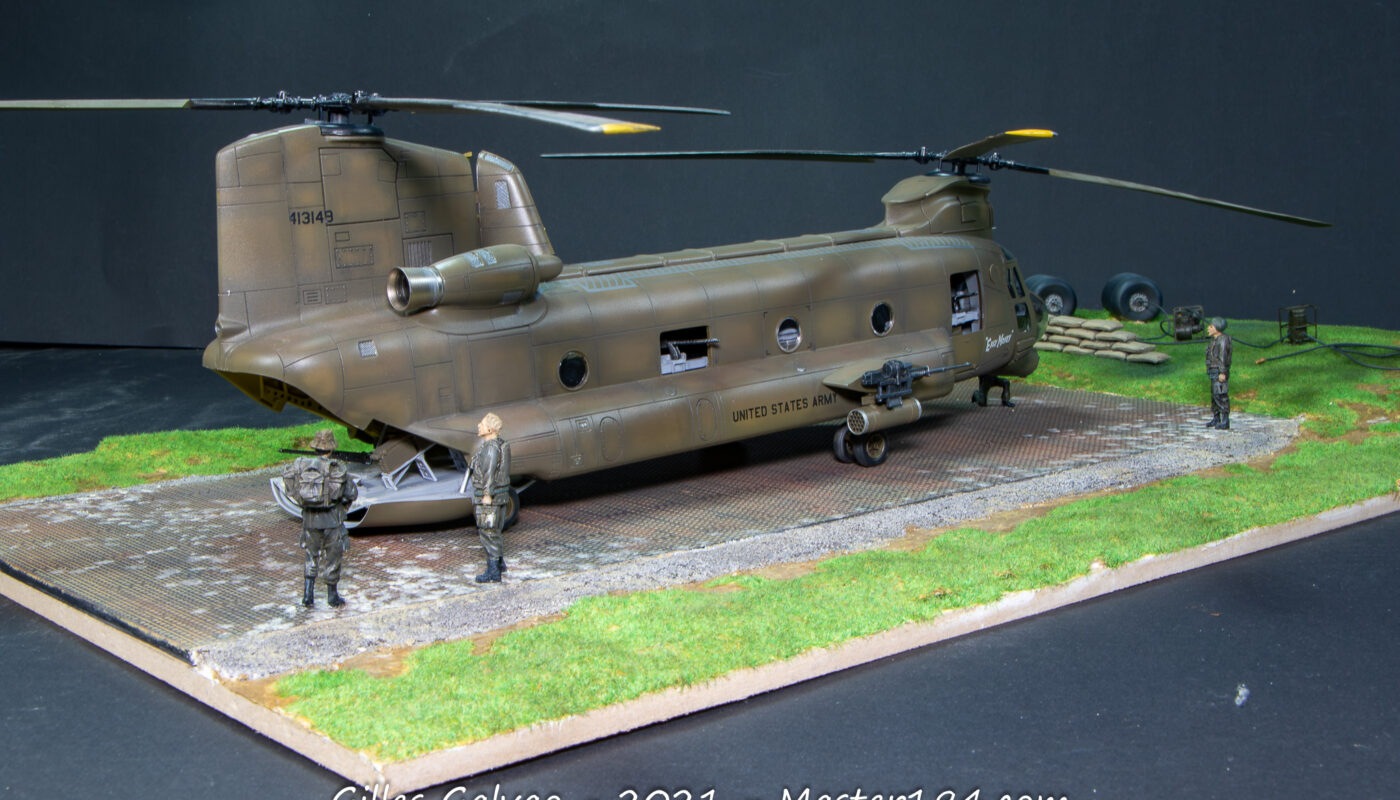
My choice was the Easy Money, serial number 64-13149. Italeri has included most of the distinctive features of this Chinook gunship: the cannons, machine guns, rocket pods, firing positions and nose-mounted grenade launcher. It provides a good starting point, although a few additional details help to improve the finished model.
Interior assembly
I start by painting the various interior components, including the substantial cabin floor and the rear loading ramp.
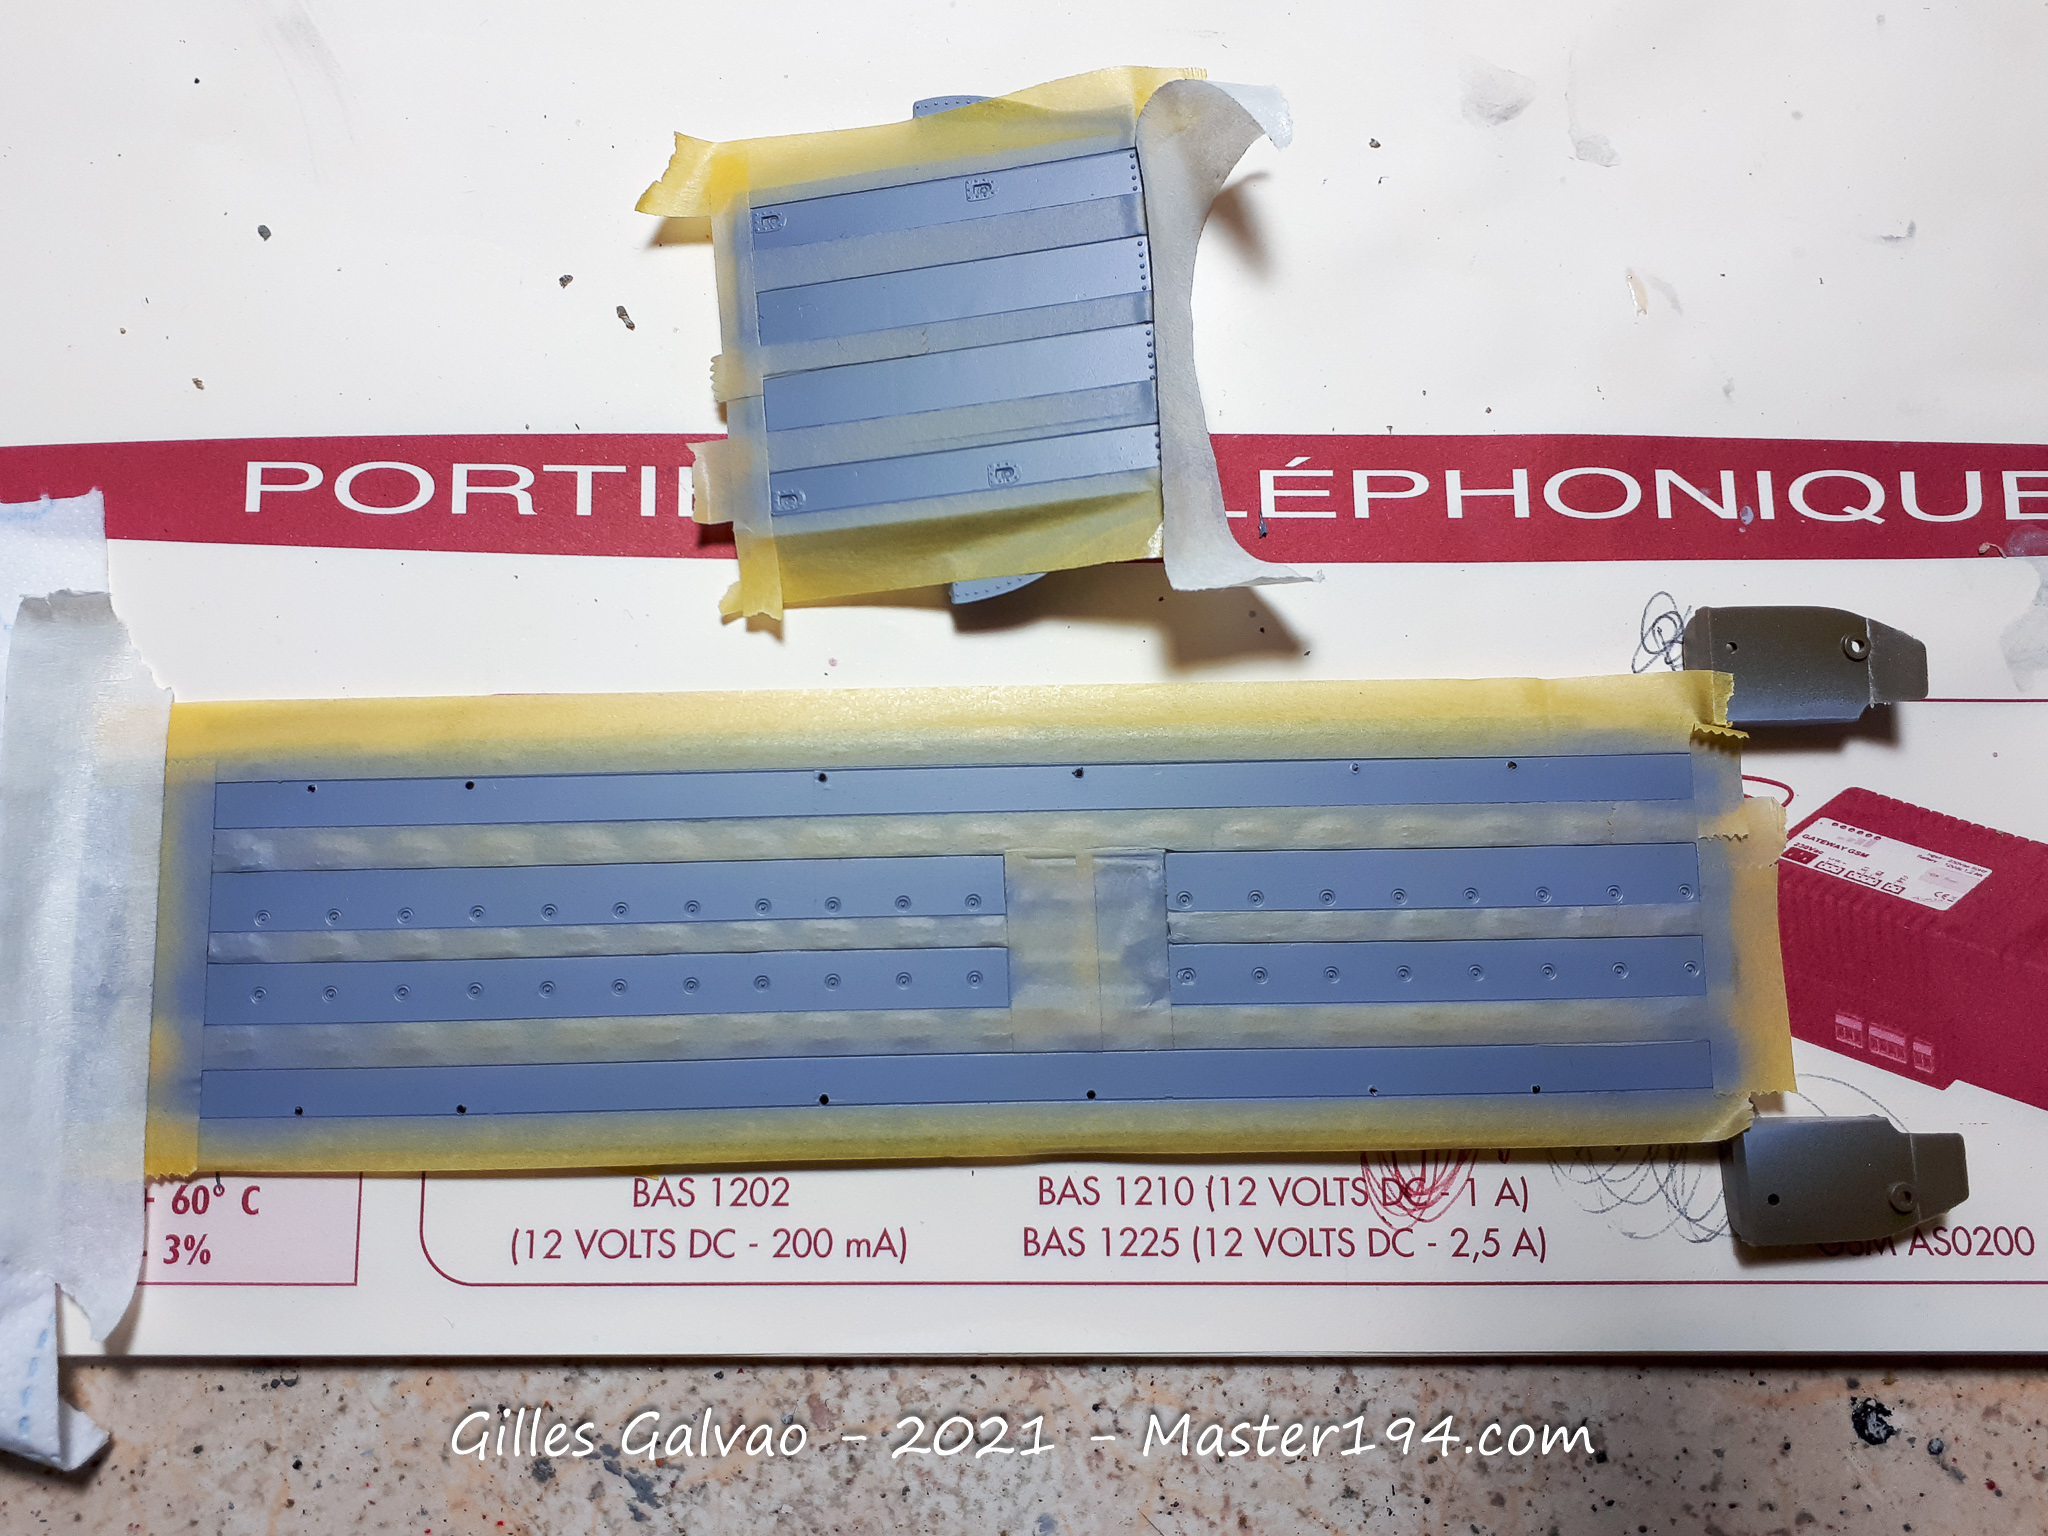
The main components are now painted. I use Gunze H308 and H305 for the various grey areas, and H304 for the Olive Drab sections.
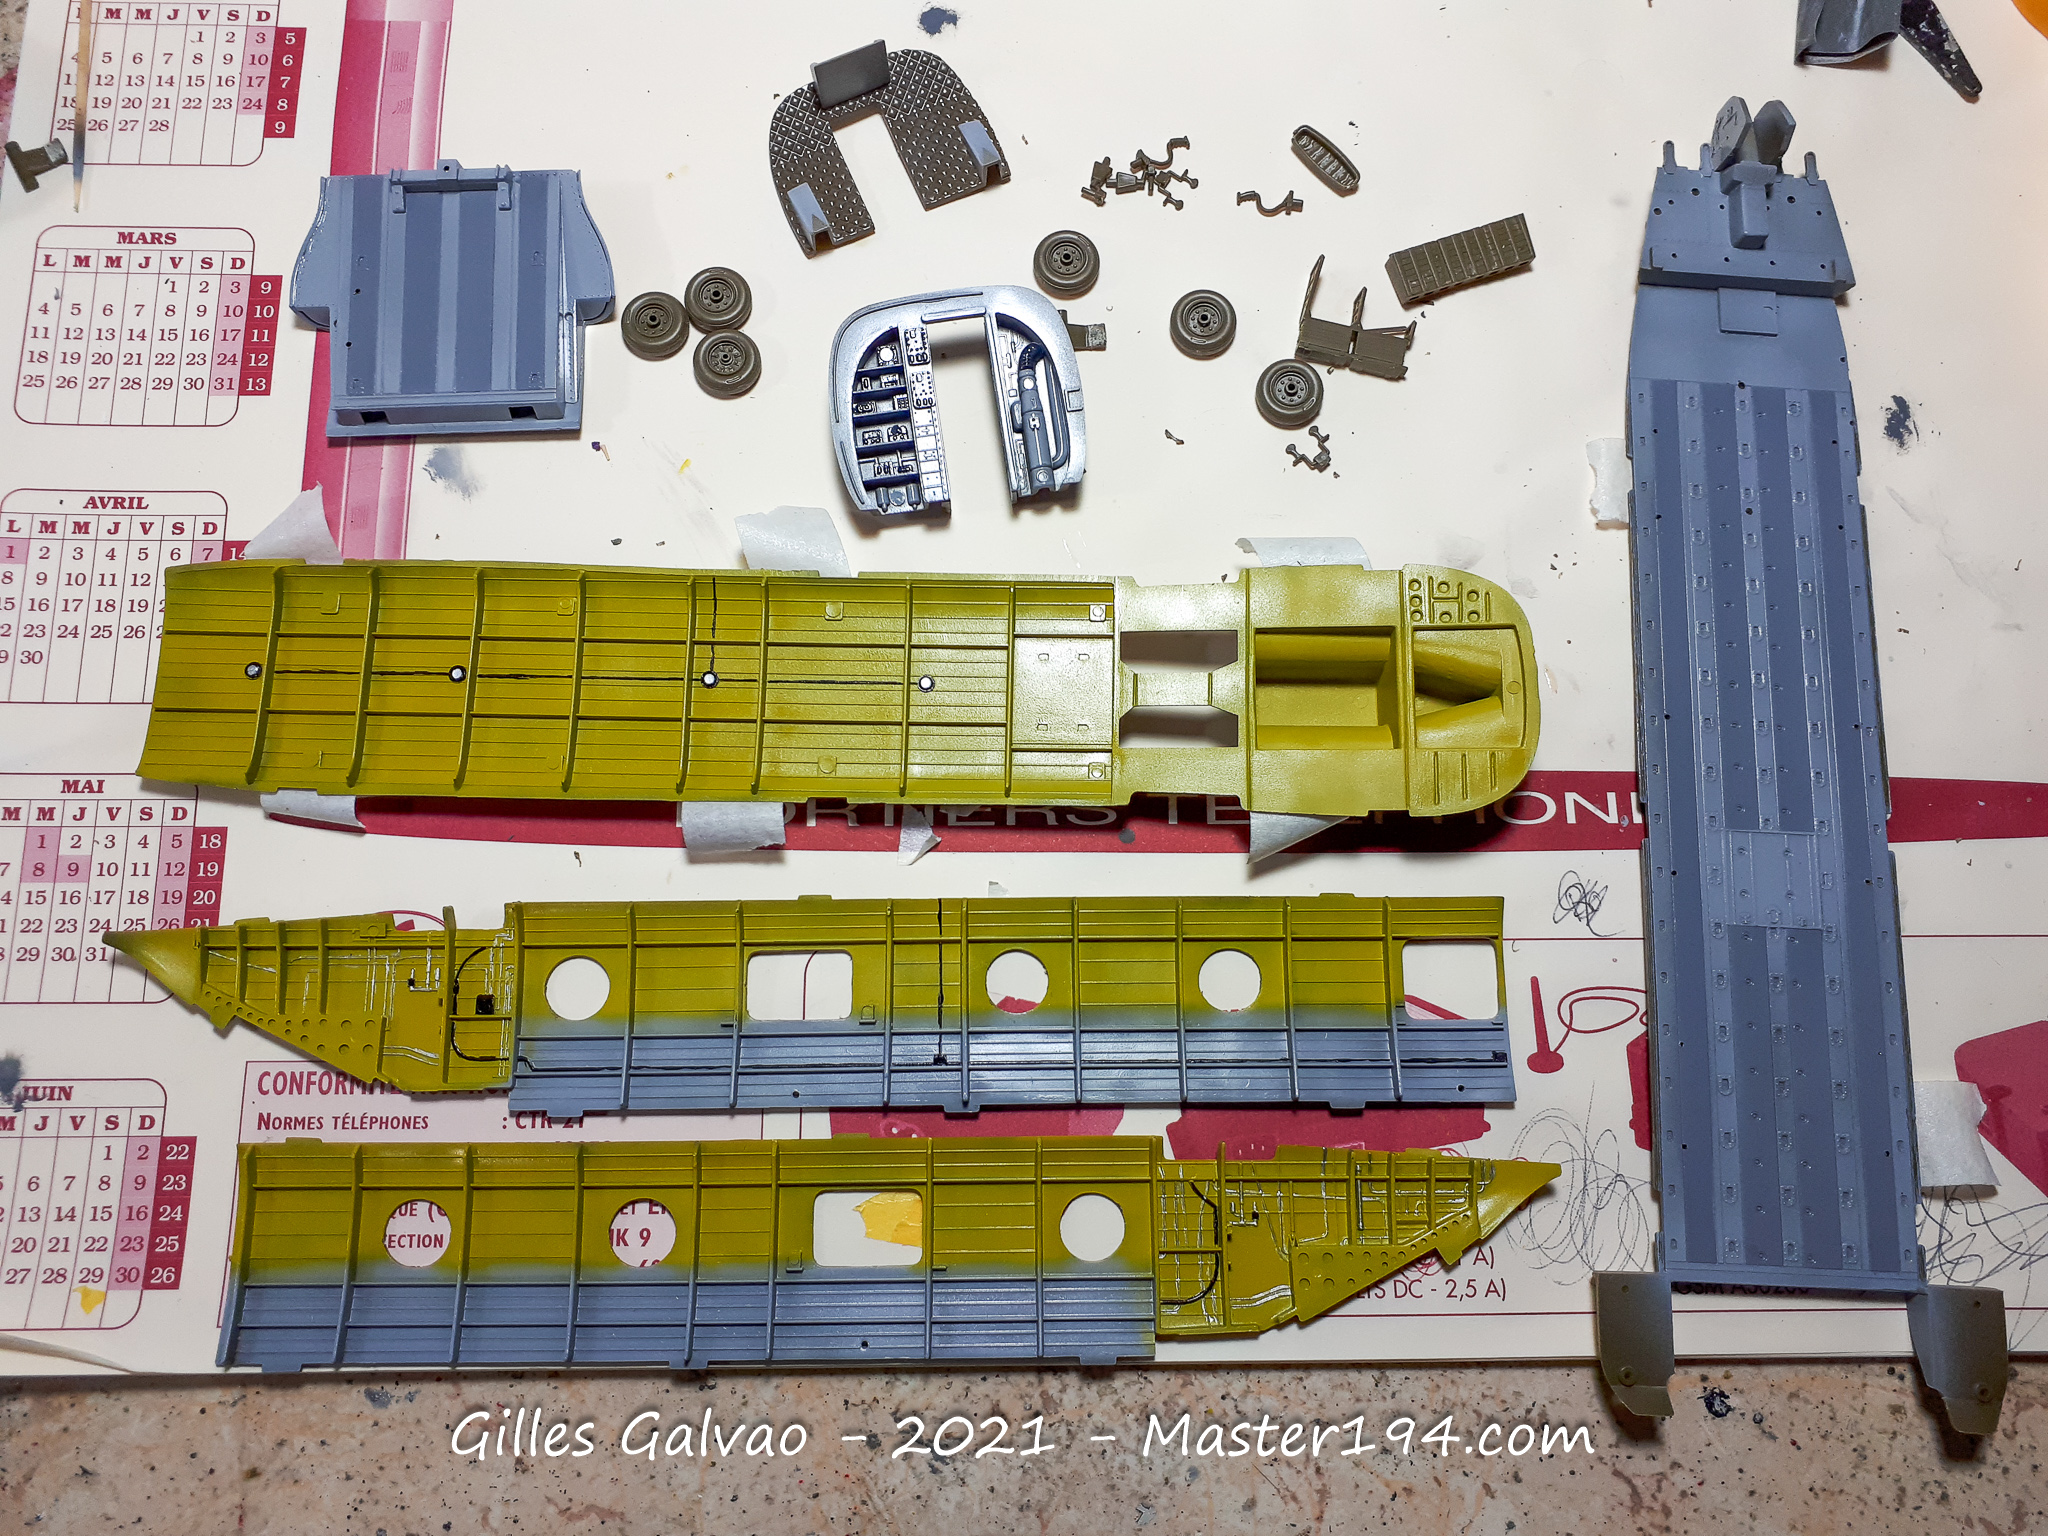
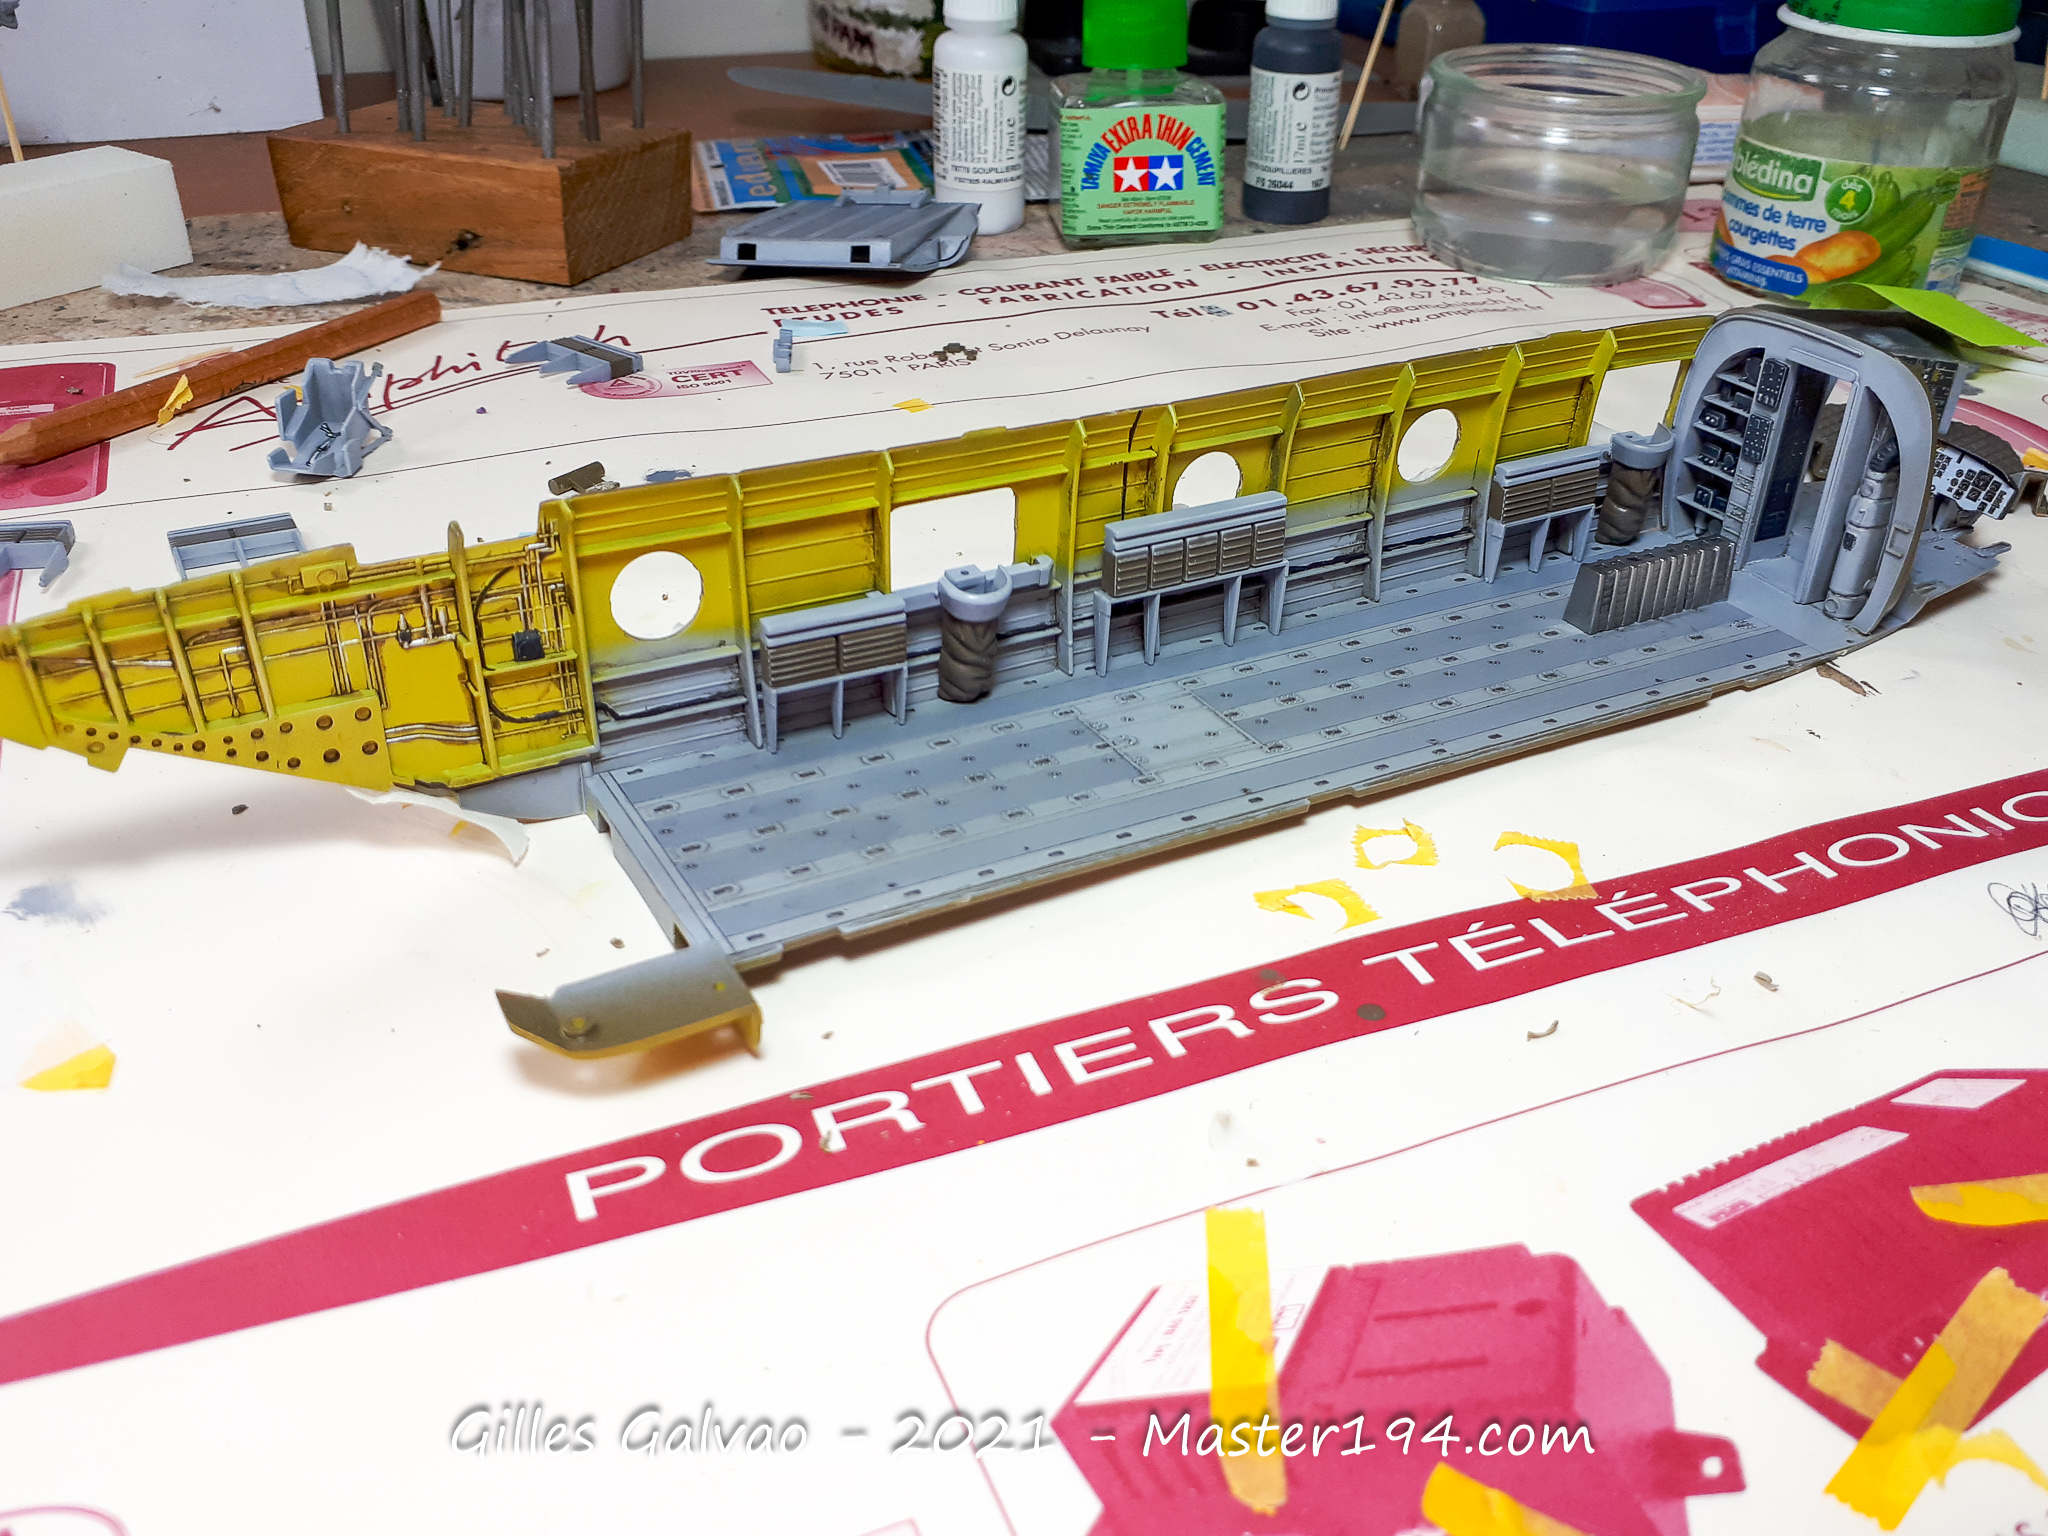
Assembly of the interior can begin. I add the spent-casing collection bags, along with the various ammunition boxes and magazines, which are essential to reproducing the distinctive appearance of this heavily armed version.
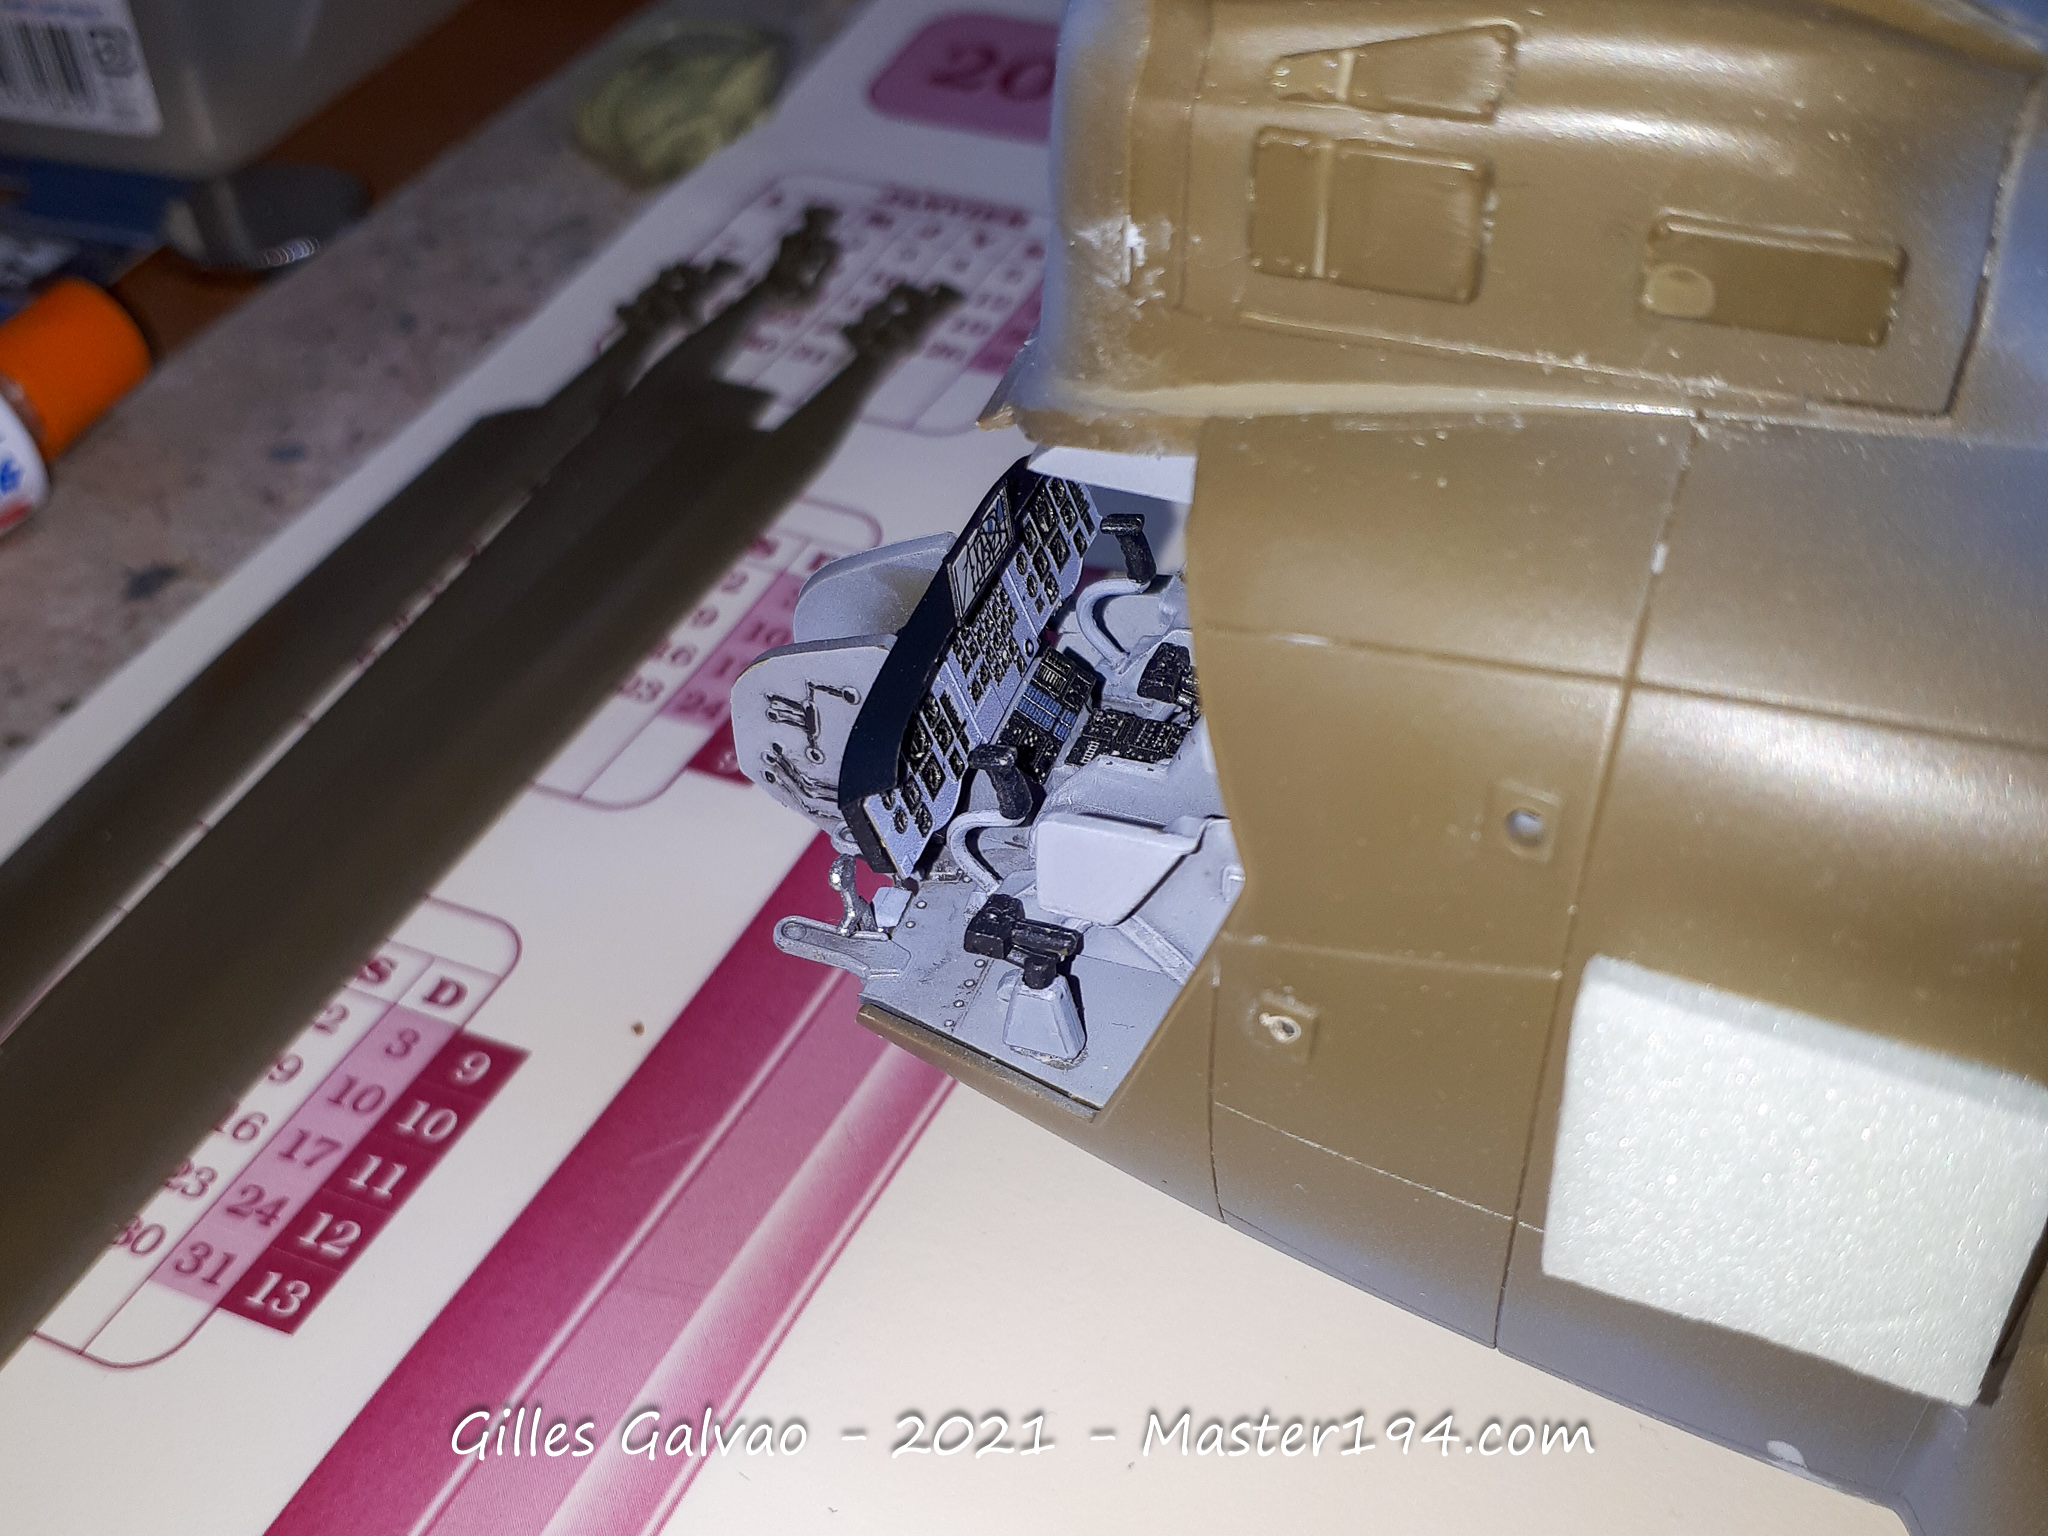
The cockpit is prepared separately. Photo-etched parts provide a welcome improvement to the instrument panels and various pieces of equipment.
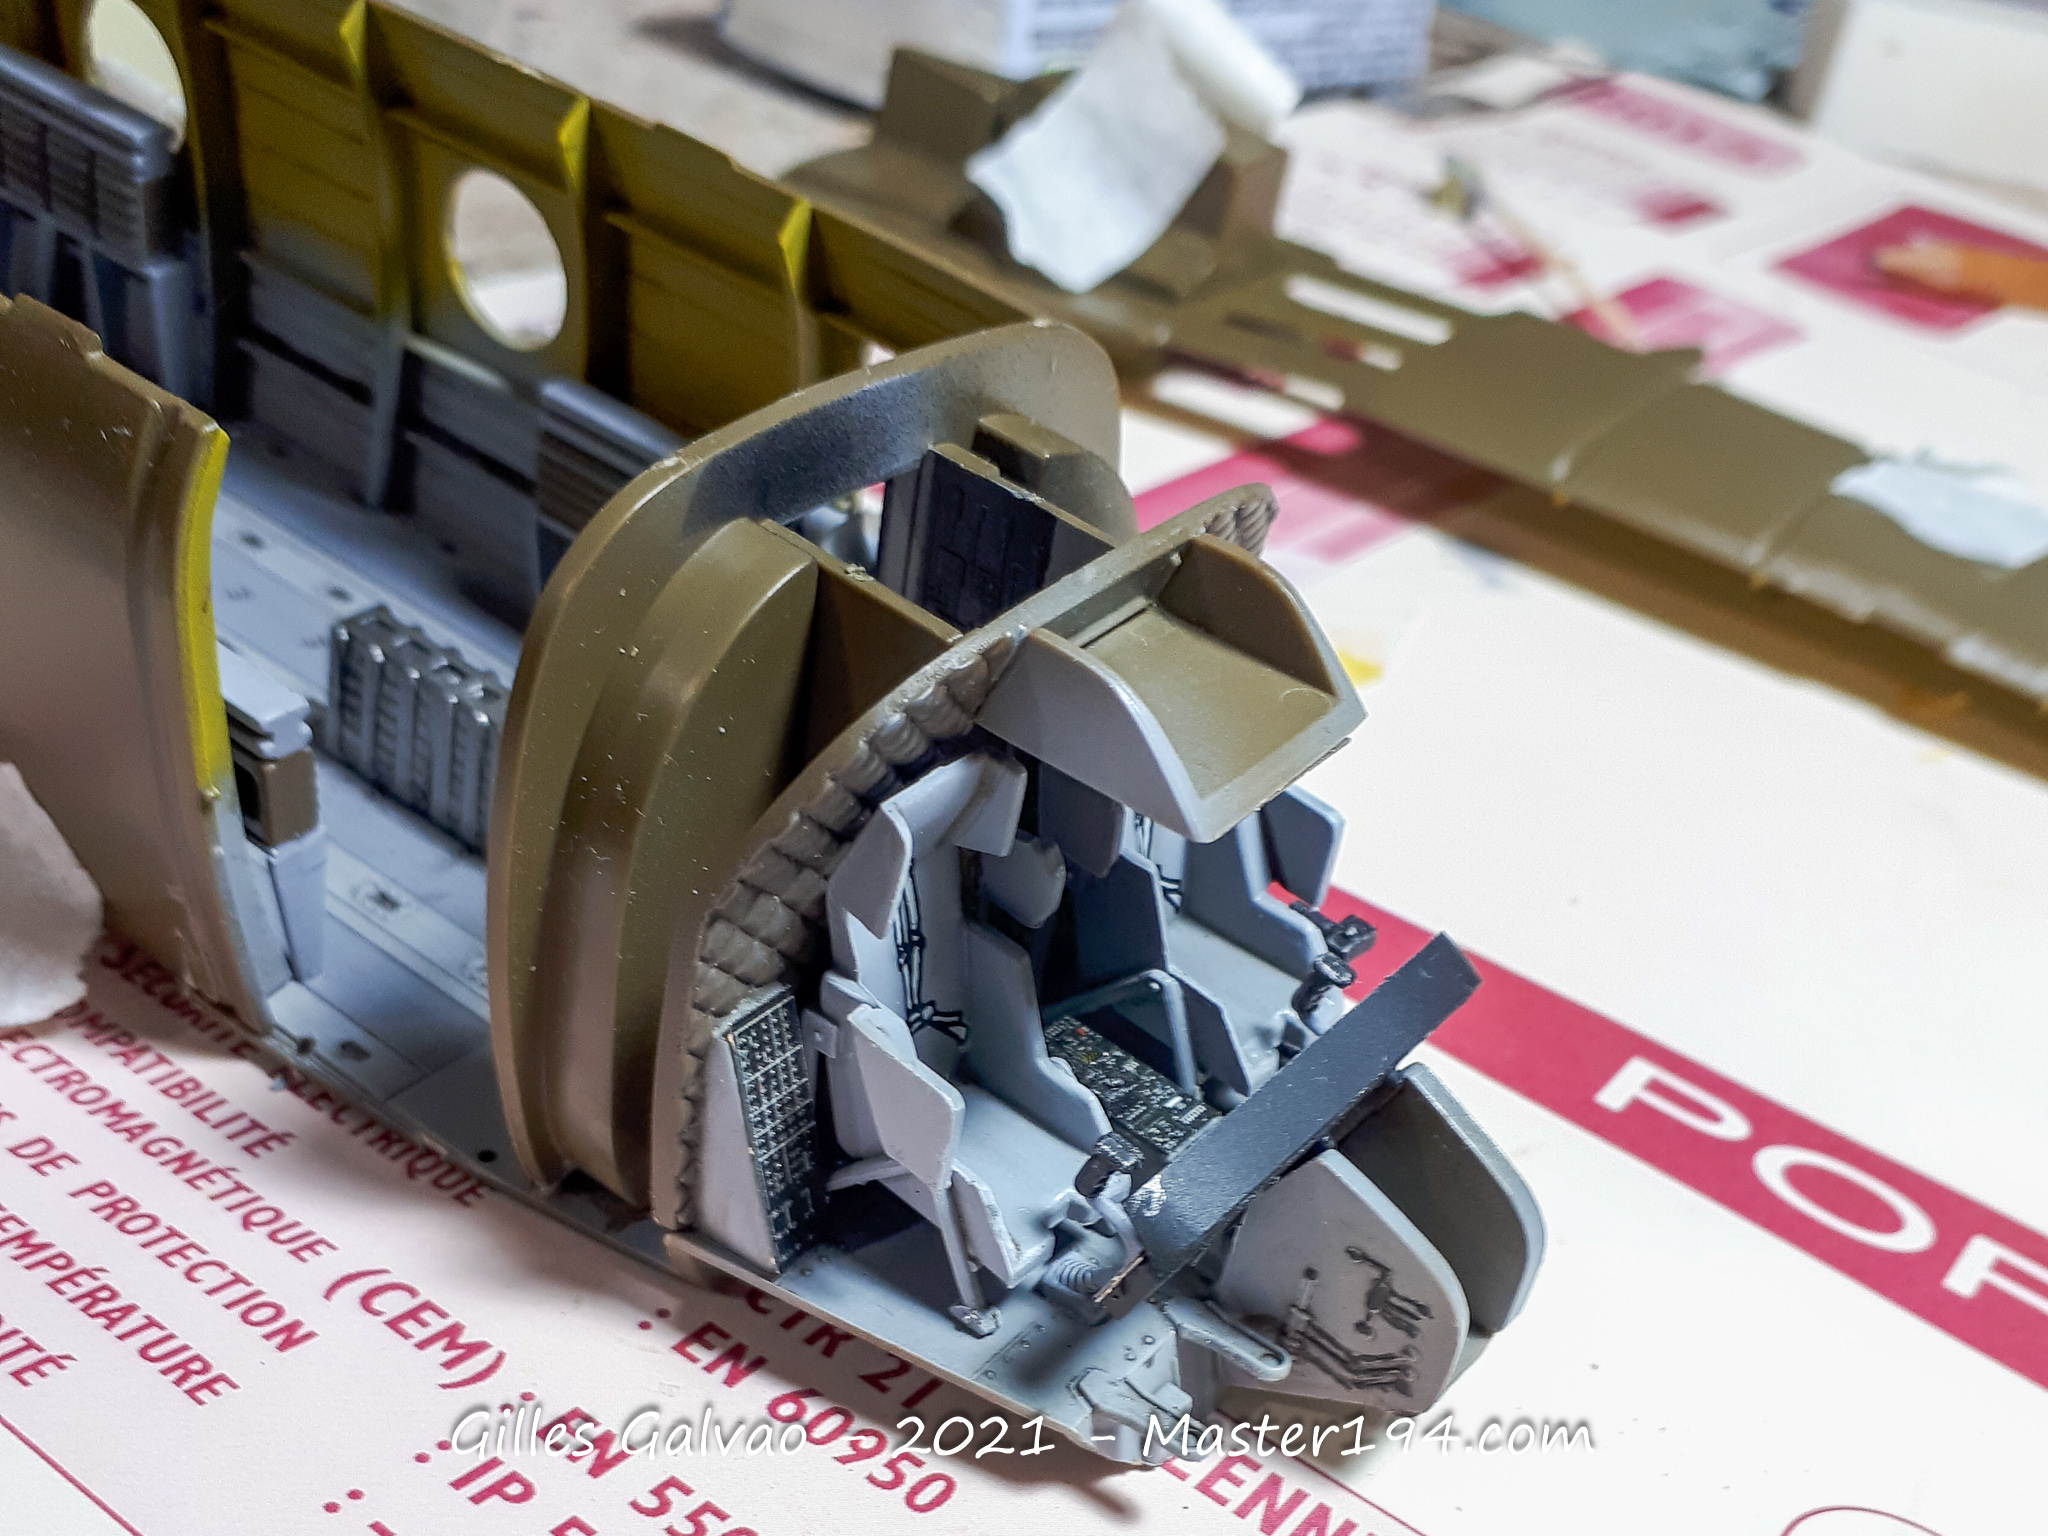
I then dry-fit the main components to check their positioning and make sure everything lines up before proceeding.
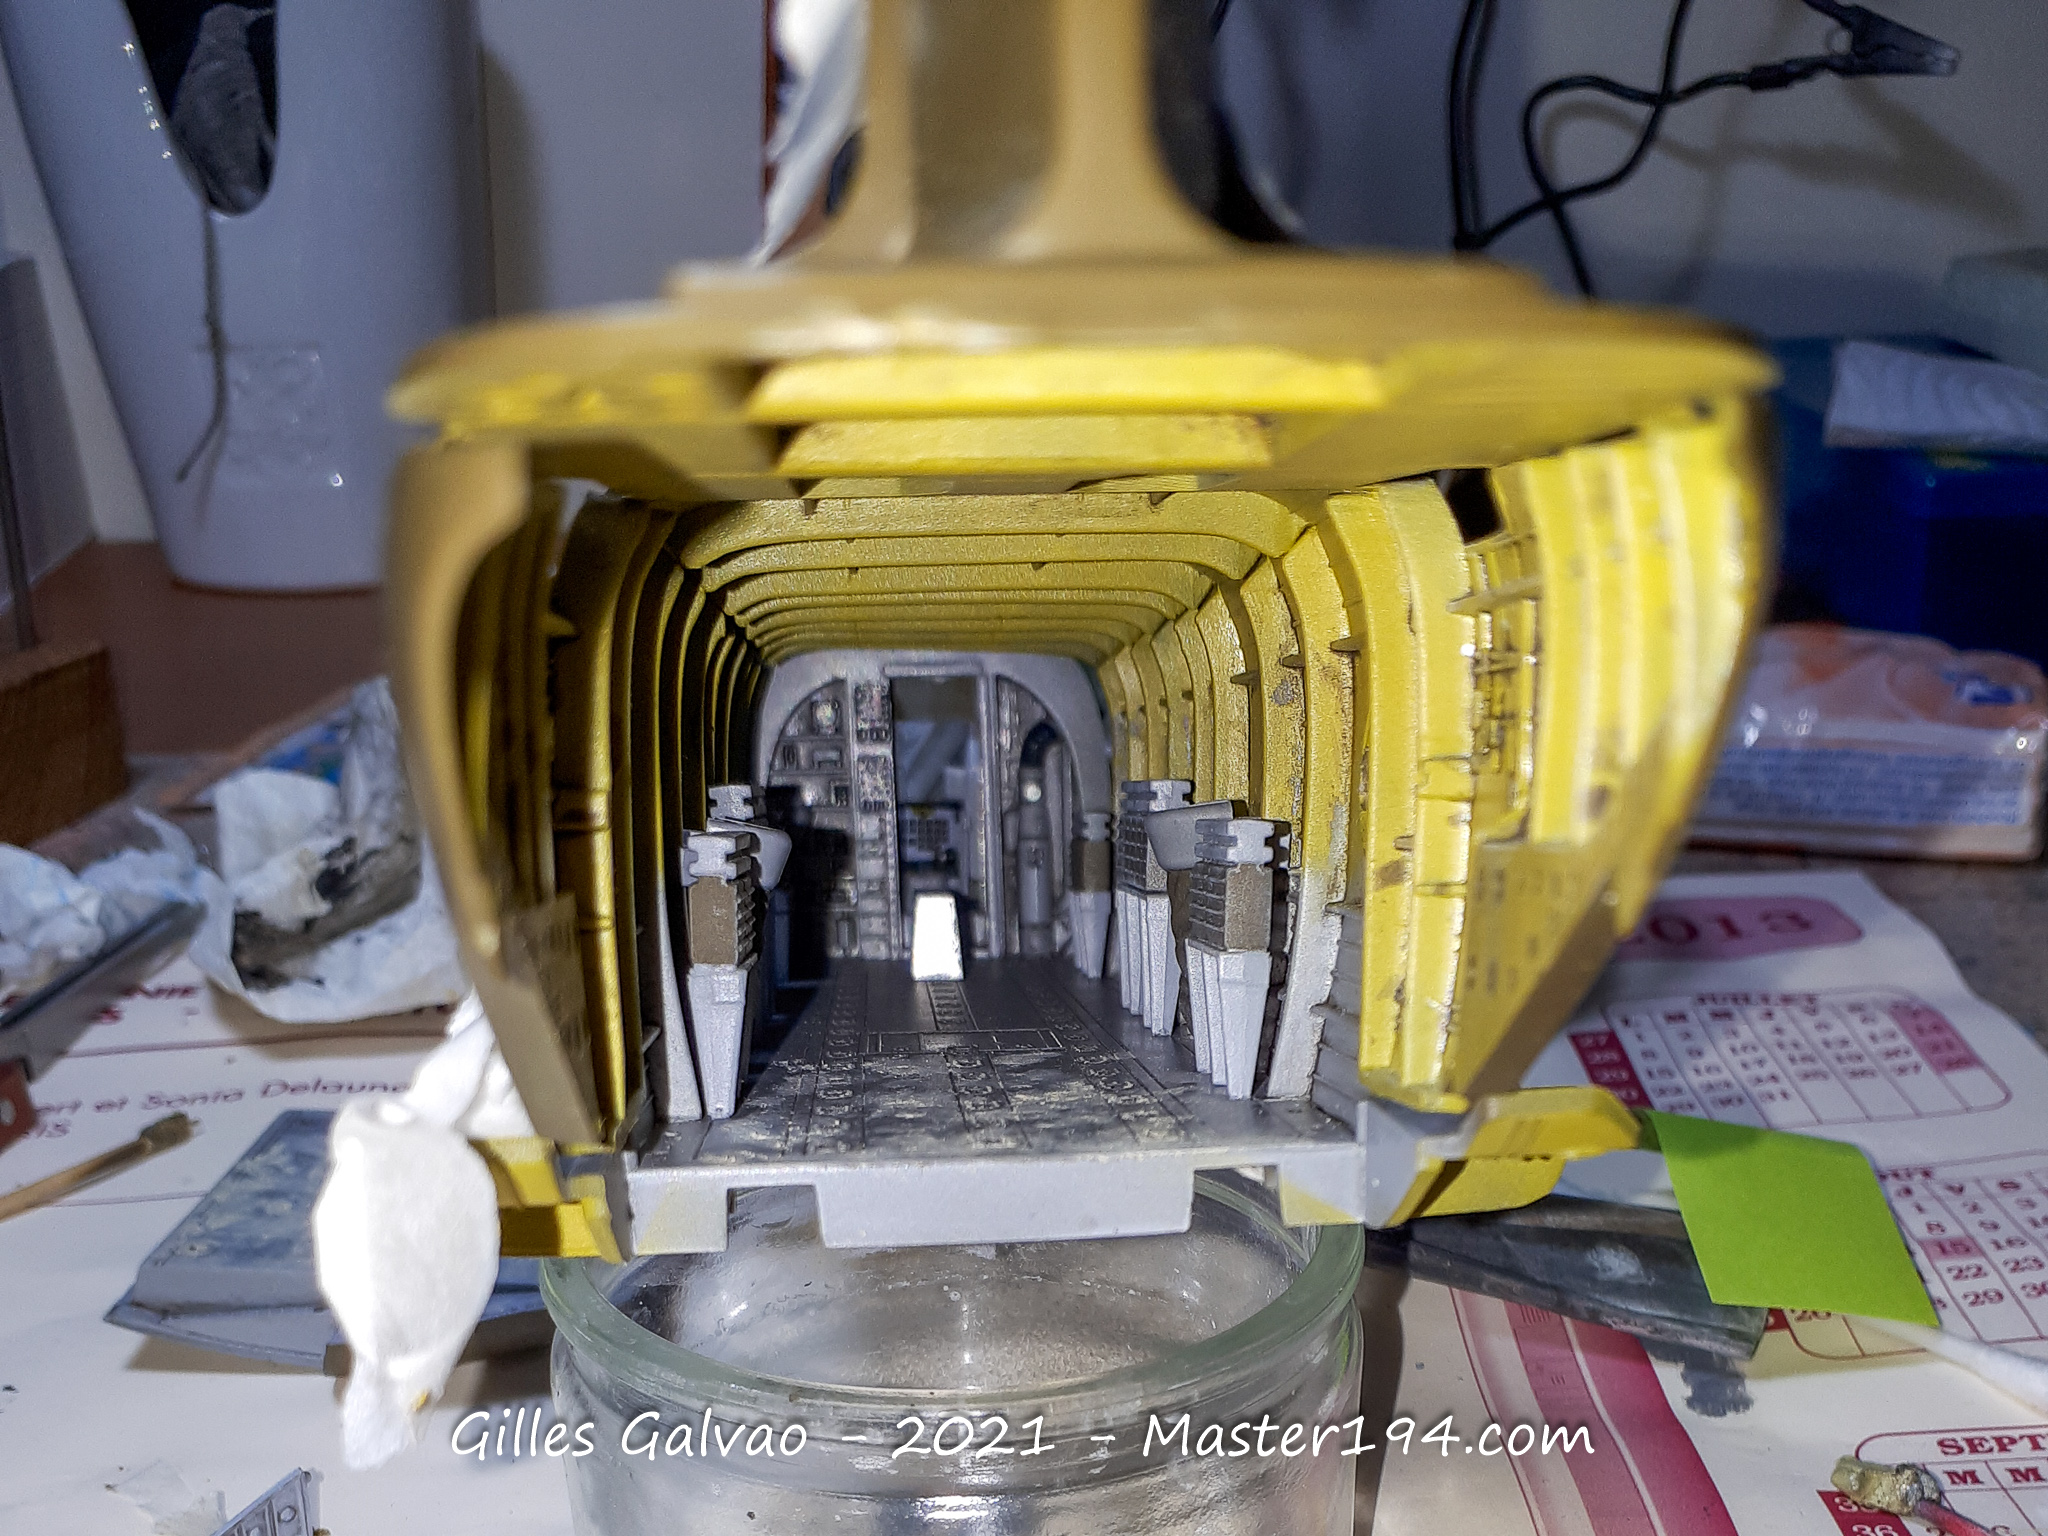
With the interior complete, it is time to fit it inside the fuselage. This stage presents no particular difficulties, provided everything is carefully checked before applying glue.
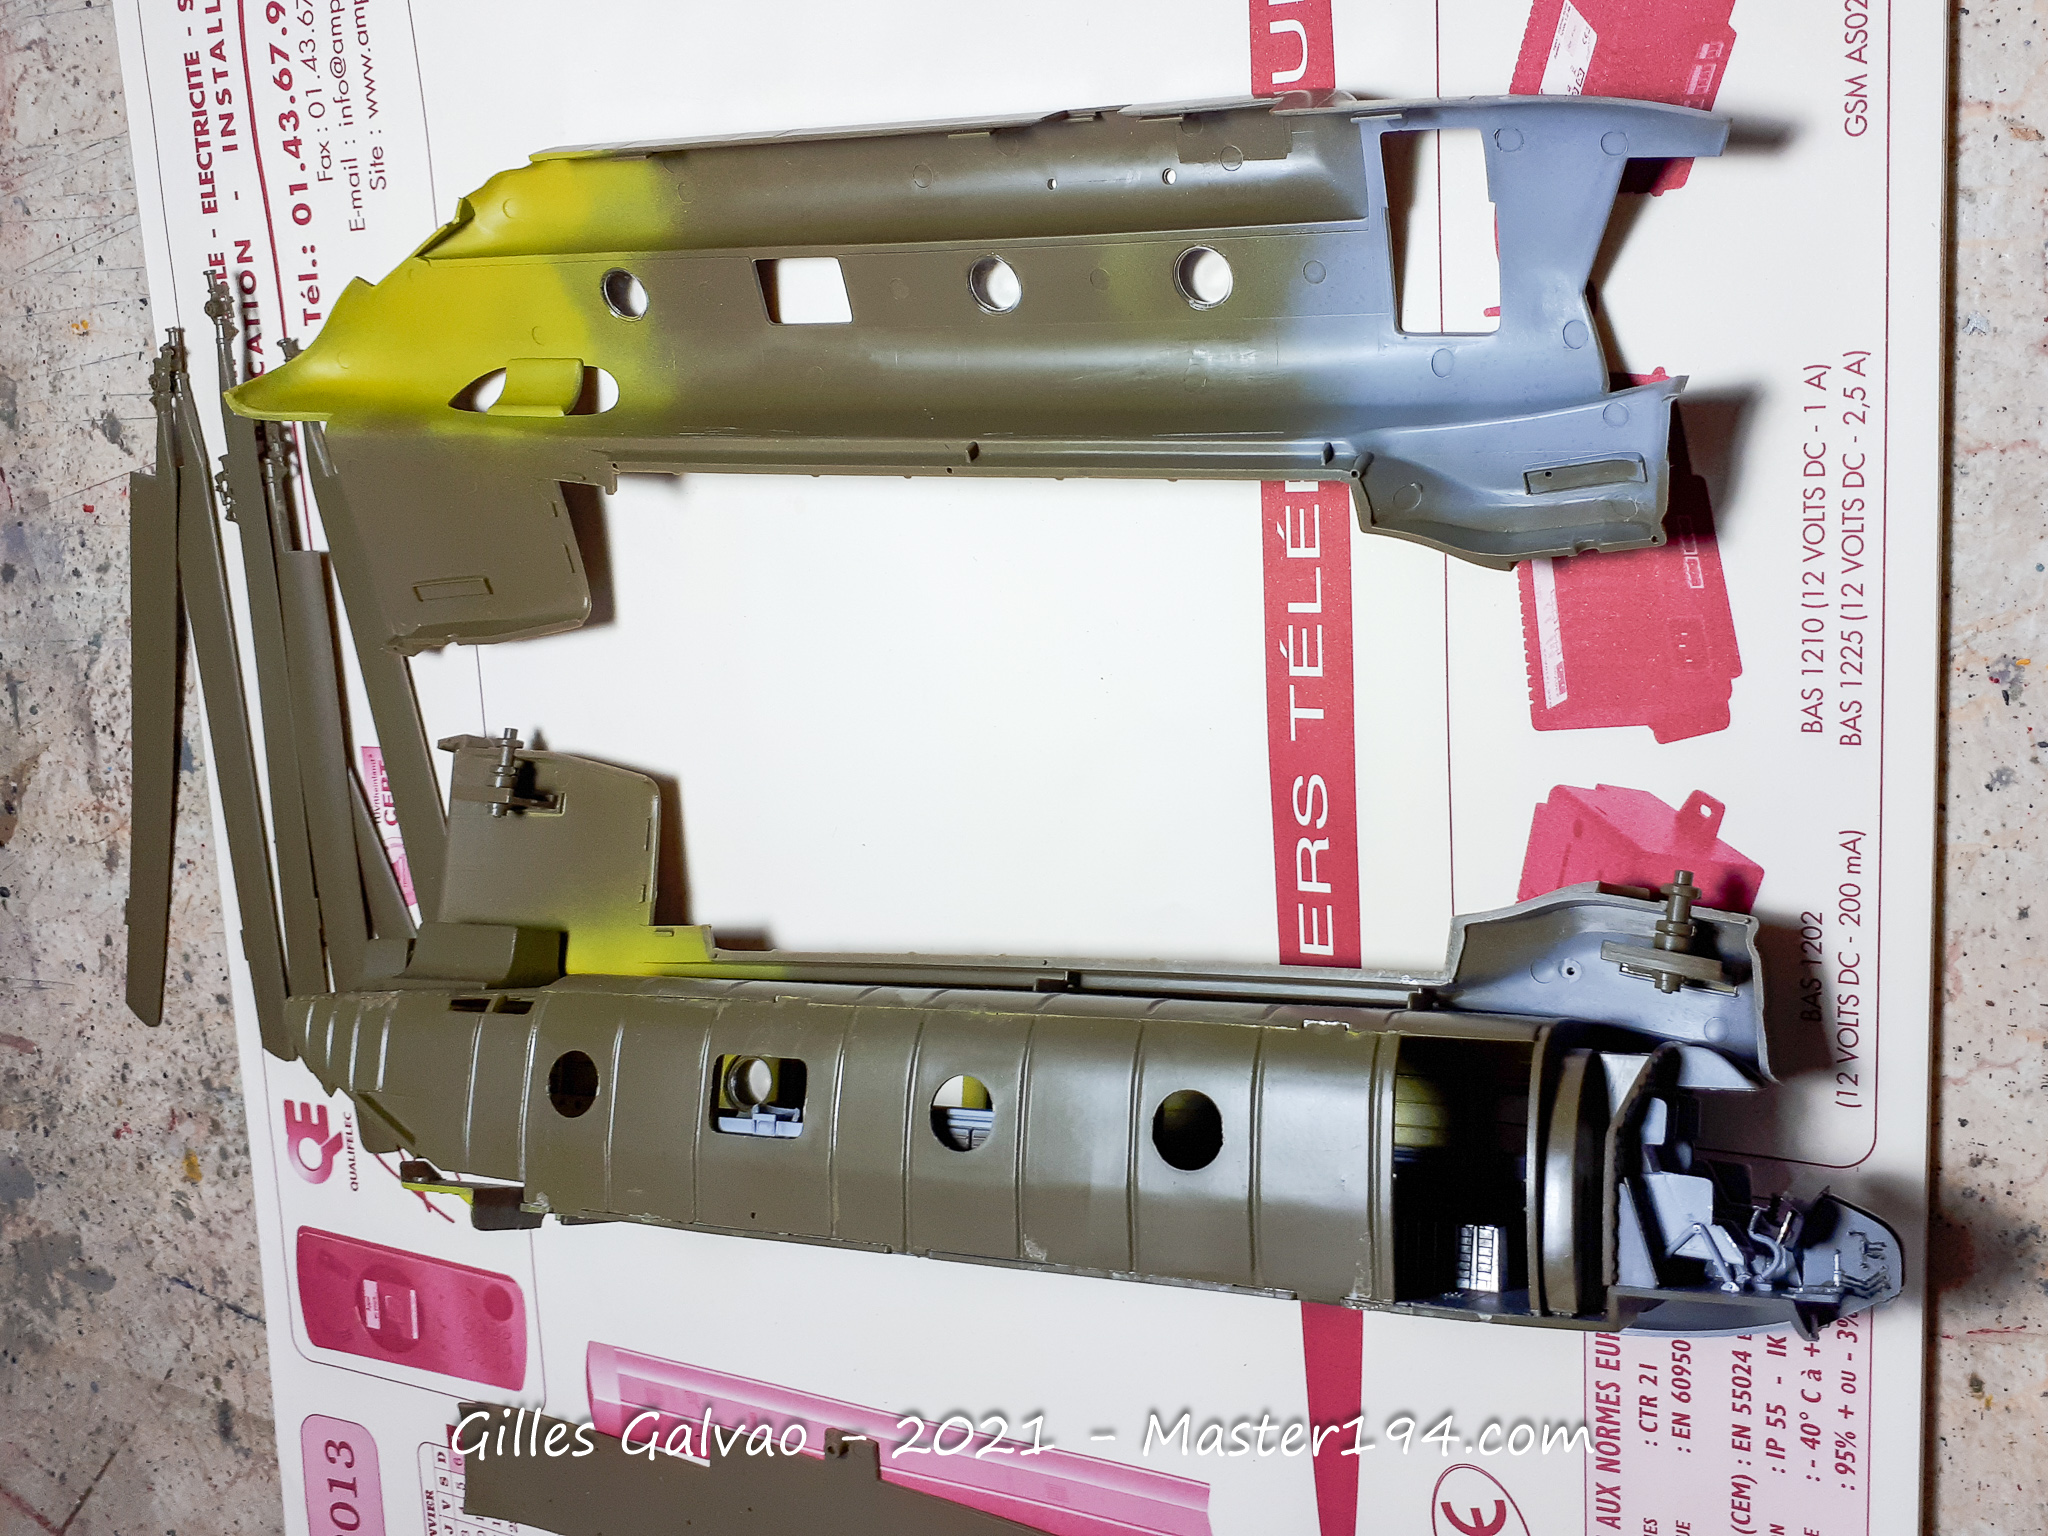
The two fuselage halves are joined and held firmly in place while the glue sets. One important point: do not forget to drill the numerous mounting holes required for the external equipment. Once the fuselage is closed, this would be a much more awkward job!
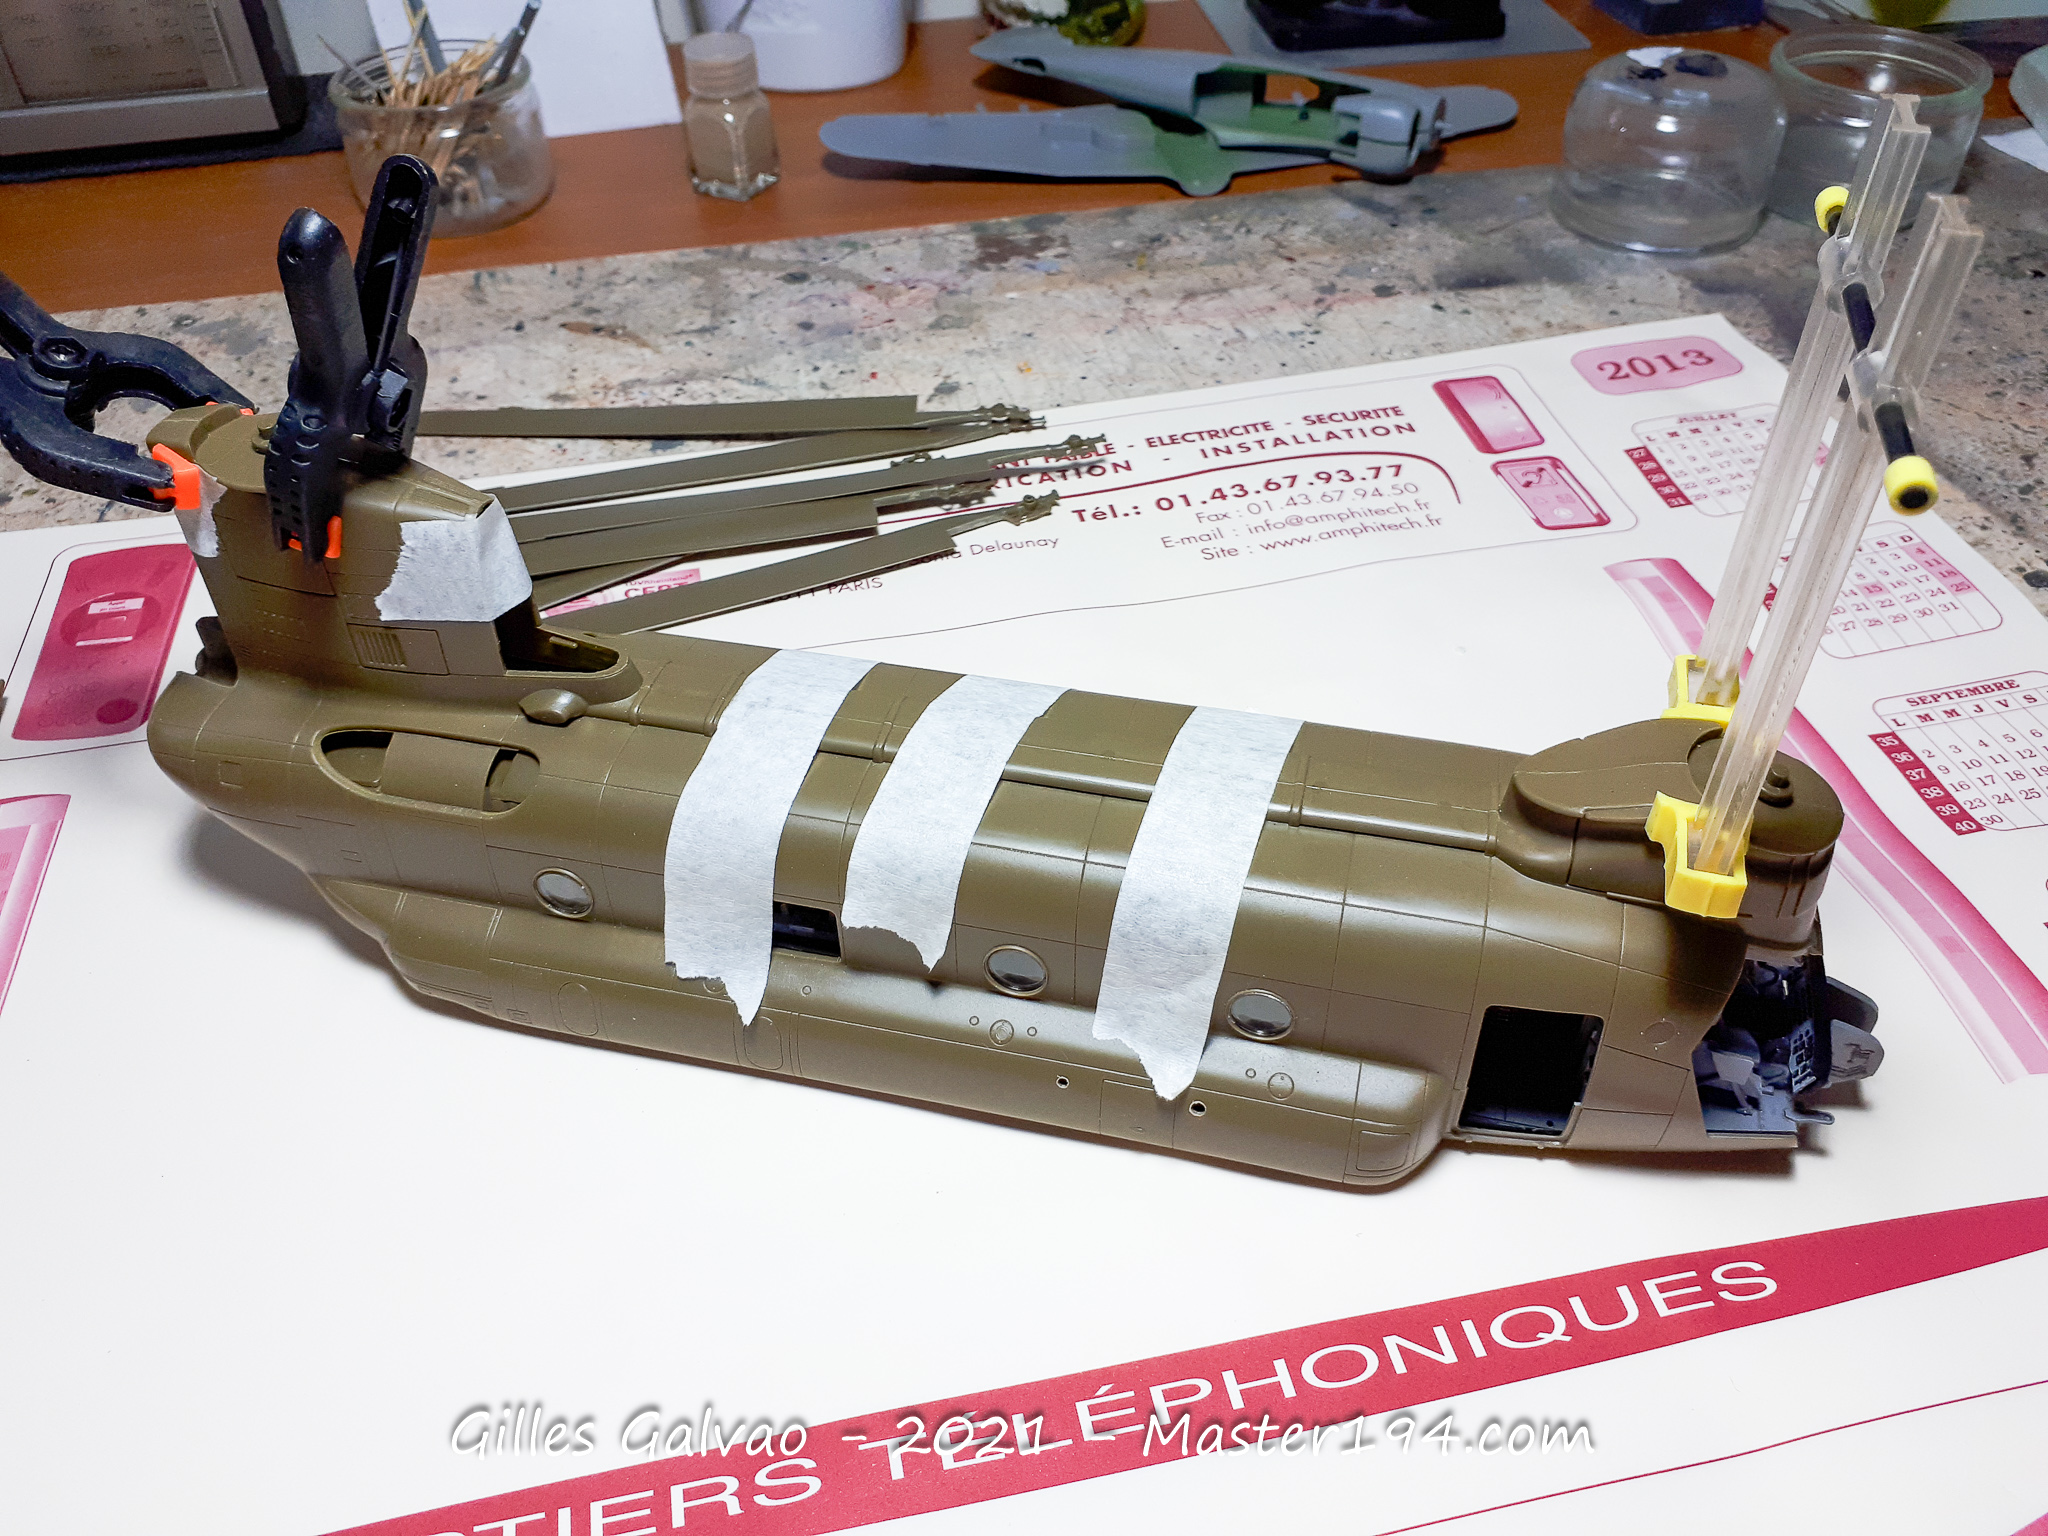
The lower fuselage section must also be fitted to complete the main assembly.
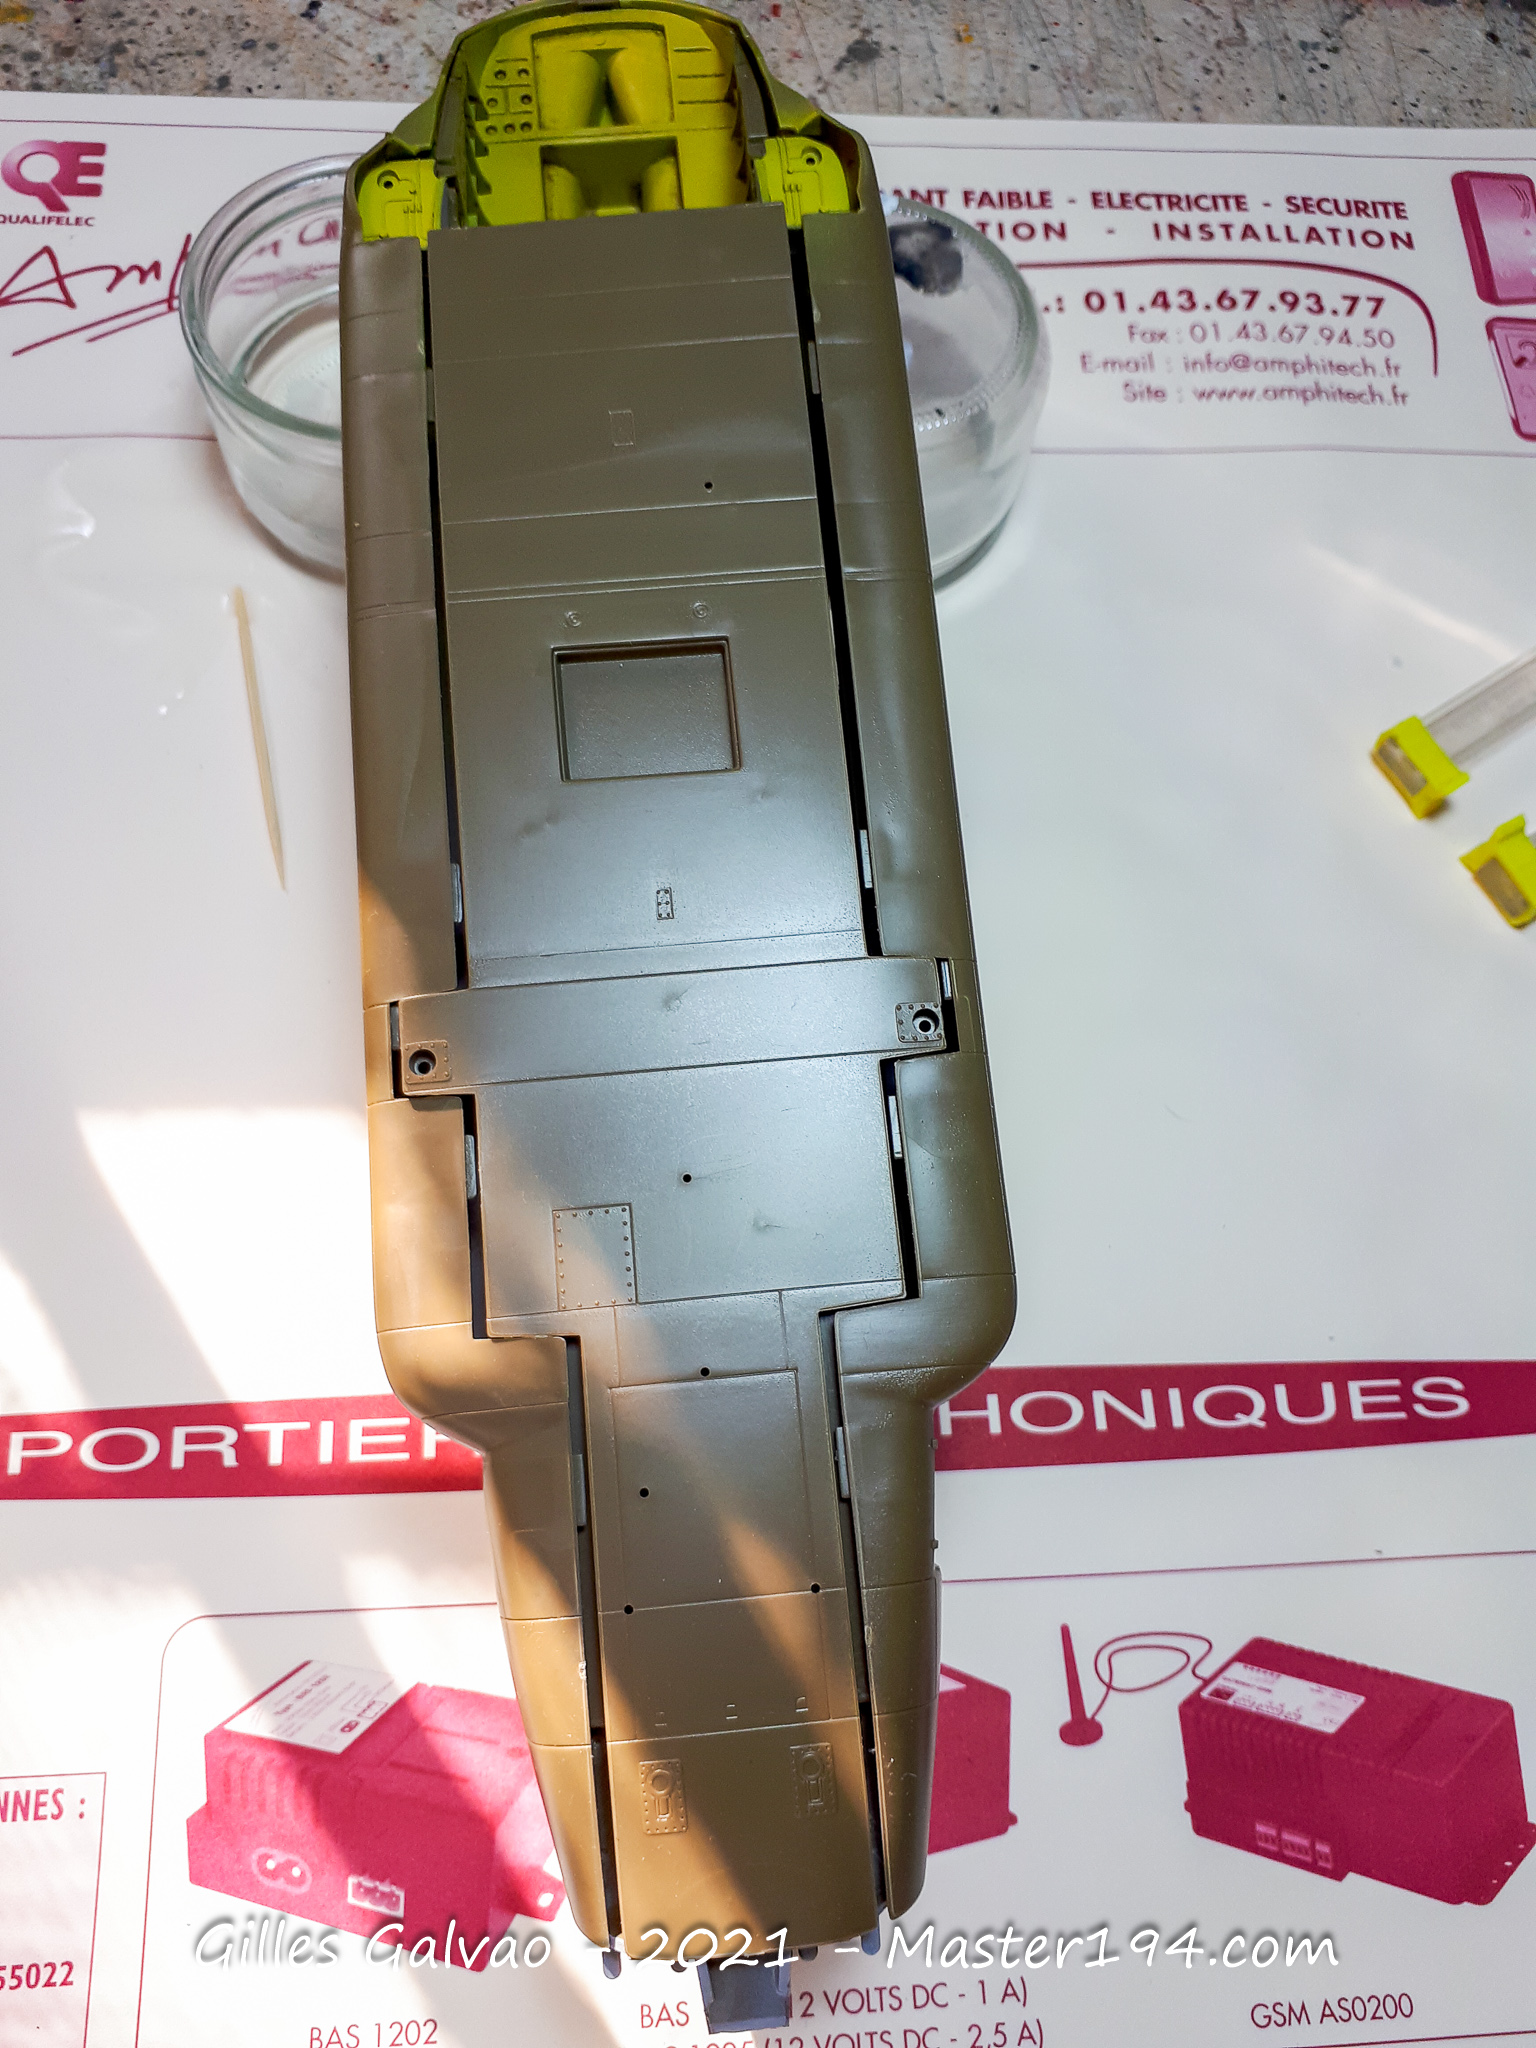
Once the main components are together, attention turns to the seams. Some filler and sanding are required to achieve a clean finish. There is a fair amount of work involved here!
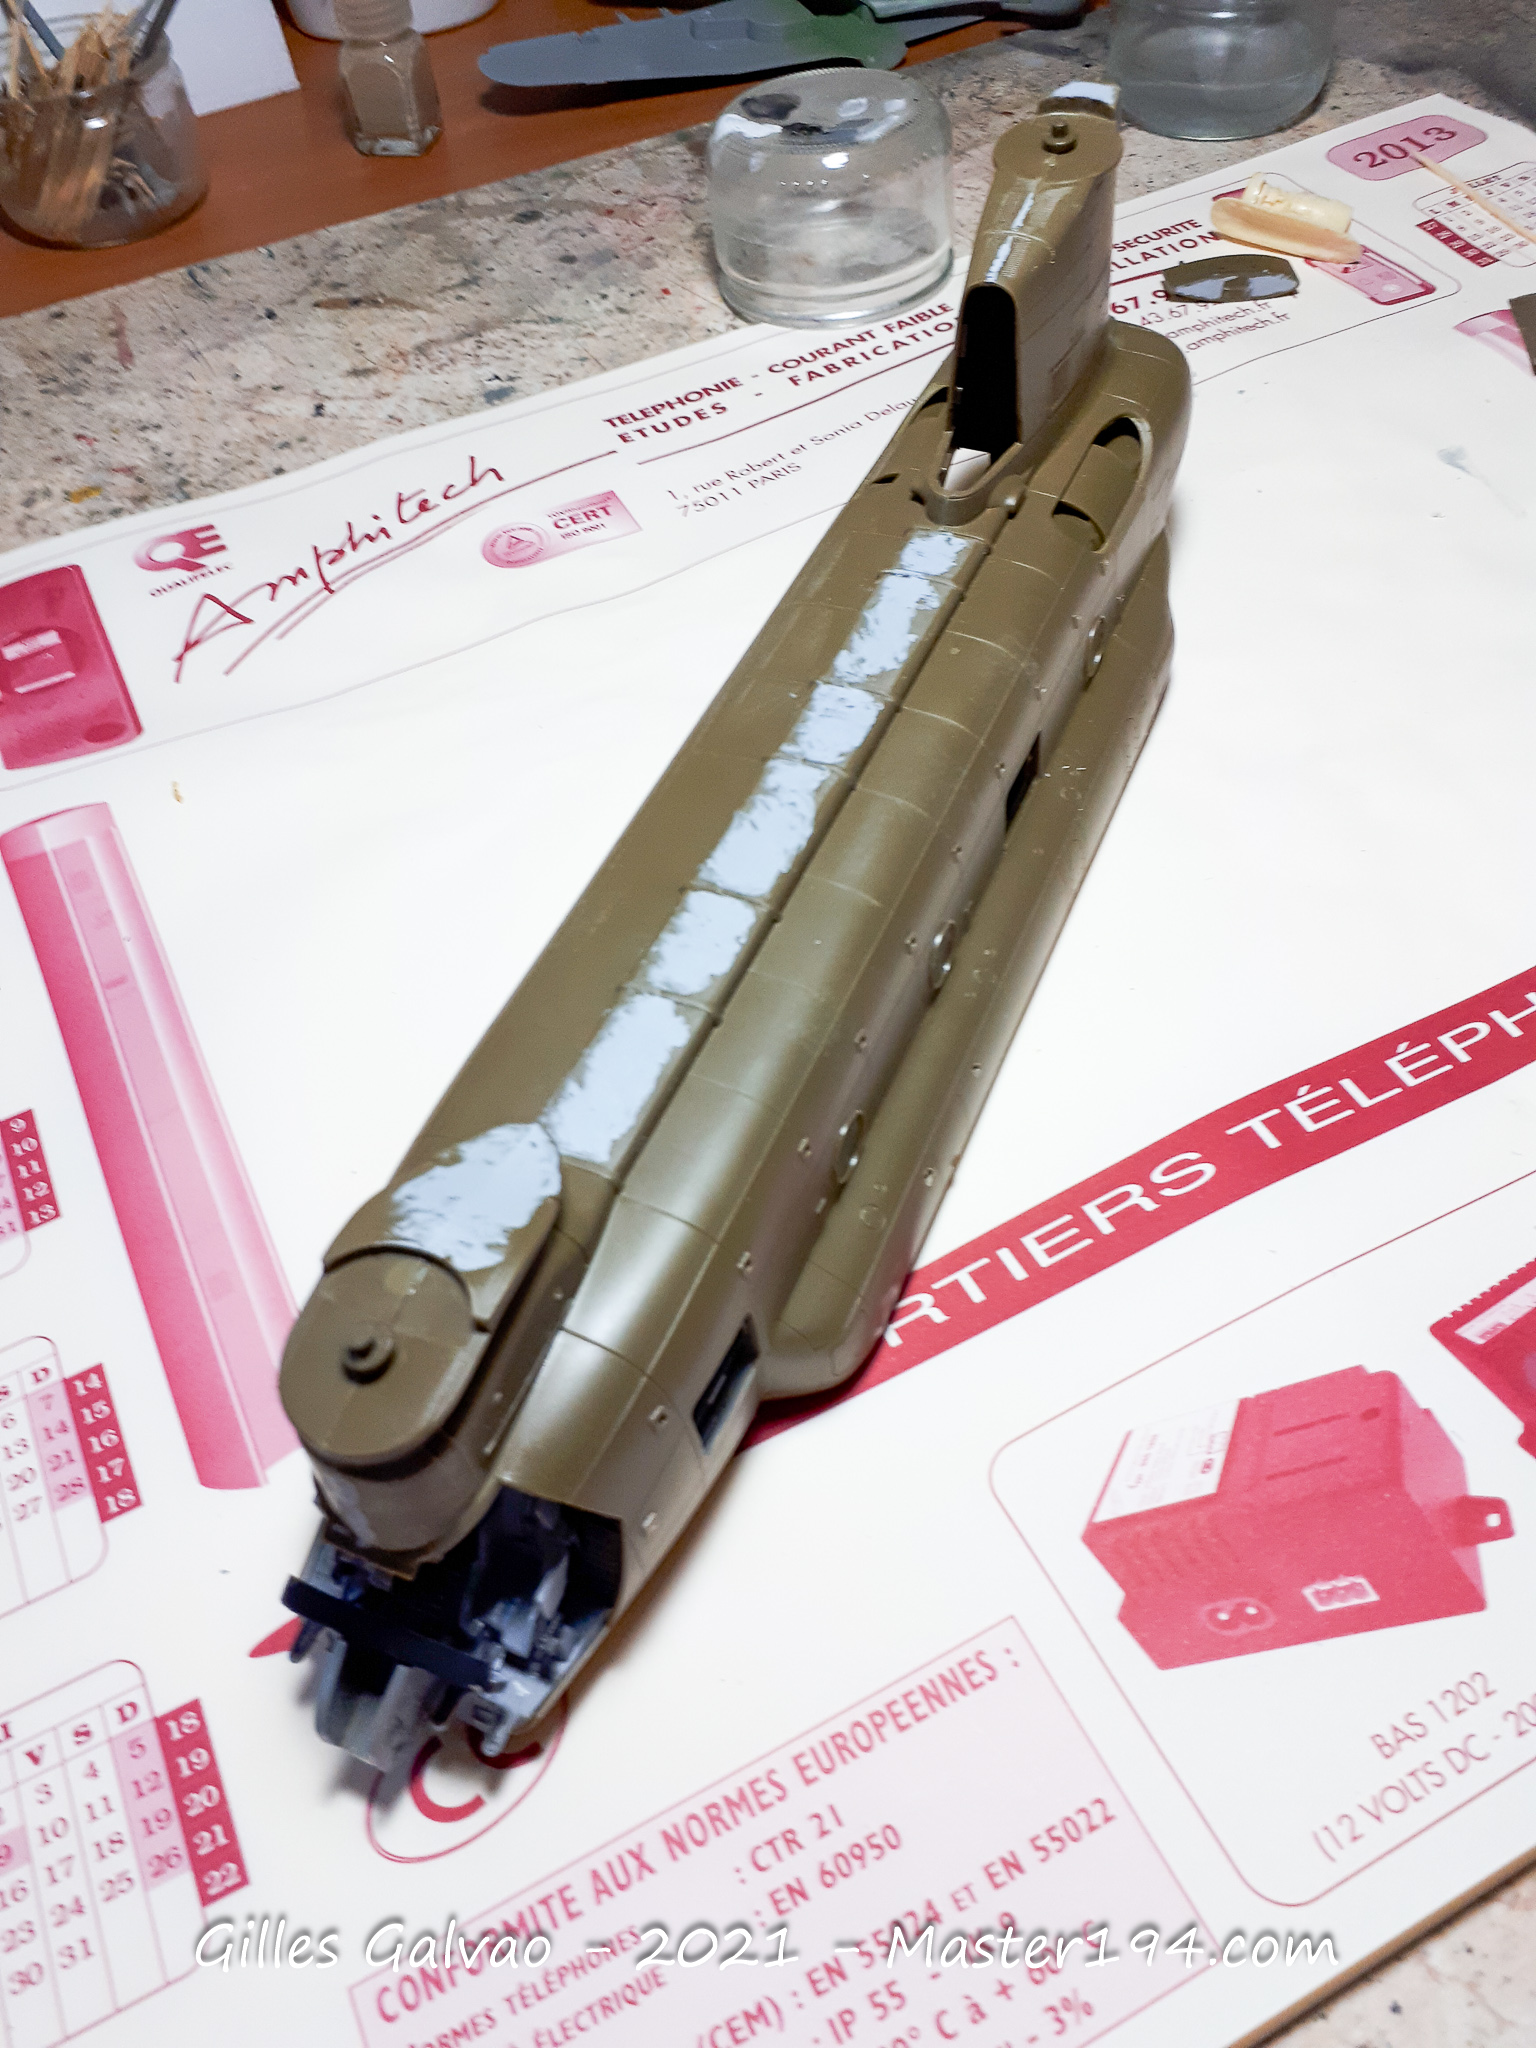
The forward section also requires some attention. The joints need to be carefully filled and sanded before moving on to the glazing and preparing the model for painting.
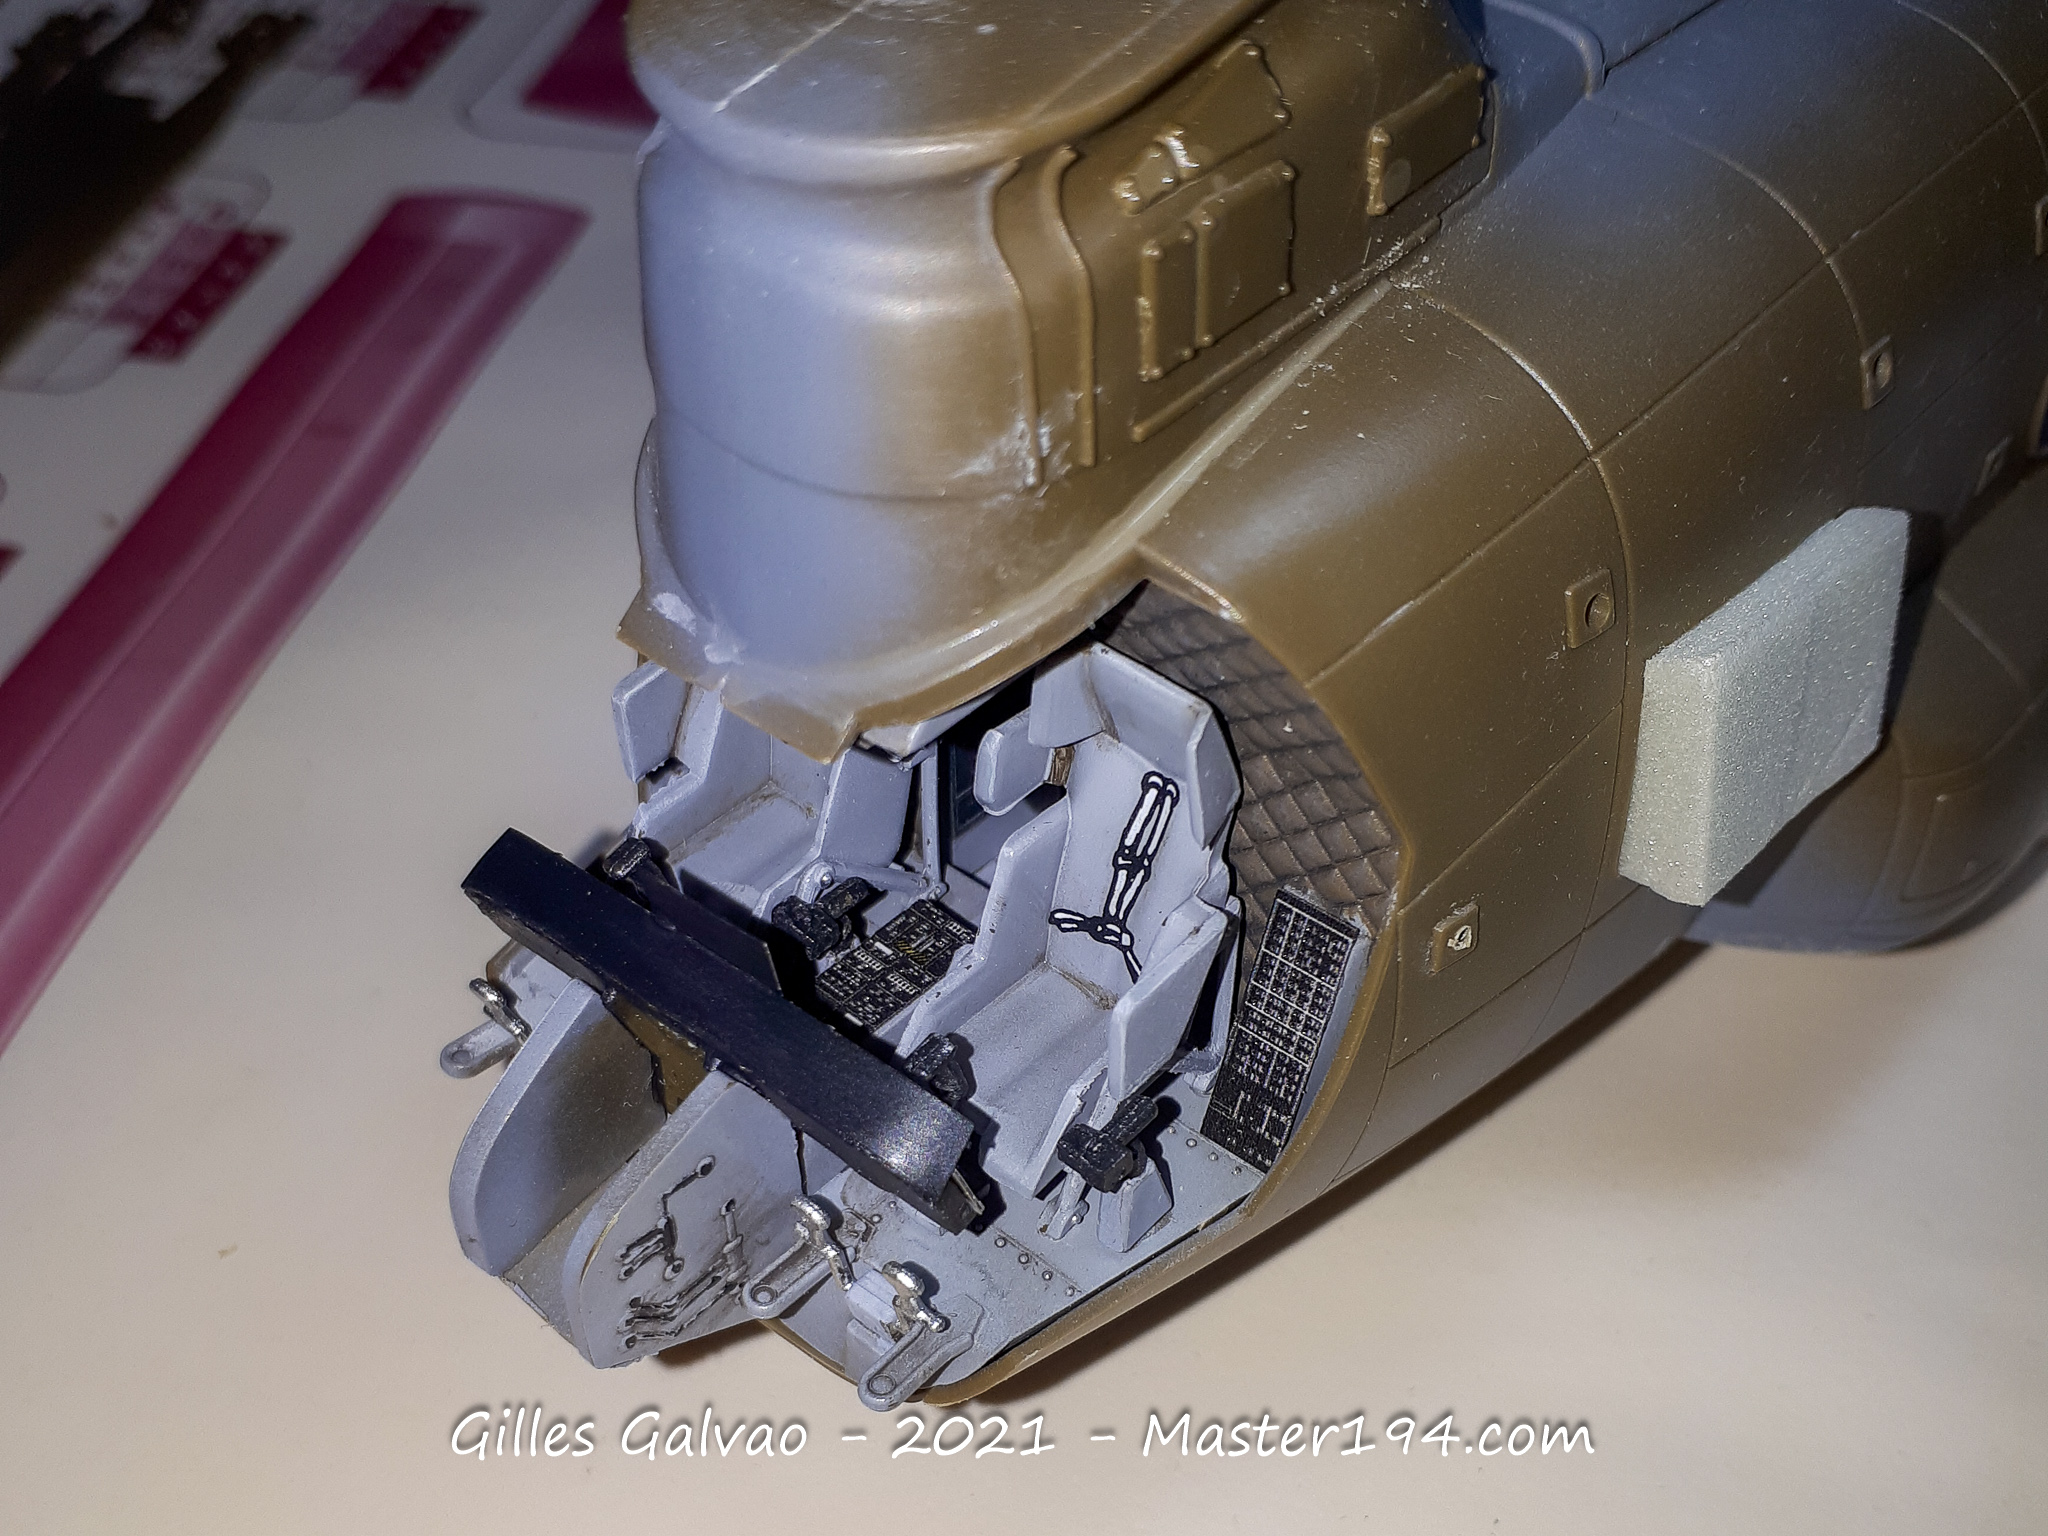
The photo-etched parts really come into their own in the cockpit. They add finer detail to the instrument panels and equipment, which remains clearly visible through the canopy.
The glazing is fitted next. Do not forget to tint the upper section with translucent green to reproduce the appearance of this particular panel.
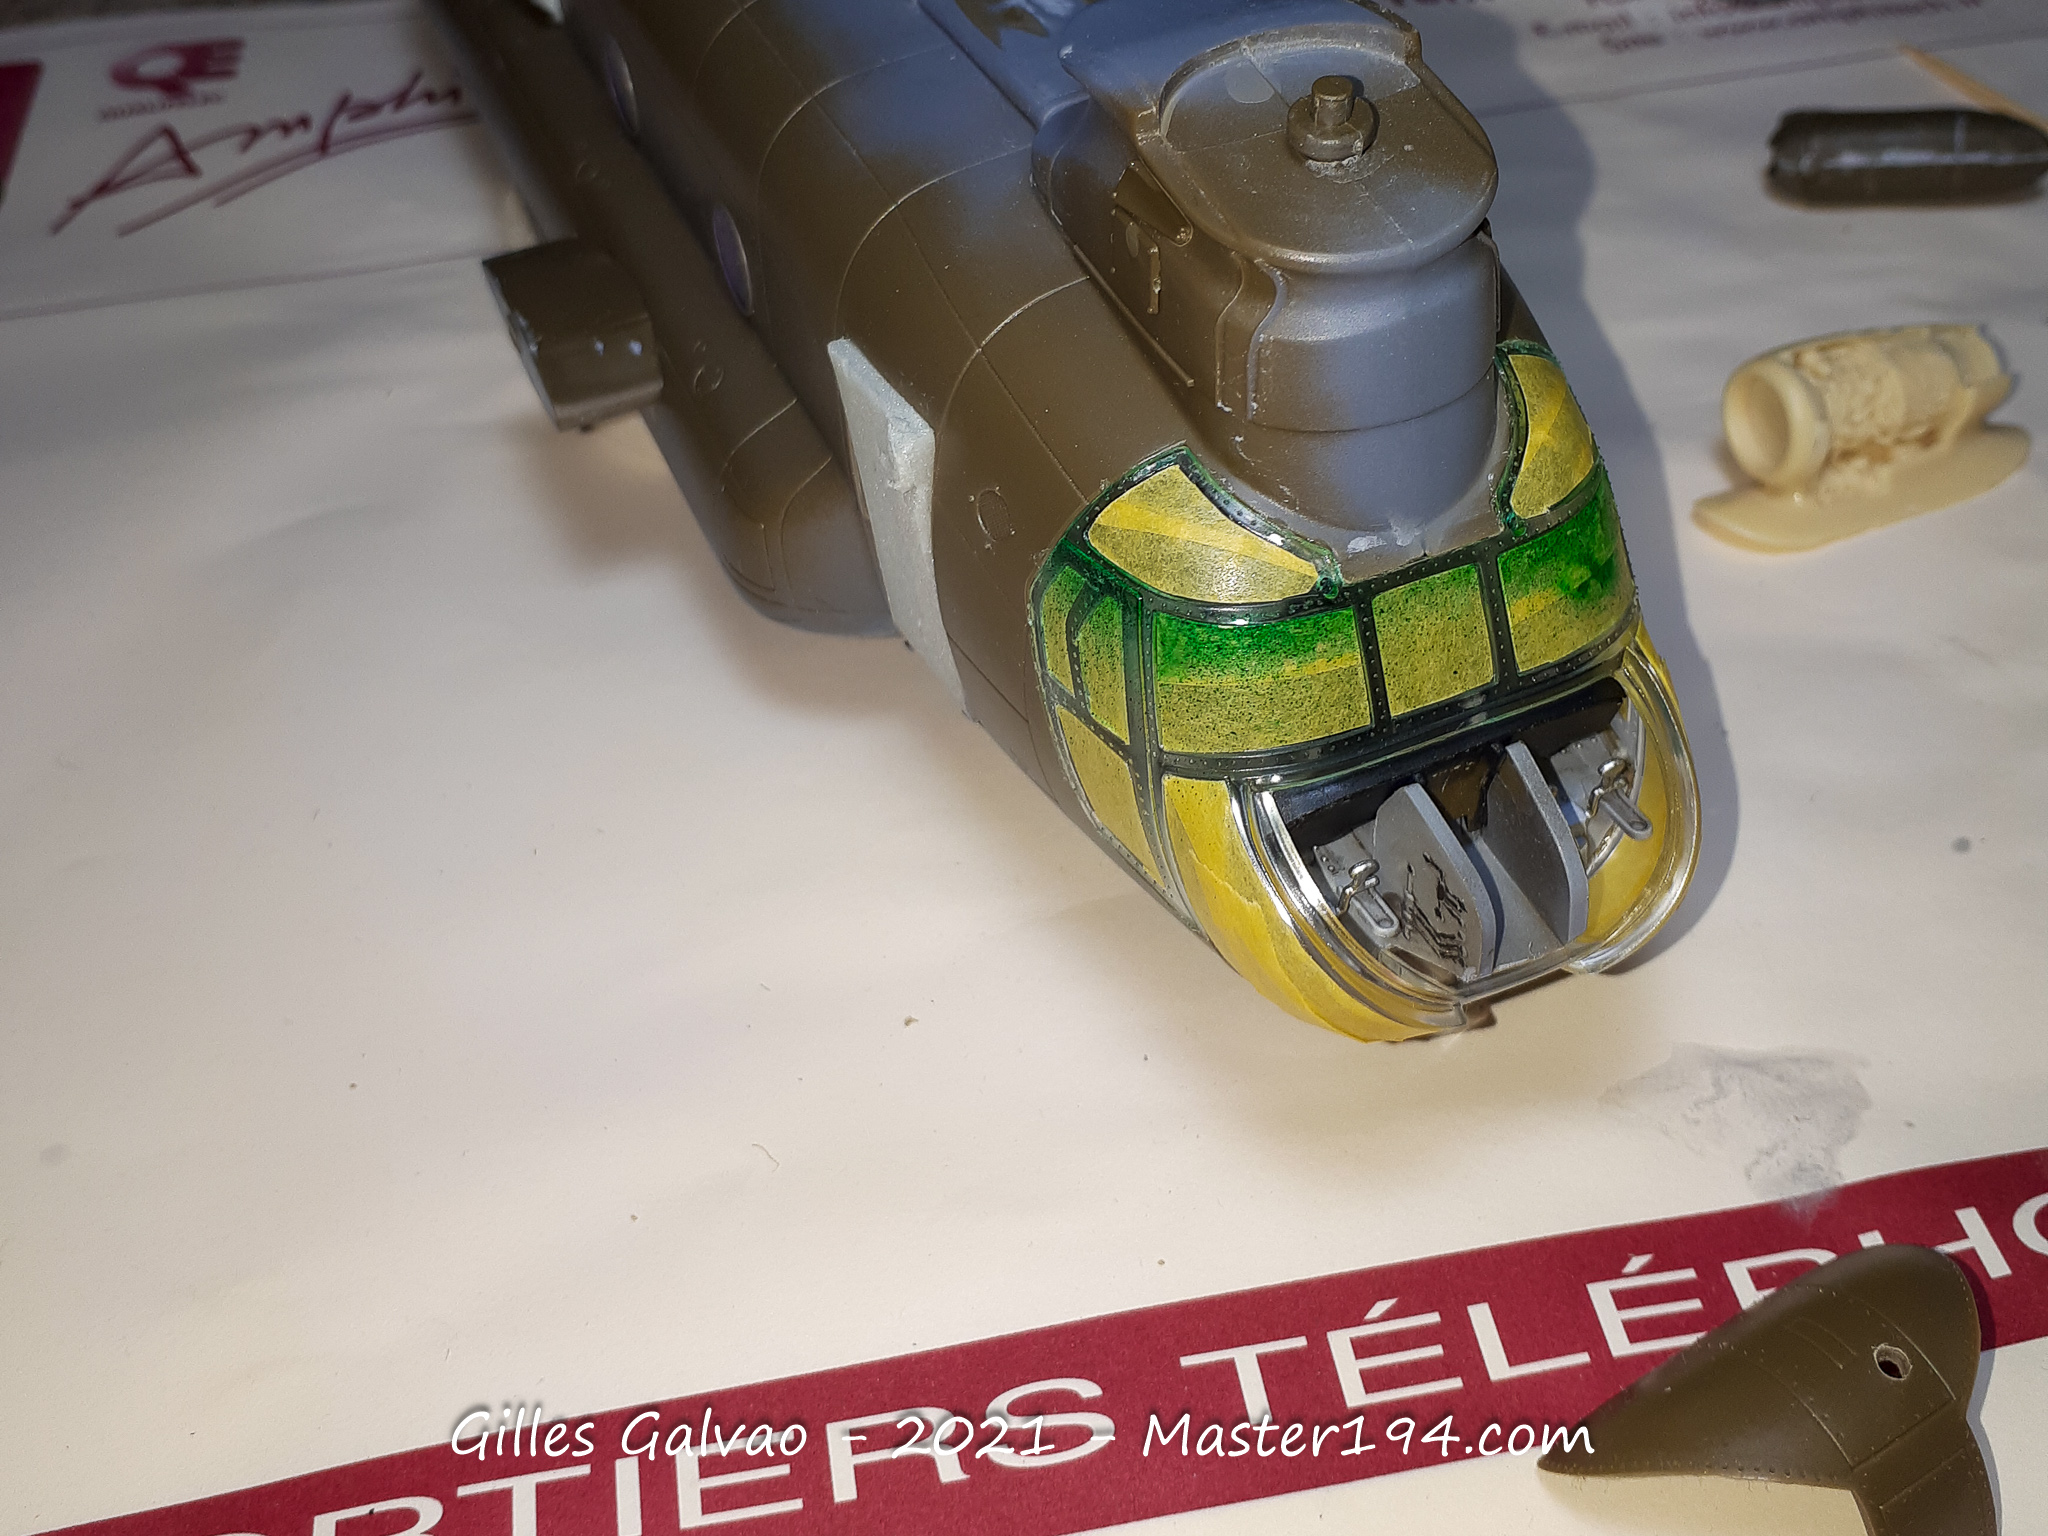
A first coat of paint helps reveal any remaining imperfections around the joints. The glazing and all areas that need to remain clear are carefully masked. Fitting the canopy was certainly not the easiest part of this build!
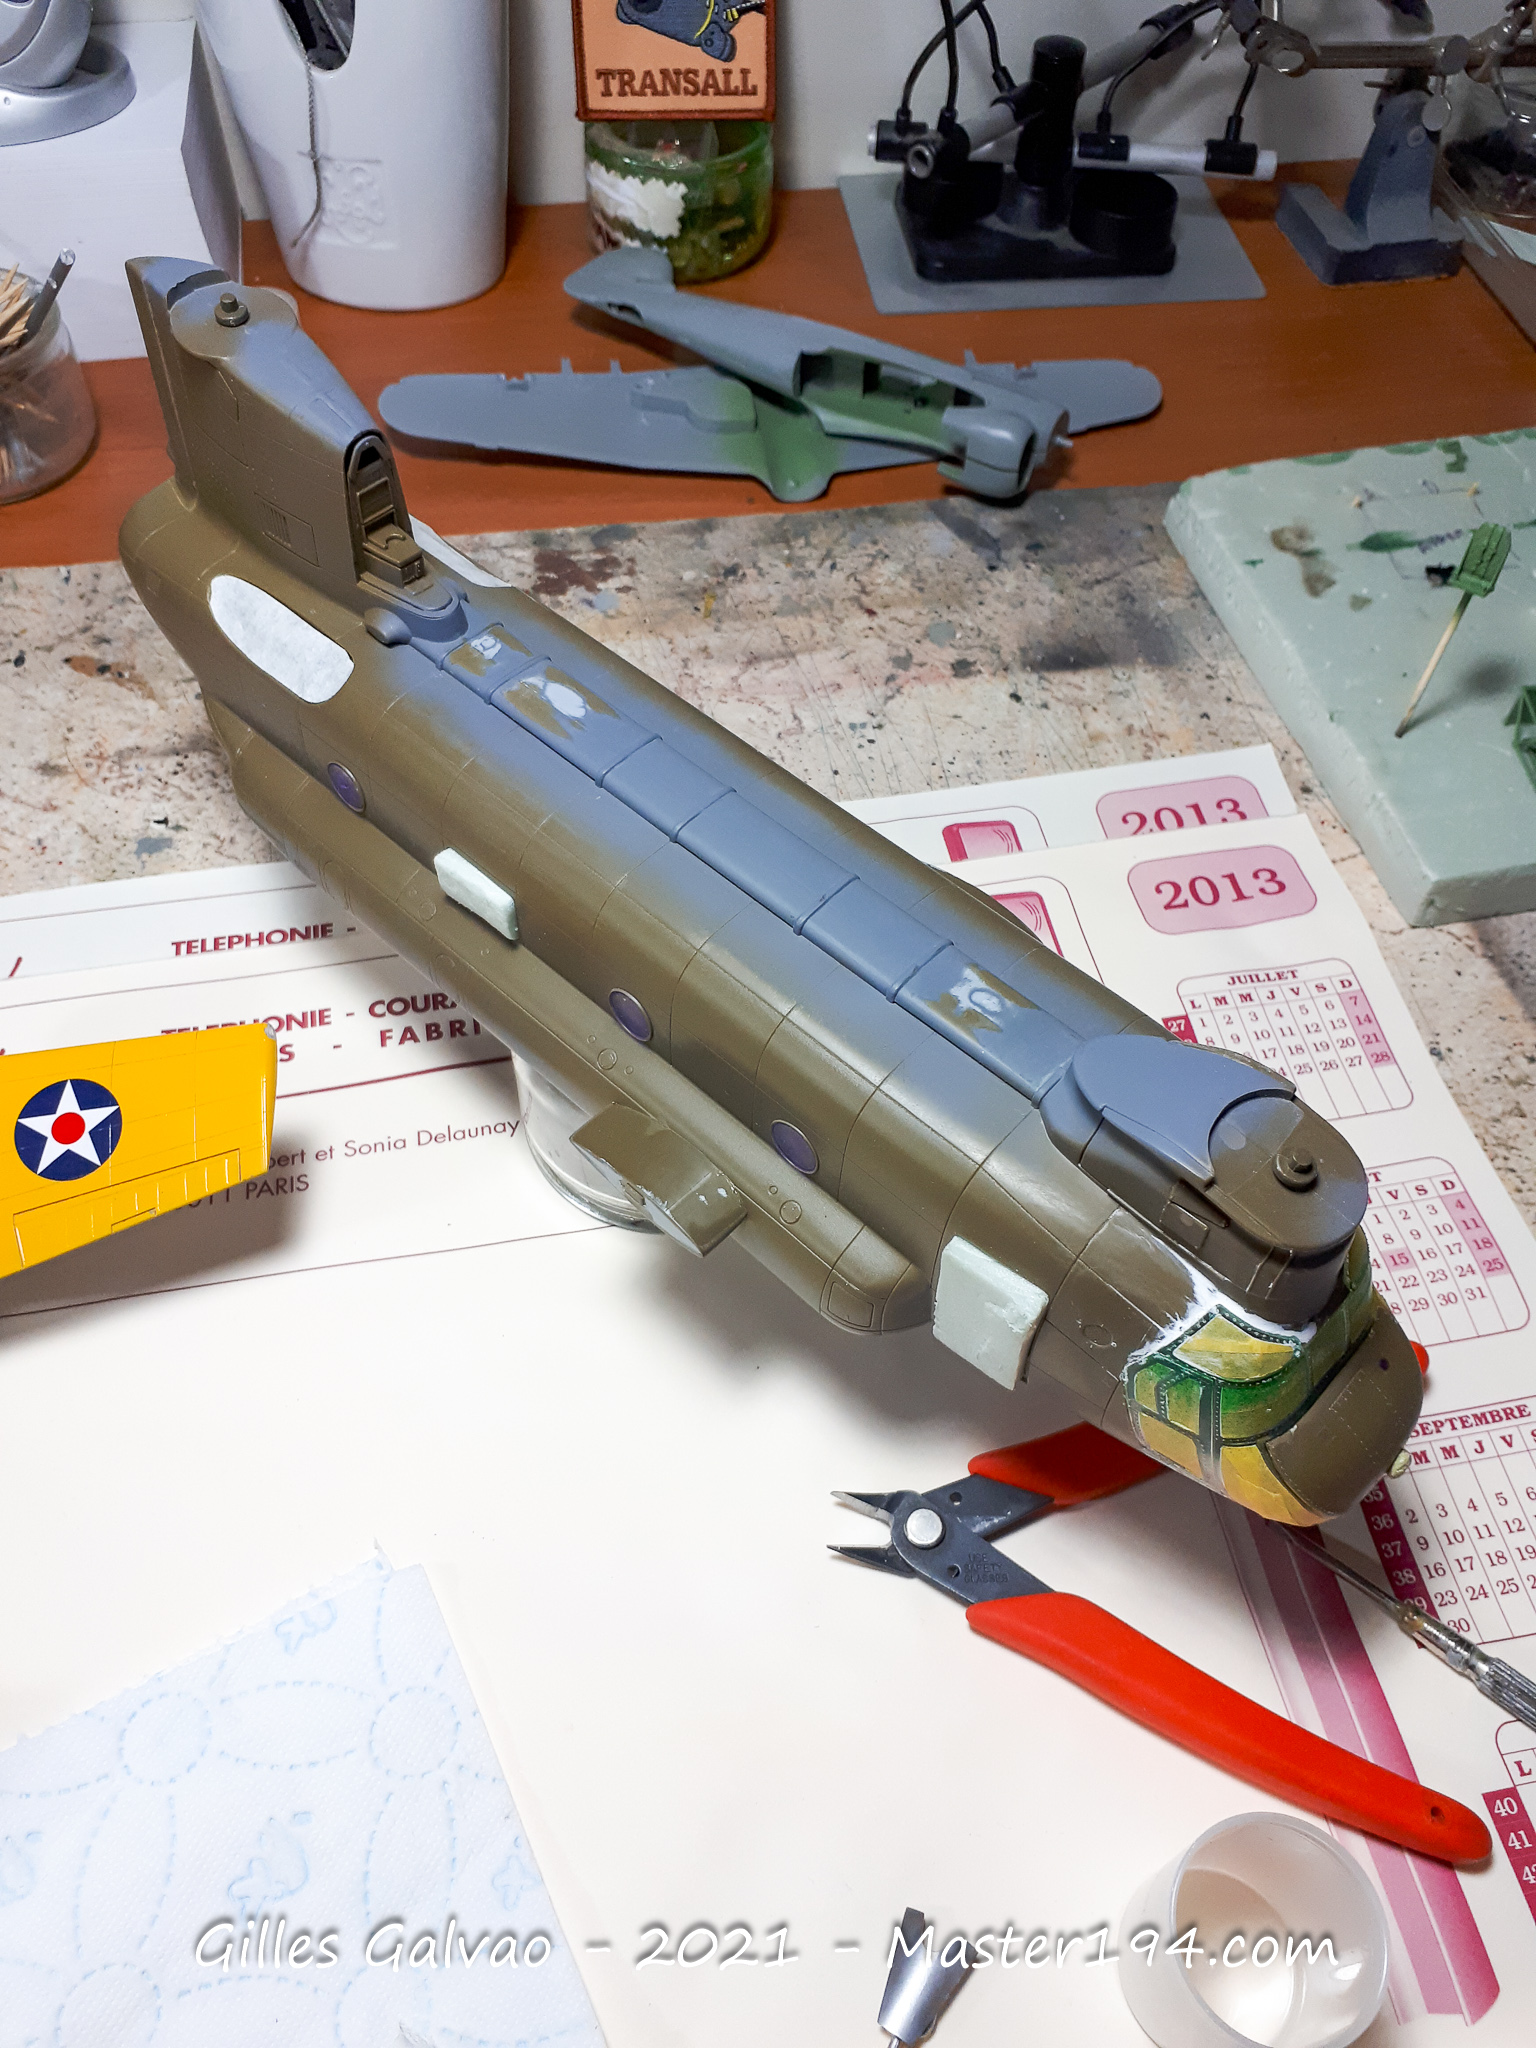
A final coat of primer brings everything together and provides another opportunity to check for flaws before applying the main colours.
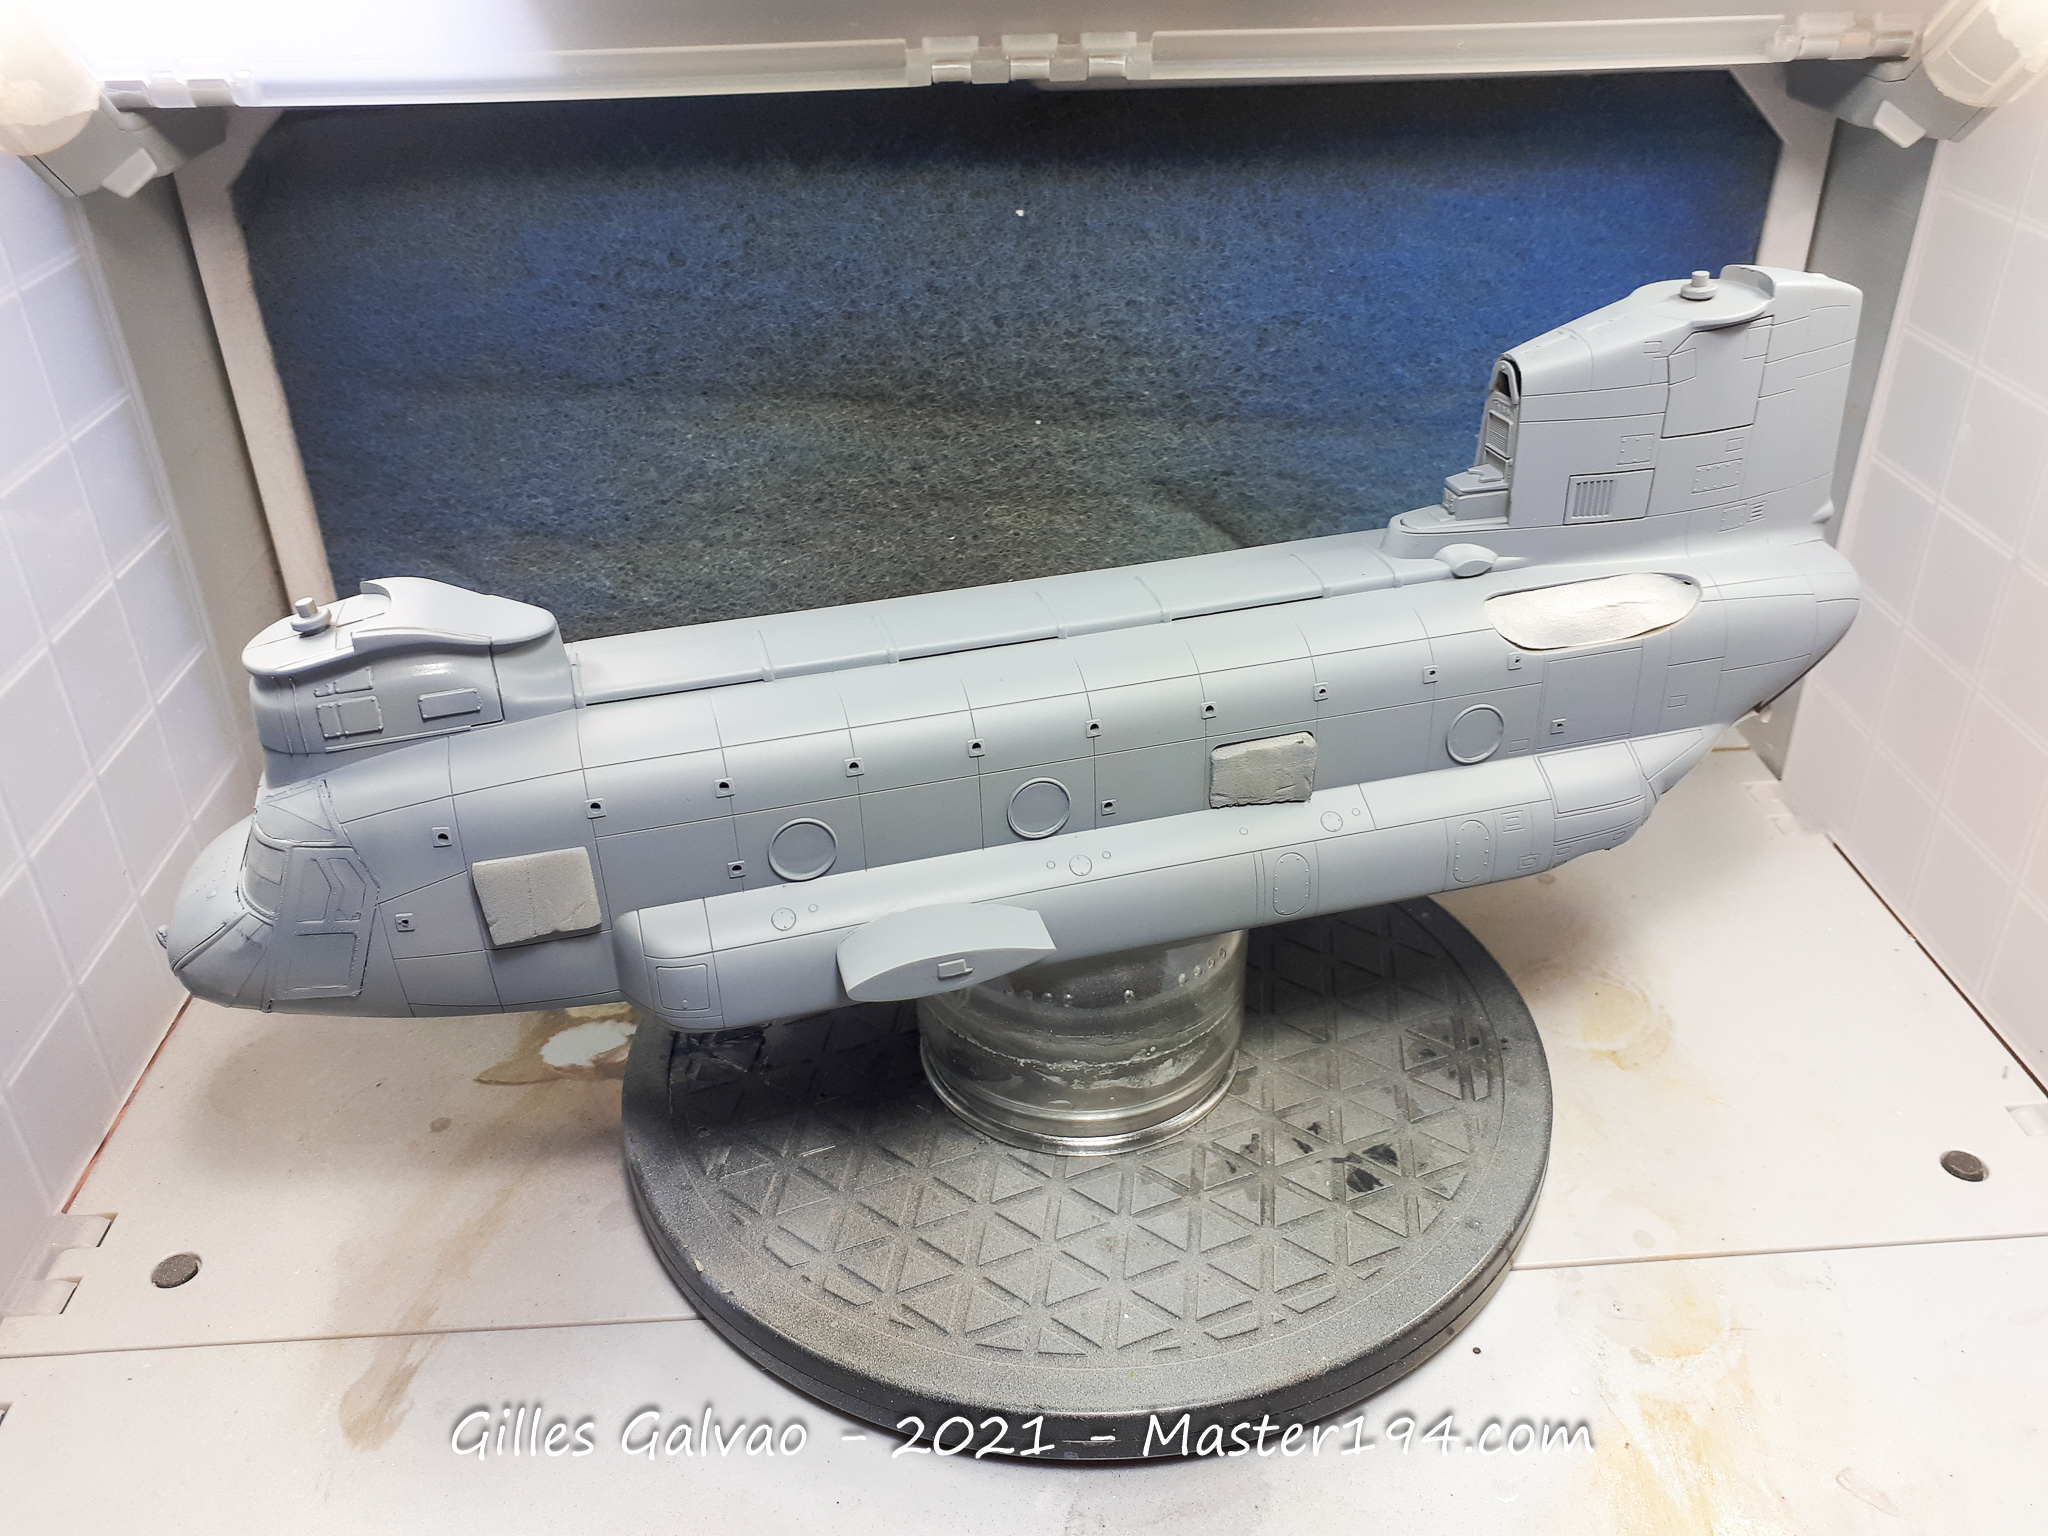
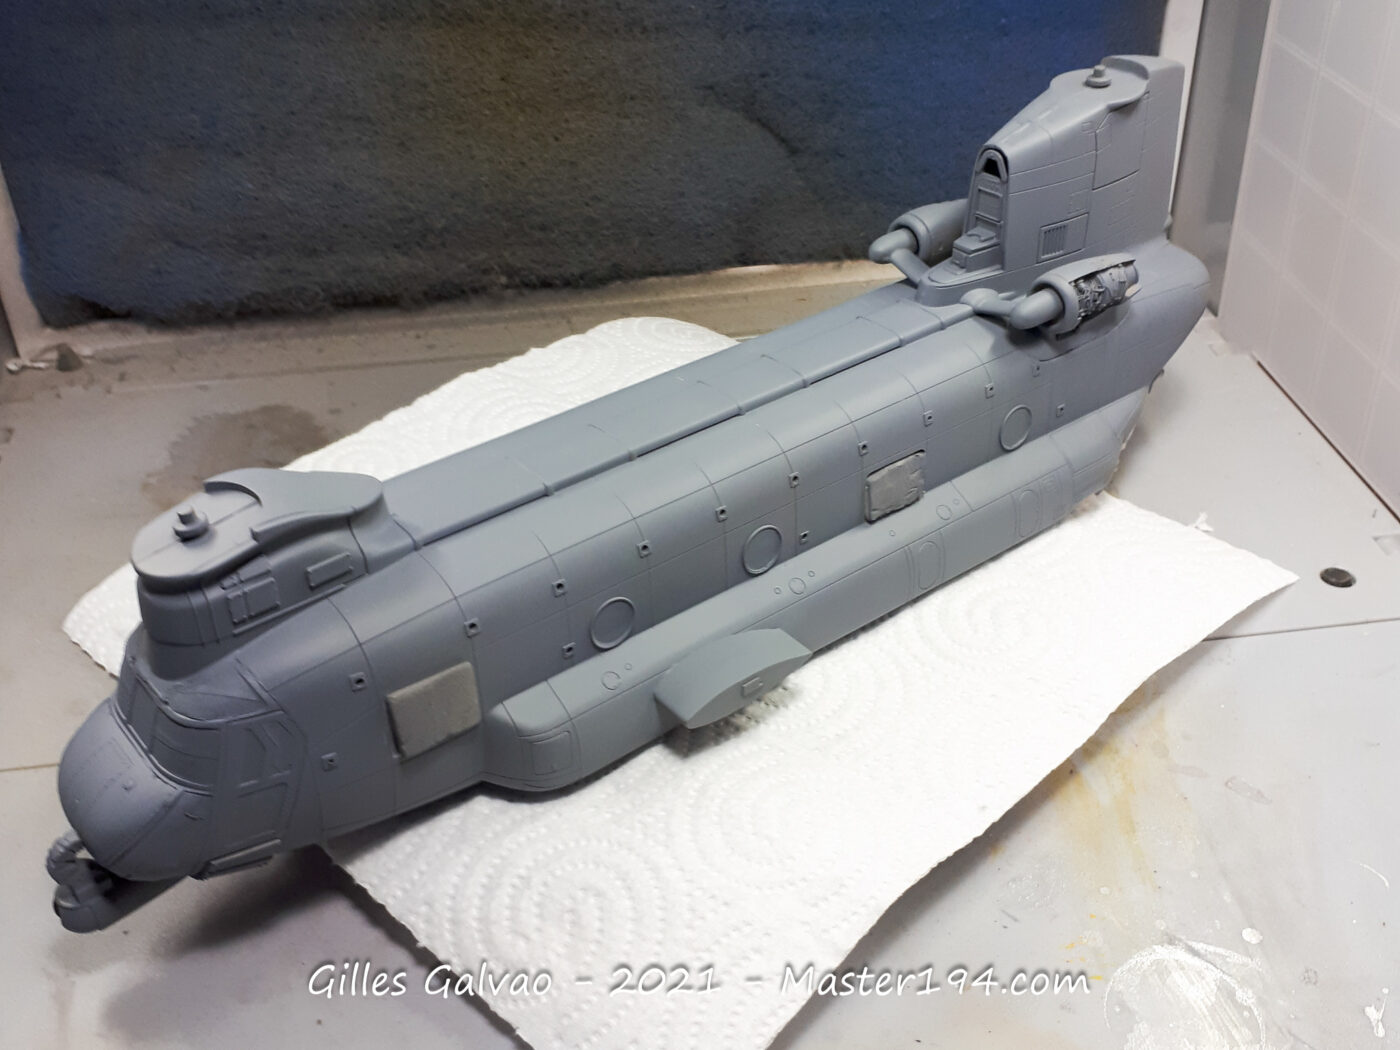
The engines and nose-mounted grenade launcher can now be fitted. The distinctive silhouette of the ACH-47A is finally taking shape.
Painting
With assembly complete, it is time for paint. I start with another coat of primer to ensure an even surface.
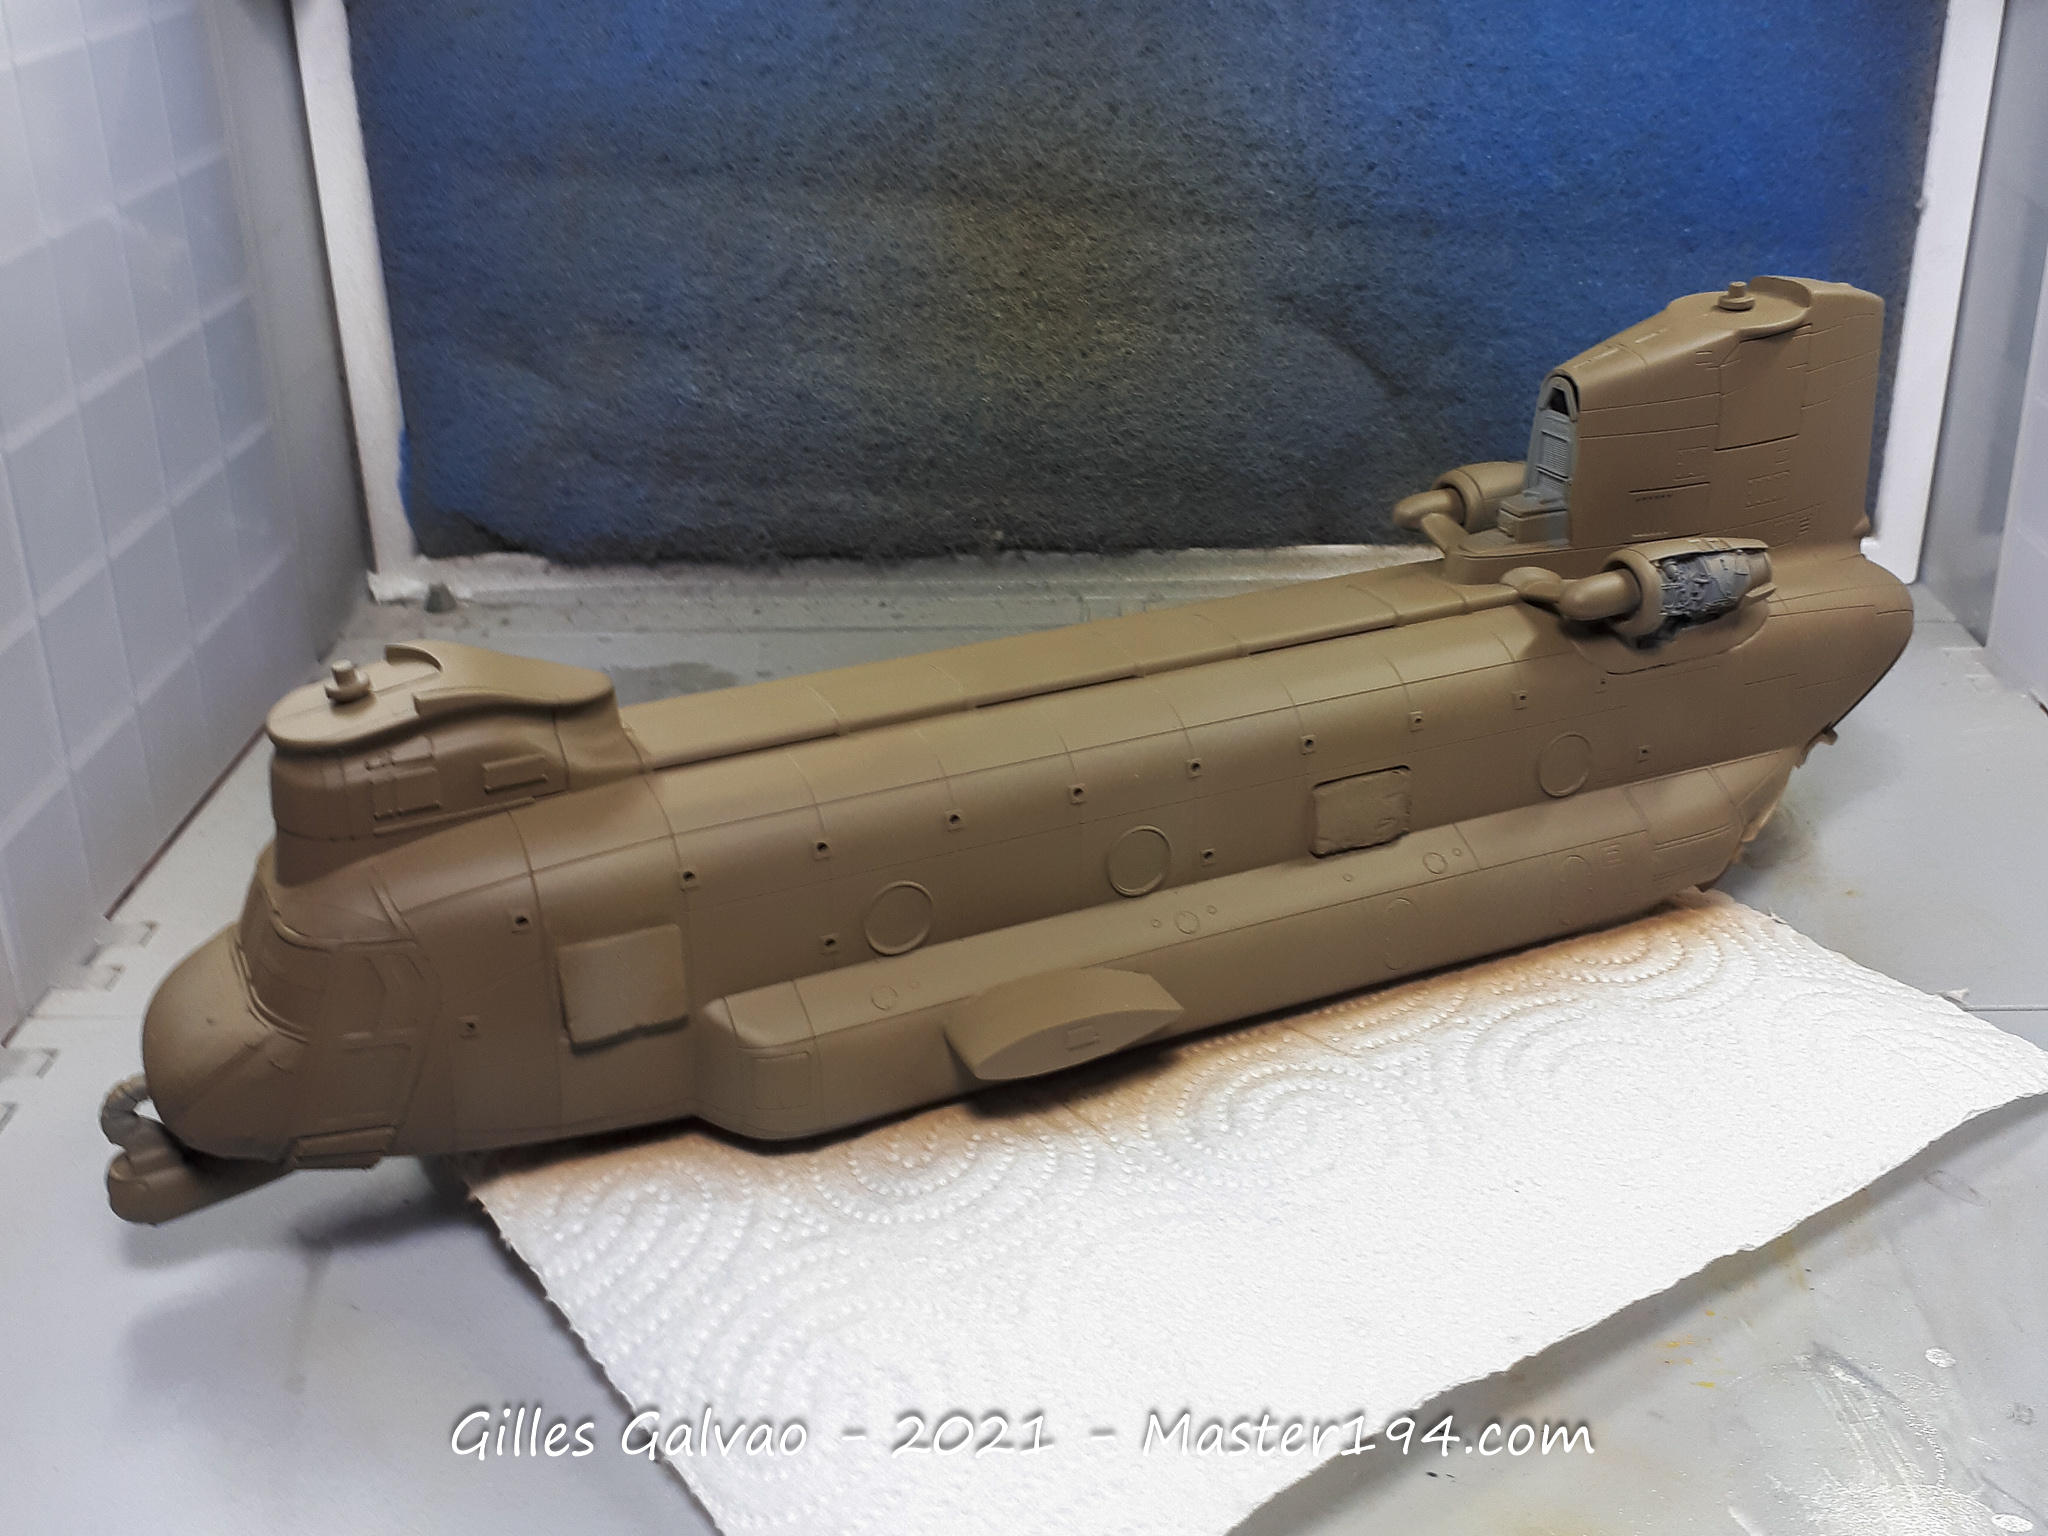
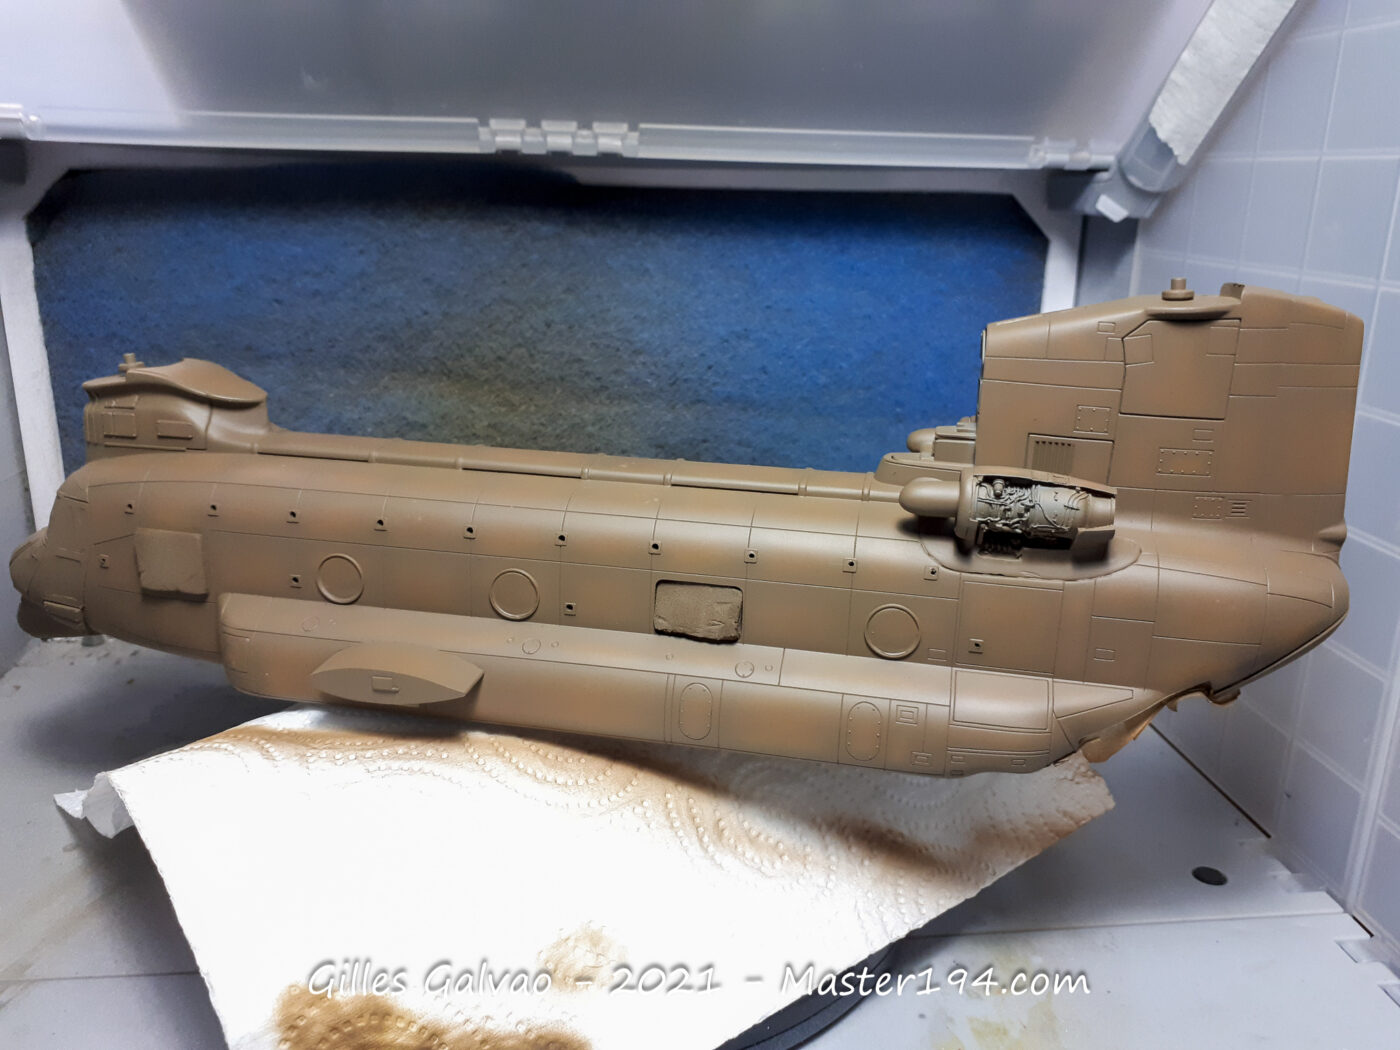
Olive Drab is the dominant colour. Simple enough in theory, but a large, uniformly painted surface can easily look rather flat. Variations in tone and carefully controlled shading are essential to bring out the contours of the airframe and give the model some depth.
I then pick out various panels in a yellow-orange shade.
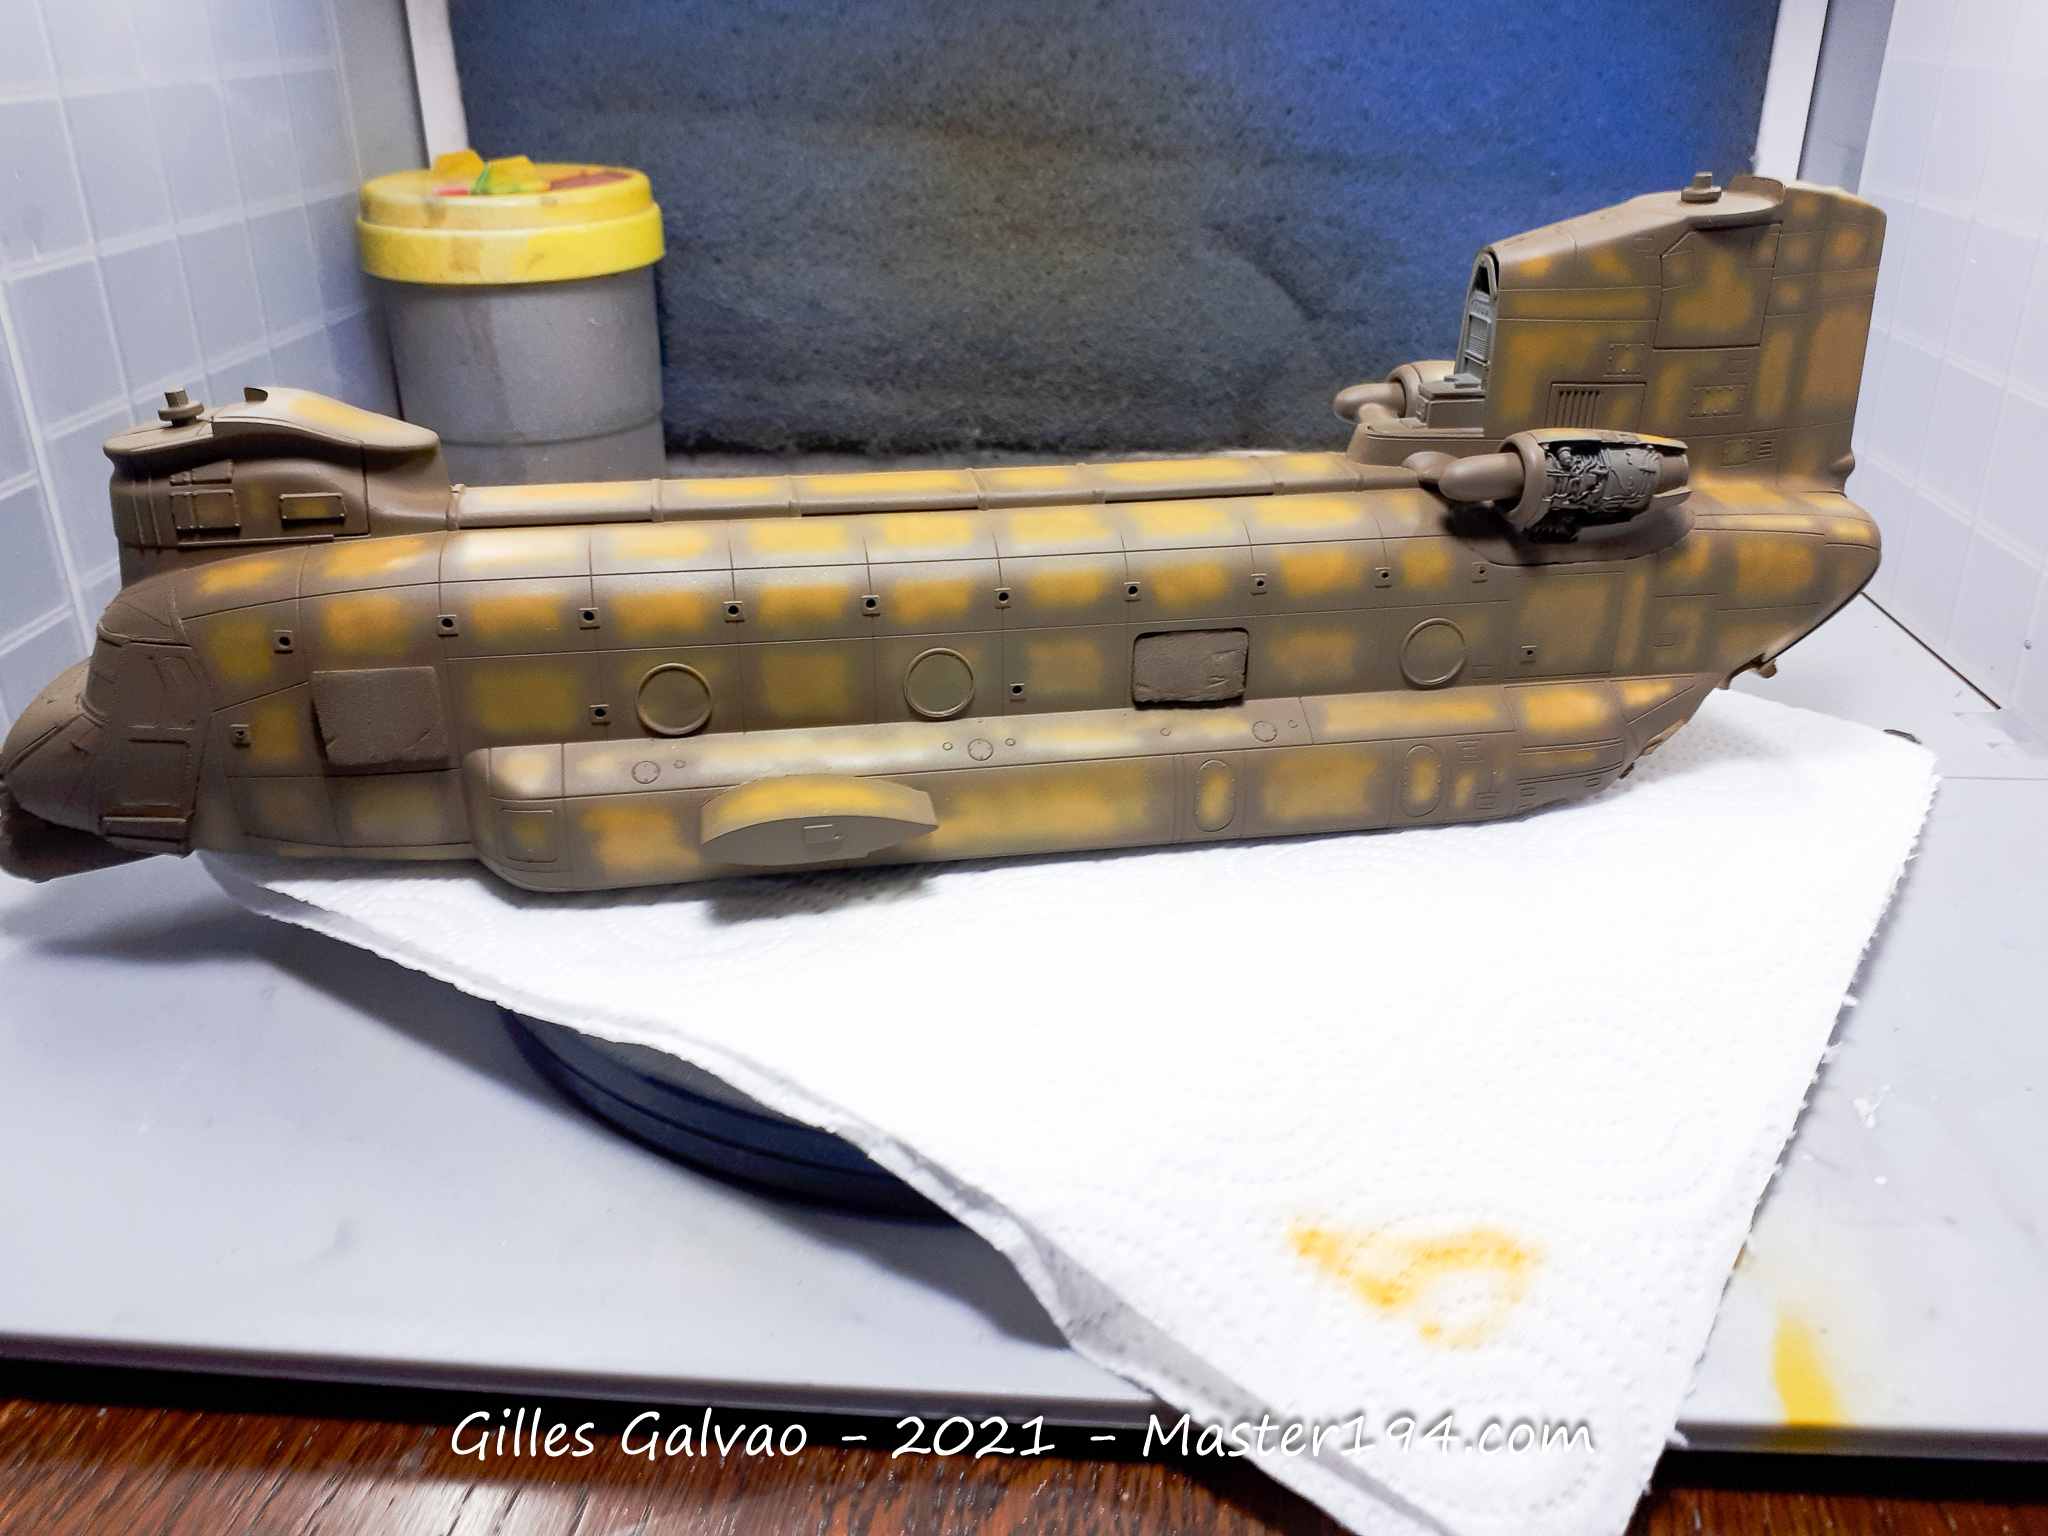
A light overspray of Olive Drab blends the different shades together and brings the finish into harmony.
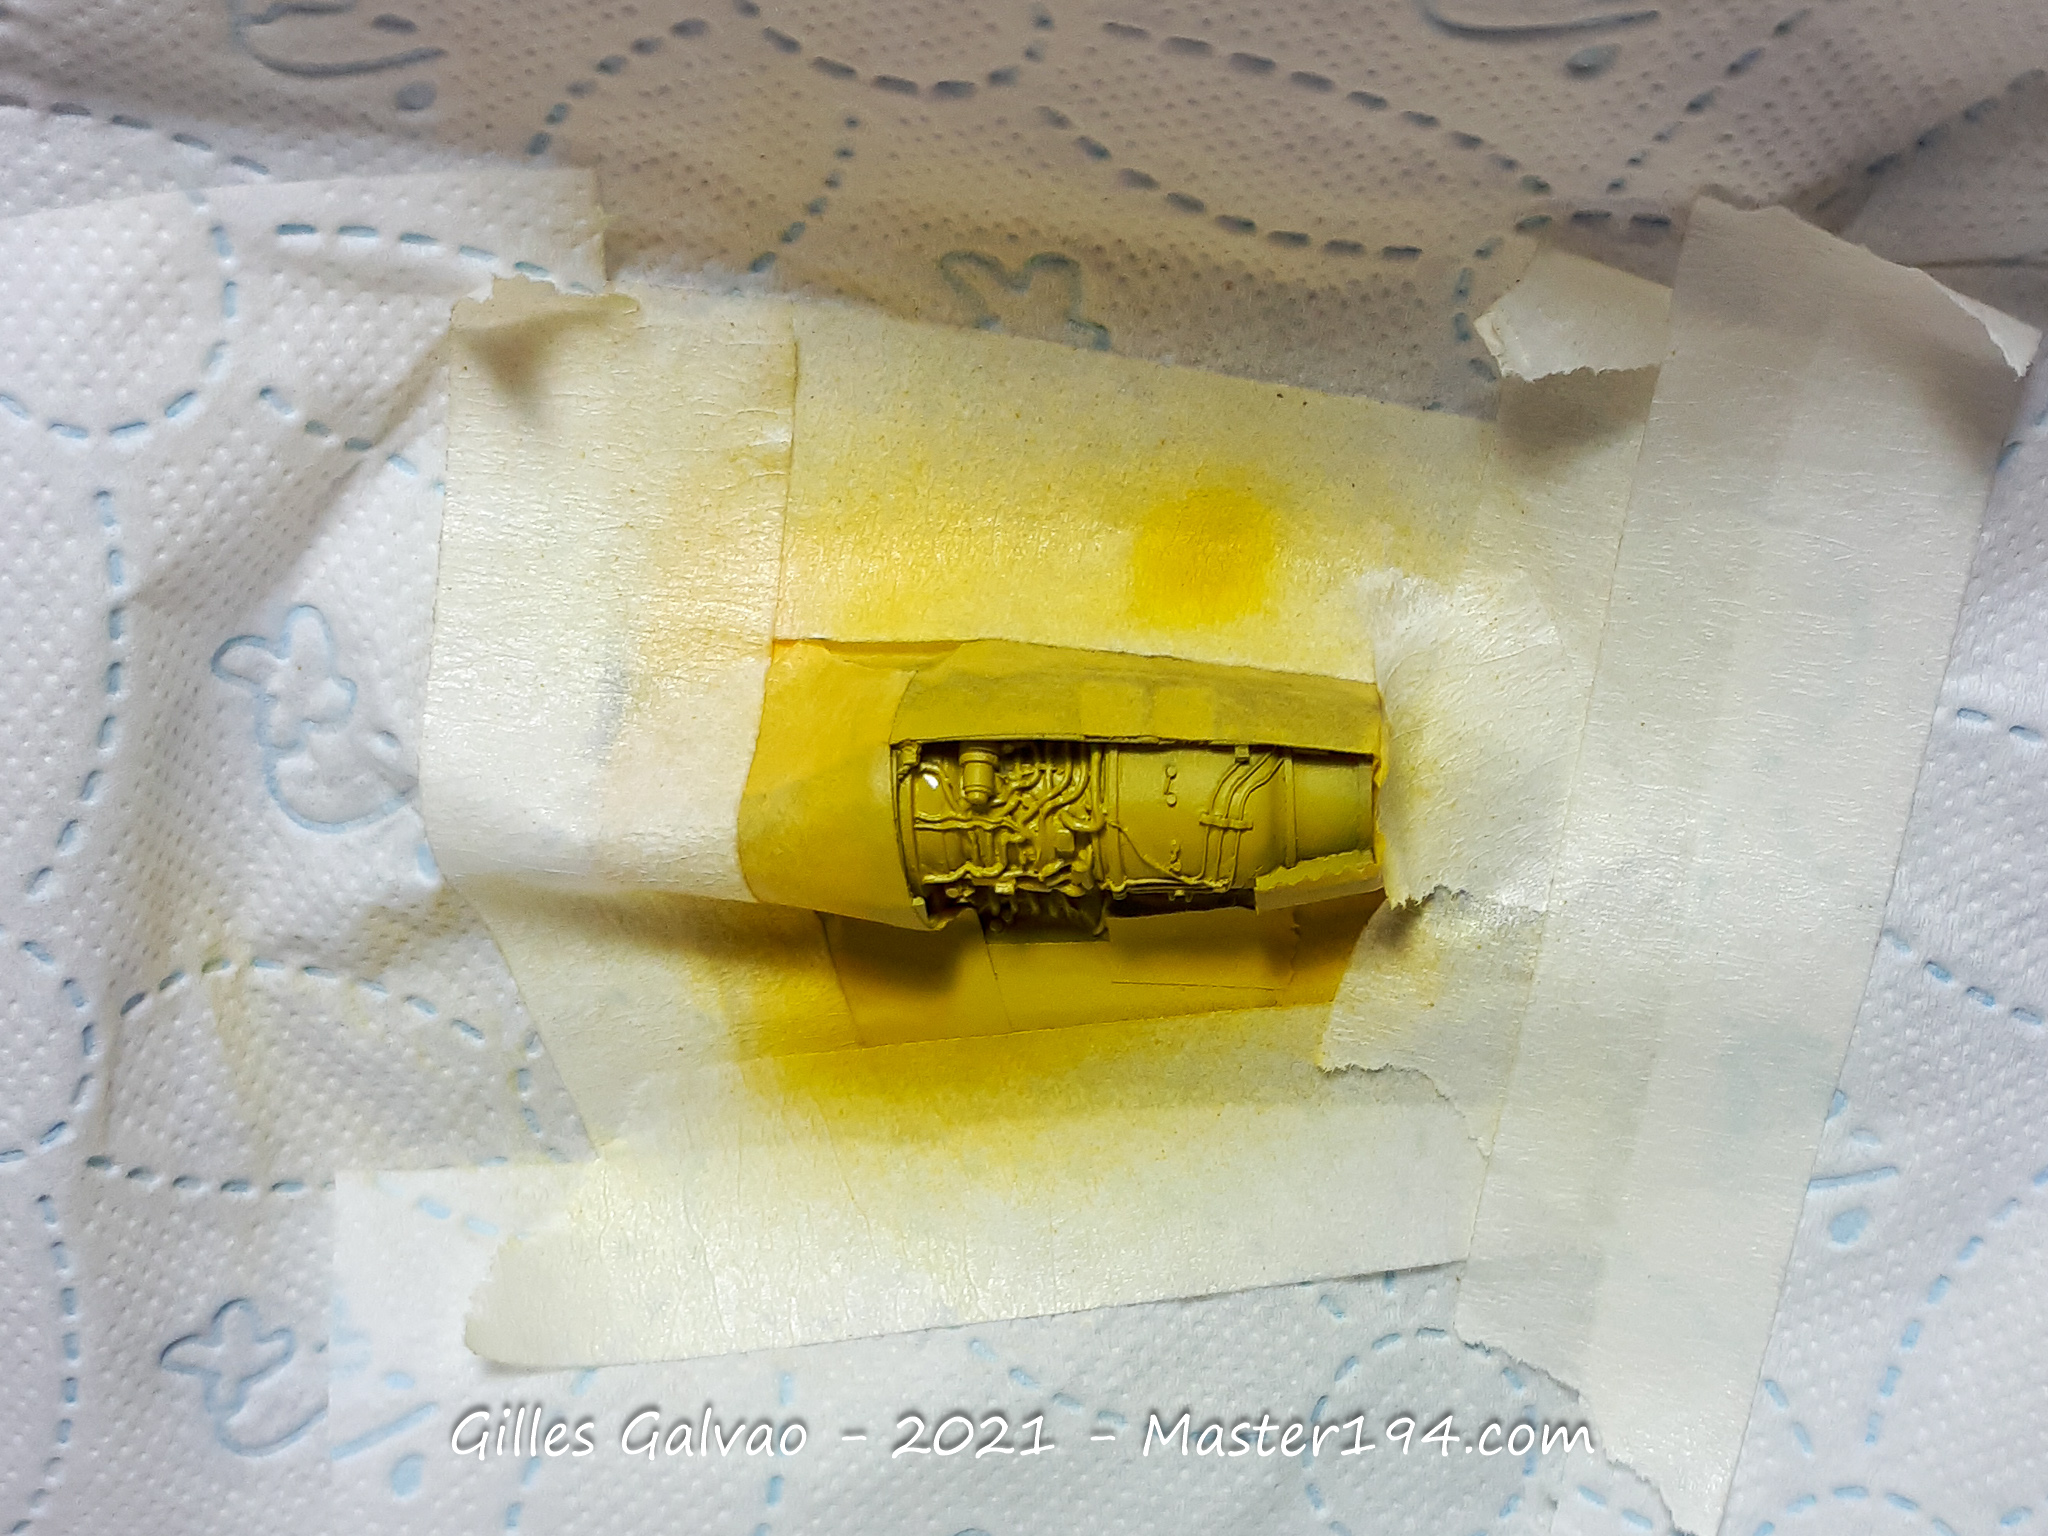
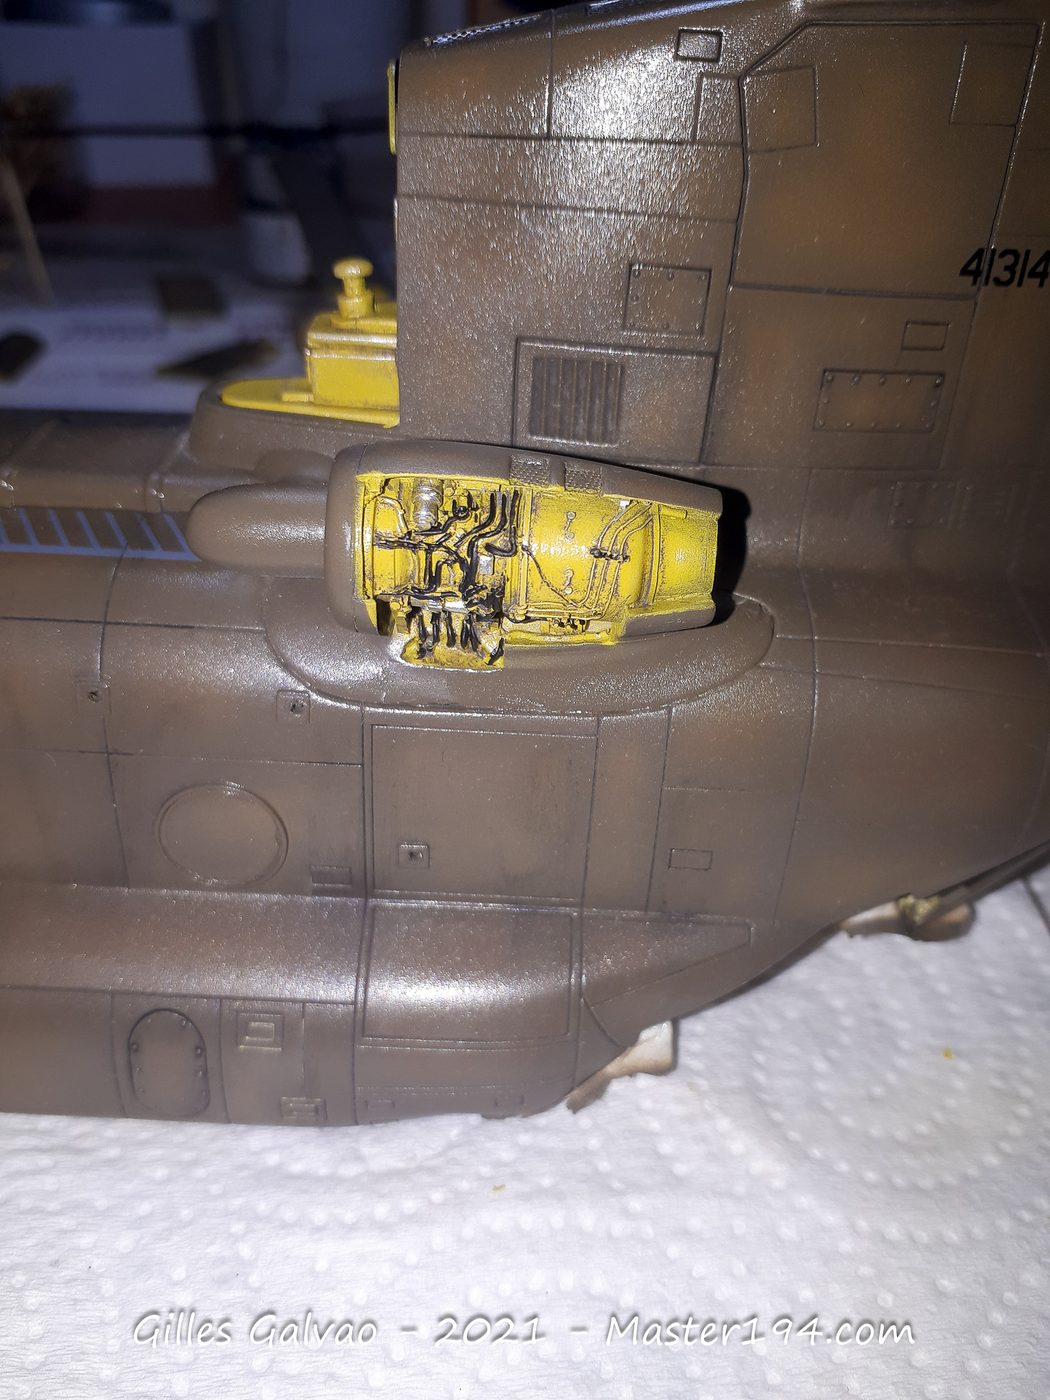
To add a little interest to this large airframe, I also bought a CMK resin engine set, allowing me to display one engine with its cowling open. It is a worthwhile addition that gives the finished model another focal point.
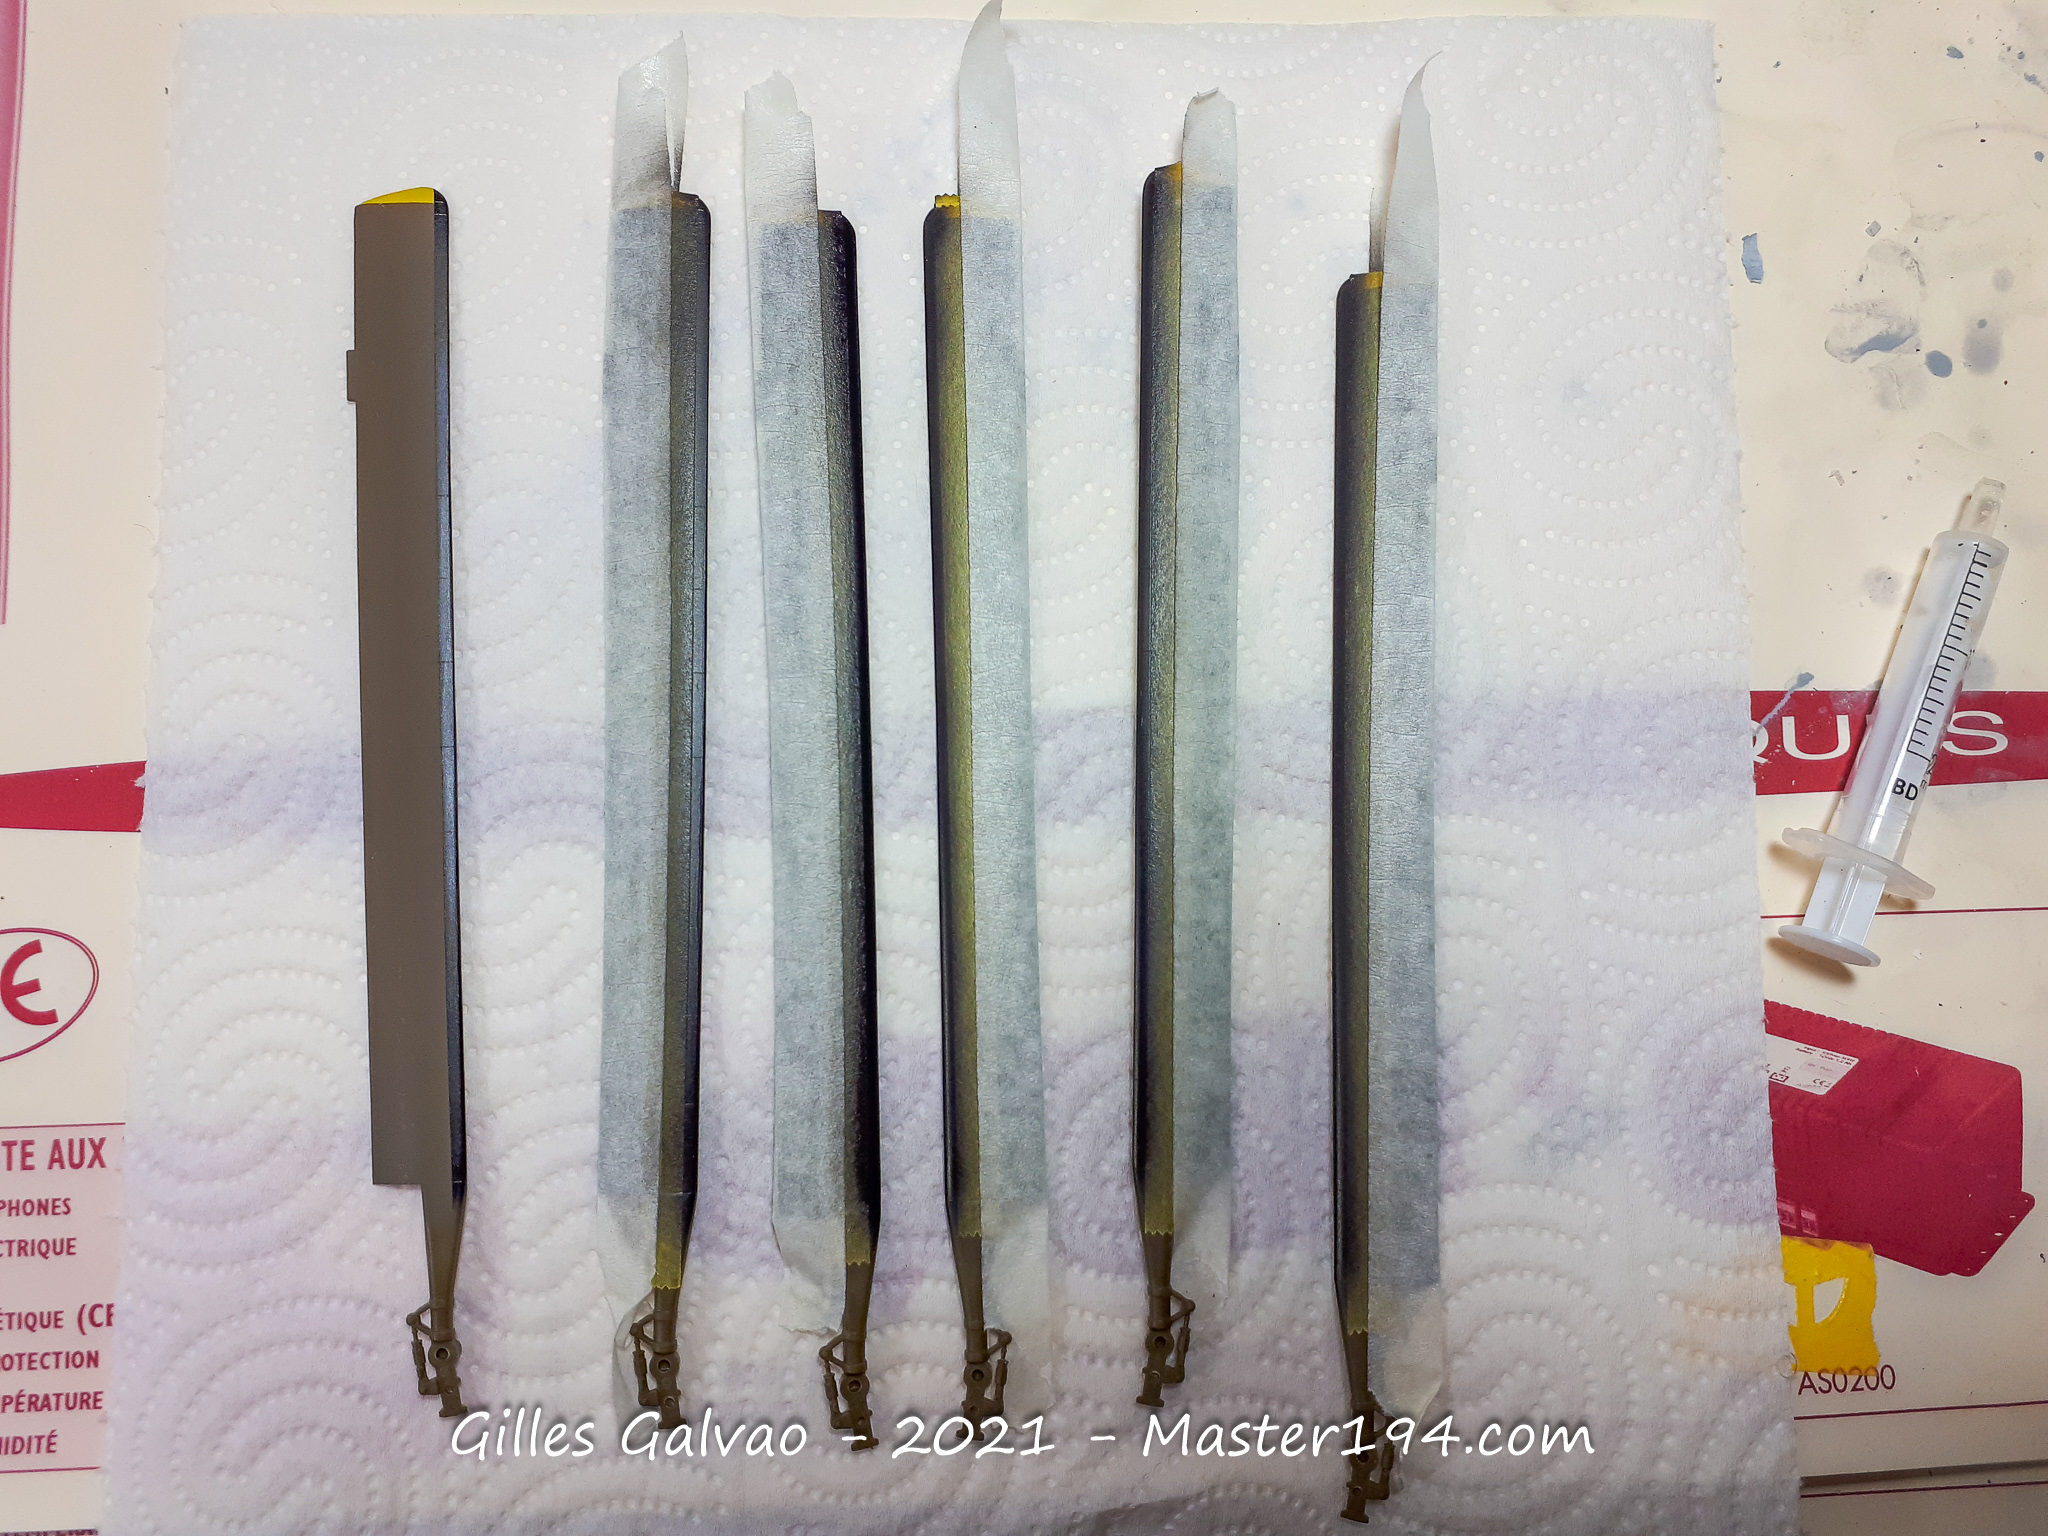
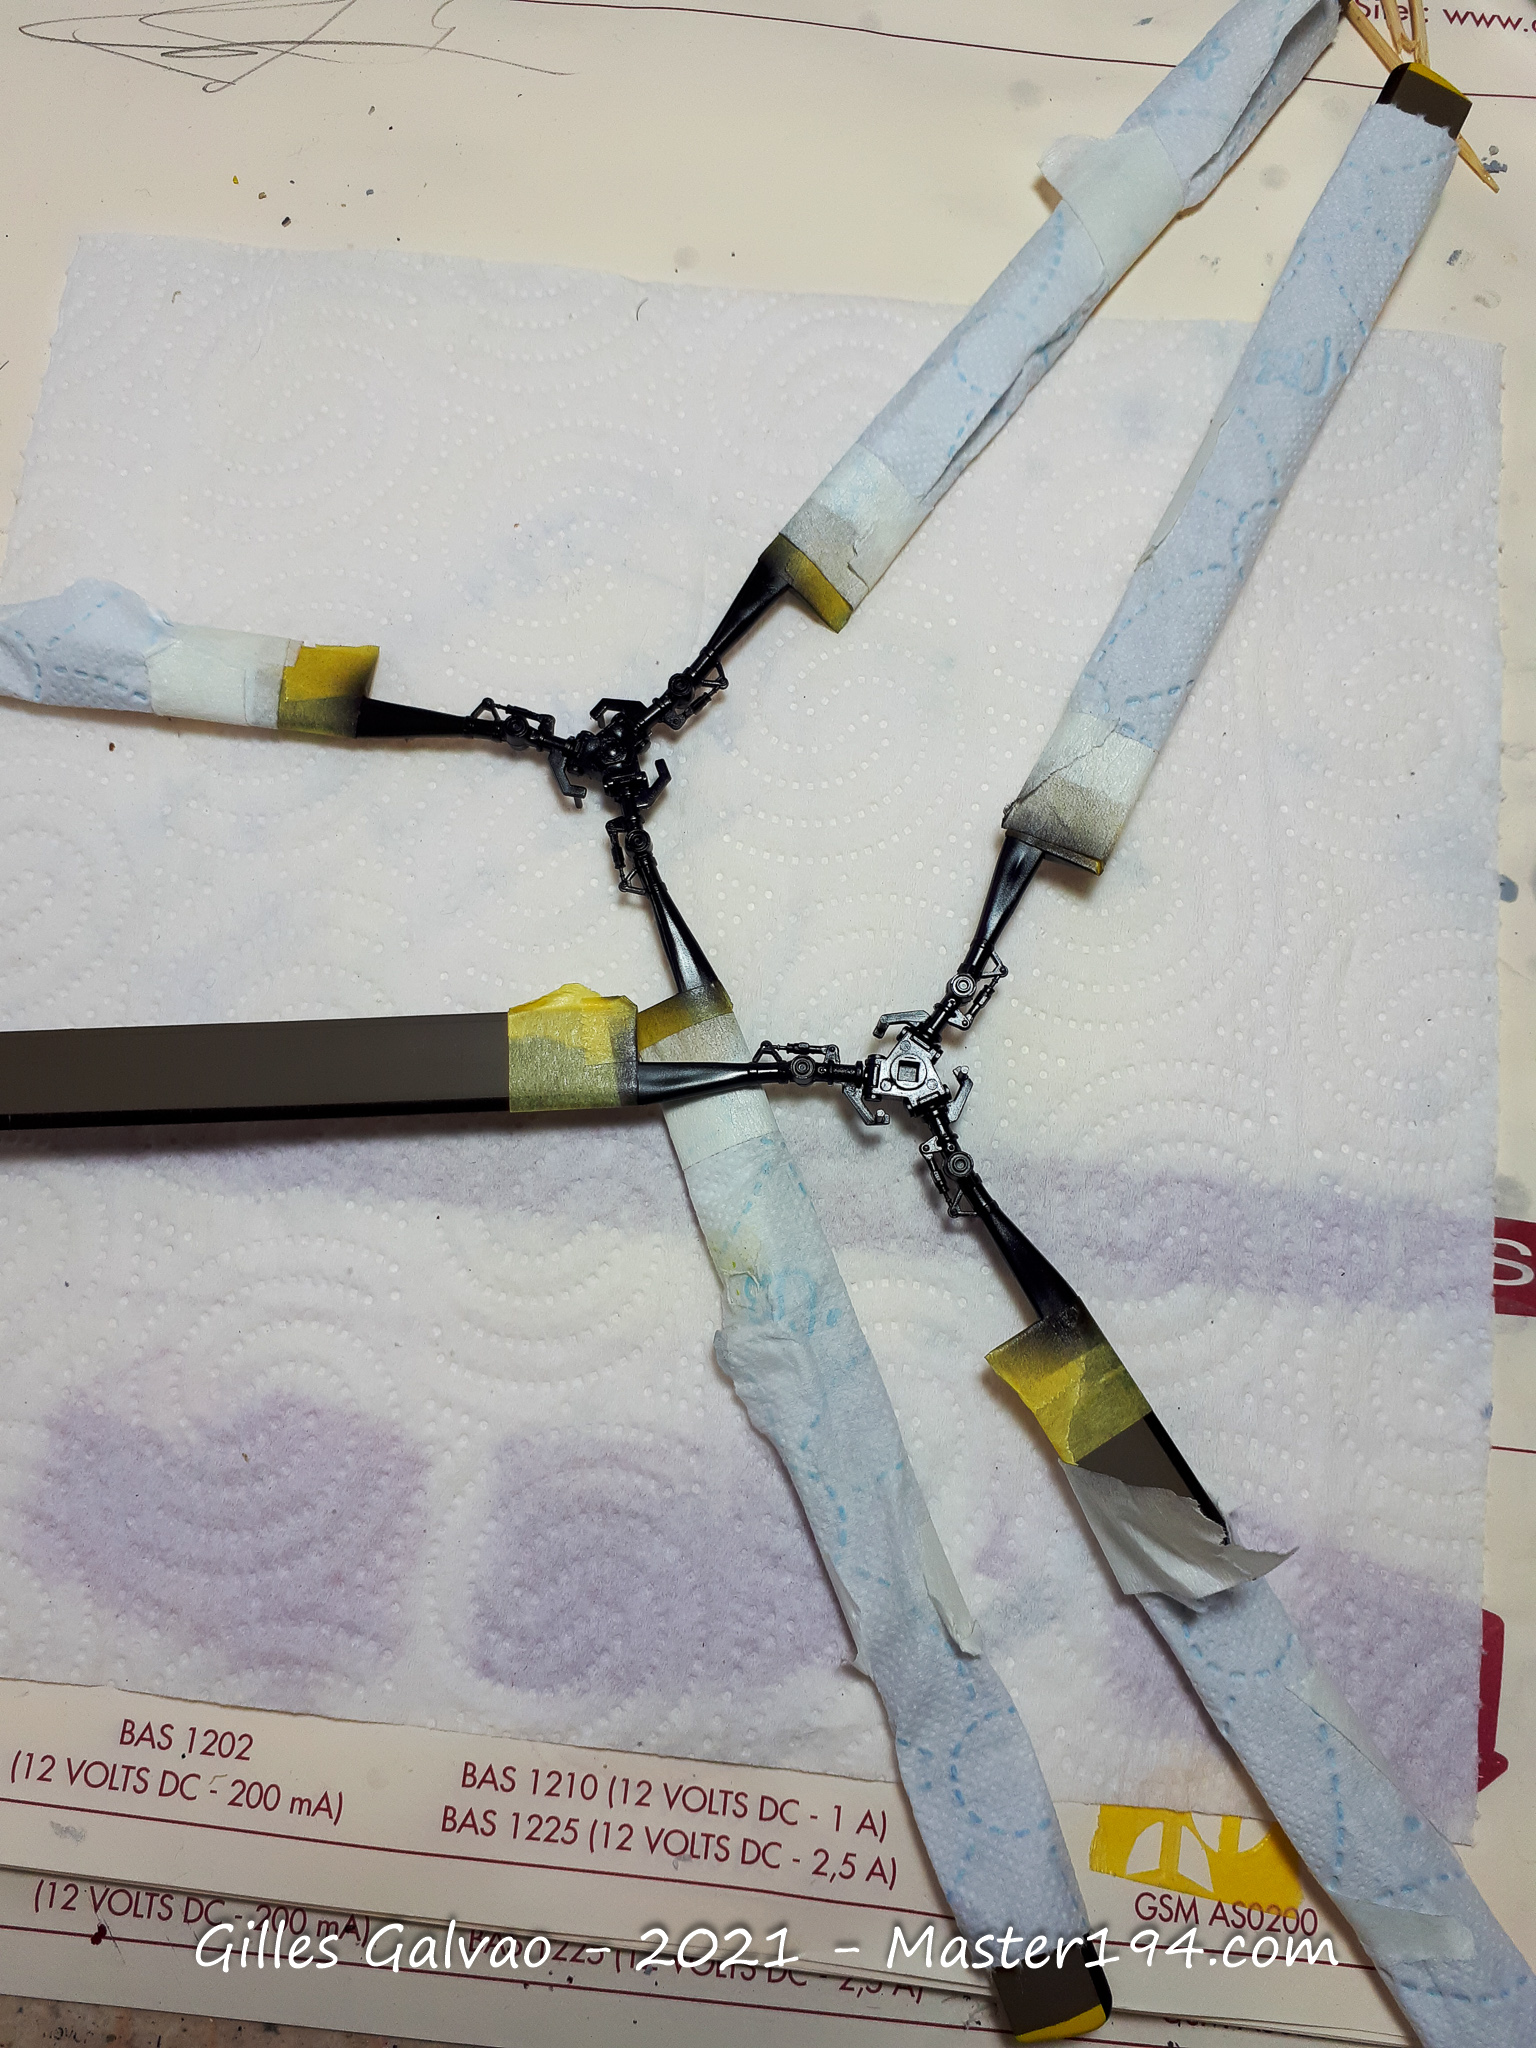
The rotor blades need a little attention as well. Their paint finish contributes significantly to the overall realism of the model.
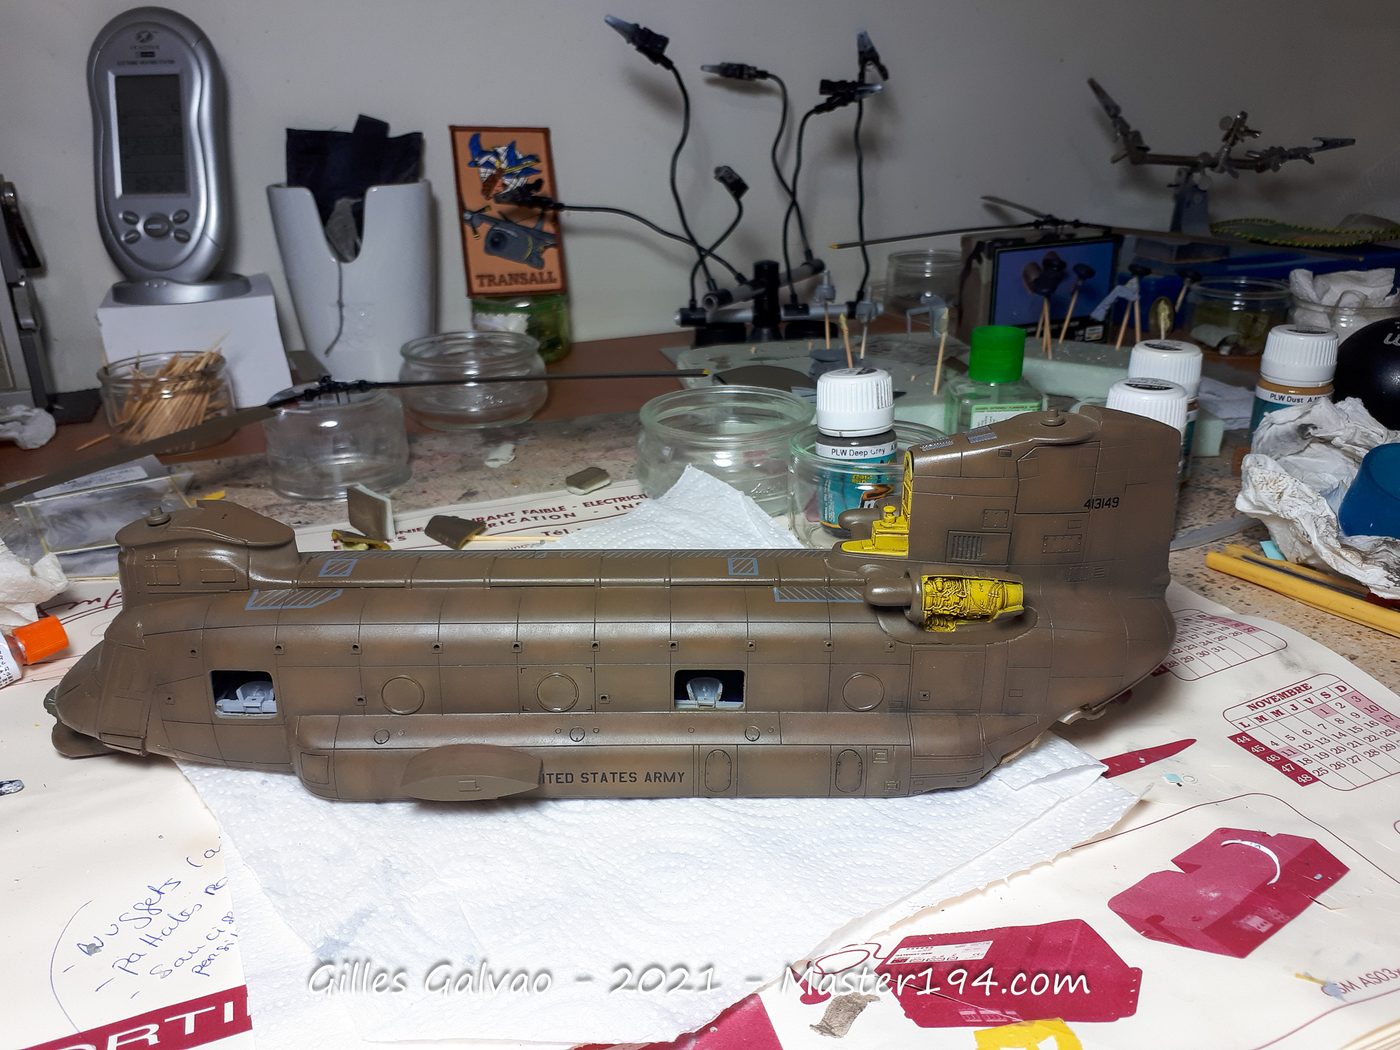
Next come the decals and weathering, using a wash and various effects to bring out the details and tone down the appearance of a brand-new aircraft.
One small warning for anyone building this version: Revell’s instructions show decal 2A on the port side, whereas it should be fitted on the starboard side of the aircraft represented here.
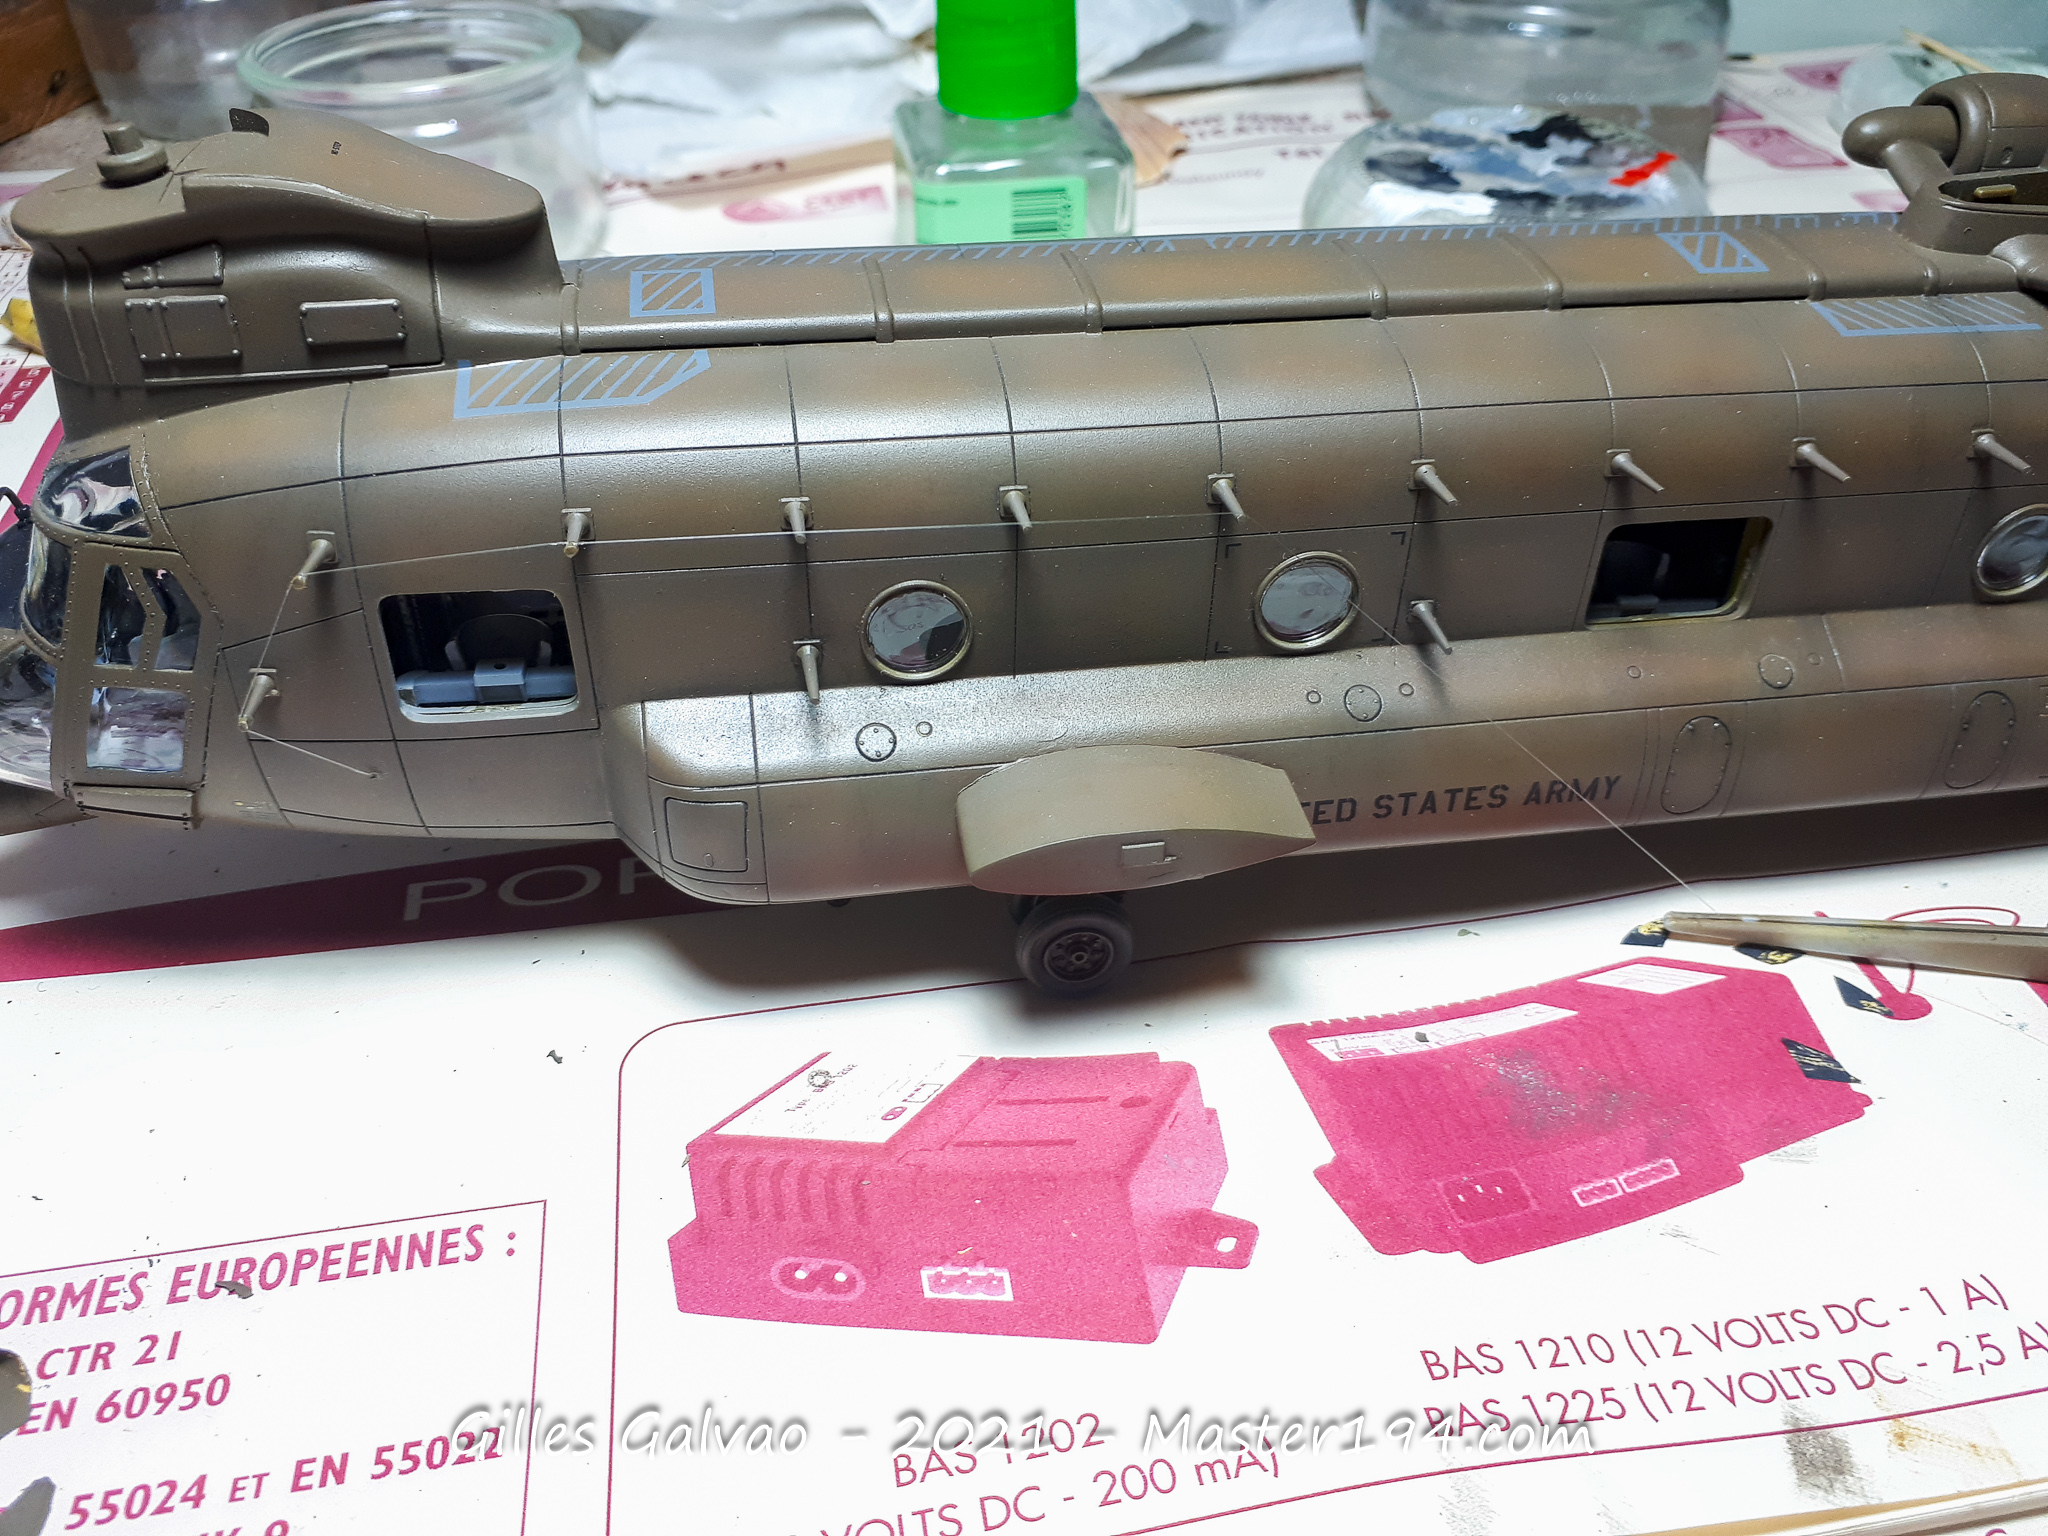
I finish with the smaller details, including the fine wires running along much of the fuselage. They are particularly delicate, so fitting them requires a little patience.
Building the Vietnam diorama
While researching the Easy Money, I came across a video and several particularly interesting photographs. They inspired me to place the helicopter in an operational setting rather than simply display it on its landing gear.
Several details caught my eye:
- The aircraft is parked on PSP (Pierced Steel Planking) mats, marked by signs of use and foot traffic.
- The PSP surface sits on a raised area of compacted crushed stone.
- A shallow depression runs around the raised platform, beyond which the ground gives way to grass, earth and mud.
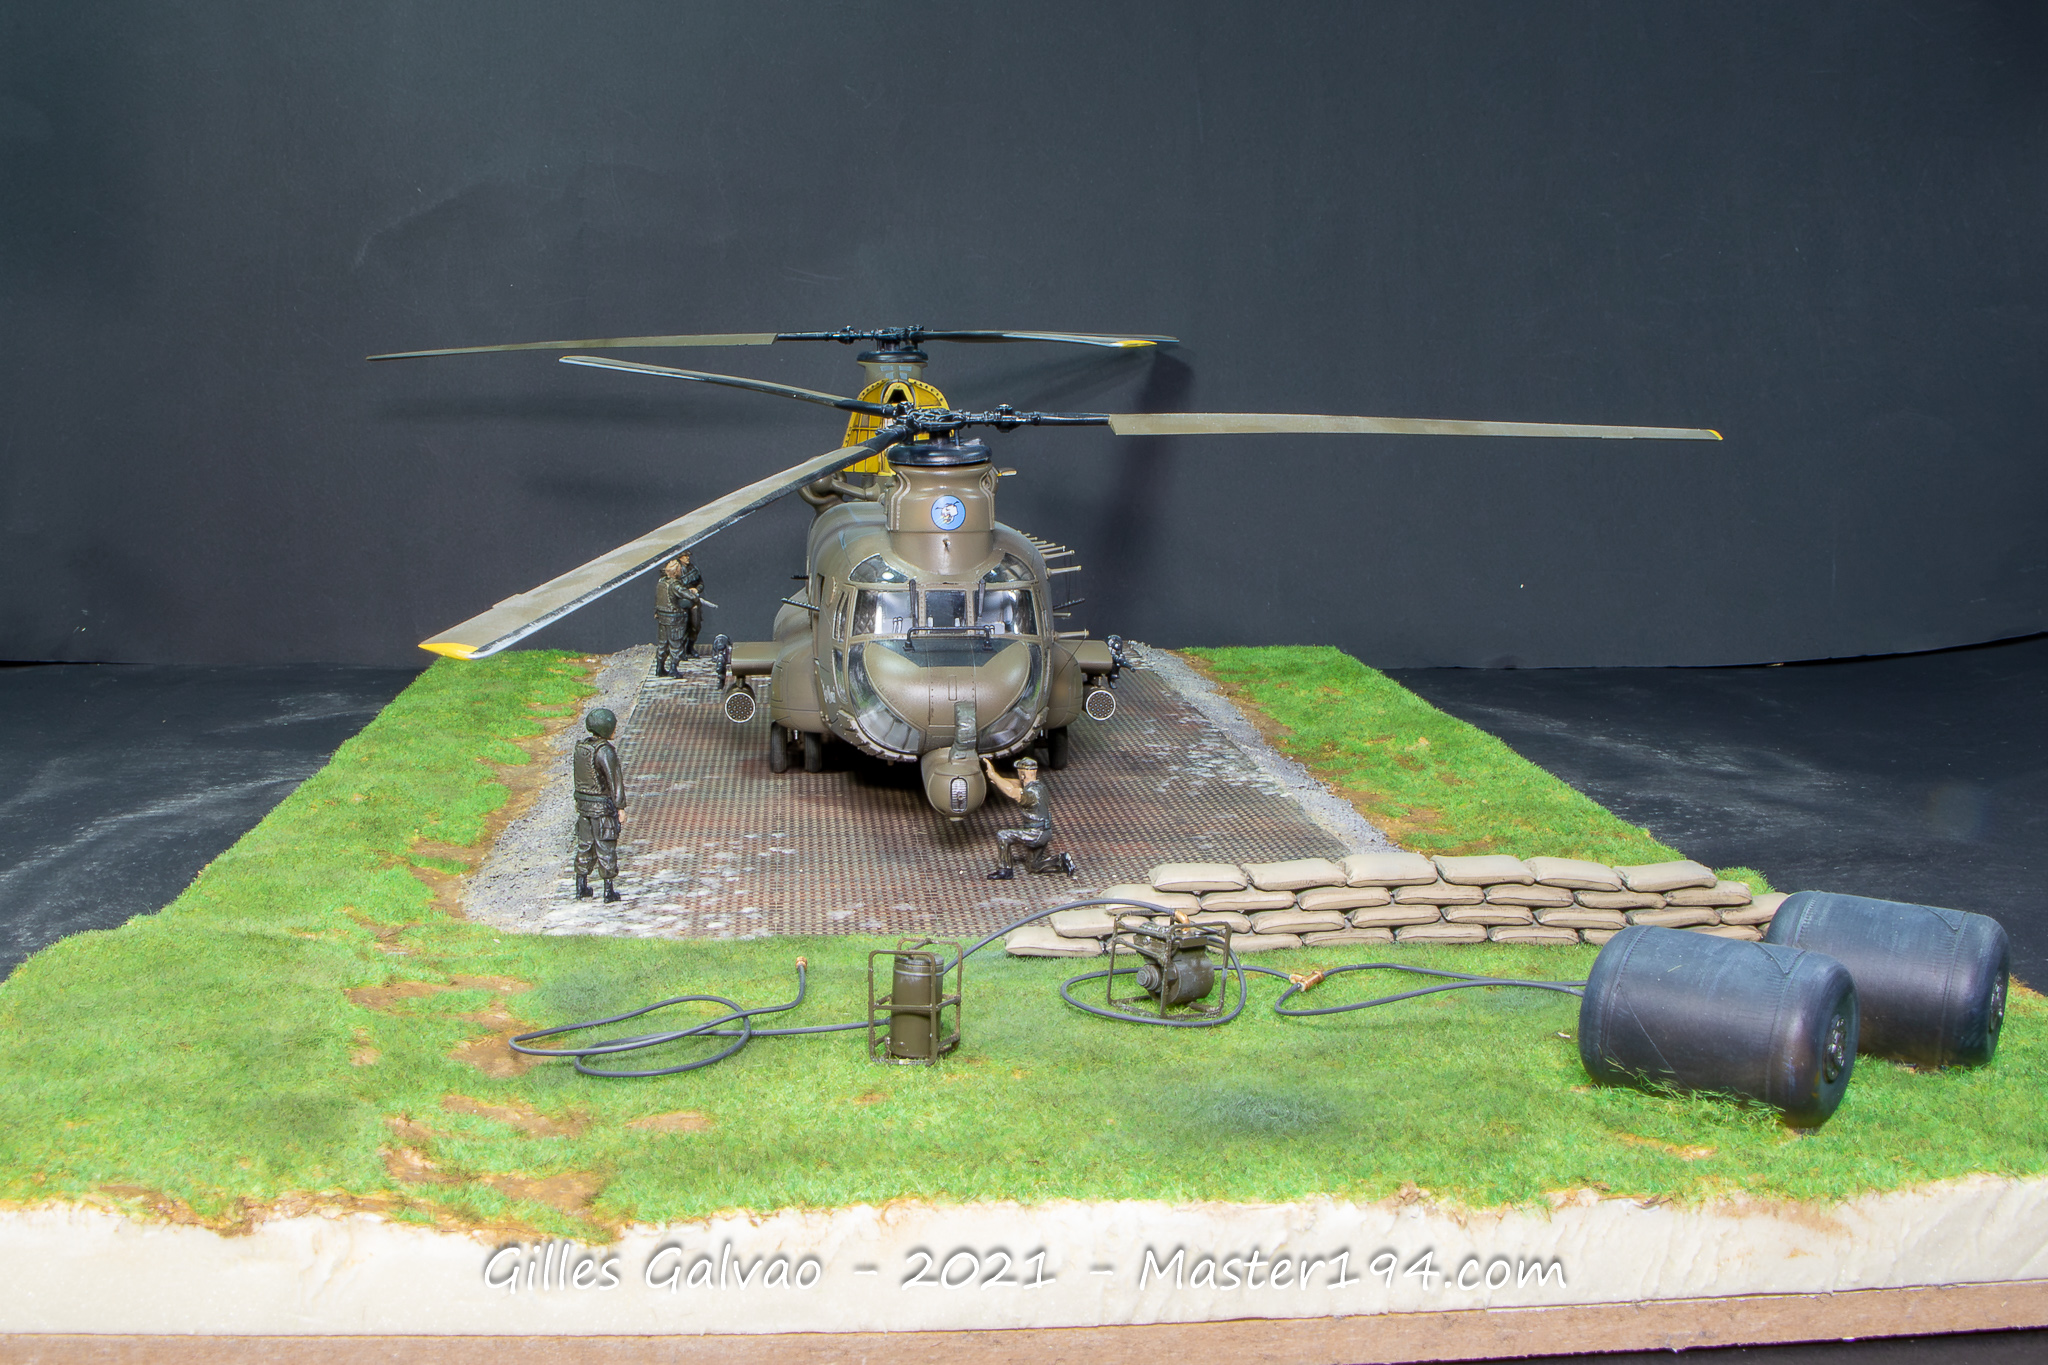
- In front of the helicopter are flexible fuel tanks protected by sandbags.
I decided to recreate this setting. There is, however, one small compromise: I had to cheat a little with the distances. In reality, the fuel tanks and sandbags are positioned farther away from the helicopter, safely clear of the rotor blades. Reproducing the actual spacing would have resulted in a rather oversized diorama!
Preparing the groundwork
I begin by gluing Eduard plastic PSP sections onto an MDF base. These provide the starting point for the scene and determine the layout of the ground.
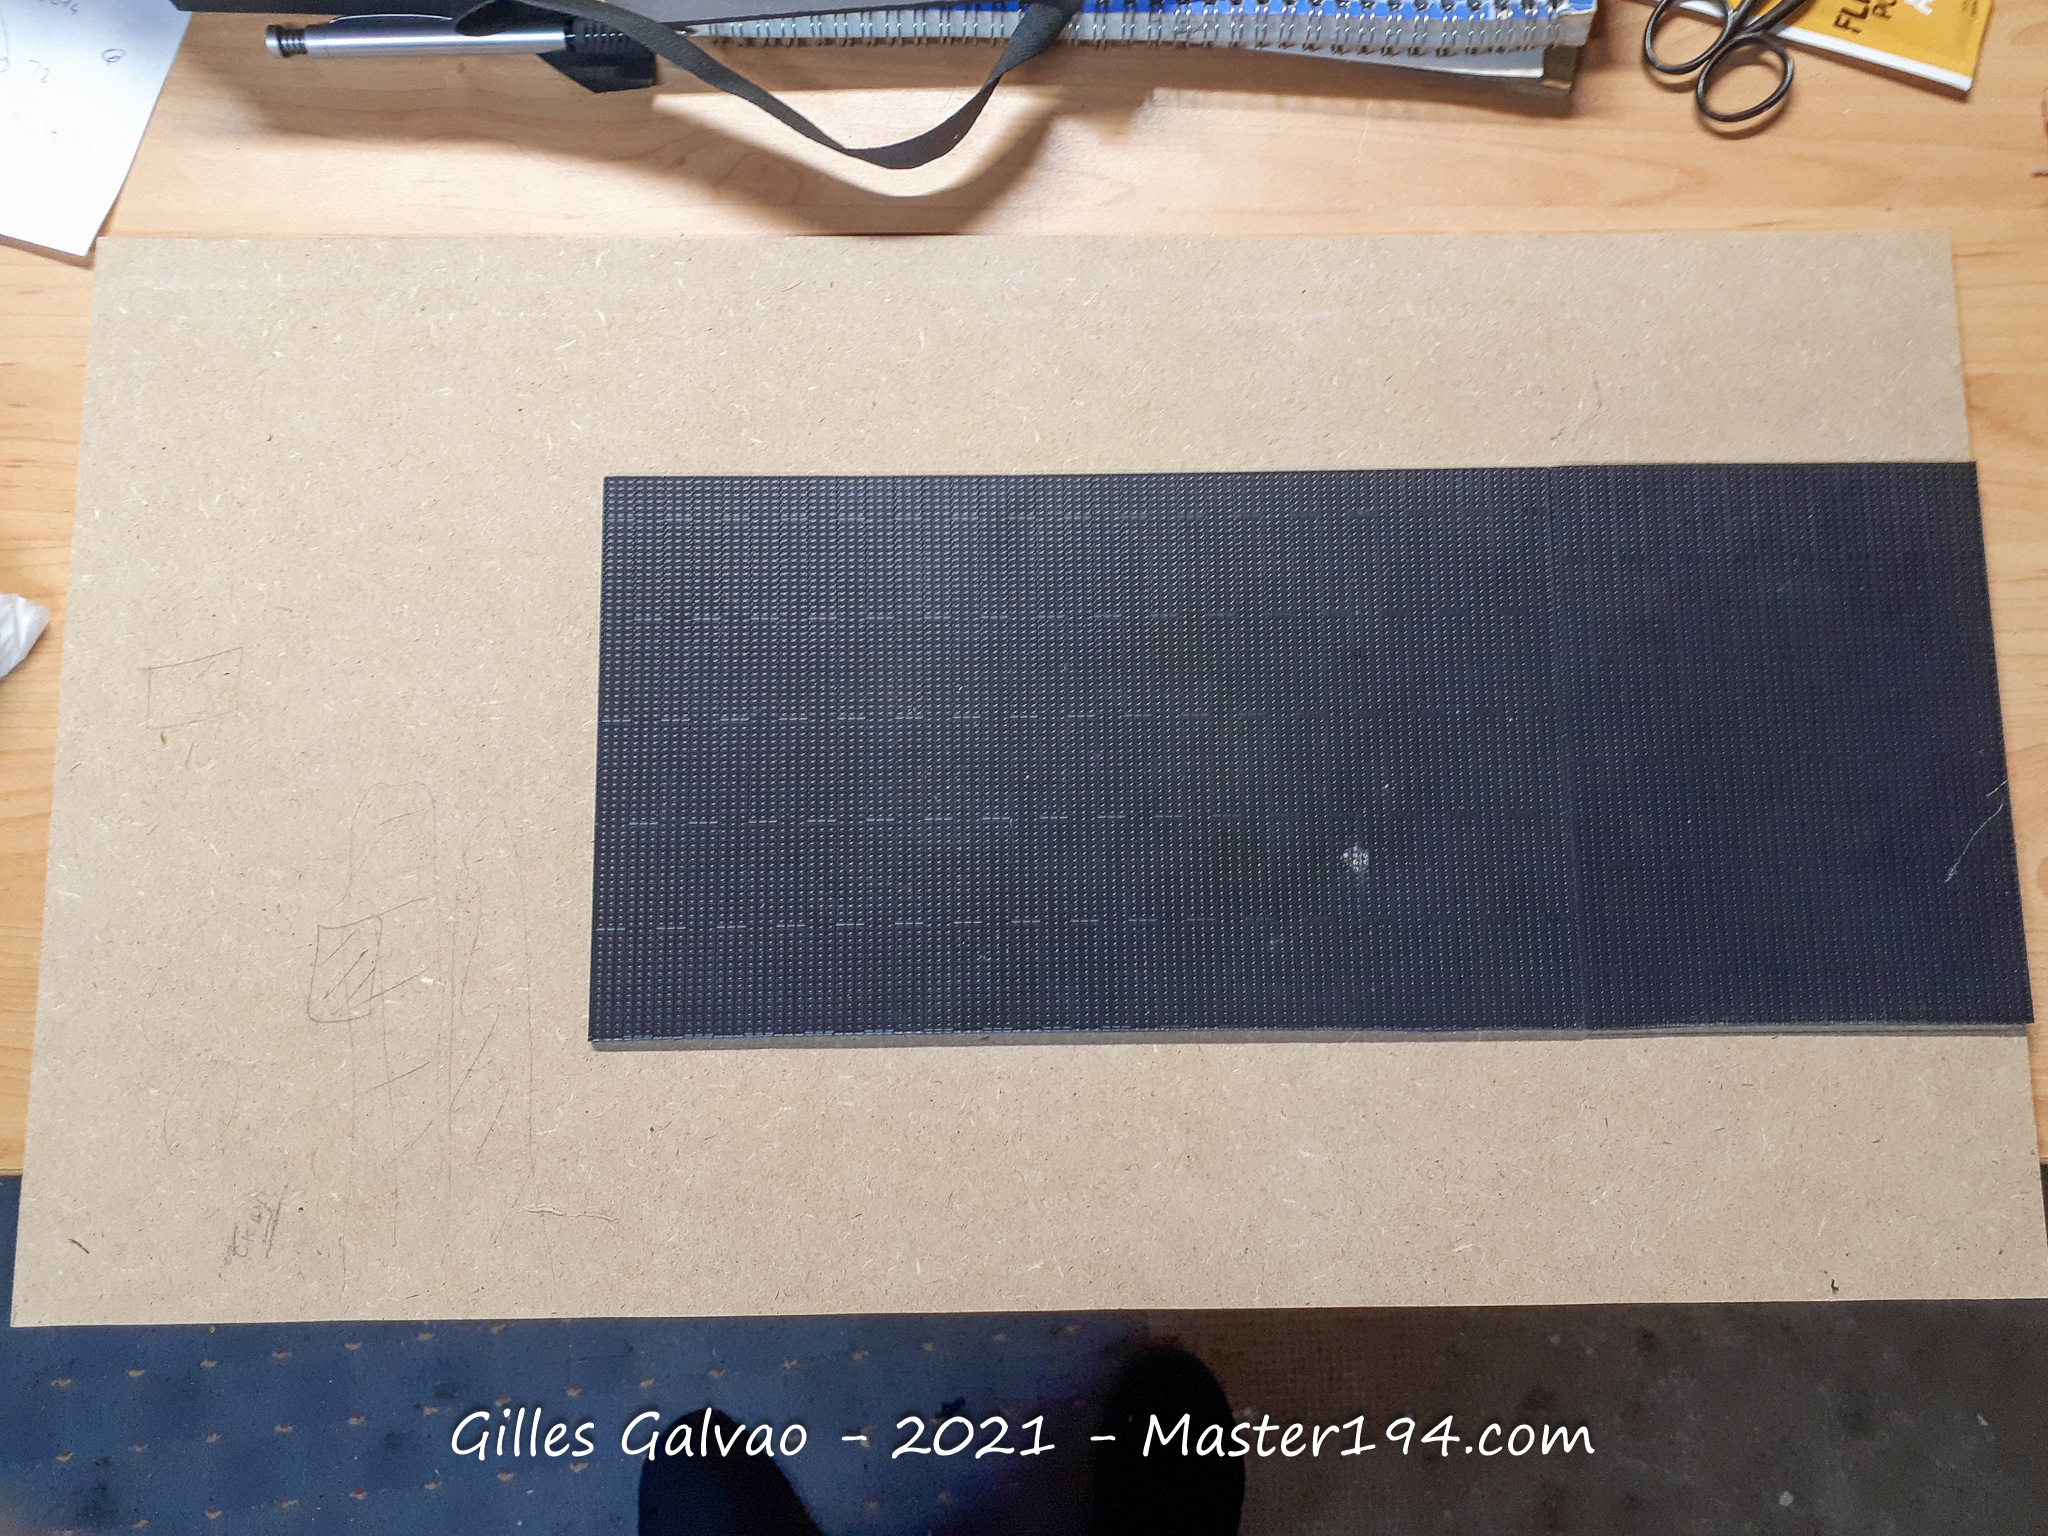
I then use extruded polystyrene foam to build up the raised area in front of the helicopter. Textured paste is applied to create the bottom of the shallow ditch bordering the platform.
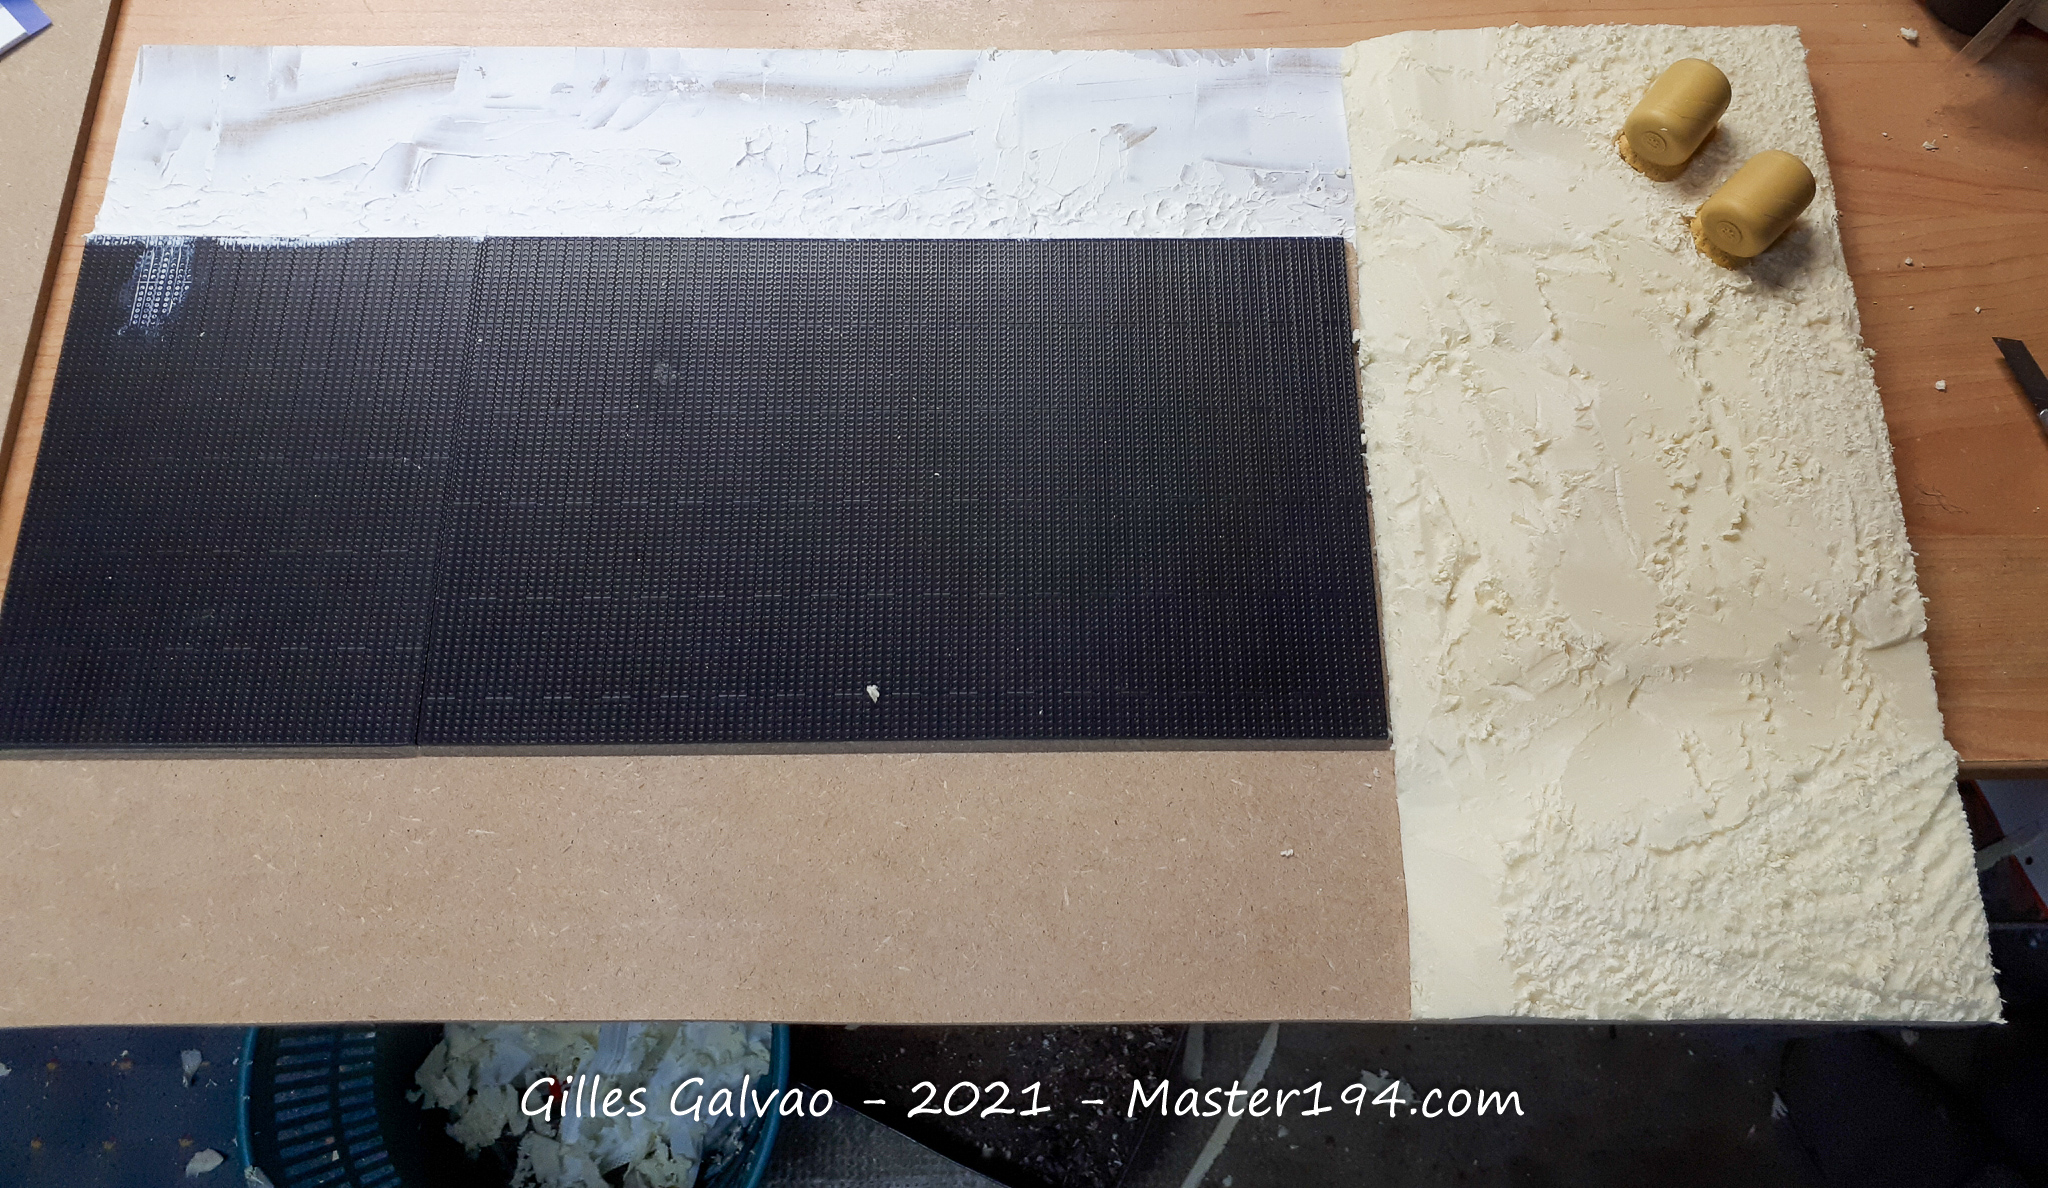
The remaining edges are built up with offcuts of extruded polystyrene foam, which are subsequently covered with textured paste. The aim is to create an irregular, natural-looking terrain rather than a platform with overly geometric edges.
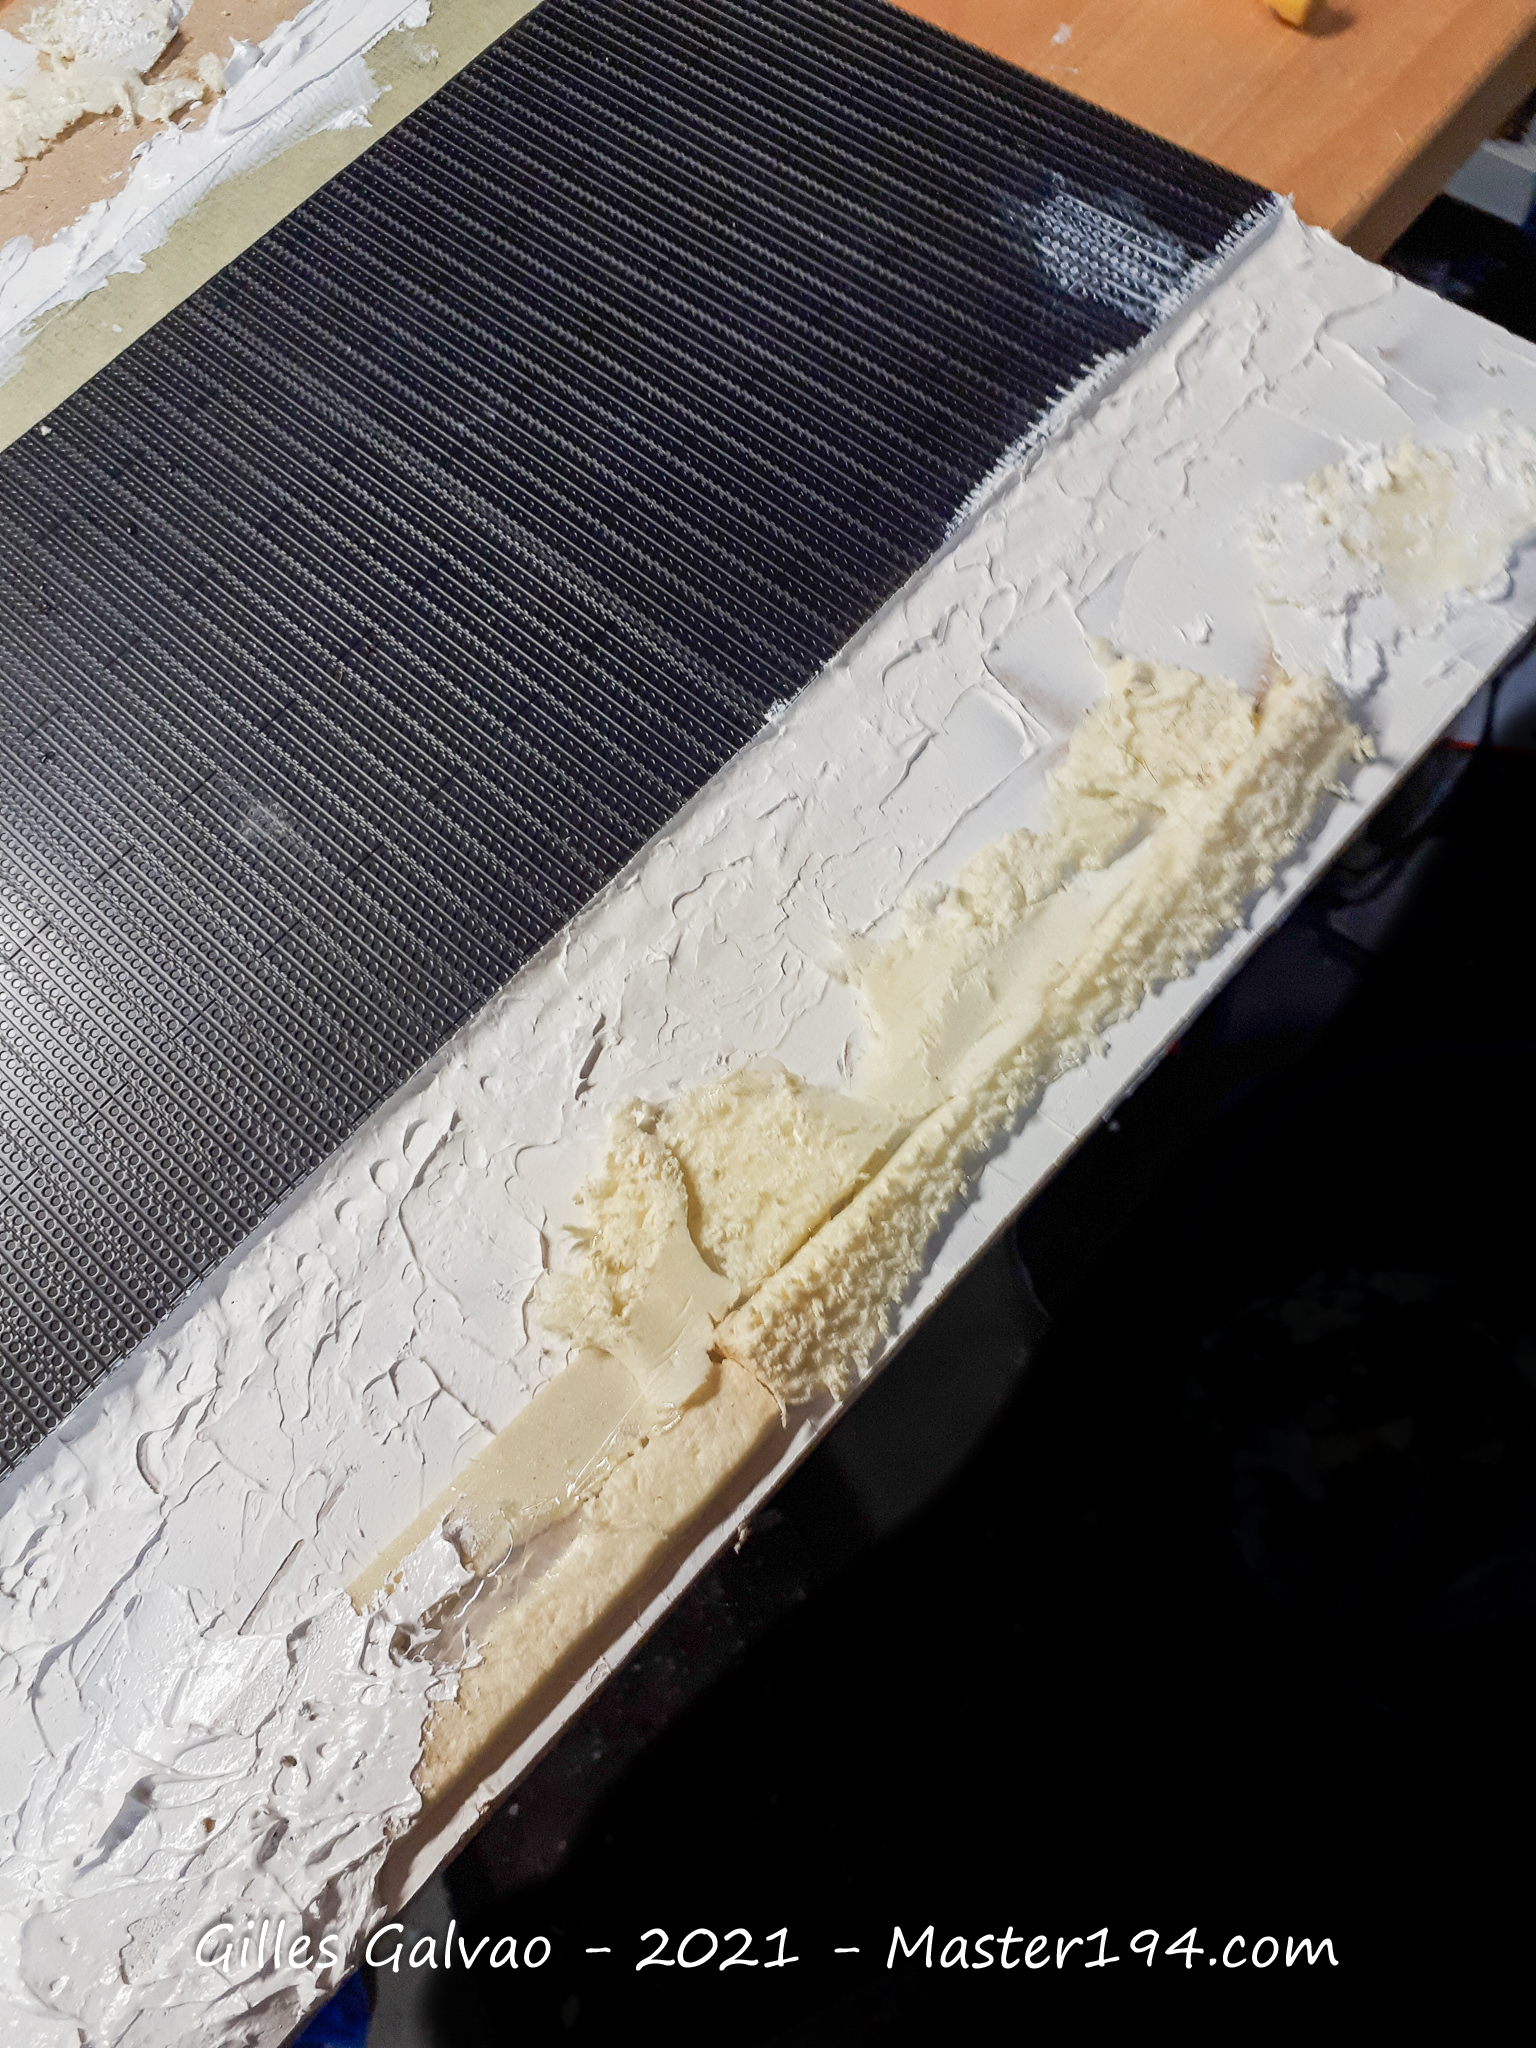
The basic groundwork is now taking shape. A few adjustments remain before I can move on to the different surface textures and painting.
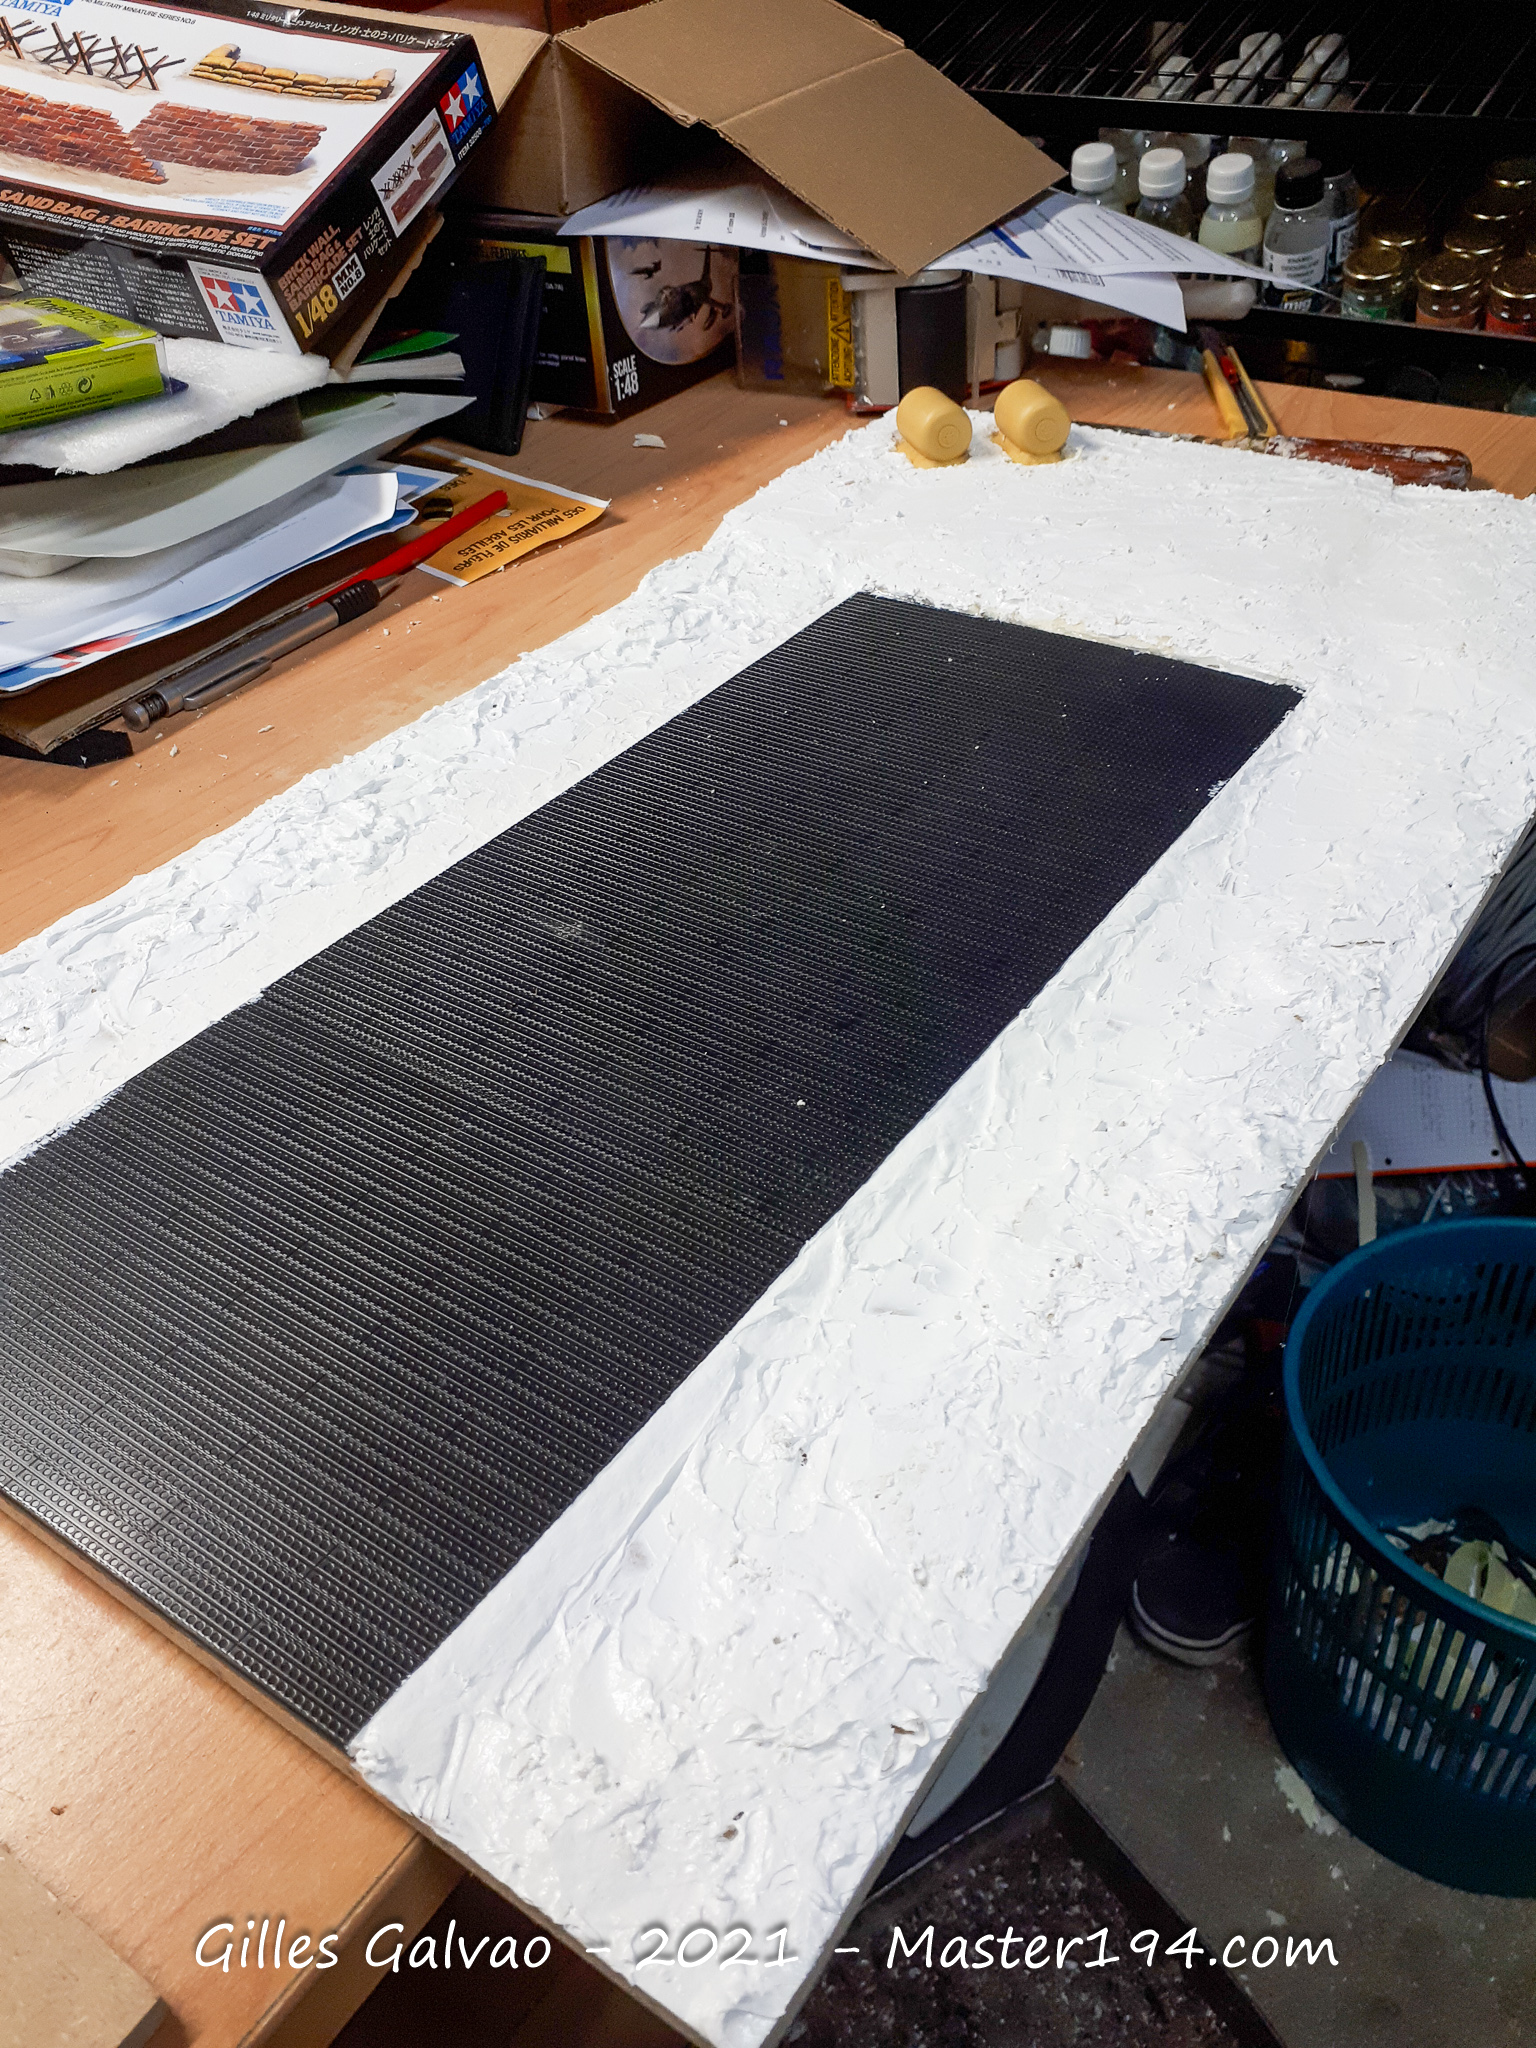
The area beneath the PSP mats must not be overlooked. I use a suitable textured paste to reproduce the crushed stone supporting the platform. The PSP sections are then painted and weathered, while the surrounding ground receives its base coat.
The flexible fuel tanks and pumps come from Verlinden.
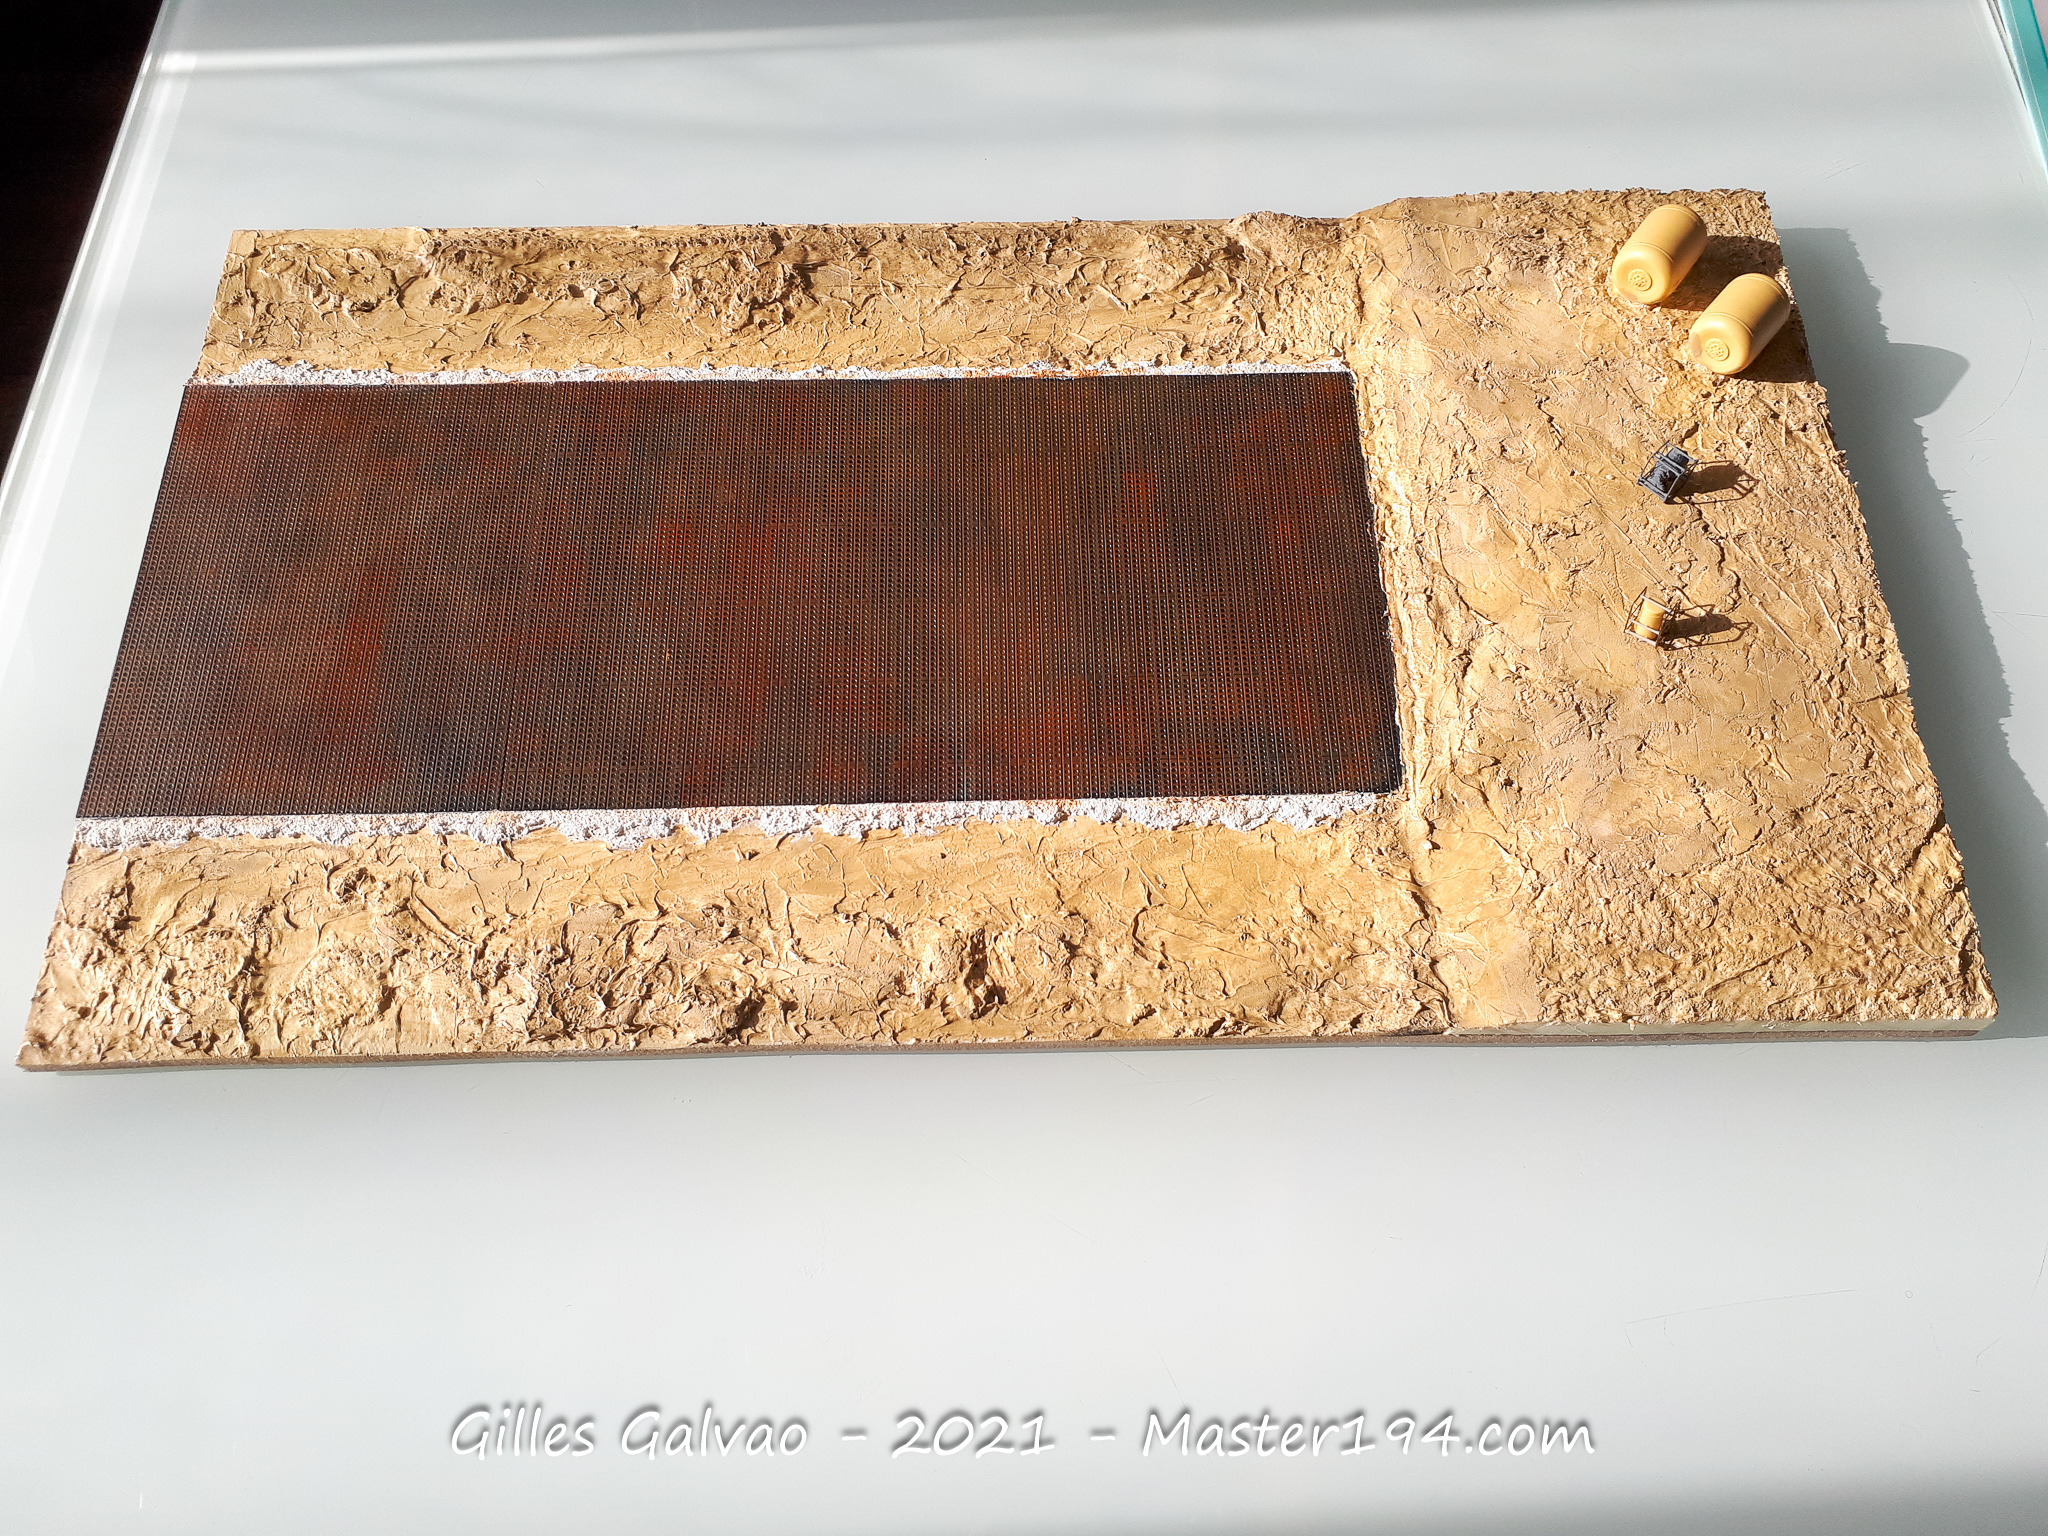
Adding the accessories
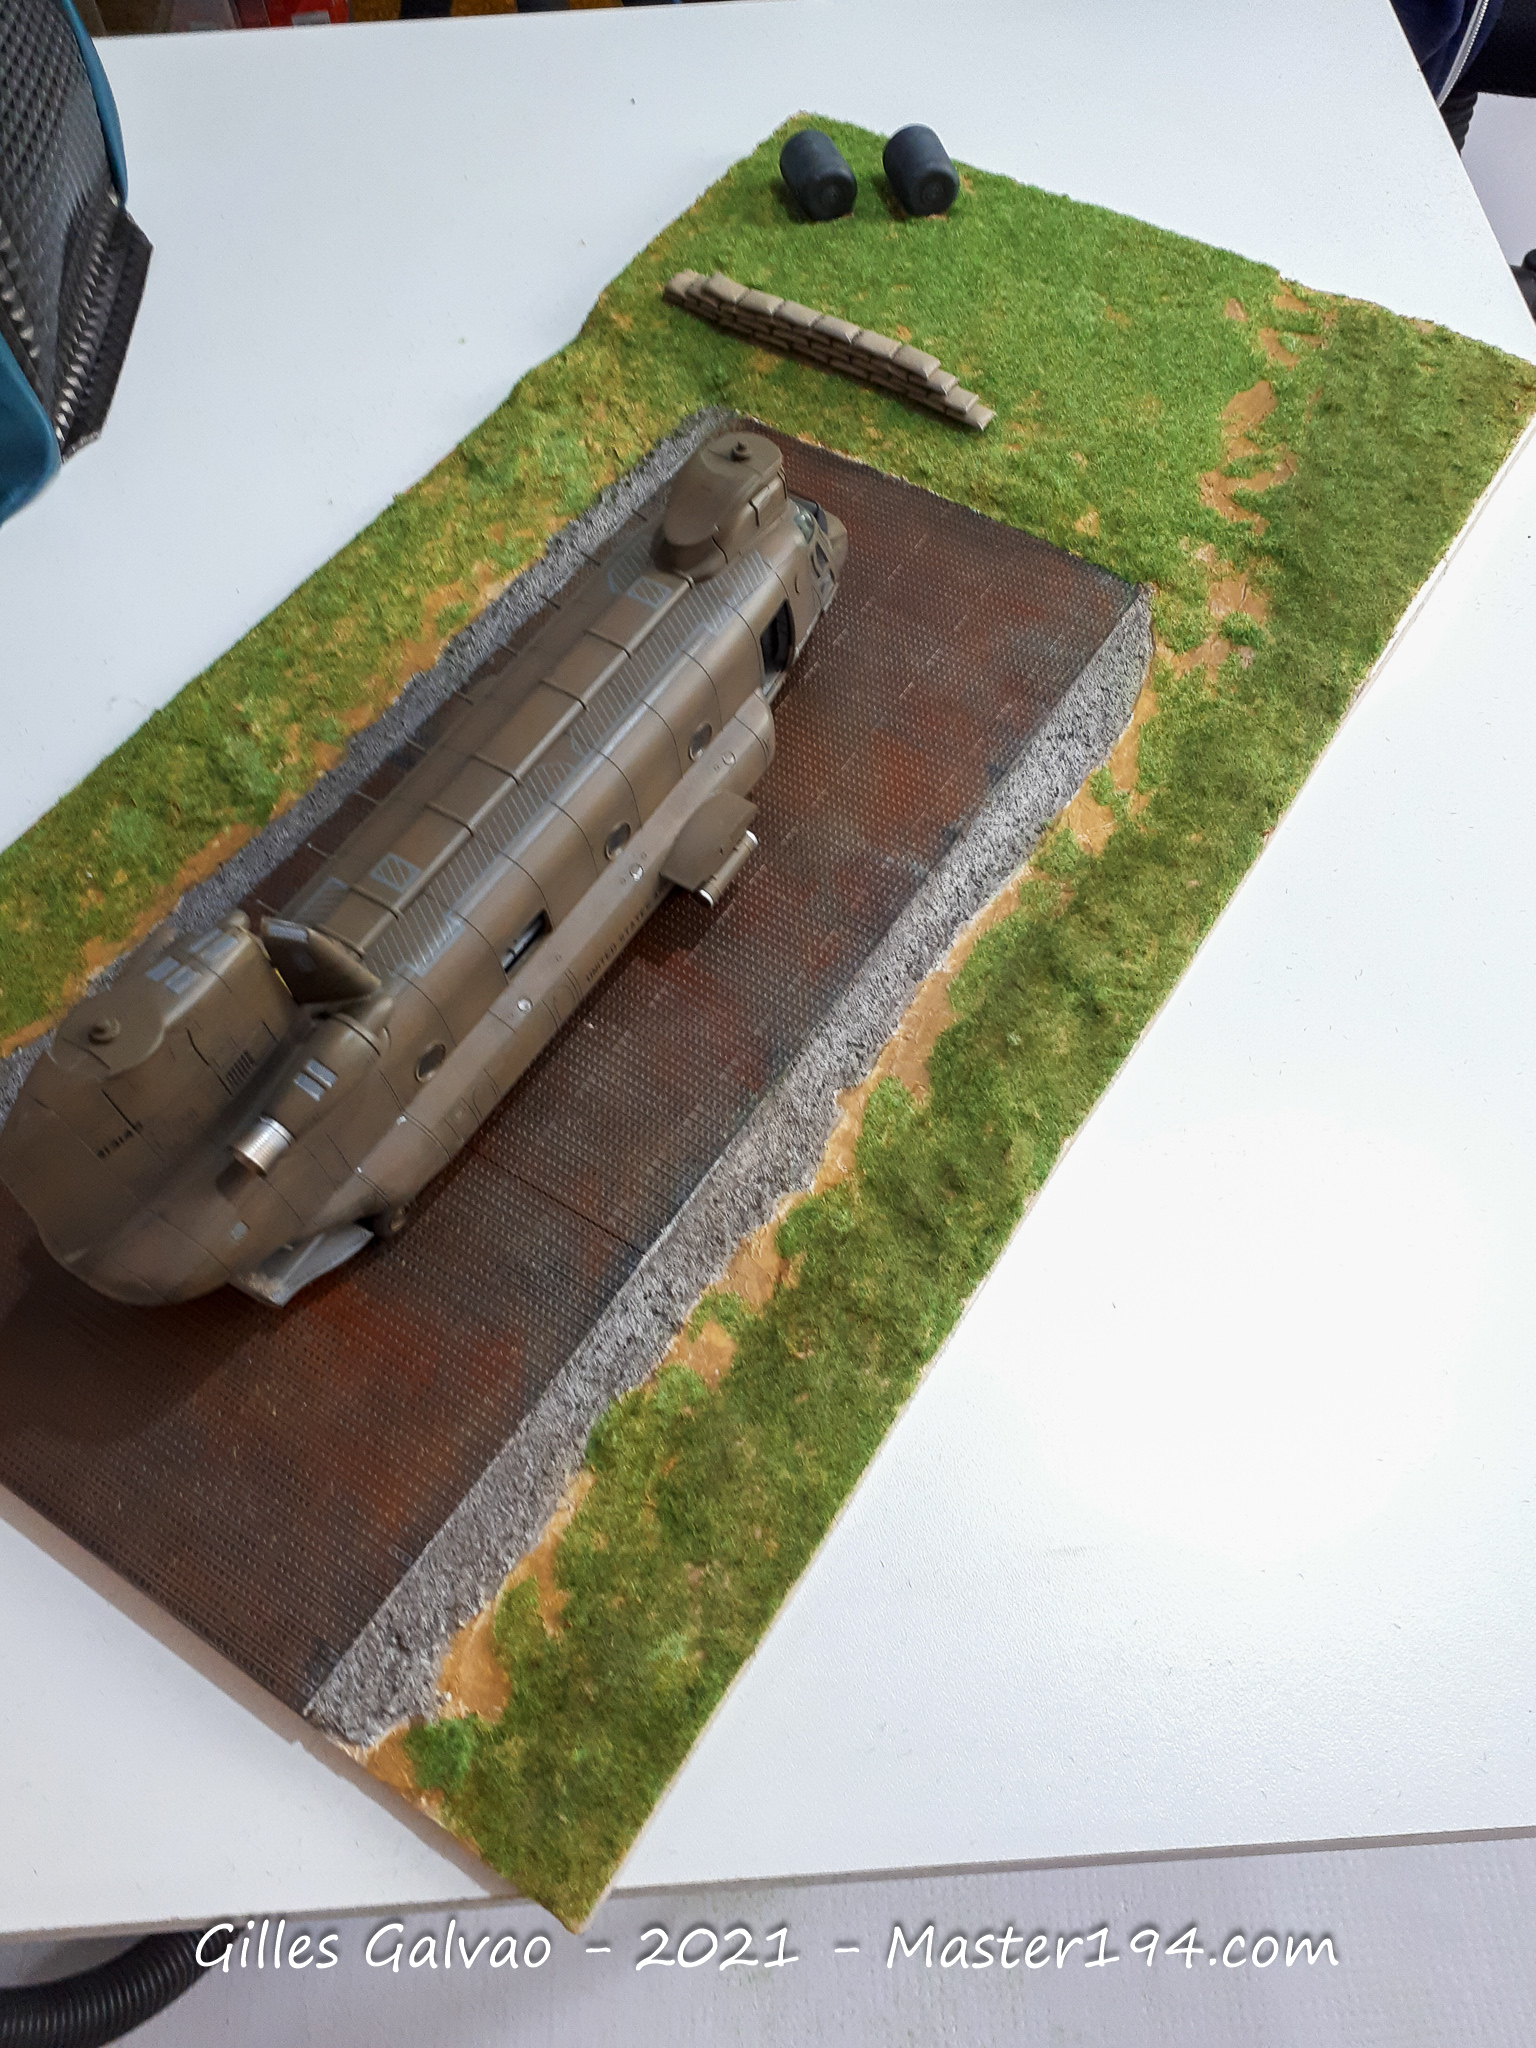
I can now add the grass and the various accessories. A dry fit helps me check the proportions and assess the overall balance of the scene.
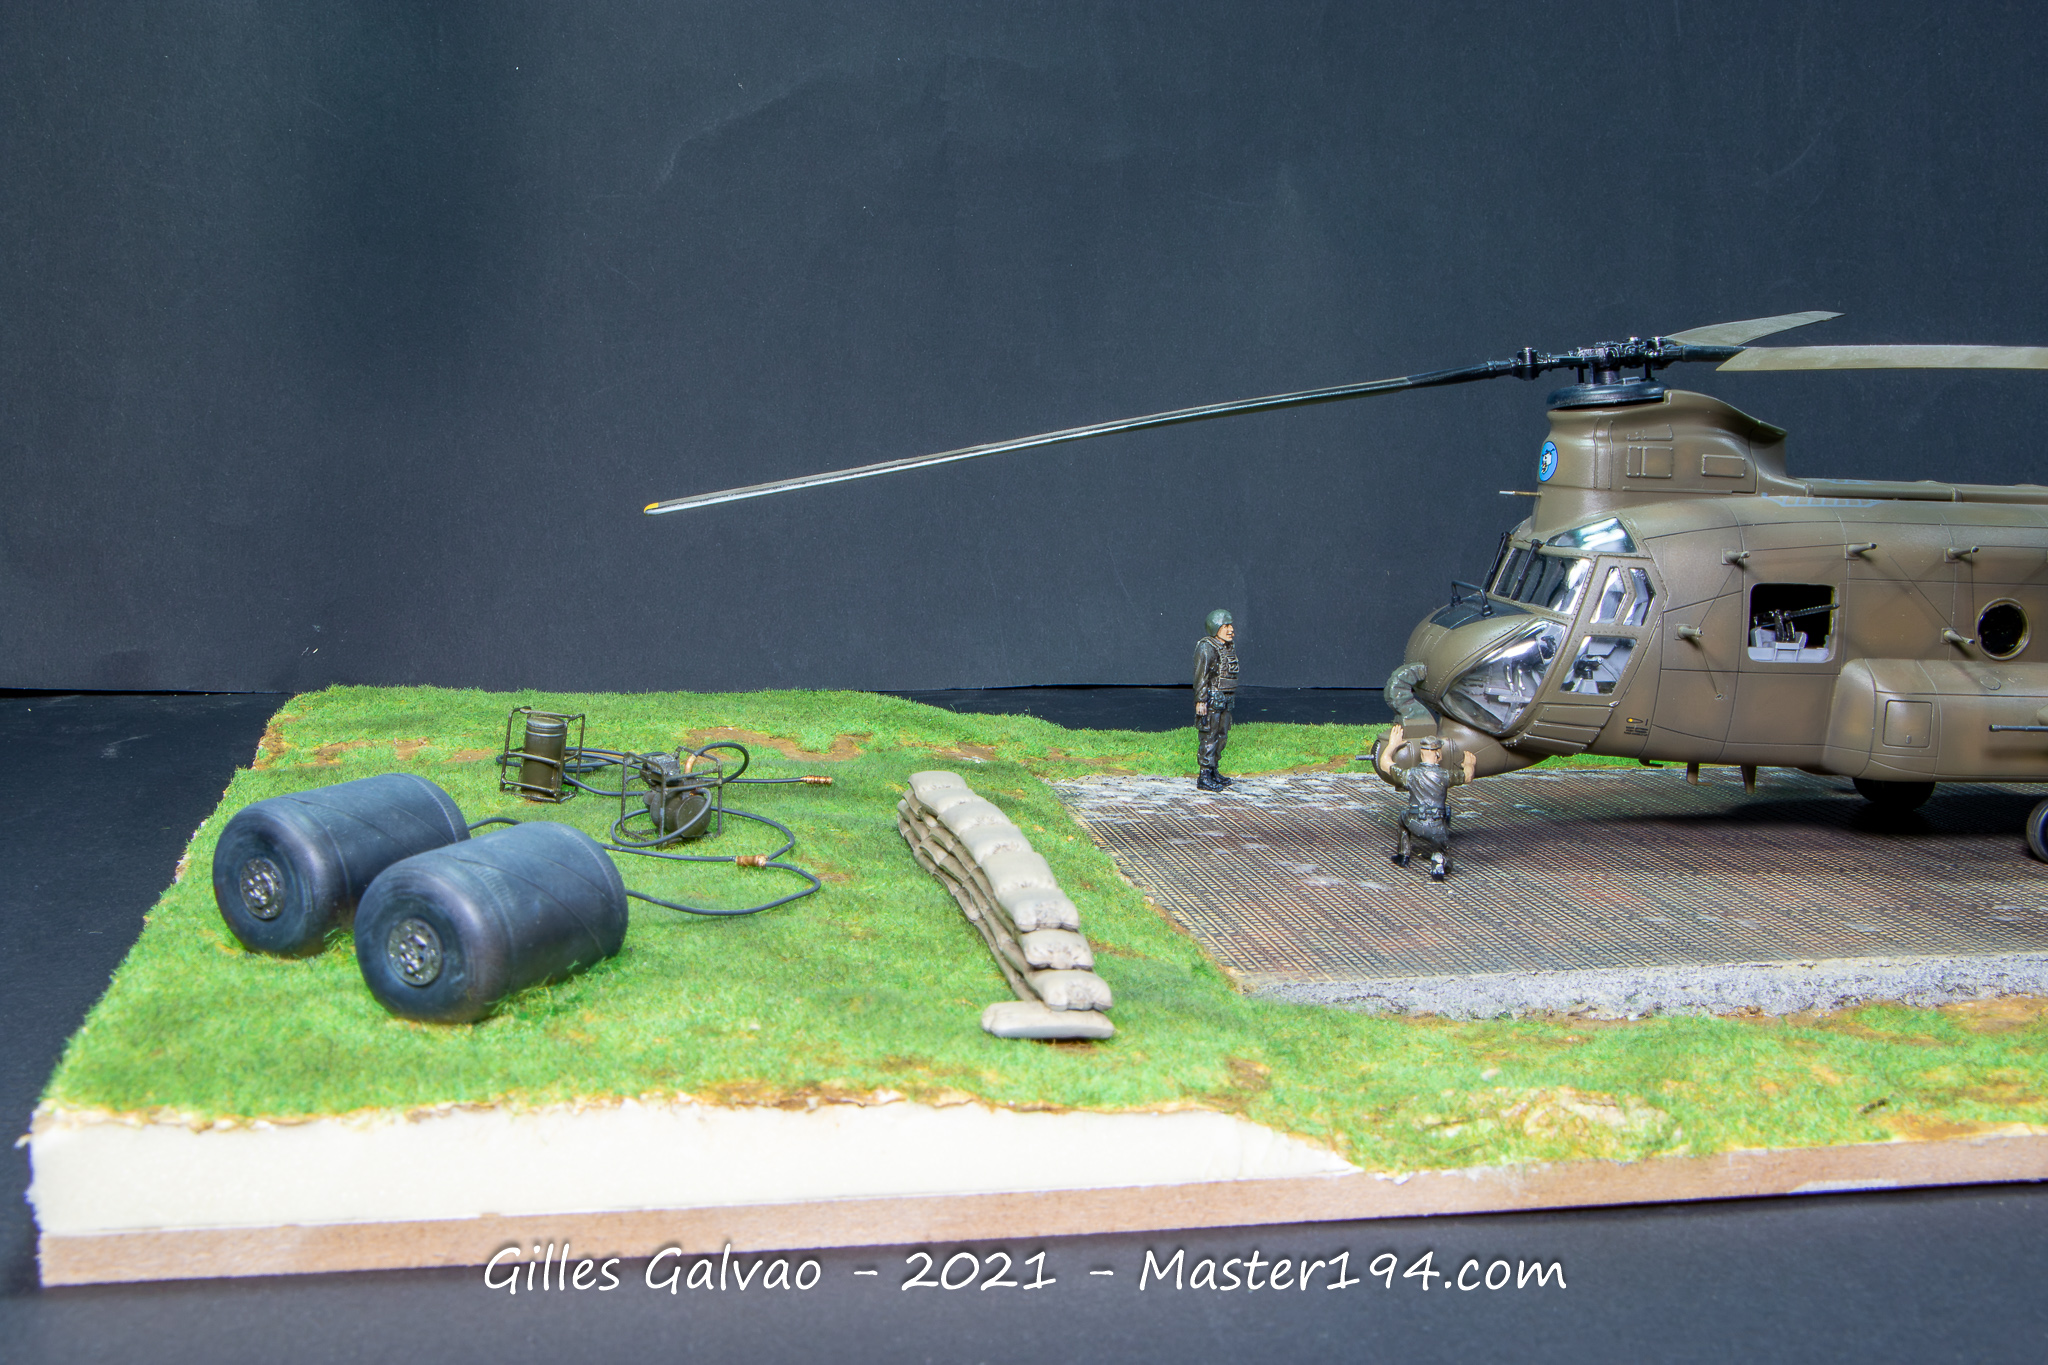
The sandbags come from a Tamiya set. A few CMK and Aerobonus figures will complete the diorama and add a human element to this scene of everyday activity at an American base in Vietnam.
The finished model
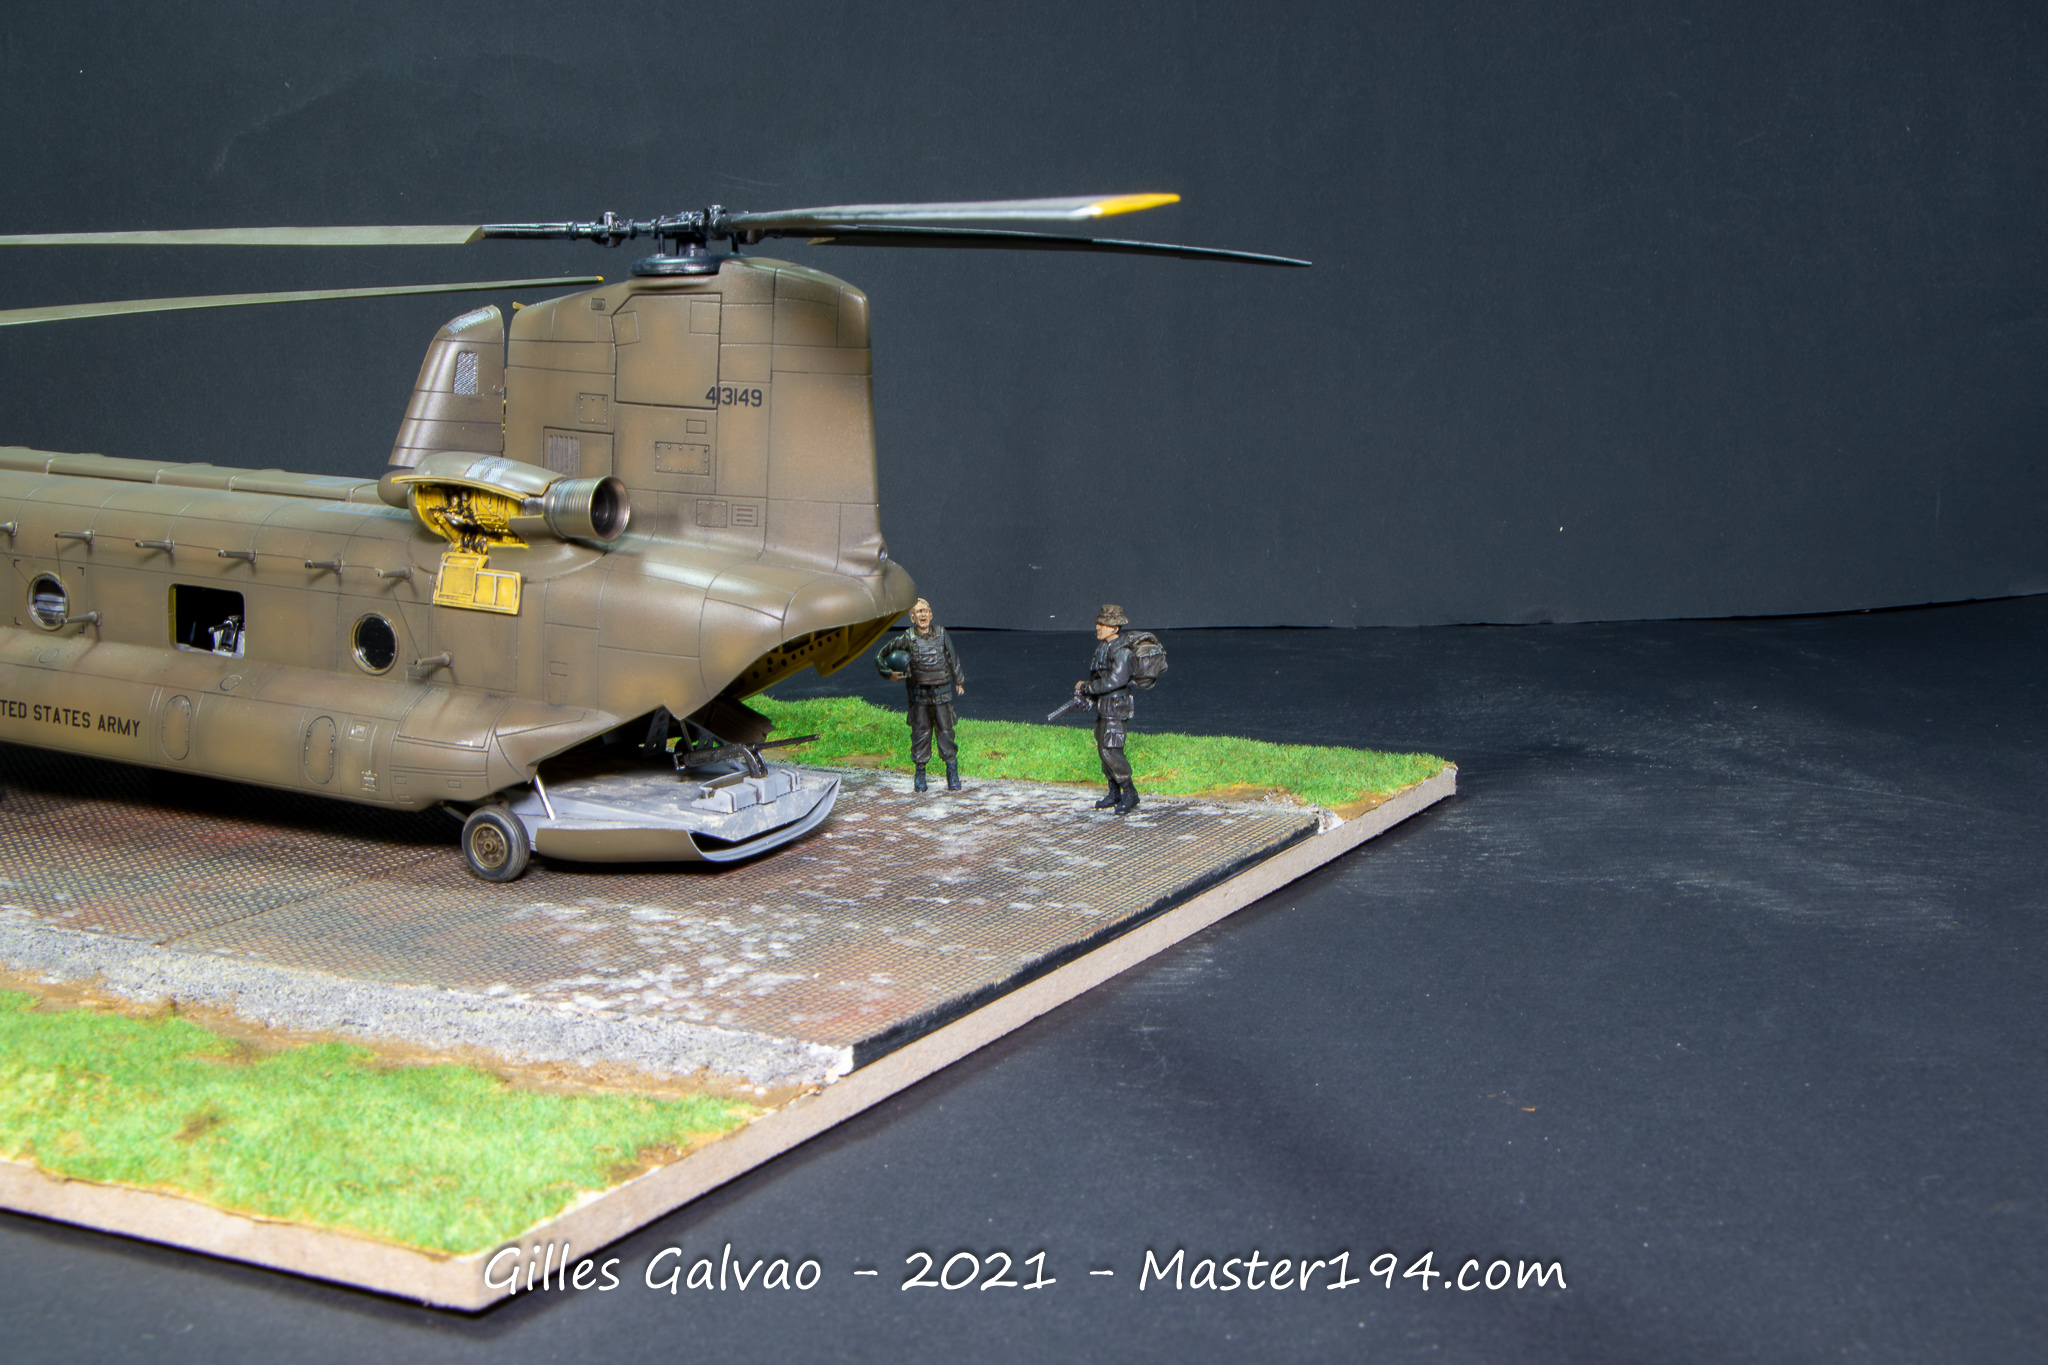
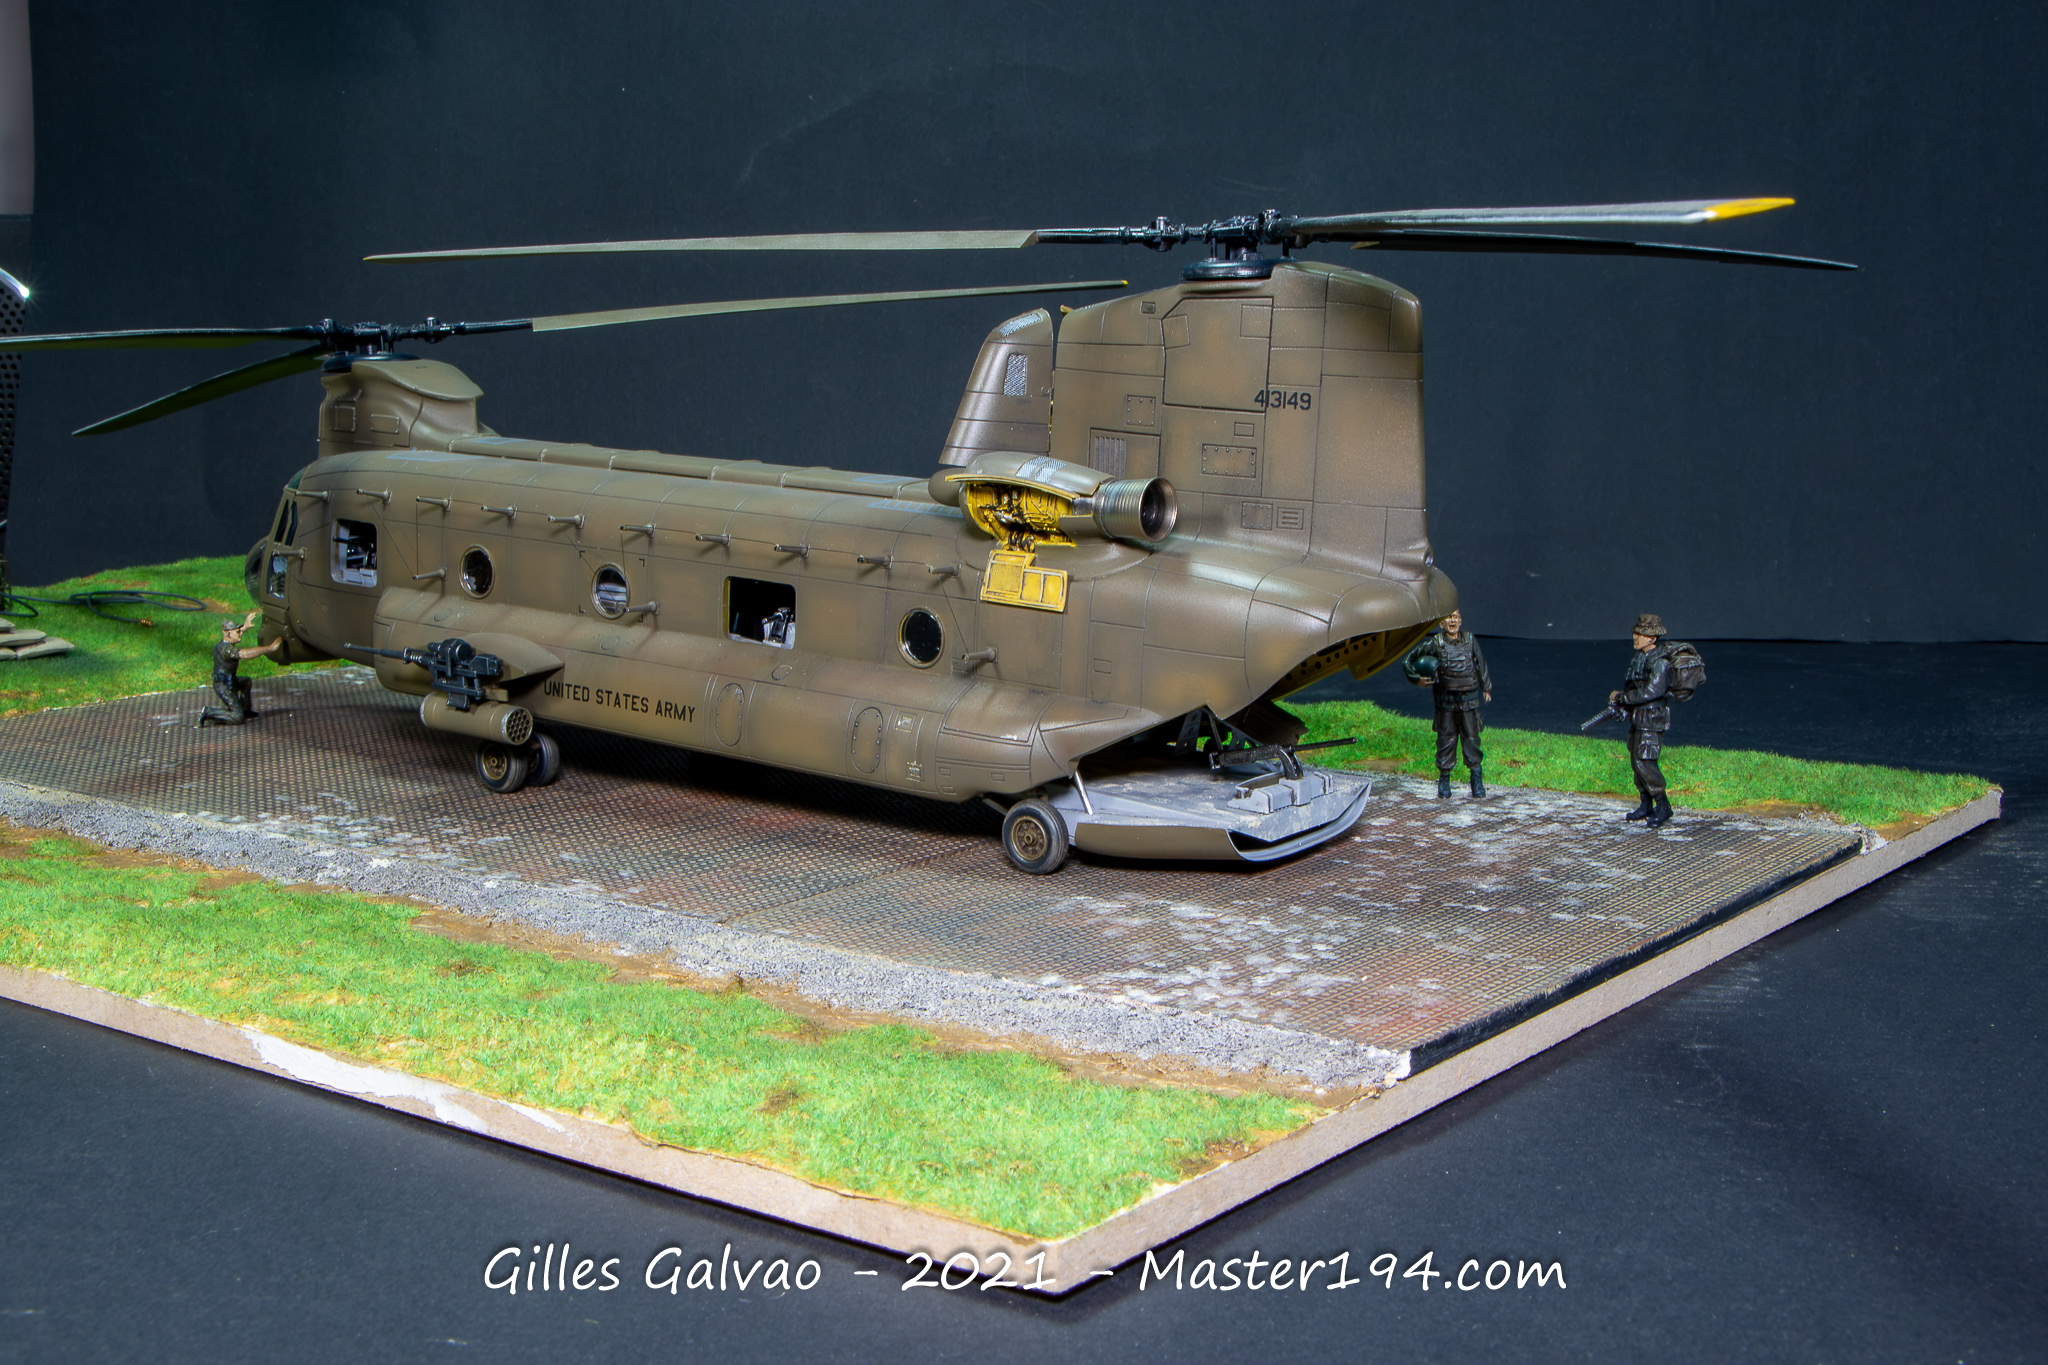
After all these stages, Easy Money is finally ready to take its place on the diorama.
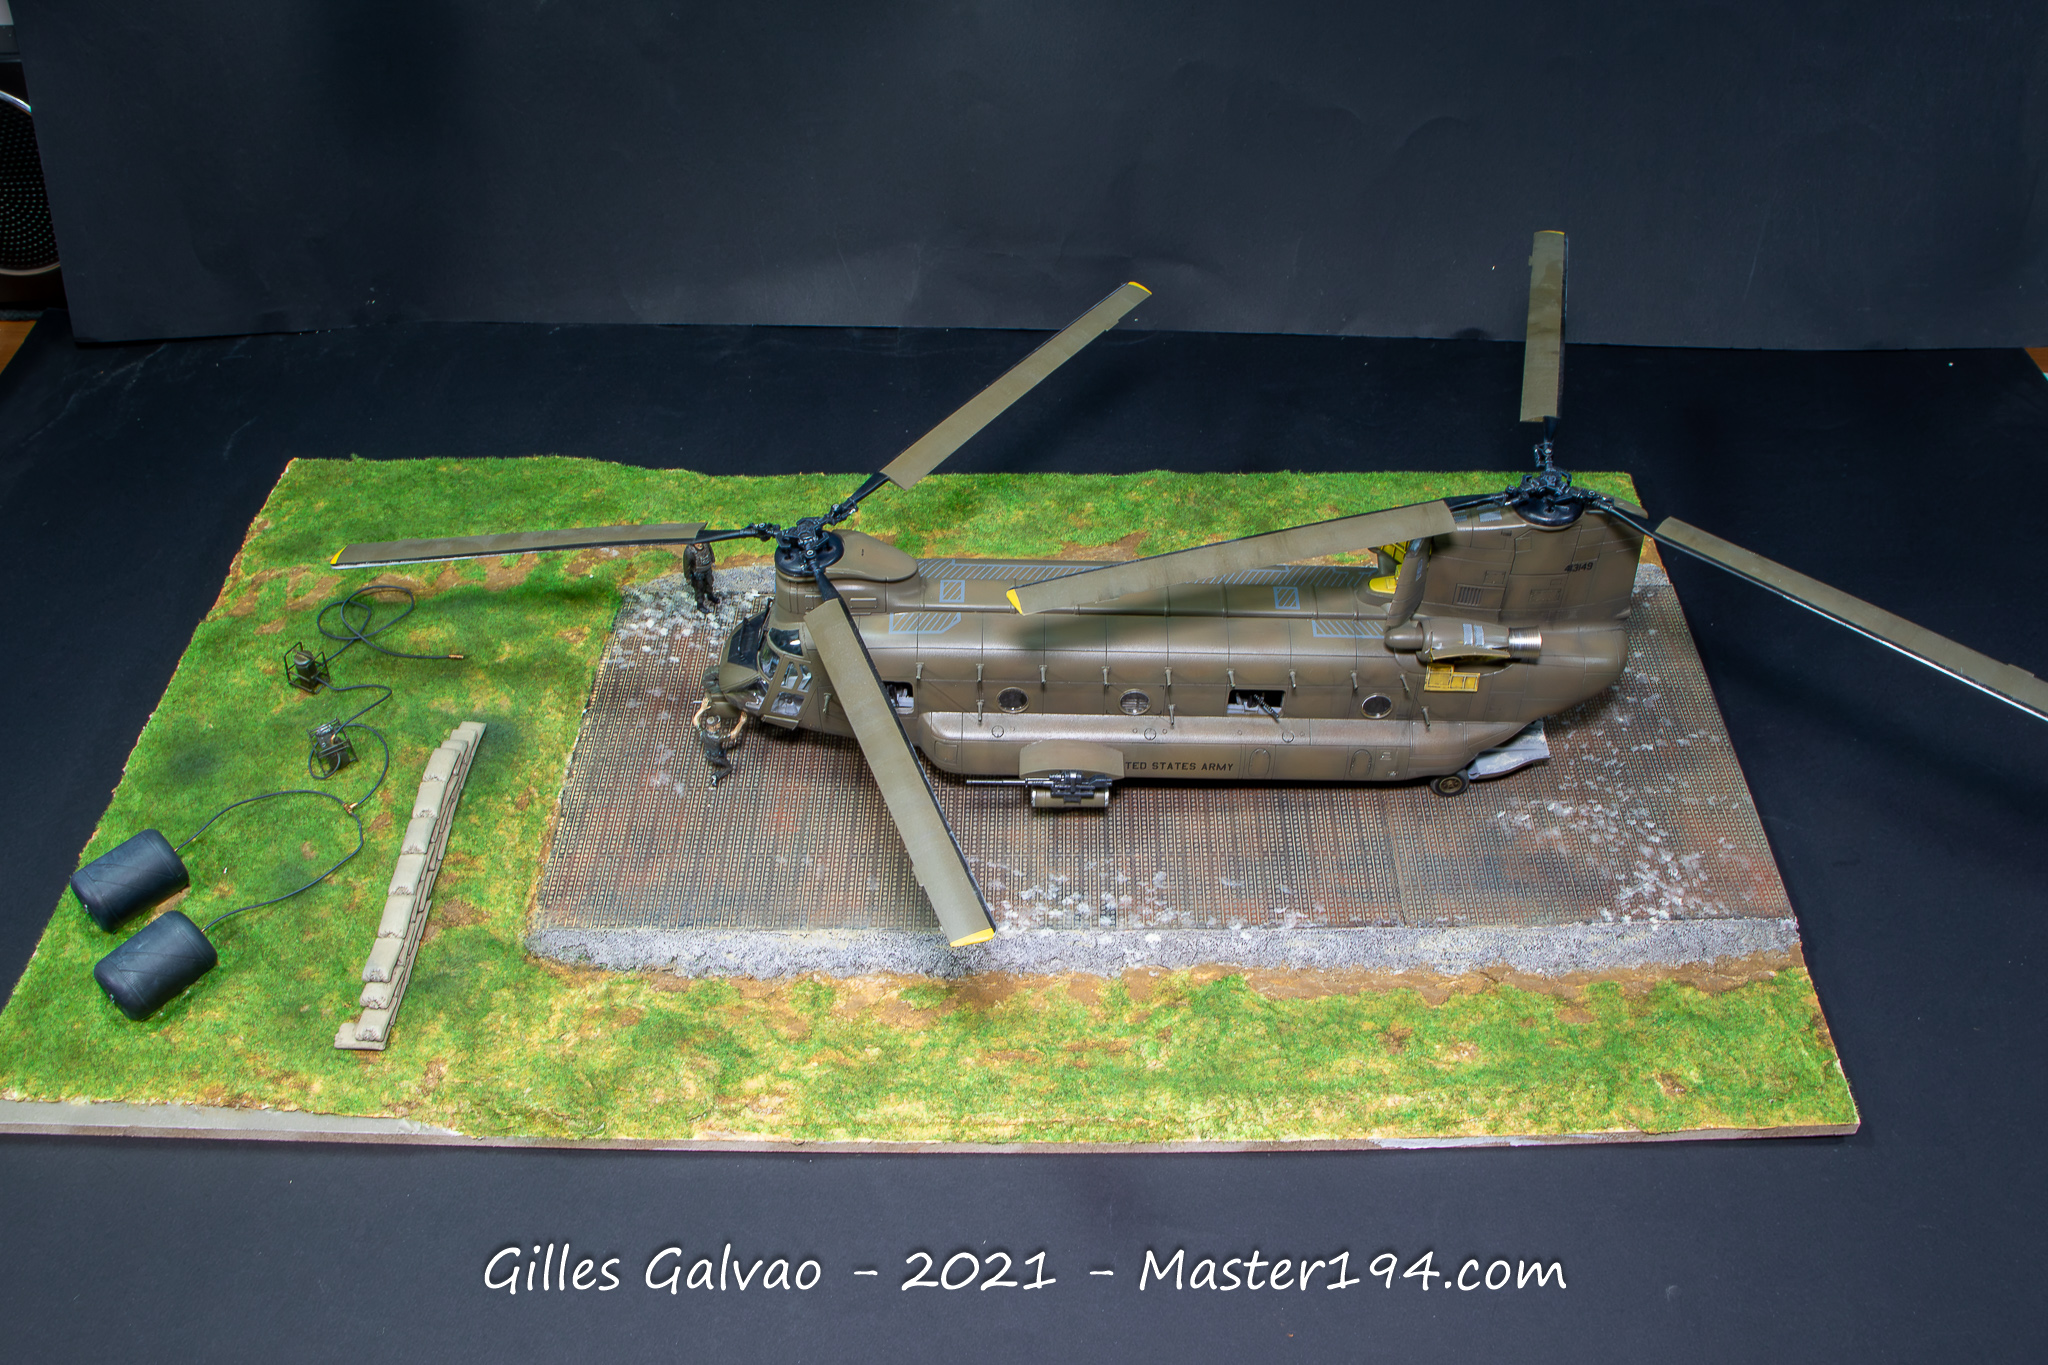
A few details are worth pointing out. The pitot tube above the cockpit has been replaced with aluminium tubing. On the starboard side, the circular grille between the cockpit and the door is covered by a plate on this particular version.

The end of an extraordinary programme
The ACH-47A story came to an end after only a few years. Despite the results achieved in combat and the potential of this heavily armed platform, the programme never led to series production.
The US Army still had an enormous requirement for Chinooks to transport troops, equipment and artillery. Committing these valuable aircraft to a specialised gunship role was therefore a difficult trade-off. At the same time, smaller attack helicopters, particularly the AH-1 Cobra, offered a more suitable solution for escort and close air support missions.
The Guns-A-Go-Go experiment was not without value, however. It demonstrated the possibilities offered by a large, stable platform capable of carrying a substantial weapons load and providing sustained fire support for ground forces.
Of the four aircraft involved in this unusual experiment, Easy Money remains the sole survivor. After serving as a training aid, it was restored and preserved at Redstone Arsenal, where it stands today as a reminder of this remarkable chapter in American military aviation.
For scale modellers, the ACH-47A is an excellent opportunity to build something rather different from the more familiar Chinook variants. Its unusual weapons fit, Olive Drab finish and the possibilities it offers for an operational diorama make it a particularly appealing subject in 1/48 scale.
And in the end, that is exactly what I was looking for when I walked into that hobby shop: an unusual aircraft, a story to tell and a few enjoyable hours at the workbench!