 by
A word from Master194:
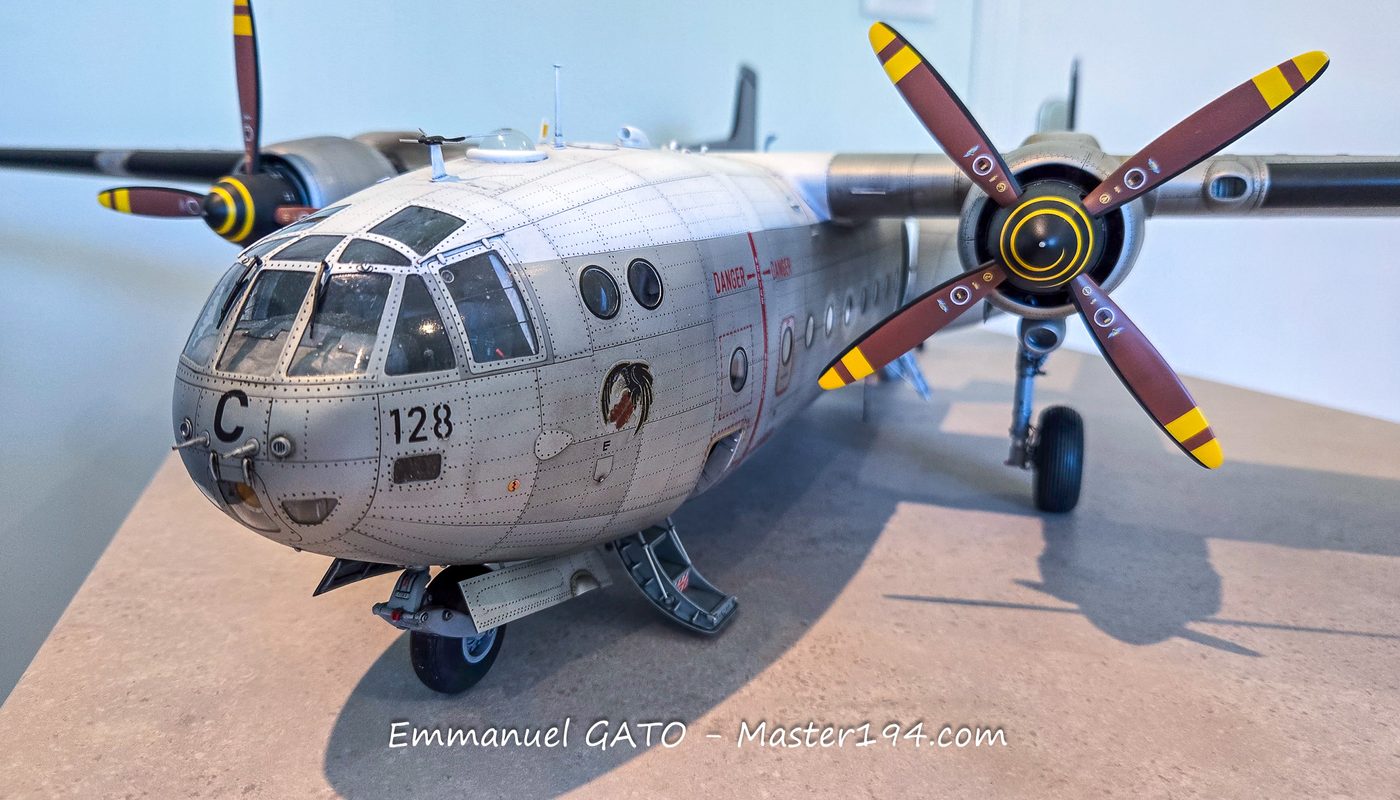
Emmanuel GATO has been active on the Master194 forum for nearly fifteen years. Over that time, he has shared several magnificent builds, often as ambitious as they are impressive. Like many of you, I followed the progress of his 1/32 scale scratch-built Nord 2501 Noratlas page by page.Given the sheer scale of the work accomplished—combining CAD design, scratchbuilding, painting, extensive detailing, and a healthy dose of ingenuity, if not outright engineering!—I wanted, with his permission, to gather all his posts into a dedicated feature article. The goal is simple: to make this journey easier to follow and, above all, to ensure that this masterclass in patience, precision, and technical and historical mastery is not lost to the forum archives.
I have deliberately kept the original forum thread chronology rather than grouping the steps by theme. That is precisely what makes this read so engaging: you discover the project as it evolves step by step, witnessing its breakthroughs, challenges, doubts, and the clever solutions devised to overcome them. It is a way to follow the builder’s mindset and gradually grasp the true magnitude of the undertaking.
The article is split across several pages to keep loading times fast.
The adventure began in July 2021 and concluded in November 2026. Along the way, this extraordinary Noratlas came a very long way—all the way to winning Best in Show at Telford!
I will now let you (re)discover and admire this true masterpiece.
Genesis of the project and preparation of the plans
After spending two years building the Vautour, I am diving into a new project that will undoubtedly be the most ambitious I have ever undertaken: the Noratlas.
The project began with a massive amount of research and documentation work. Thanks to several contributions and a few personal trips—notably to Toulouse—I managed to gather a fine collection of reference materials: technical manuals, blueprints, photographs, and measurements taken directly from the aircraft. However, certain dimensions remain tricky to pin down, such as the exact diameter of the cabin windows, the width of the crew door, and the dimensions of the rear cargo doors.
To fill in the gaps, I also had the opportunity to visit the Noratlas preserved in Aulnay-sous-Bois. The aircraft is currently used as a clubhouse by a local skydiving association. This visit allowed me to gather some extra data and chat with people who know the aircraft inside and out. Unsurprisingly, the conversation quickly drifted toward the relative merits of the Nord, the Transall, and the C-130… three aircraft that clearly left a lasting mark on an entire generation of aviators!
The project then took on its first concrete dimensions: with a 32-meter wingspan, the real Noratlas translates to exactly one meter in 1/32 scale. Quite an impressive model in perspective! A friend of mine, a veteran of the “Grise” [the affectionate nickname for the Noratlas in French service], is also following the project closely. His first-hand knowledge of the aircraft will be invaluable for cross-checking details as the build progresses.
But before reaching for the hobby knife, I first had to tackle the drafting phase. I am therefore drawing my own 1/32 scale plans. The existing reference drawings, often printed at smaller scales, simply don’t provide enough precision for certain elements, particularly panel lines and riveting. A good portion of the work has to be redone from scratch at this scale. It is a long, sometimes tedious process, but absolutely essential to have a reliable foundation before starting construction.
The blueprints are now underway. Among the vast pile of photographs at my disposal, I am still missing some overhead shots of the outer wing upper surface, between the engine nacelles and the wingtips. Once again, I am tapping into the forum members’ personal photo archives, specifically looking for shots taken during maintenance or refuelling operations.
In the meantime, I am pressing on with the drawings. A first series of plans is now complete: the underside and upper surface of the left outer wing. I am posting them here so everyone can benefit from them. There are still a few details to iron out before I can officially break ground on the kit. I’m not quite at the first cut yet!
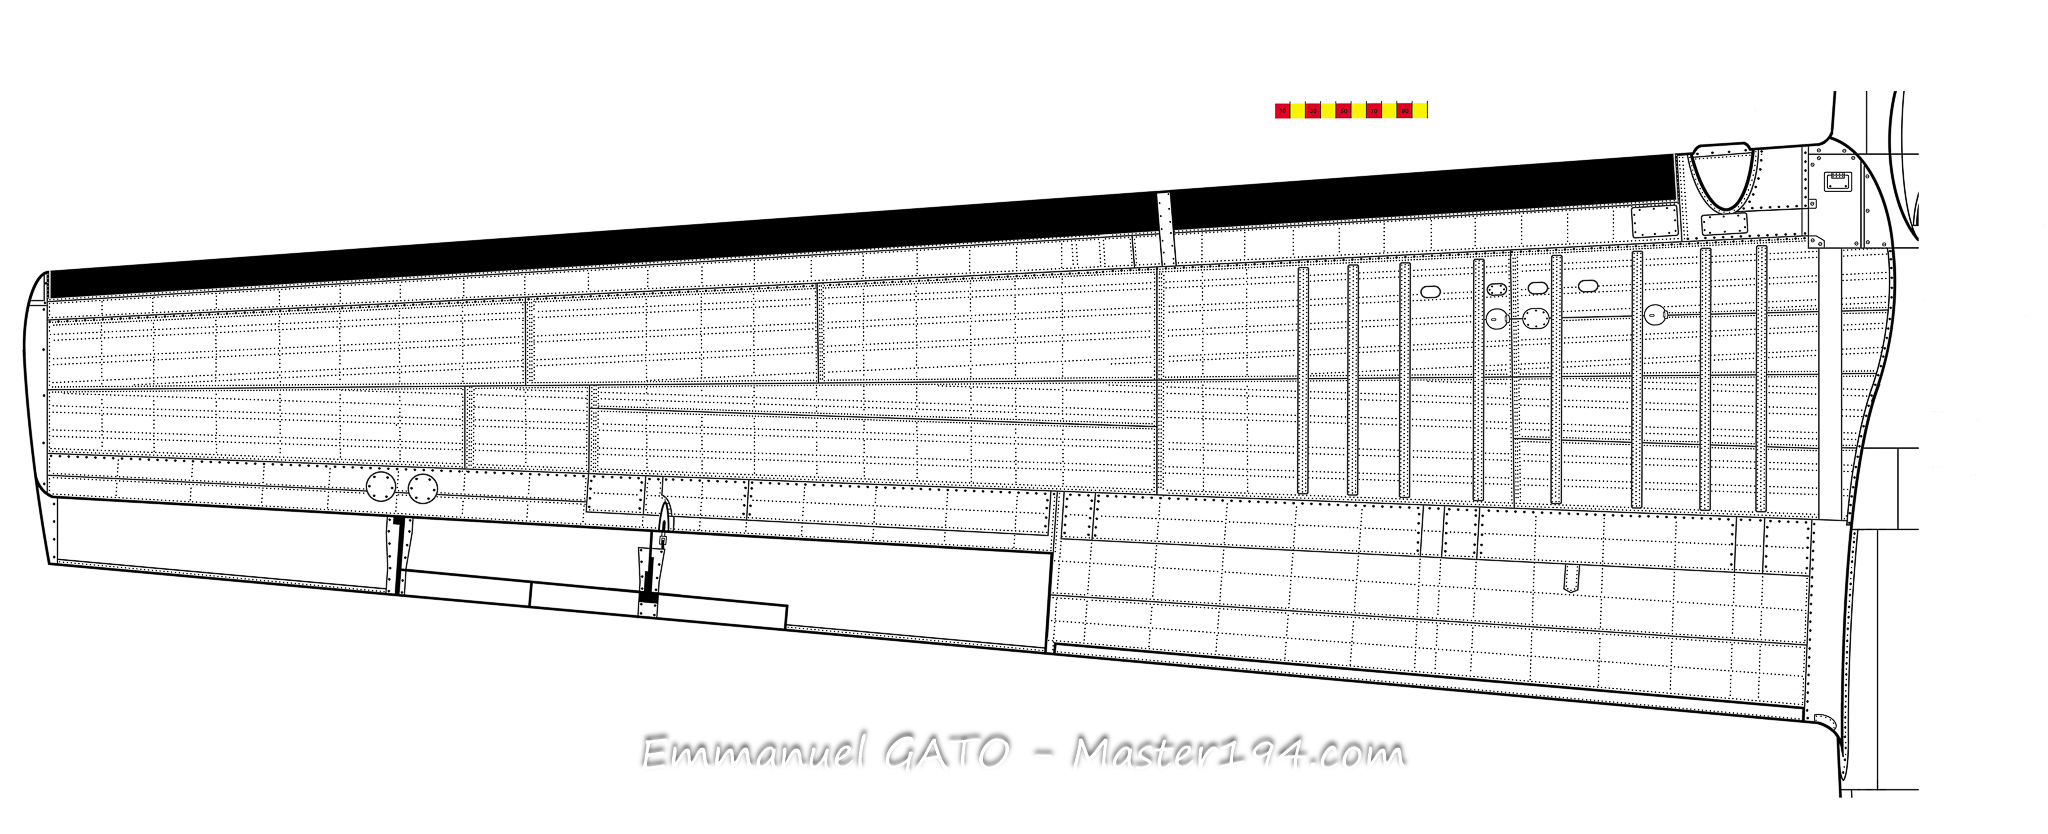
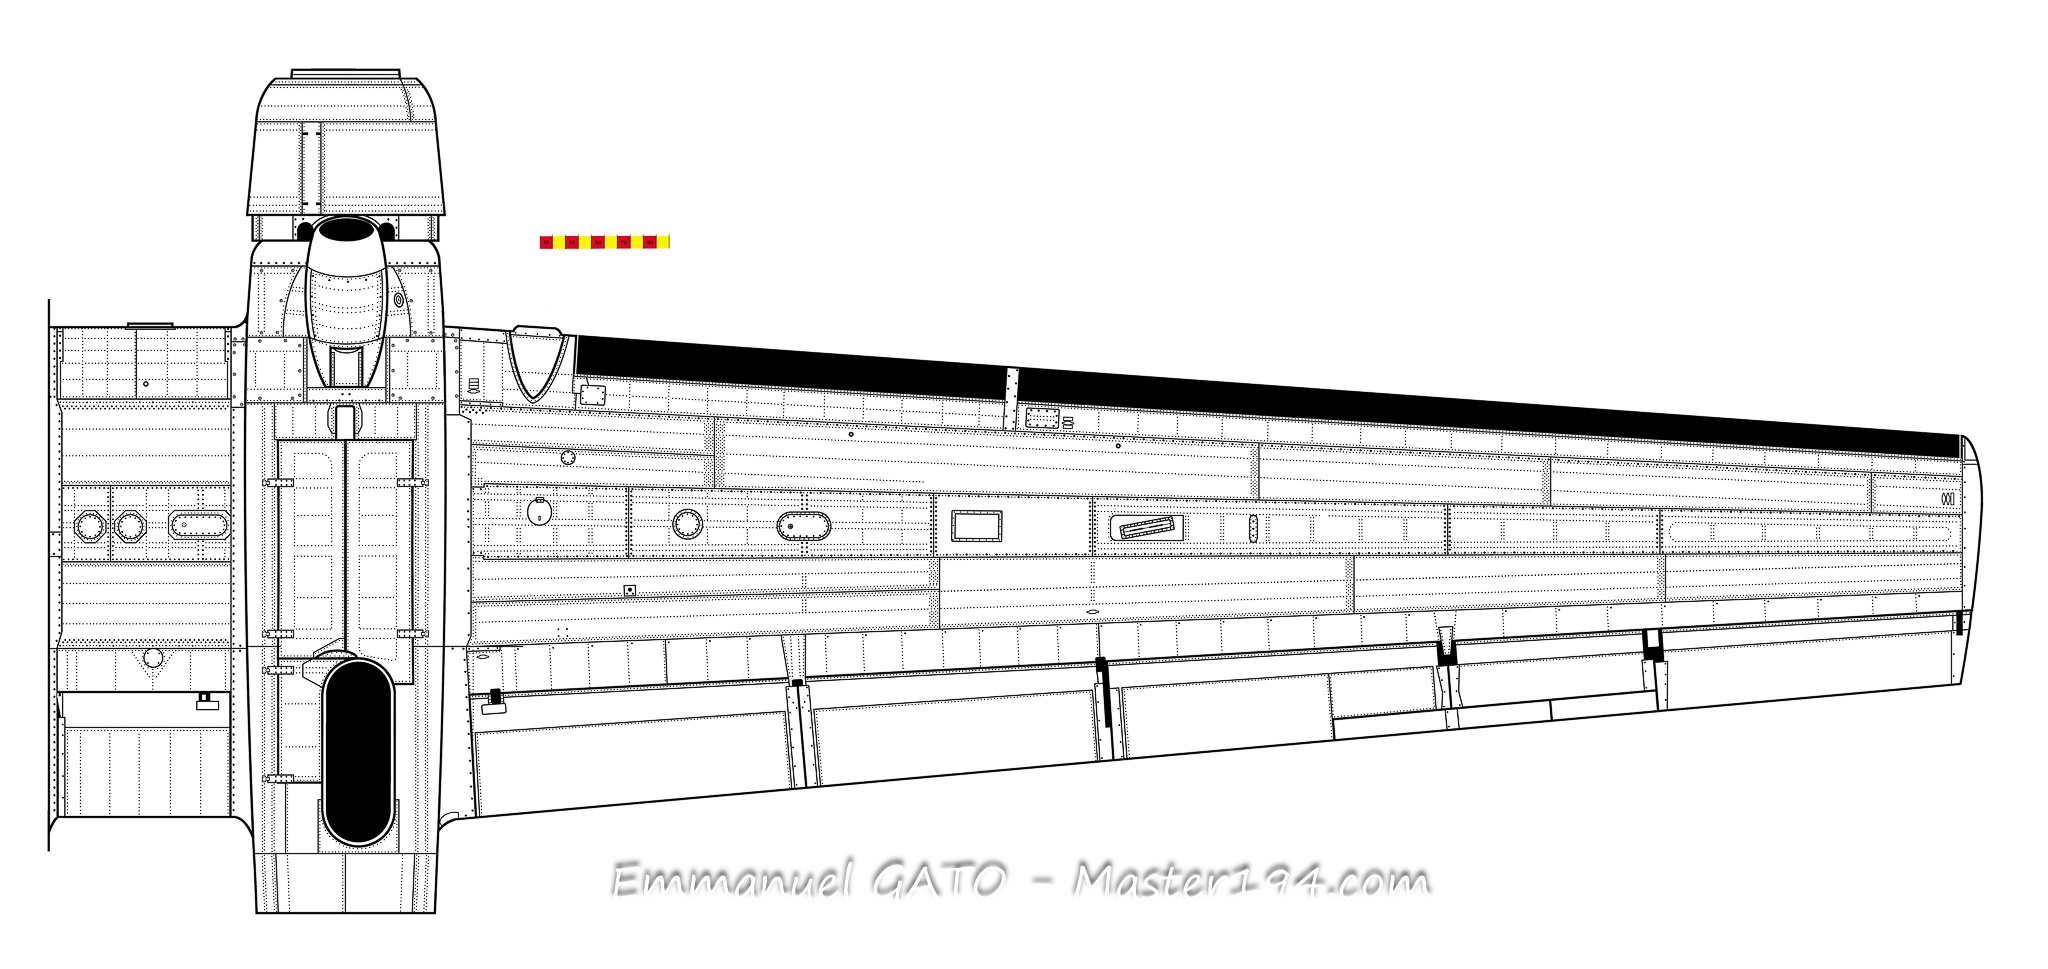
The plan I am drawing is based on original manufacturer’s documentation showing the wing’s outer contour and internal structure. This makes it much easier to accurately position the panel lines and various surface details. For the rest, I am working from photographs taken from multiple angles. After a lot of trial and error, a coherent layout is finally coming together.
AD
The main advantage of computer-aided drawing is being able to correct the inevitable positioning errors across the various sub-assemblies. I am now going to tackle the right wing. The only notable difference seems to be the landing light and a few details on the underside. This should go faster and allow me to get back to the fuselage, which is already well under way.
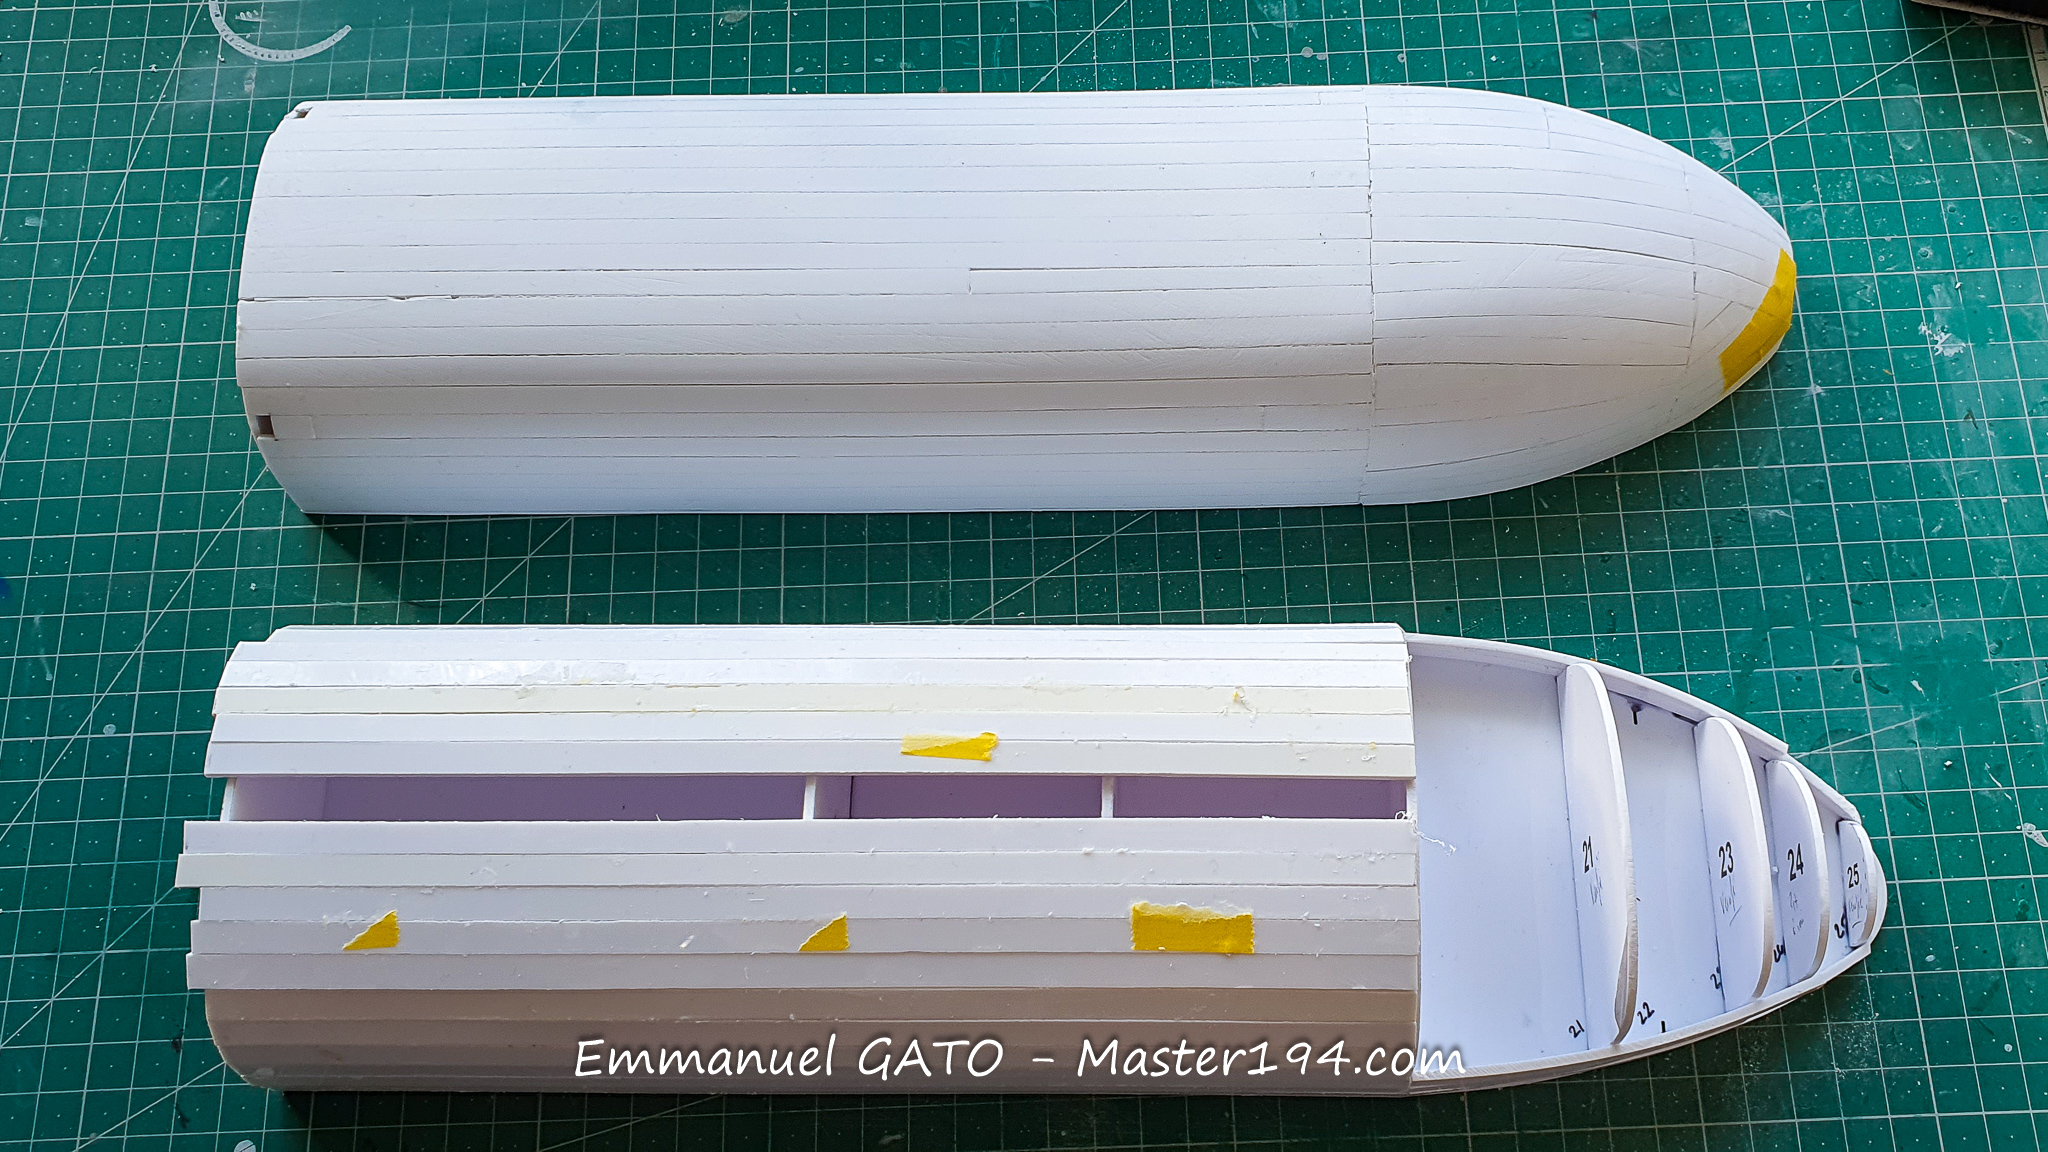
I am sharing a few photographs without too many comments. The manufacturing technique is now familiar, and the parts are still very much at the rough framing stage. There is still a lot of sanding and shaping ahead.
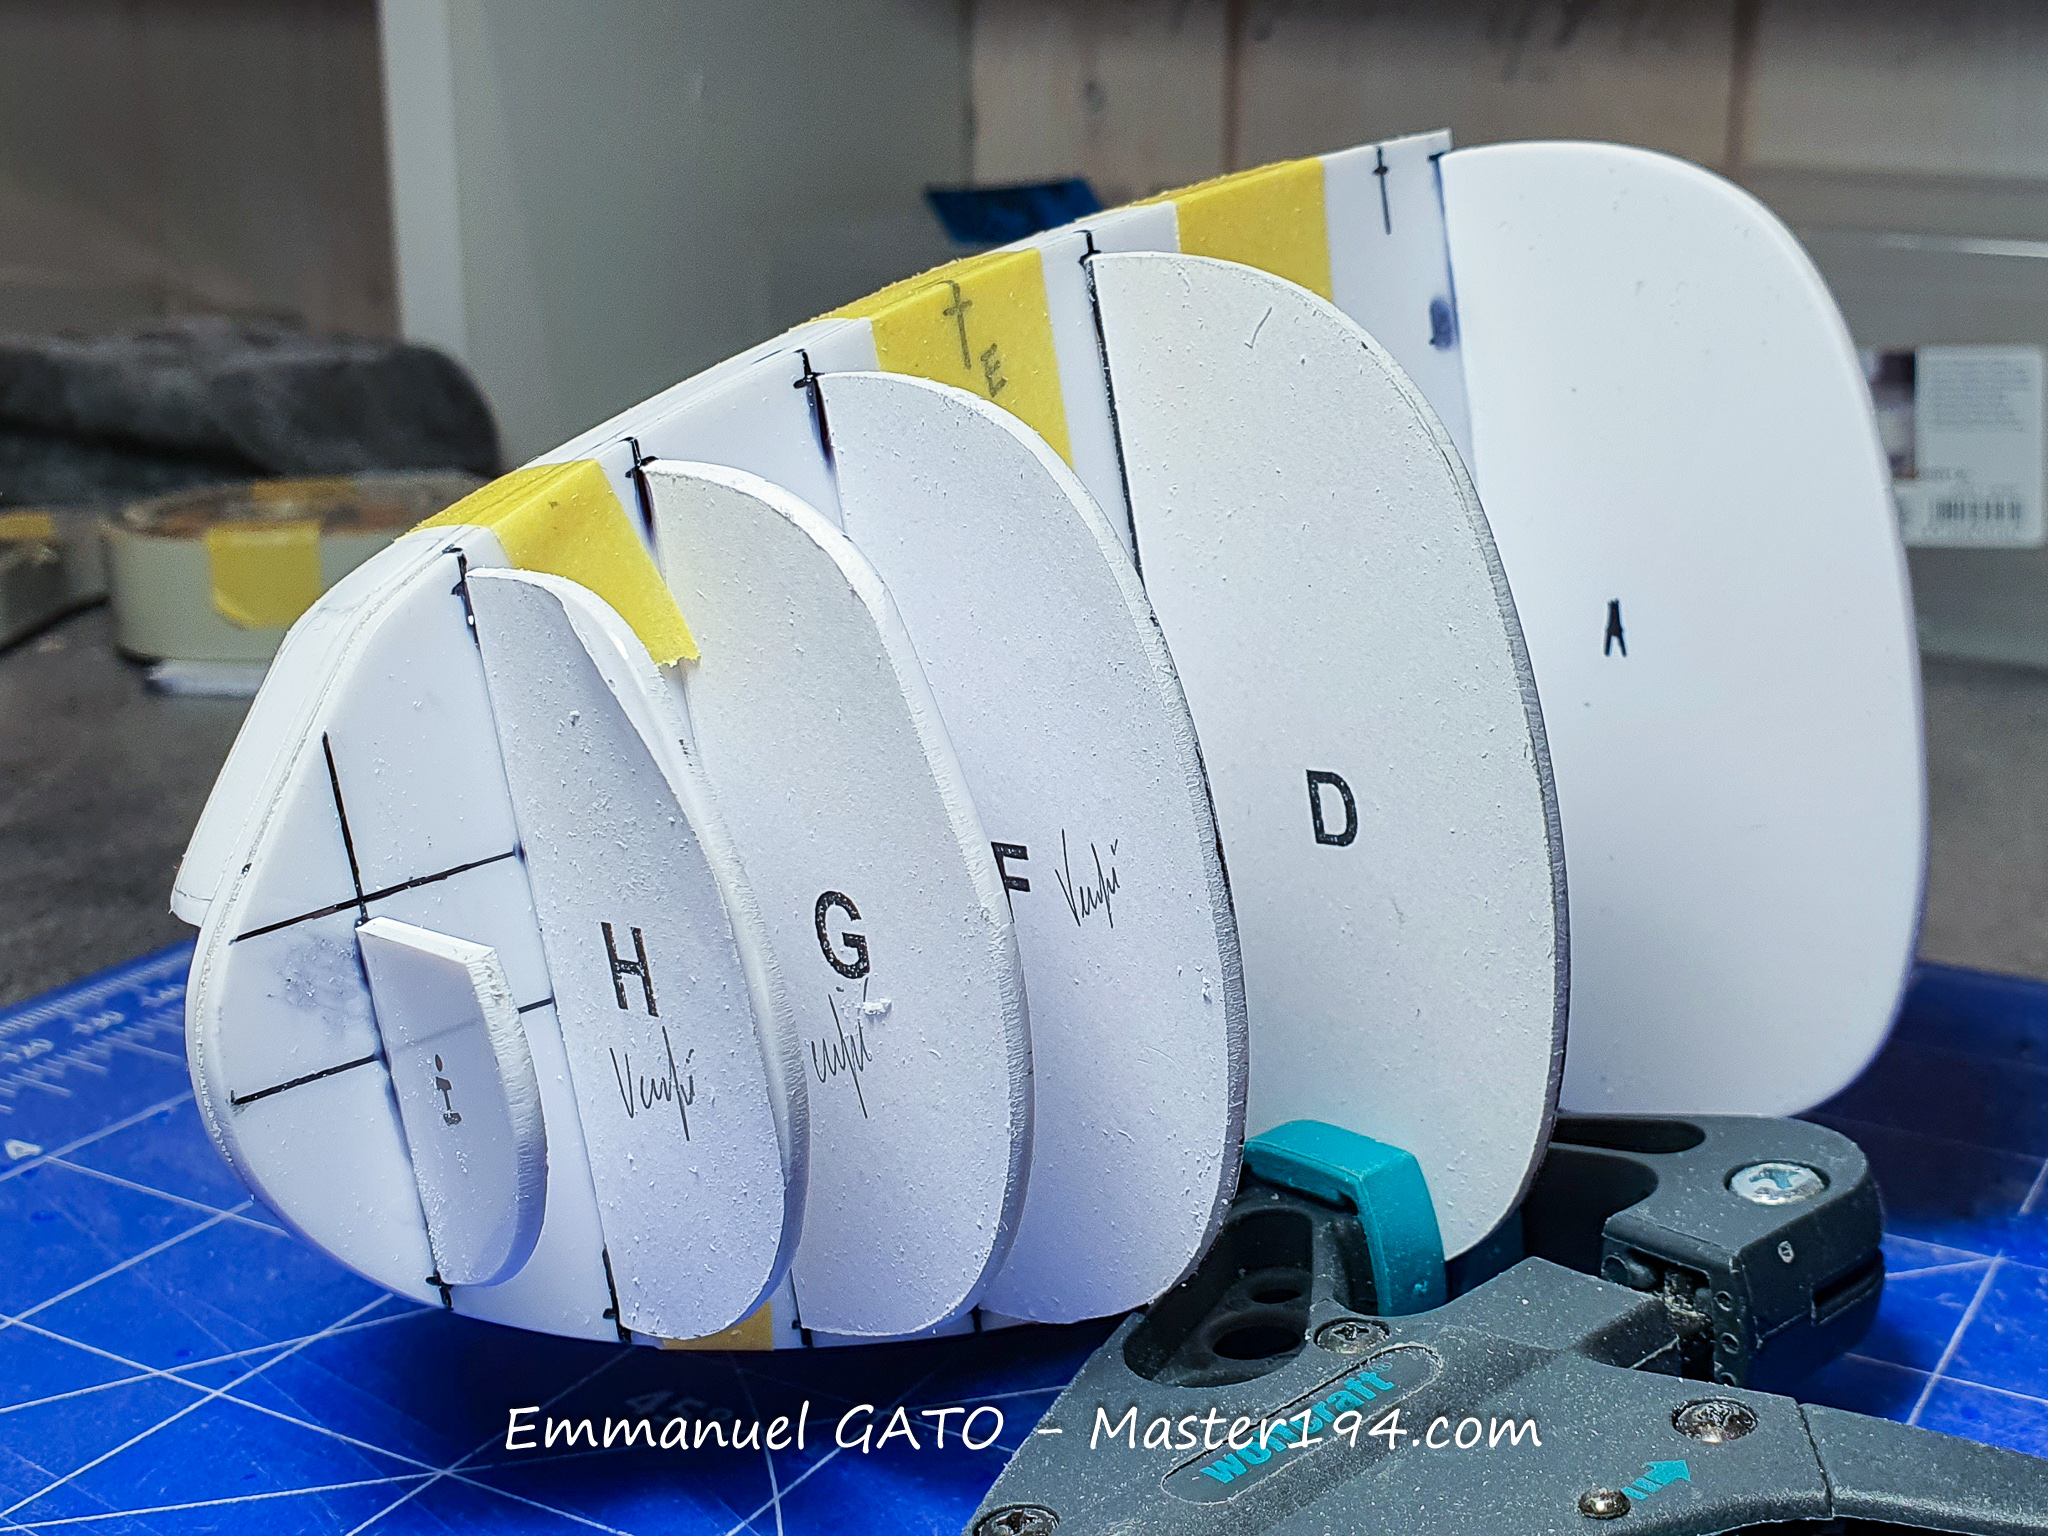
The main challenge of this kit will be fabricating certain metal parts, especially the landing gear and spar structure. The beast is bulky and, consequently, quite heavy. The internal structure will therefore need to be up to the task.
Another piece of research: my friend Michel, a former Noratlas pilot, explained to me that one of the aircraft’s classic missions was transporting a Mirage IV engine for maintenance operations. We will come back to that…
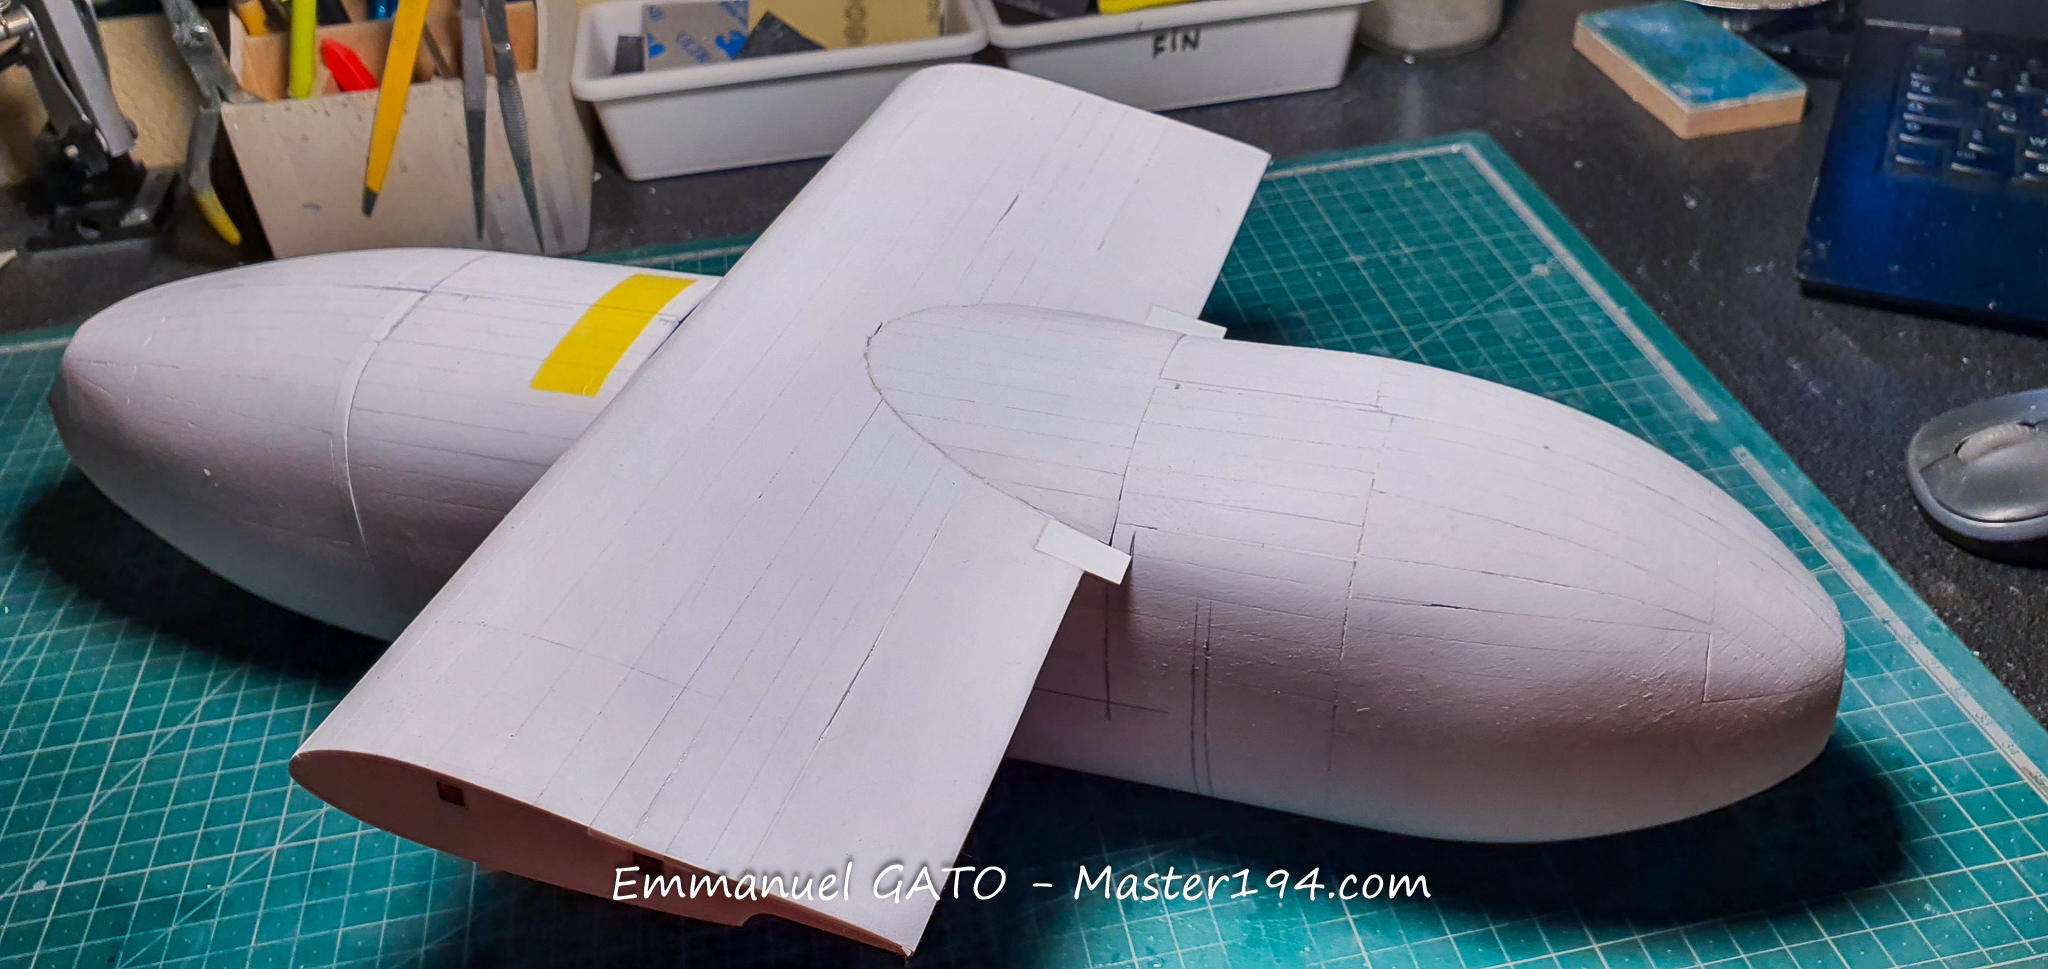
First structures and overall geometry
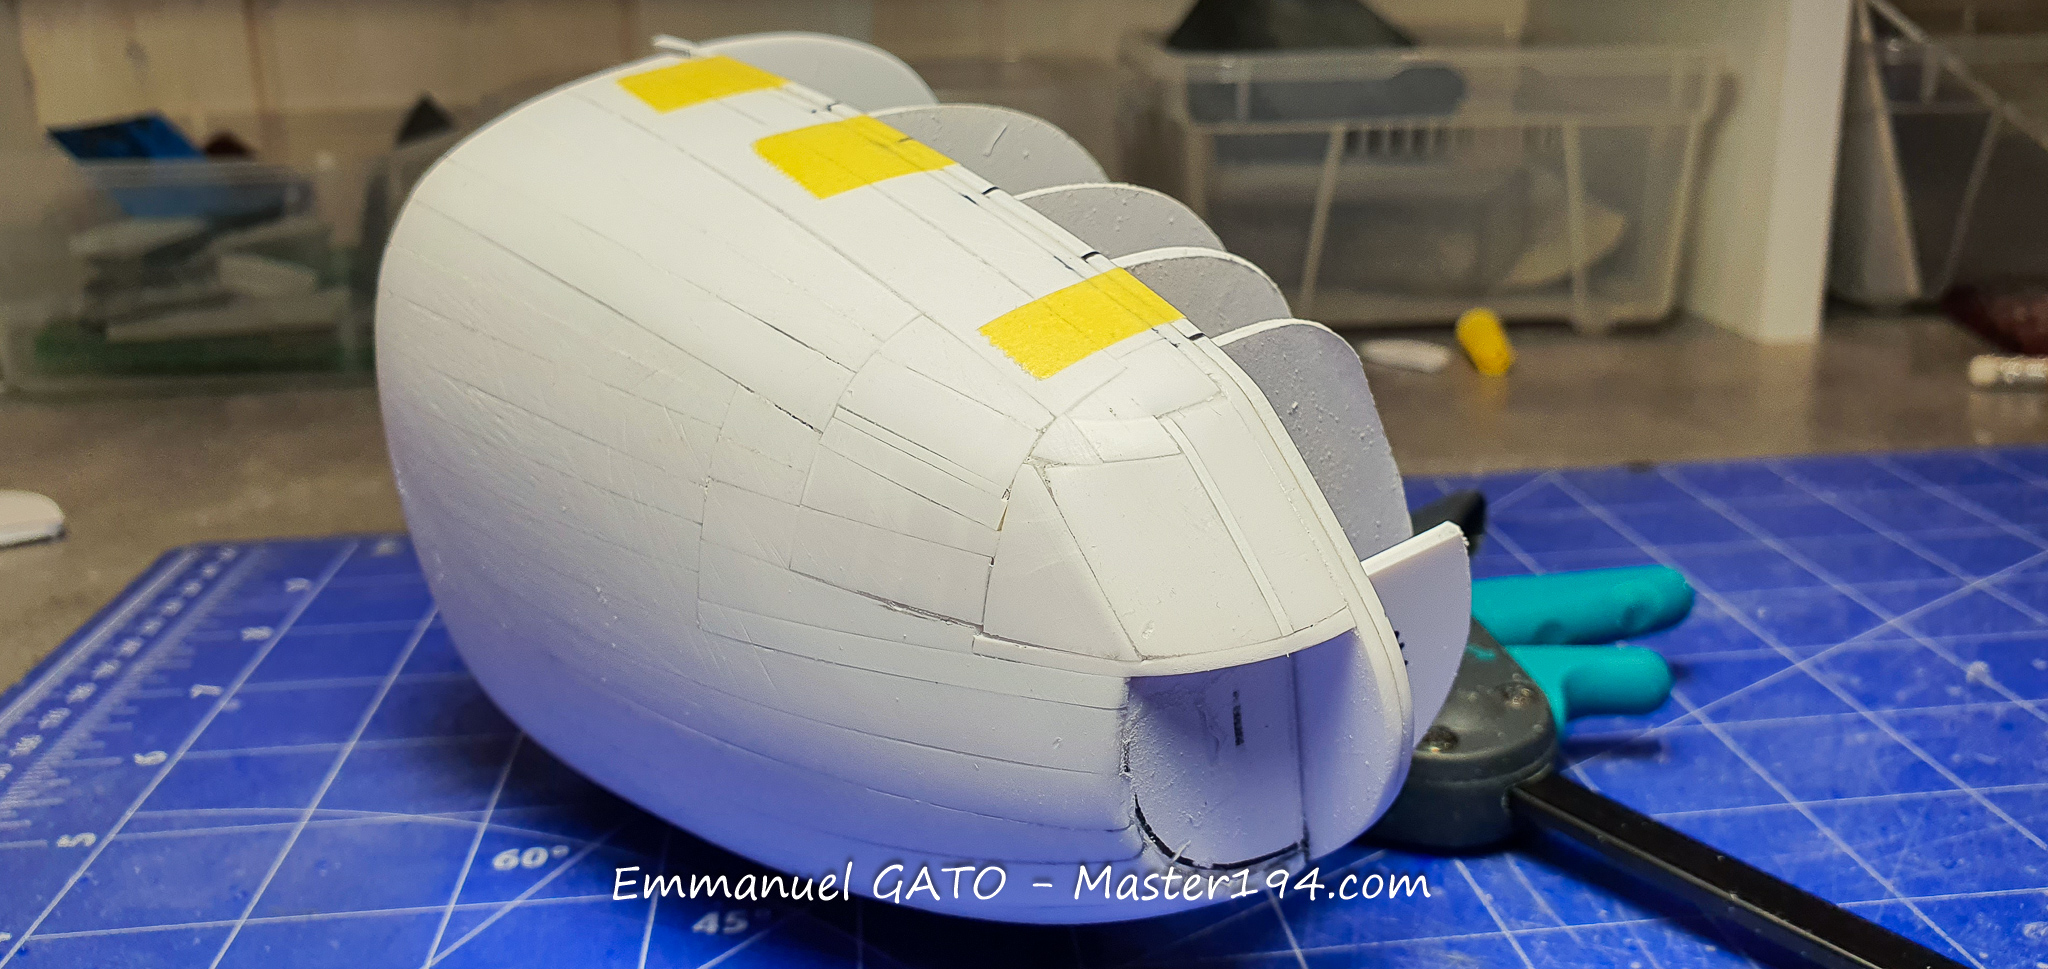
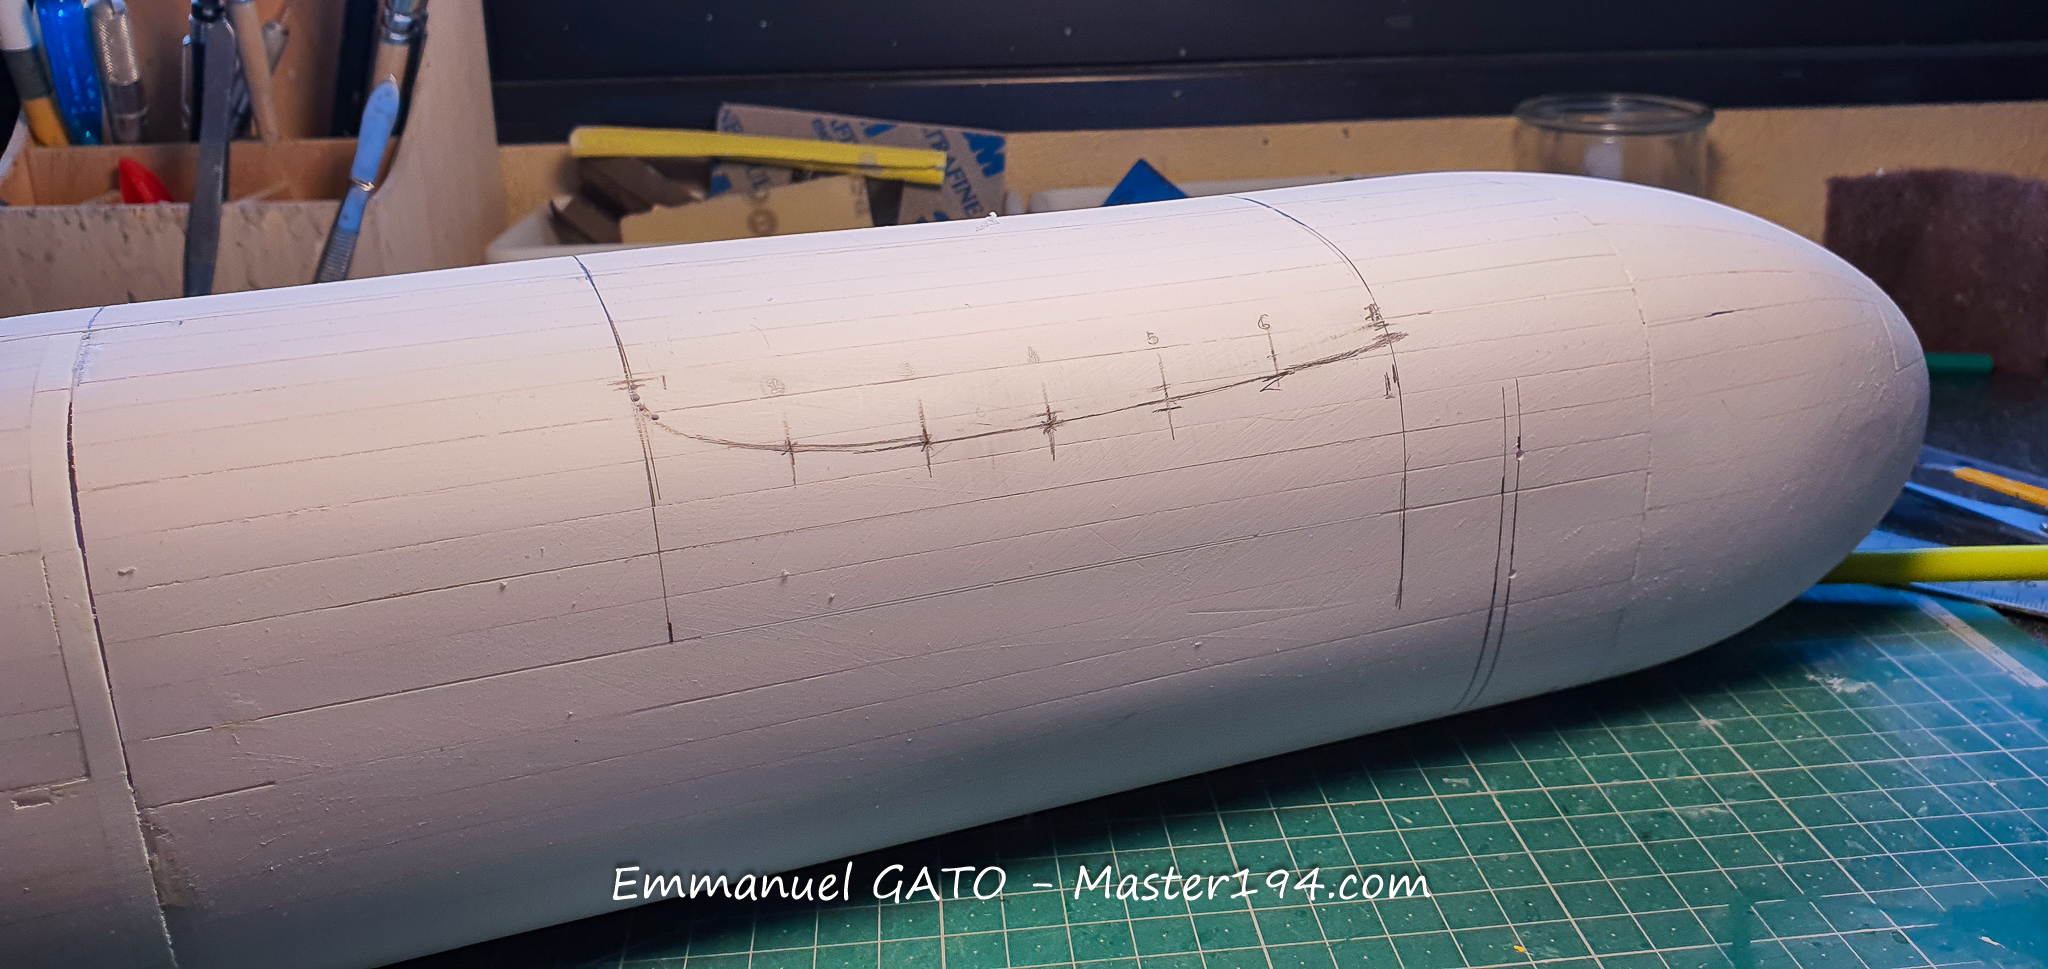
Here are the first results. The point I am proudest of is the level alignment of the internal datum plane. The adjustments were made down to the millimeter so that the cut of the right fuselage half matches the left one seamlessly. With a one-meter wingspan, even a slight flaw here would quickly translate into massive discrepancies out at the wingtips.
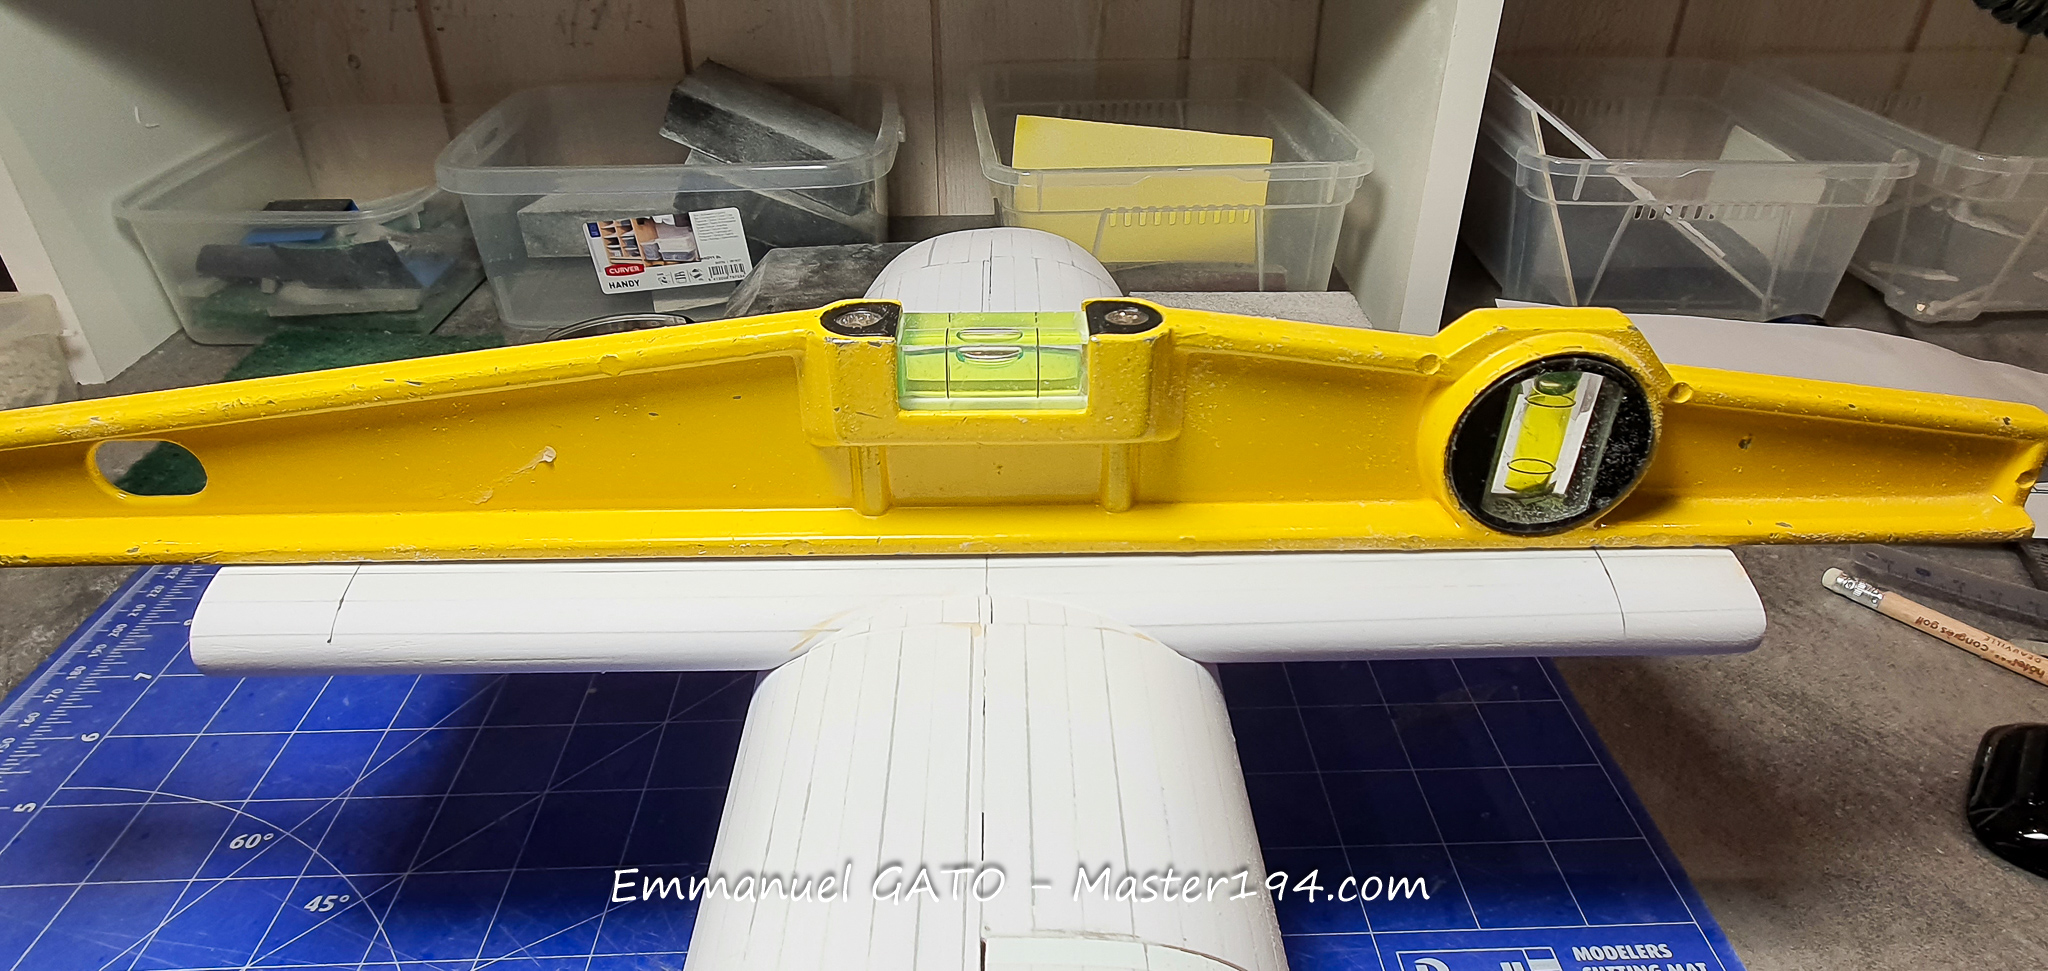
The second photograph shows the construction method for a tail boom. Nothing groundbreaking, but it is starting to be quite a sizeable chunk! I had never built anything this large in my entire modeling career.
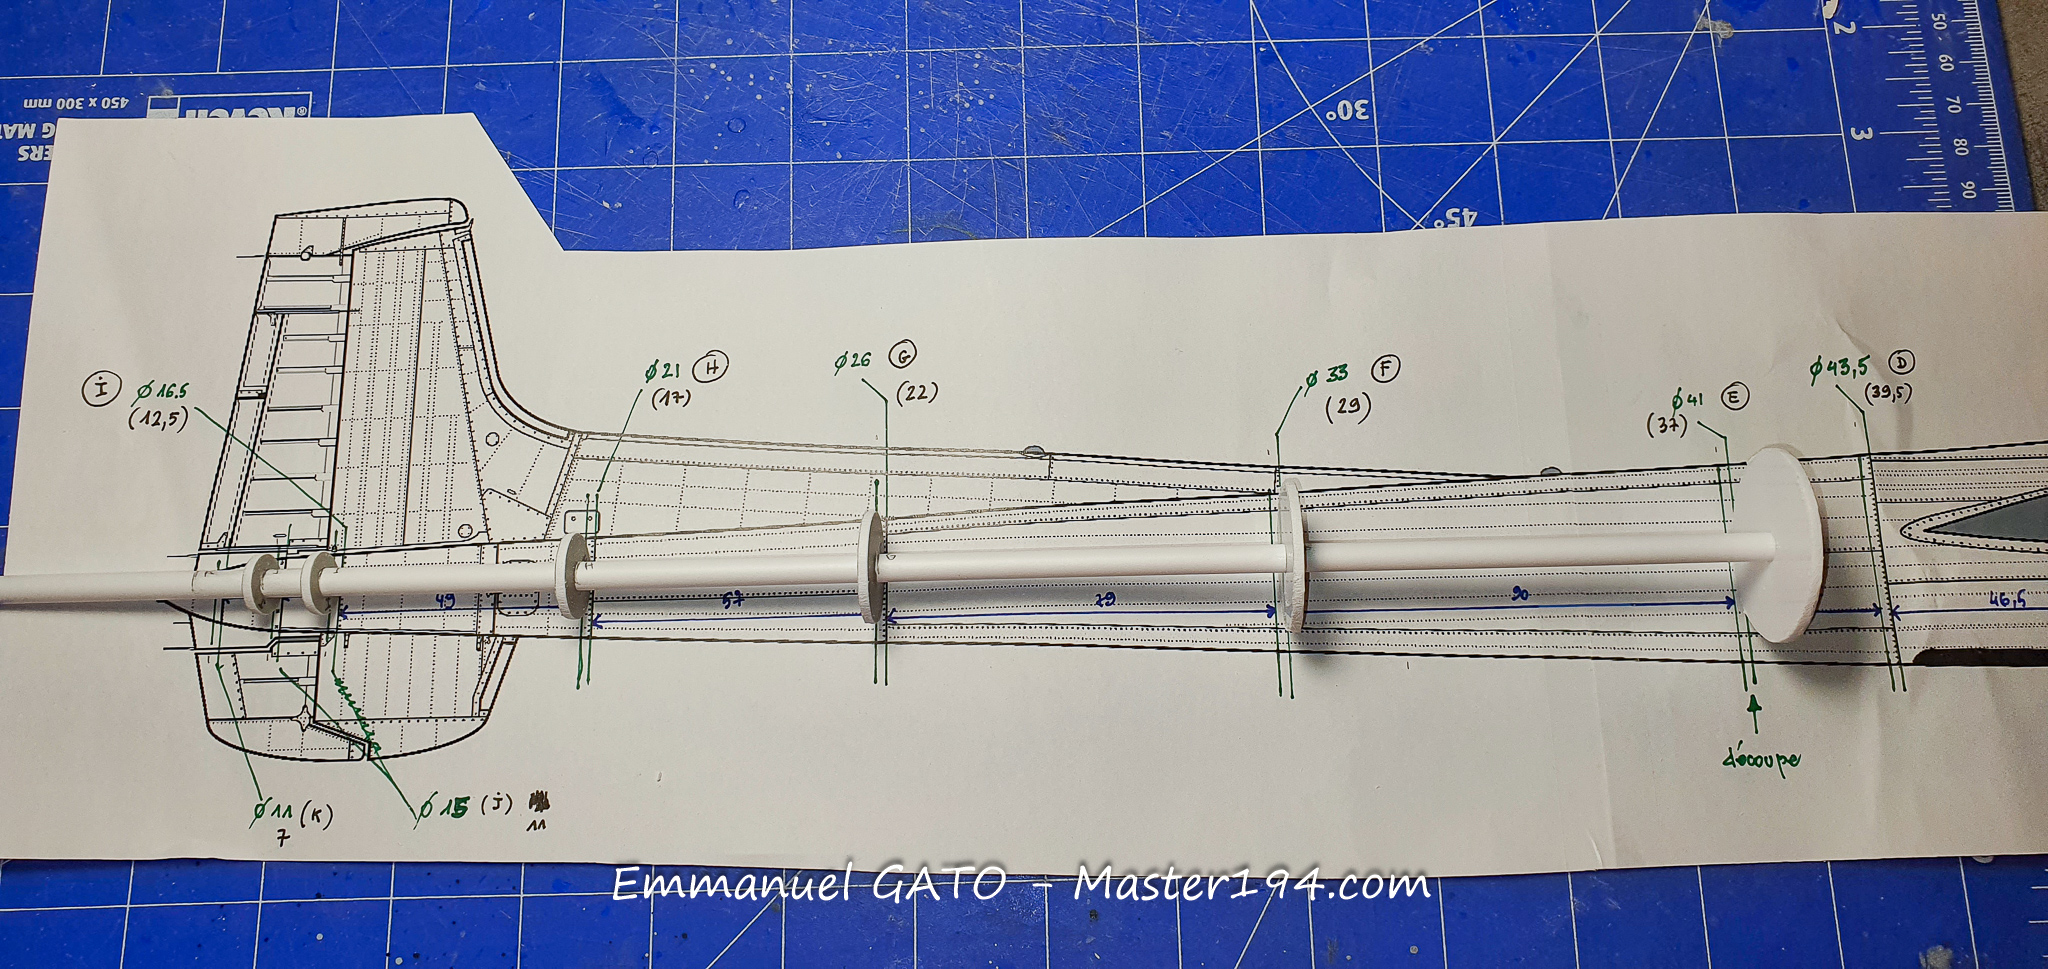
Here is the resulting piece. Fitting it onto the wing won’t be an easy task, though I haven’t settled on my exact method yet.
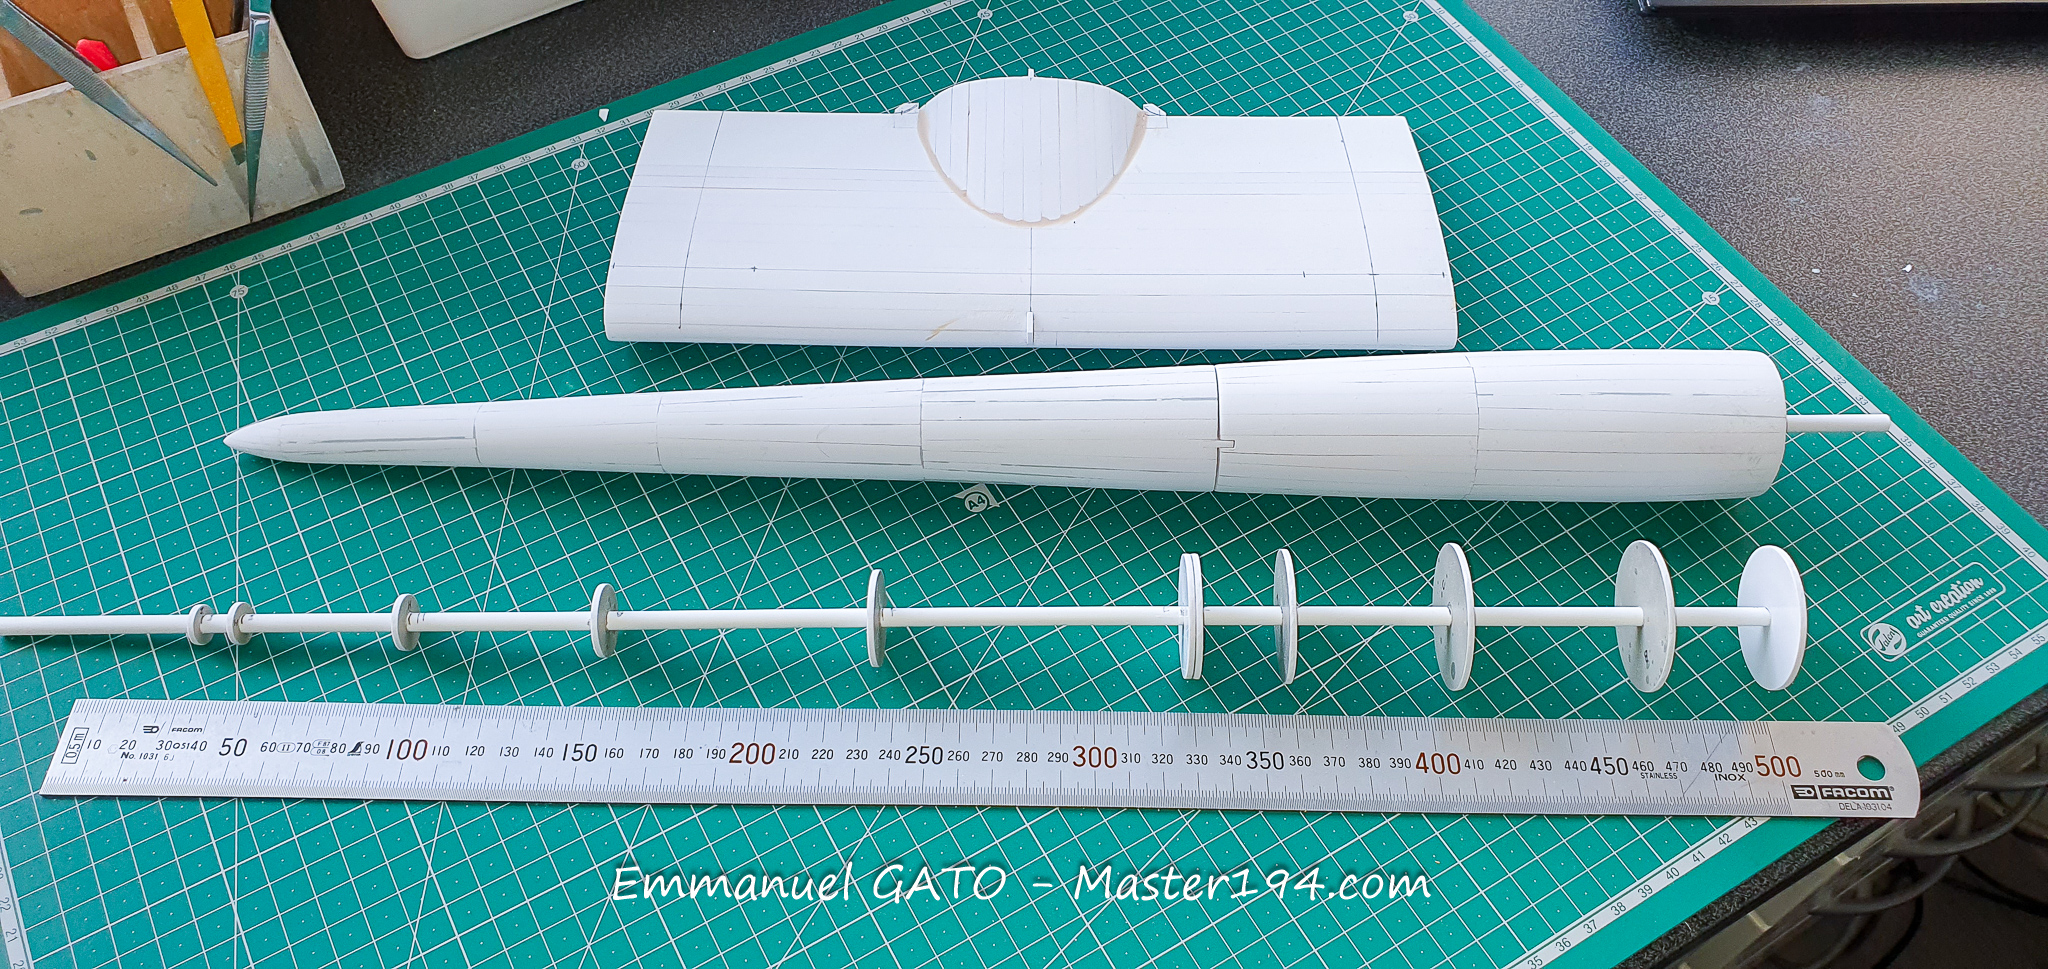
The first sub-assemblies are now brought together. The whole thing is already taking up quite a bit of bench space! My goal is to build the entire airframe first and capture its distinctive geometry before starting on the interior detailing. Indeed, the model will be displayed with the rear clamshell doors open.
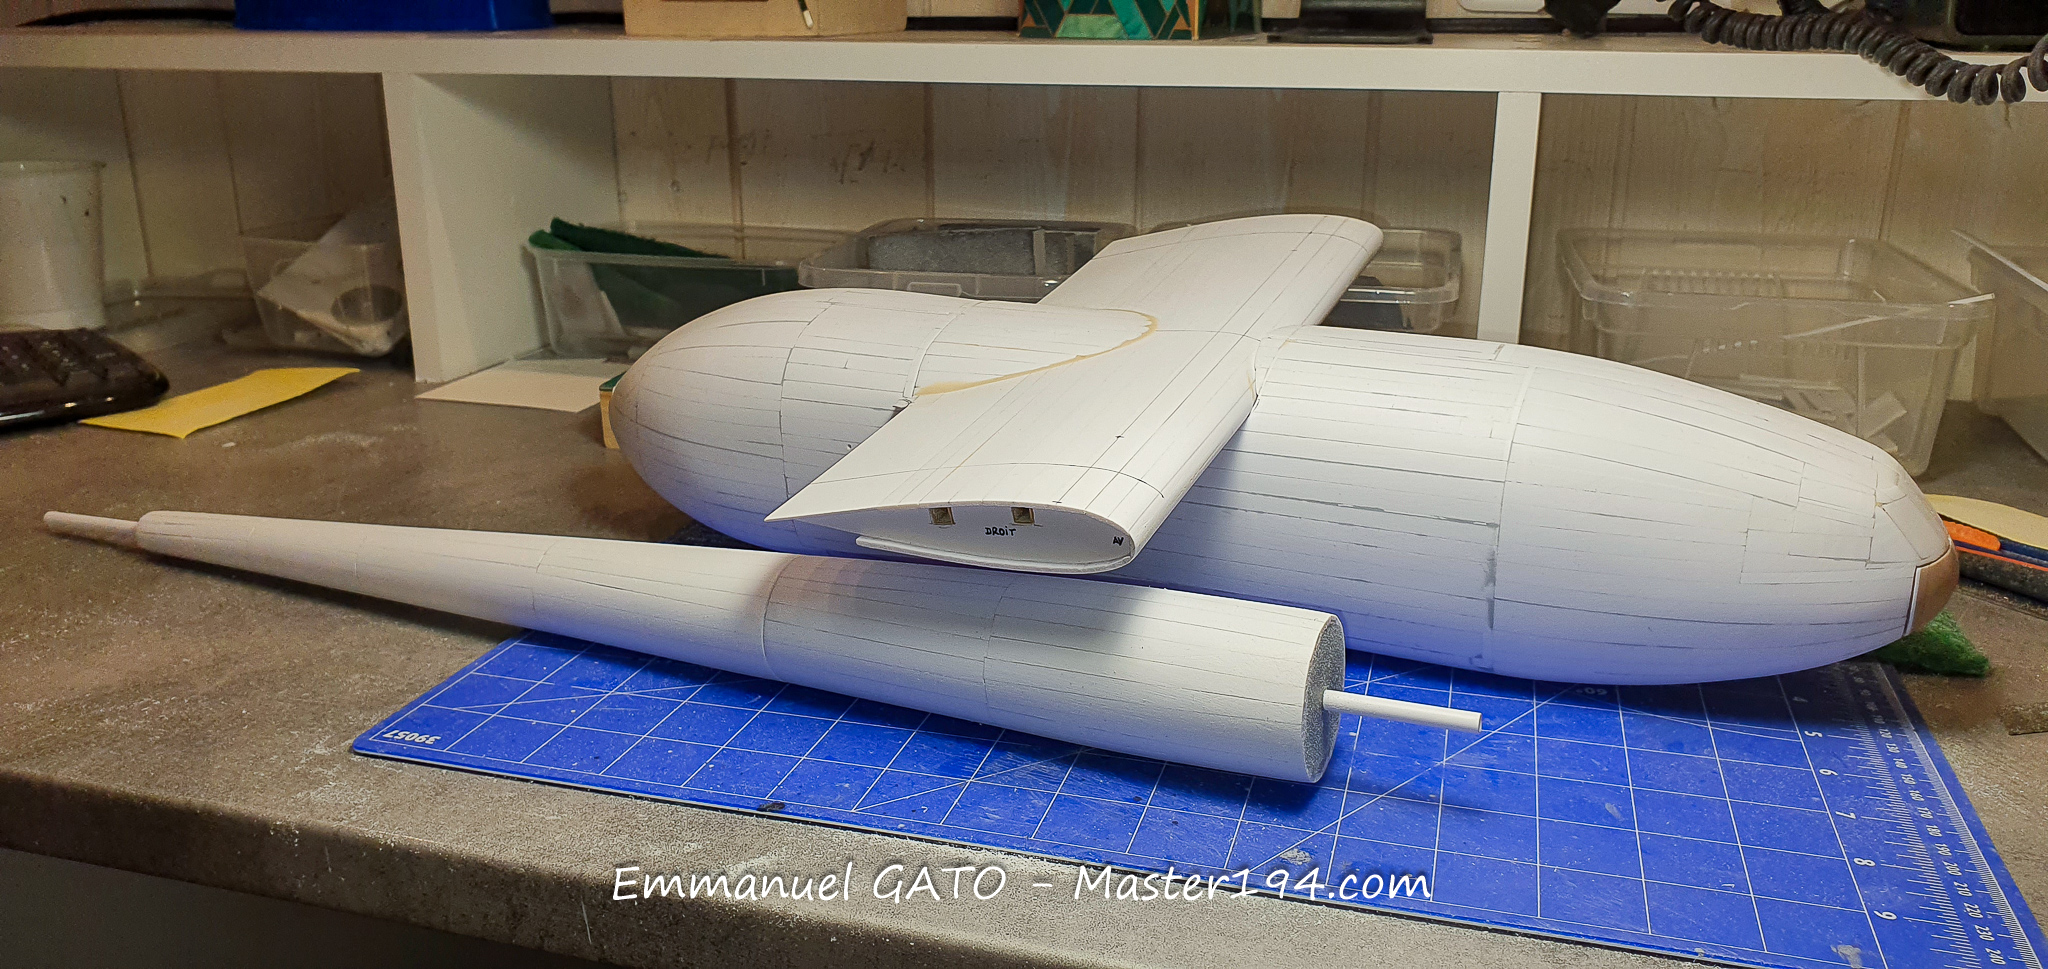
To answer a question about how the tail booms were built, I chose to stick with the same material rather than mixing different media over a small section. I am a compulsive user of plastic [styrene], which offers great qualities in terms of crispness and strength.
The “soul” (core) of the tail boom is simply made of an Evergreen plastic tube. It serves to center washers of various diameters that then support the plastic strips. I chose this solution because the tube will eventually need to be cut to clear the main landing gear wells. Doing this in metal would have been much trickier in such a confined space.
For the second tail boom, I left a section open to show the rough framing of the future wheel well.
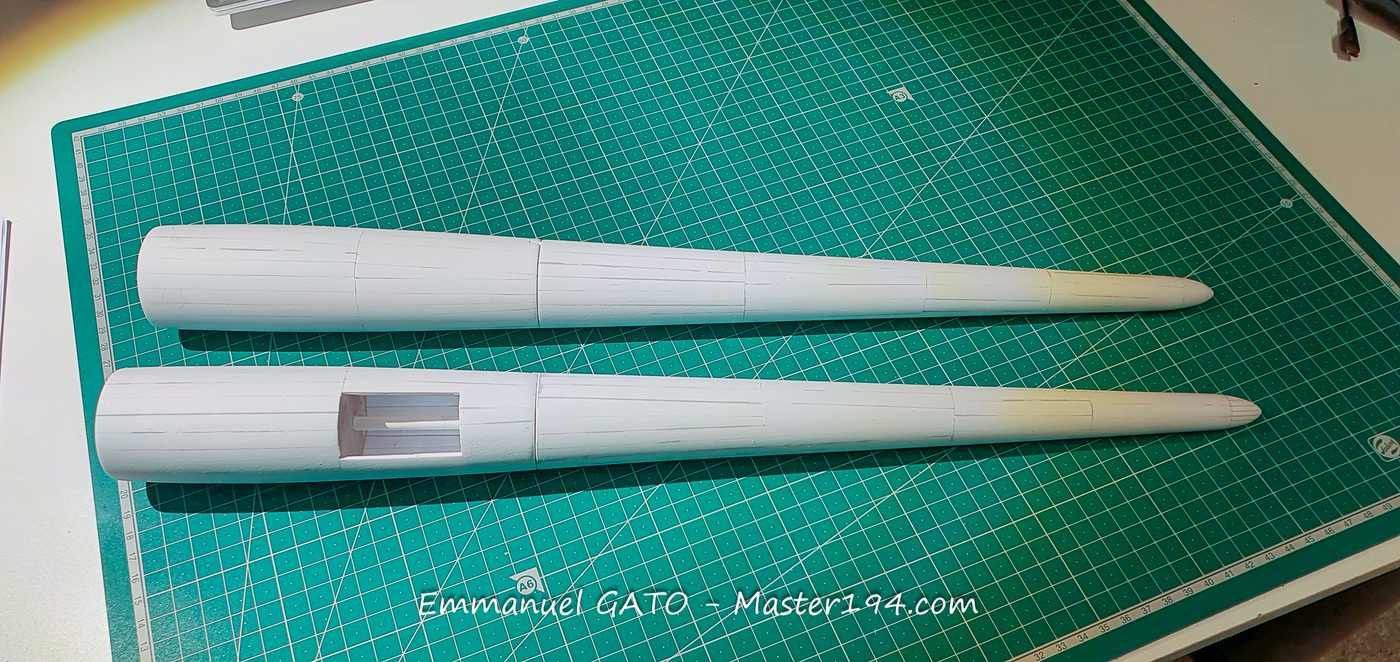
I am also considering making the outer wings detachable. A one-meter wingspan is, after all, gigantic and quite impractical to transport. I had initially considered assembly cams like the ones found in flat-pack furniture, but the available models are far too large. I will have to find another solution.
Not the sexiest aircraft in the world, but I’m ending up growing fond of it! In any case, the kit does not lack challenges.
The first one is maintaining proper alignment across the entire assembly when the various segments measure several dozen centimeters. A shift of one or two millimeters can result in a catastrophic misalignment half a meter further out. A spirit level has therefore become a permanent companion on the workbench.
After considering several solutions, I finally resolved to make the outer wings detachable. The challenge will be designing a mounting system that is strong enough and, above all, virtually invisible once the wing is in place. After discussing it with a fellow modeler, I am leaning toward a threaded rod screwed in from the wingtip to clamp the two sections tightly together.
Here is the progress on this structure.
The wing box features a cutout that will fit into the landing gear well, and onto which the landing gear strut will articulate.
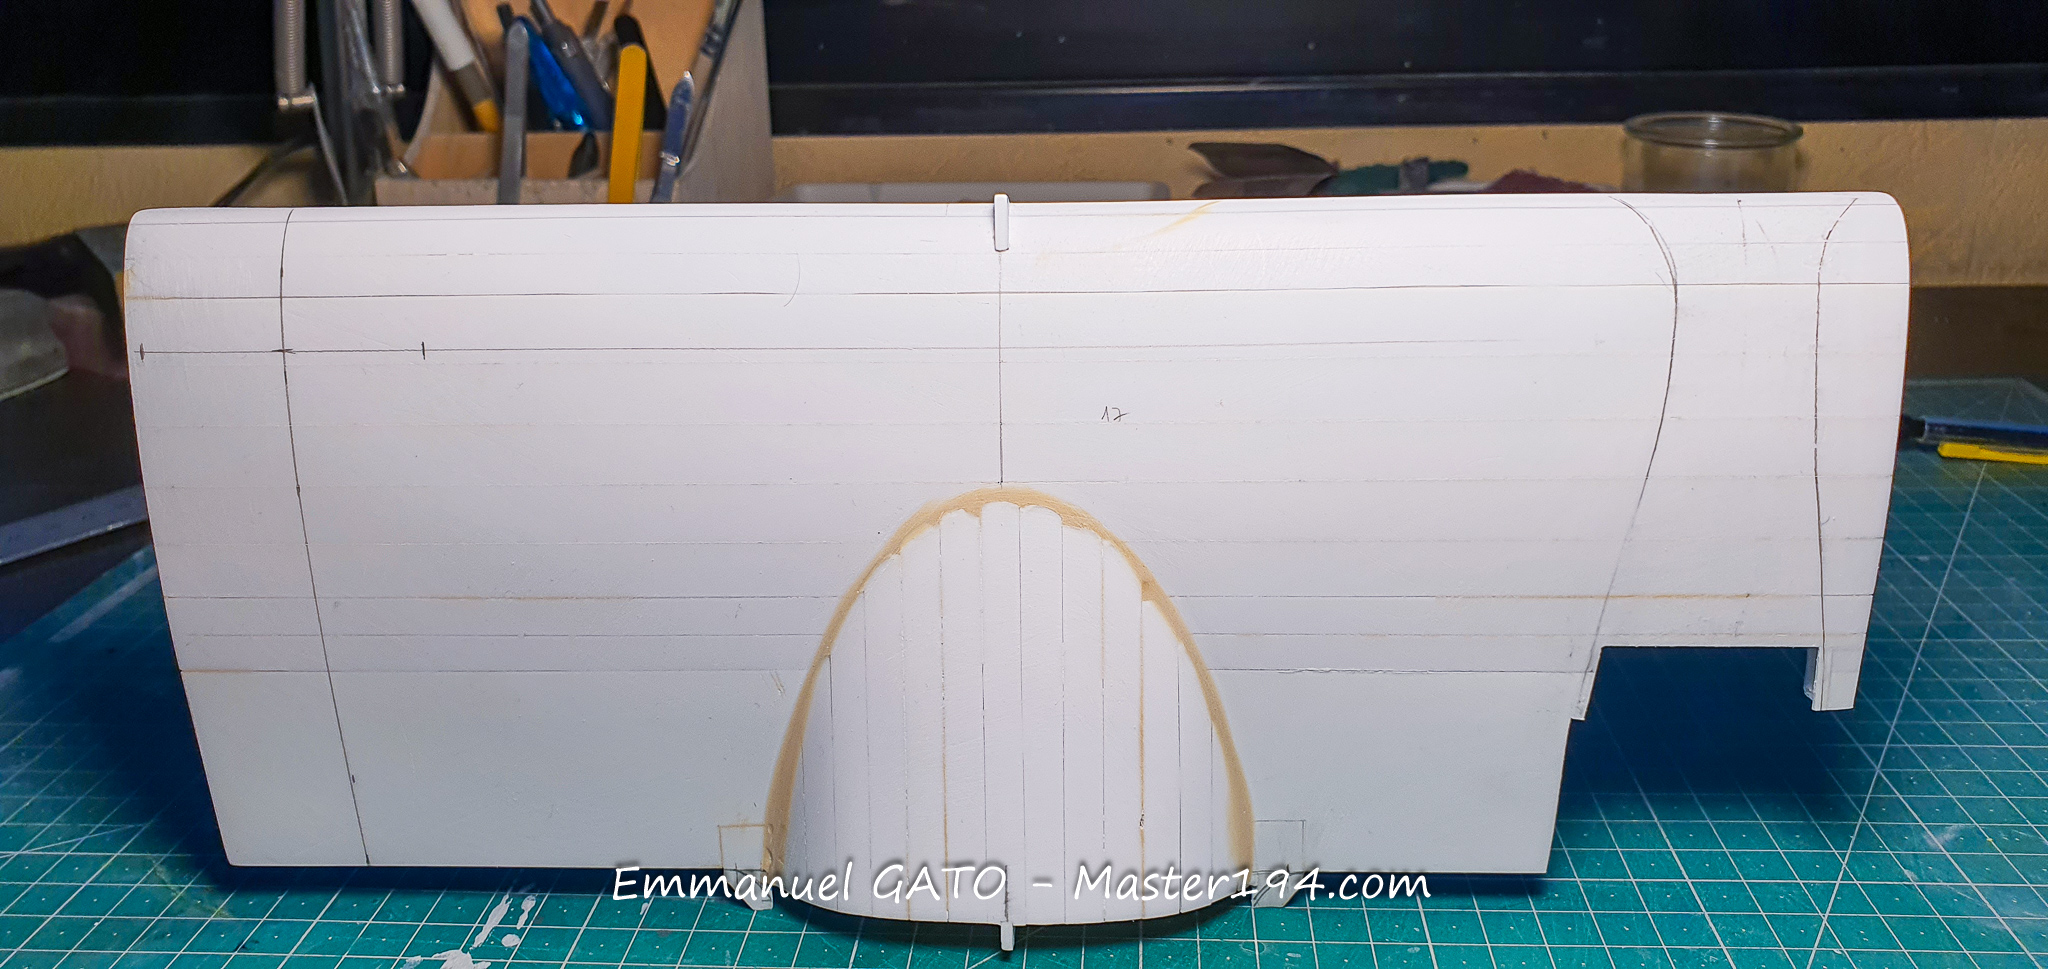
Both engine nacelles have been drilled out to allow the wing spar box to pass through. This operation requires extremely precise adjustments, particularly by filing, to preserve the symmetry of the model.
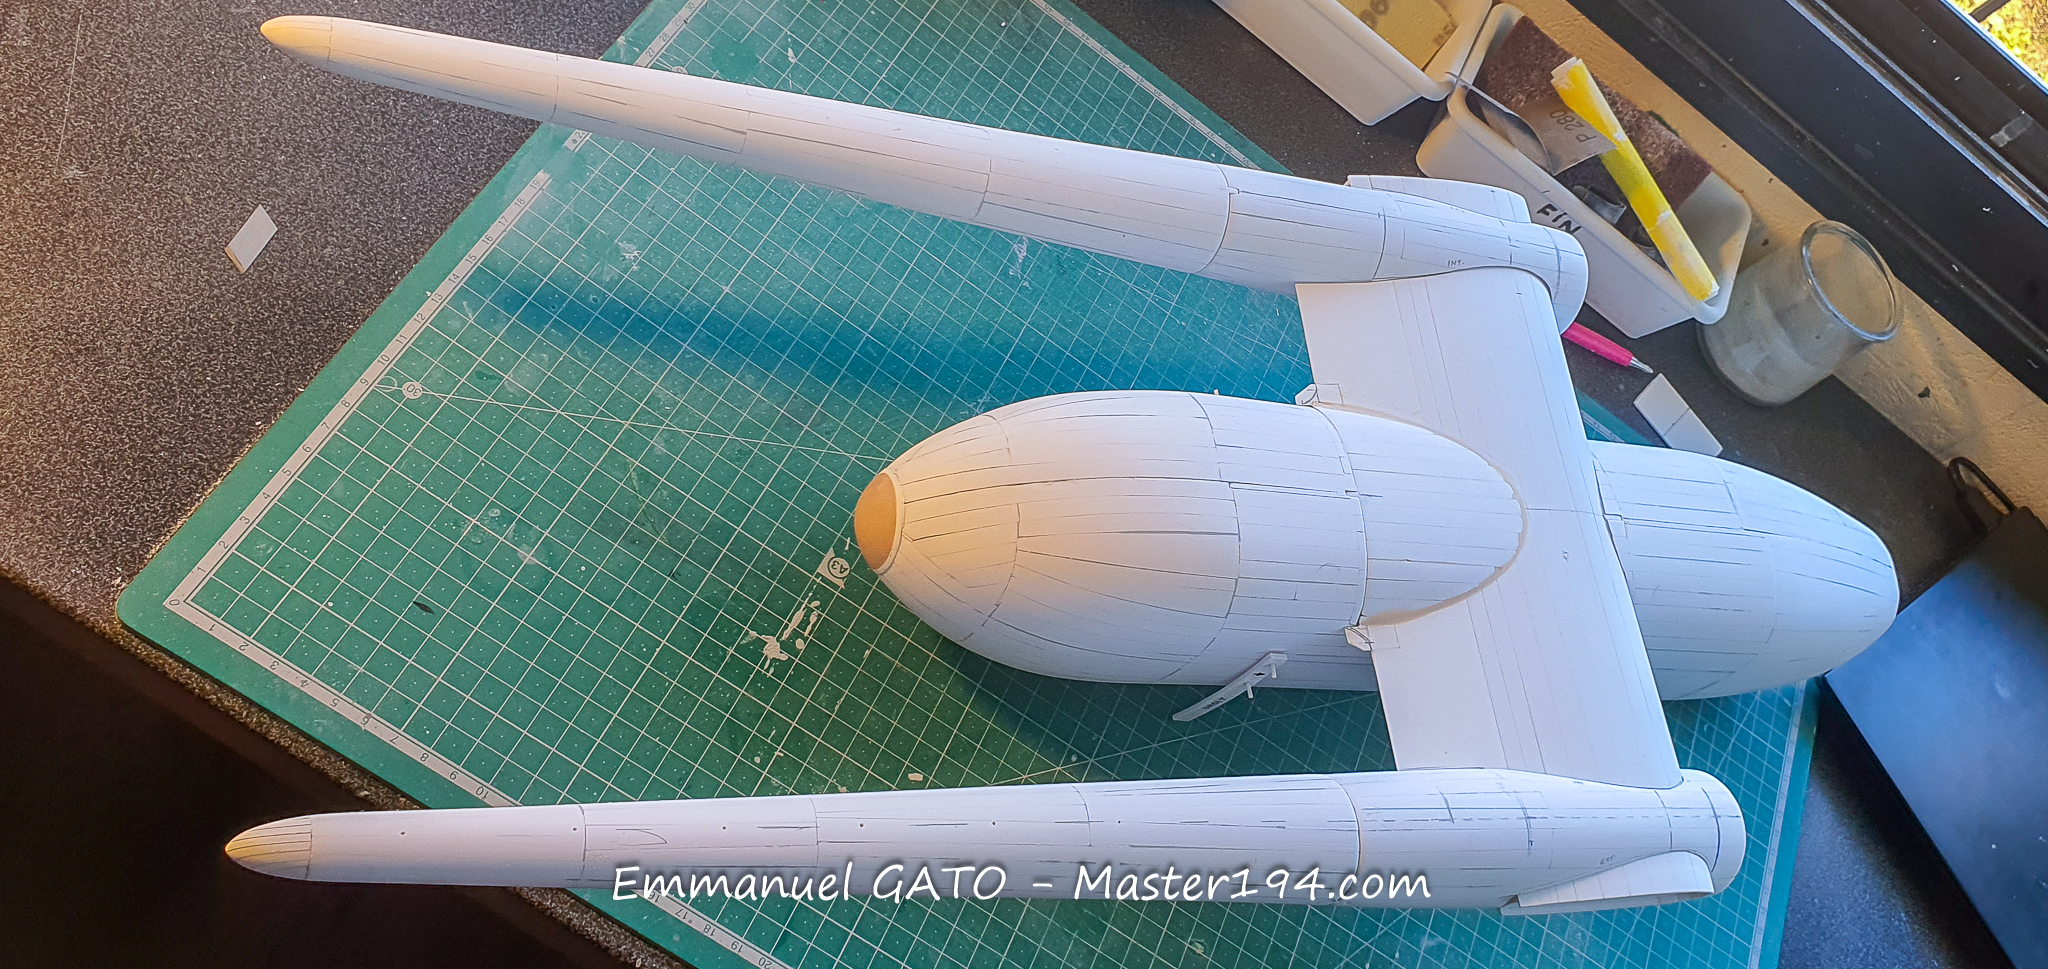
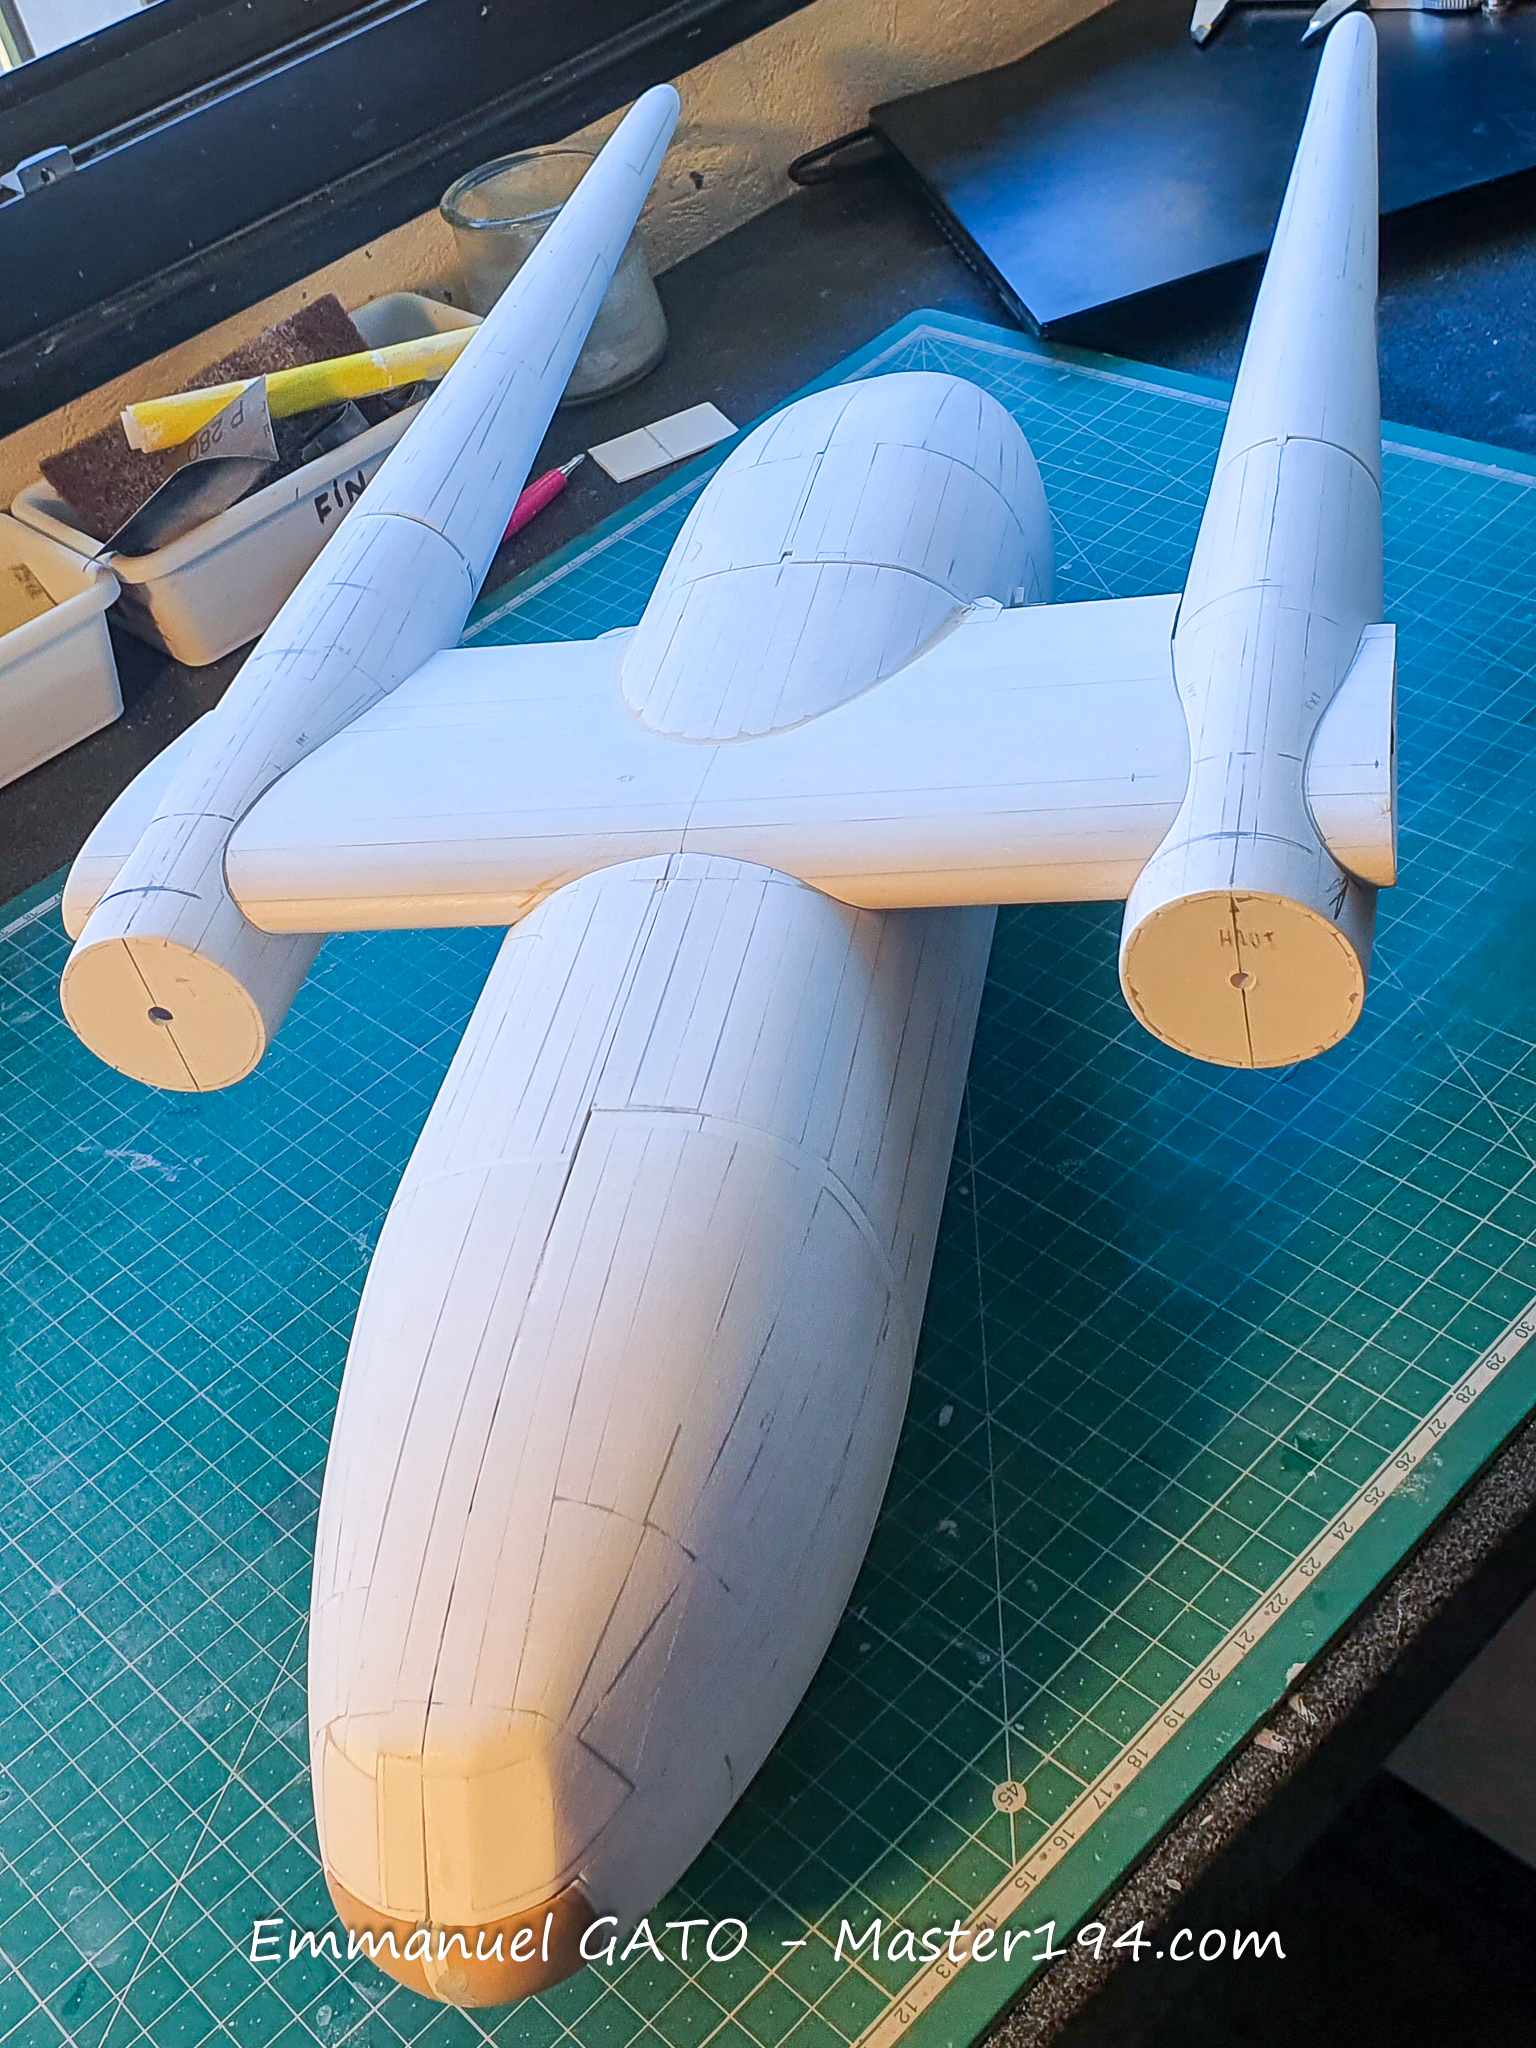
The overall geometry of the aircraft is now firmly in place, complete with the tail booms, empennage, and engine cowlings. Capturing those dumpy yet so characteristic shapes of the Noratlas is a real challenge. The slightest error in shape or profile would immediately jump out to an expert’s eye.
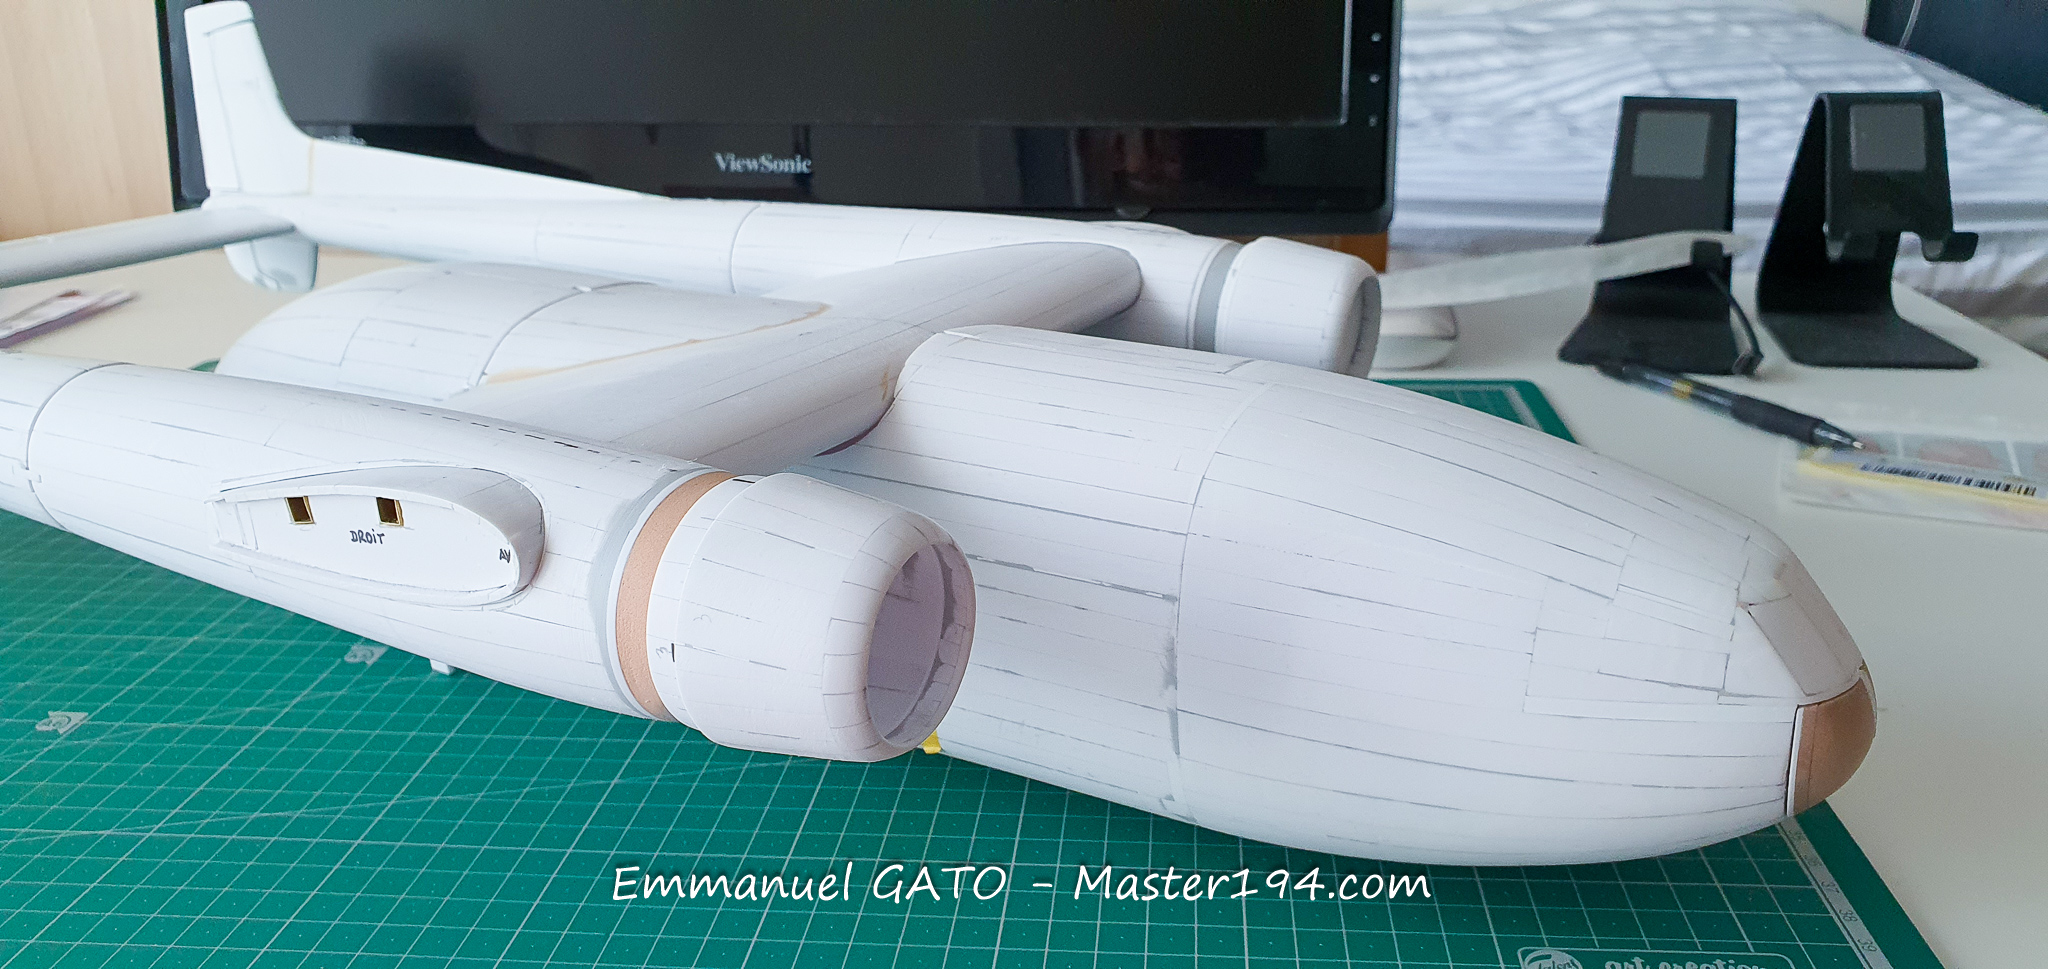
Despite the size of the model, I am pleased to remain within a one-millimeter tolerance across the whole assembly. I wouldn’t have believed it at the start!
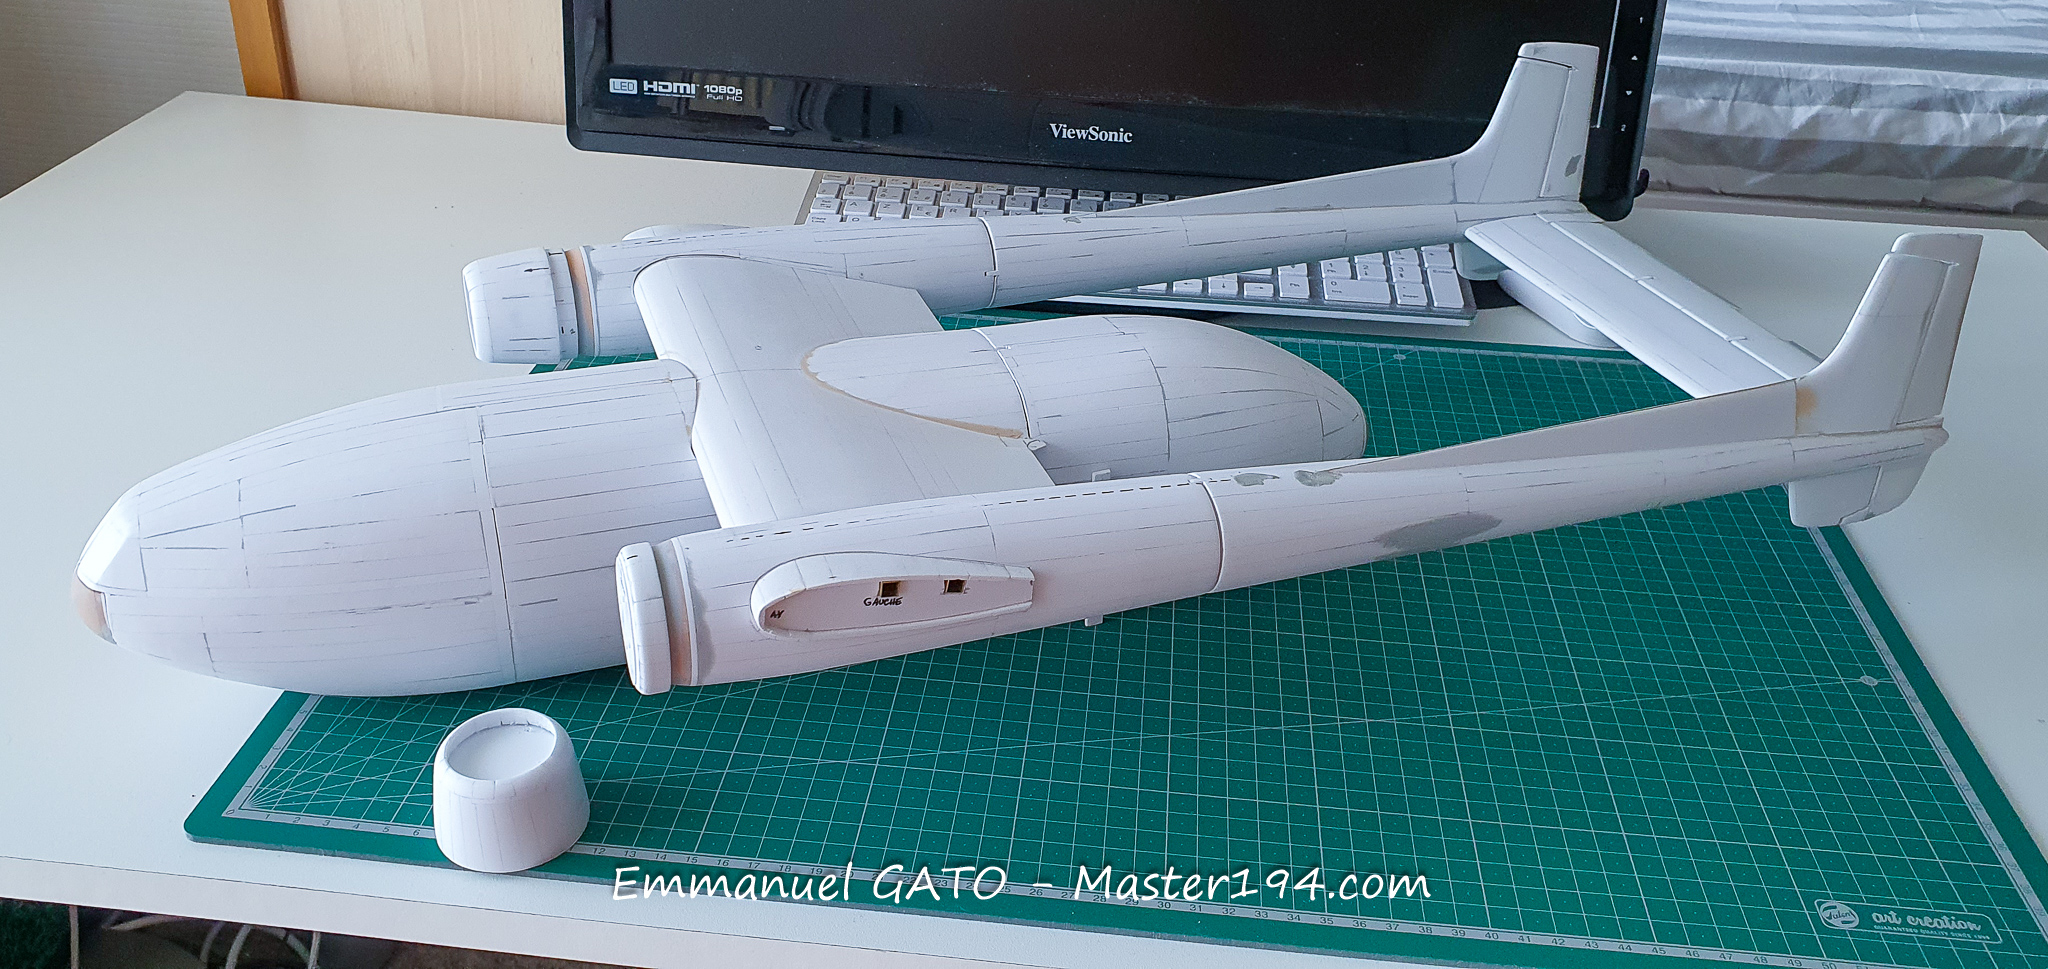
Once the engine cowlings are finished, I can tackle the landing gear. Given the weight of the model, it will be made of metal using Albion Alloy tubing. As an indication, the outer diameter of the main strut already reaches 6 mm.
The outer wings have now been added. The visual impact is quite impressive: the wingspan slightly exceeds one meter! In the photograph, the wings are simply put in place and are not yet tightened down. The visible joint therefore does not reflect the final state. The particularly fragile trailing edge is reinforced with a 0.3 mm flat strip to prevent any dents during handling.
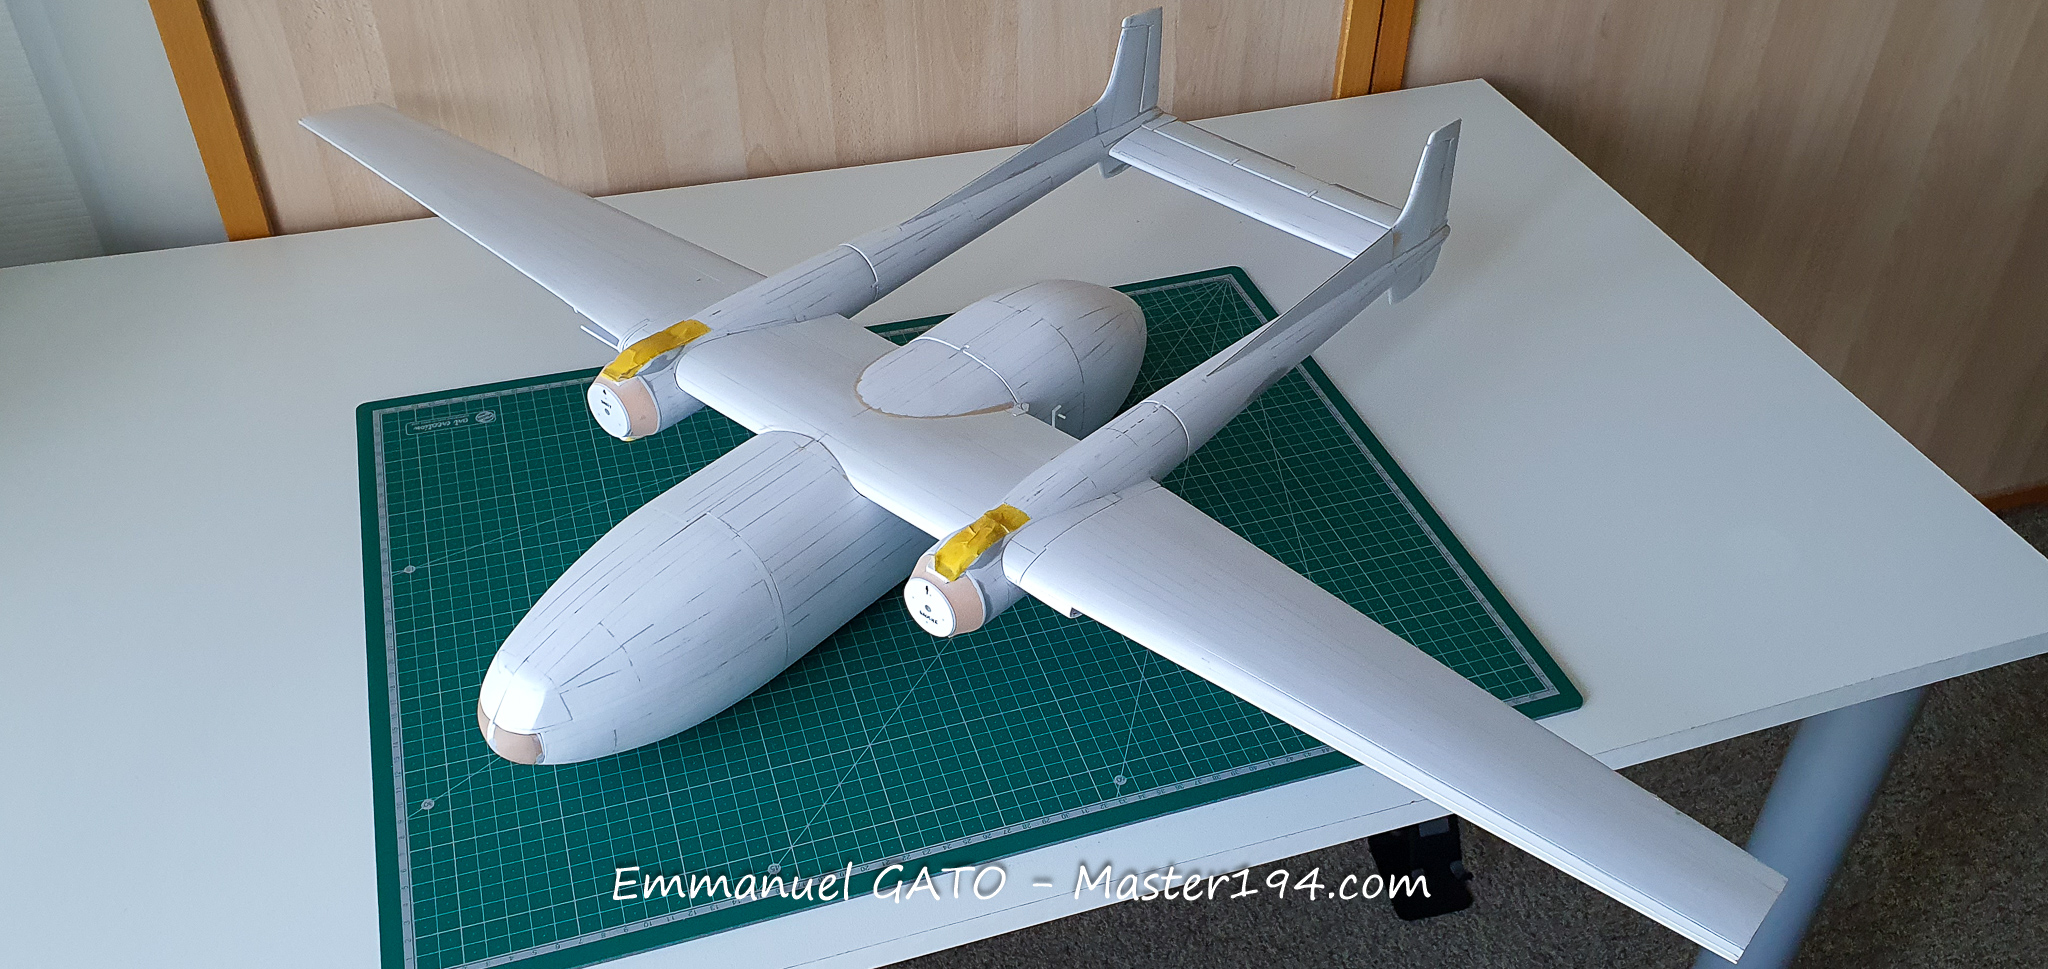
The main challenge remains making them cleanly detachable, with an almost invisible joint. At times I was tempted to glue everything permanently and use filler, but I only need to think about the space required to store or transport the model to regain my motivation.
The internal structure of the wings is quite complex and makes extensive use of Albion Alloys profiles. Two square-section profiles make up the spar box. A round tube allows the passage of the 3 mm threaded rod which, tightened from the wingtip, will secure the wing during display. The wingtip will also be removable to conceal the Parker screw.
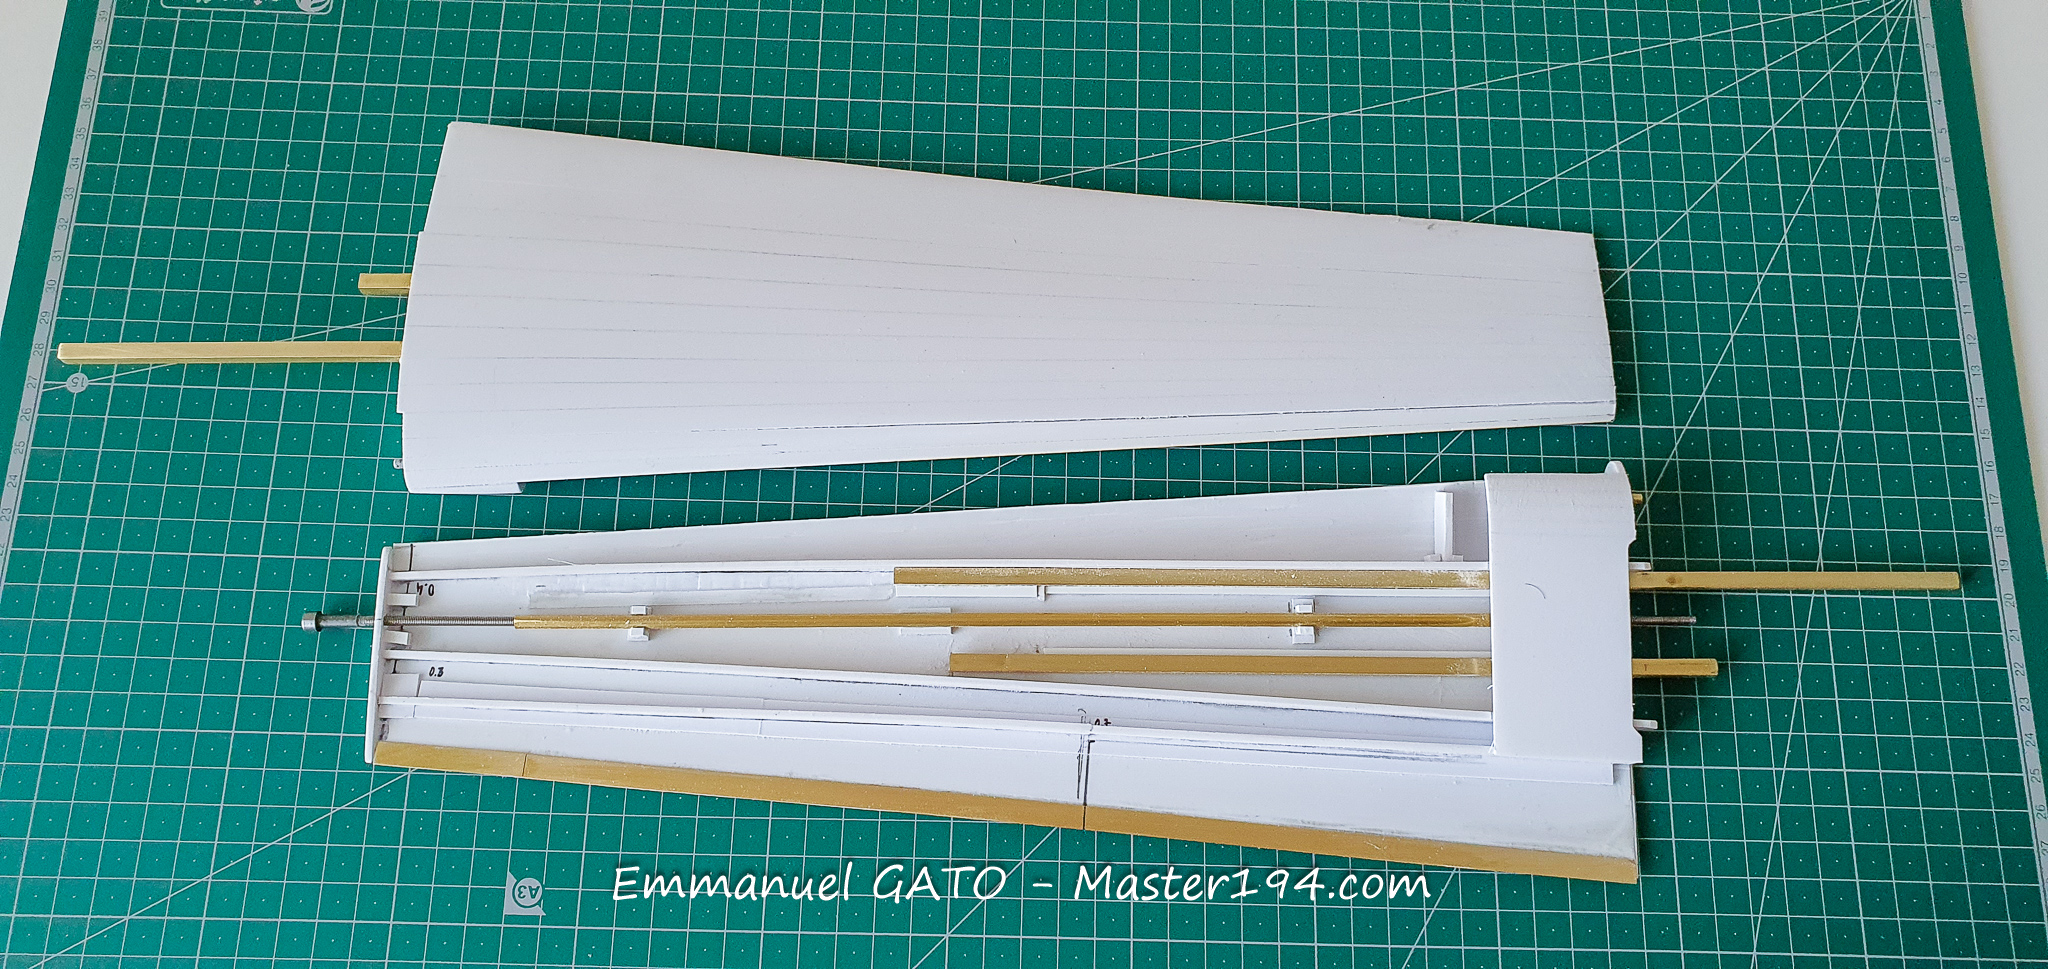
In the photograph, the wings are simply put in place and are not yet tightened down. The visible joint therefore does not reflect the final state. The particularly fragile trailing edge is reinforced with a 0.3 mm flat strip to prevent any dents during handling.
To give an idea of the weight, the complete wing box—without the lower surface or flaps—already weighs 500 grams. The landing gear will have its work cut out for it!