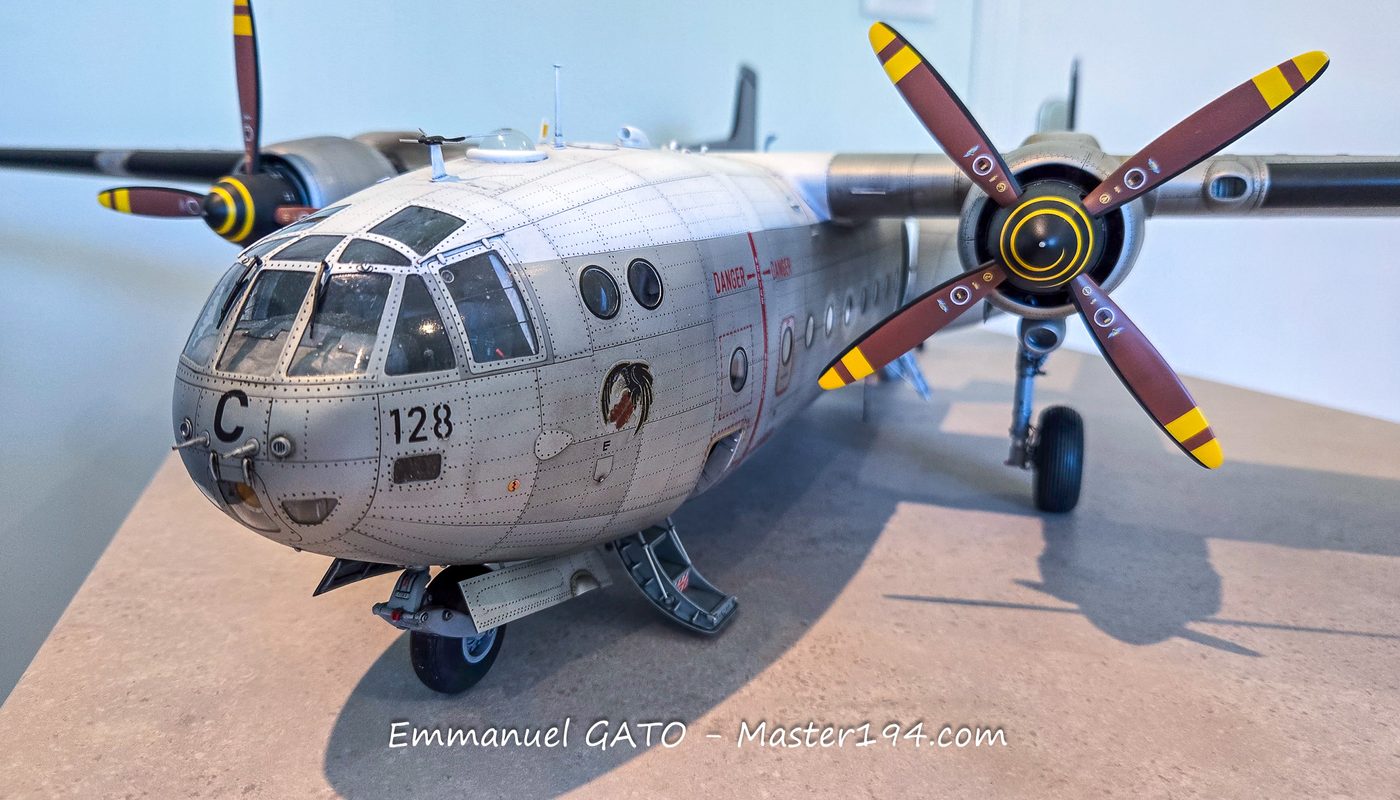
 by
The rear clamshell doors and nose gear
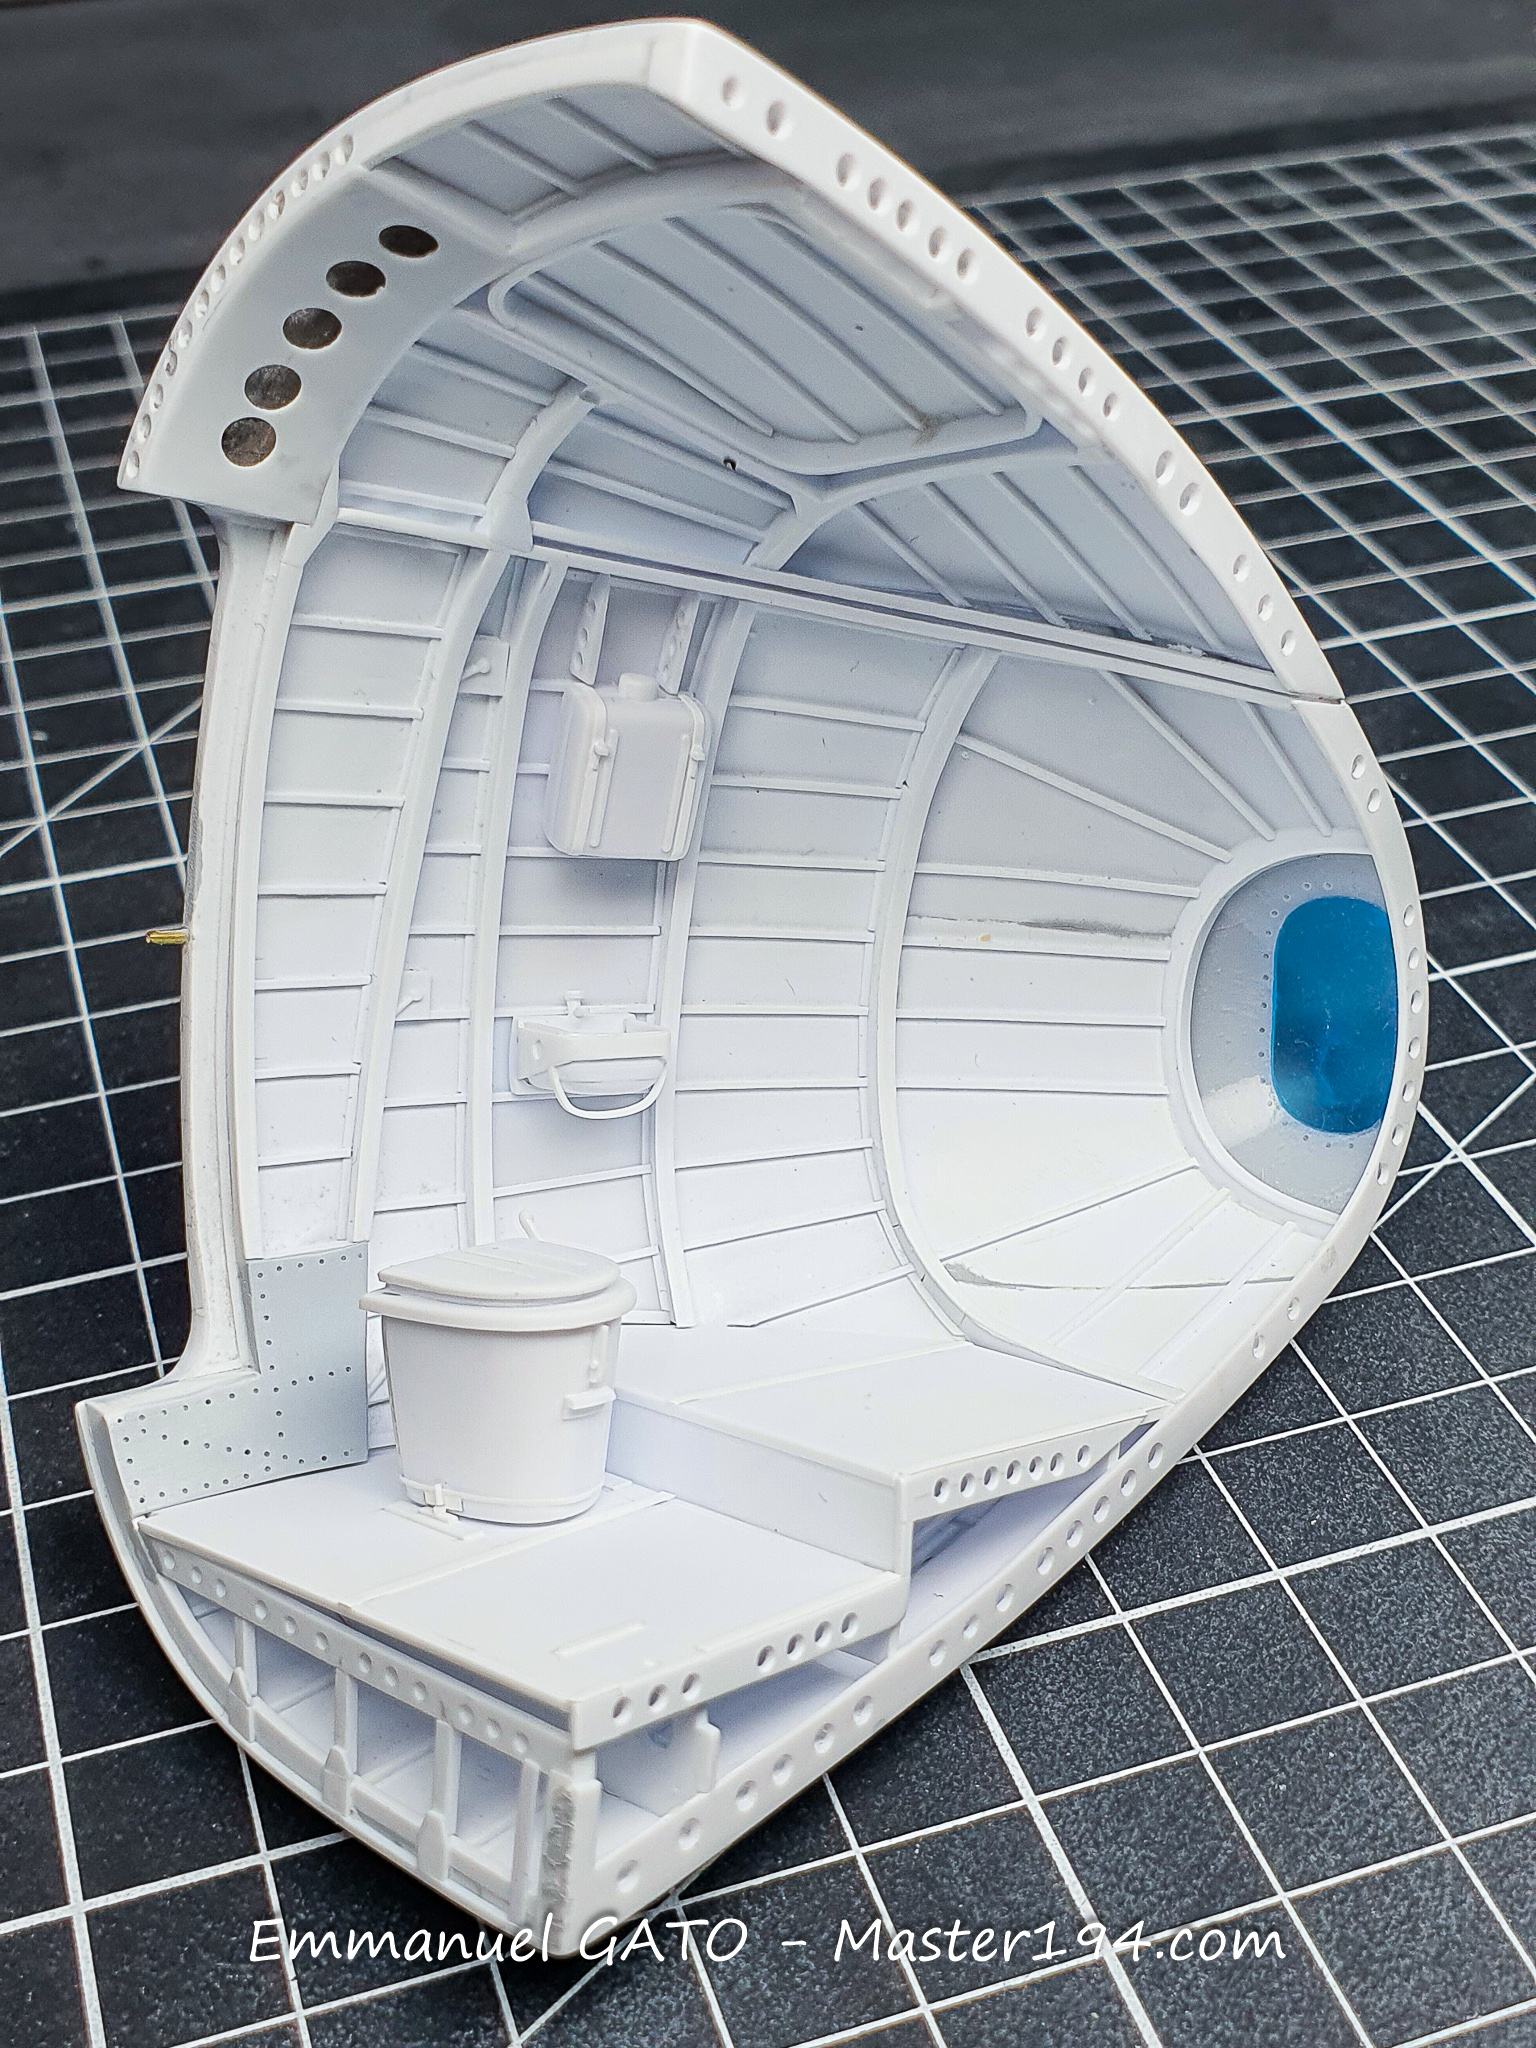
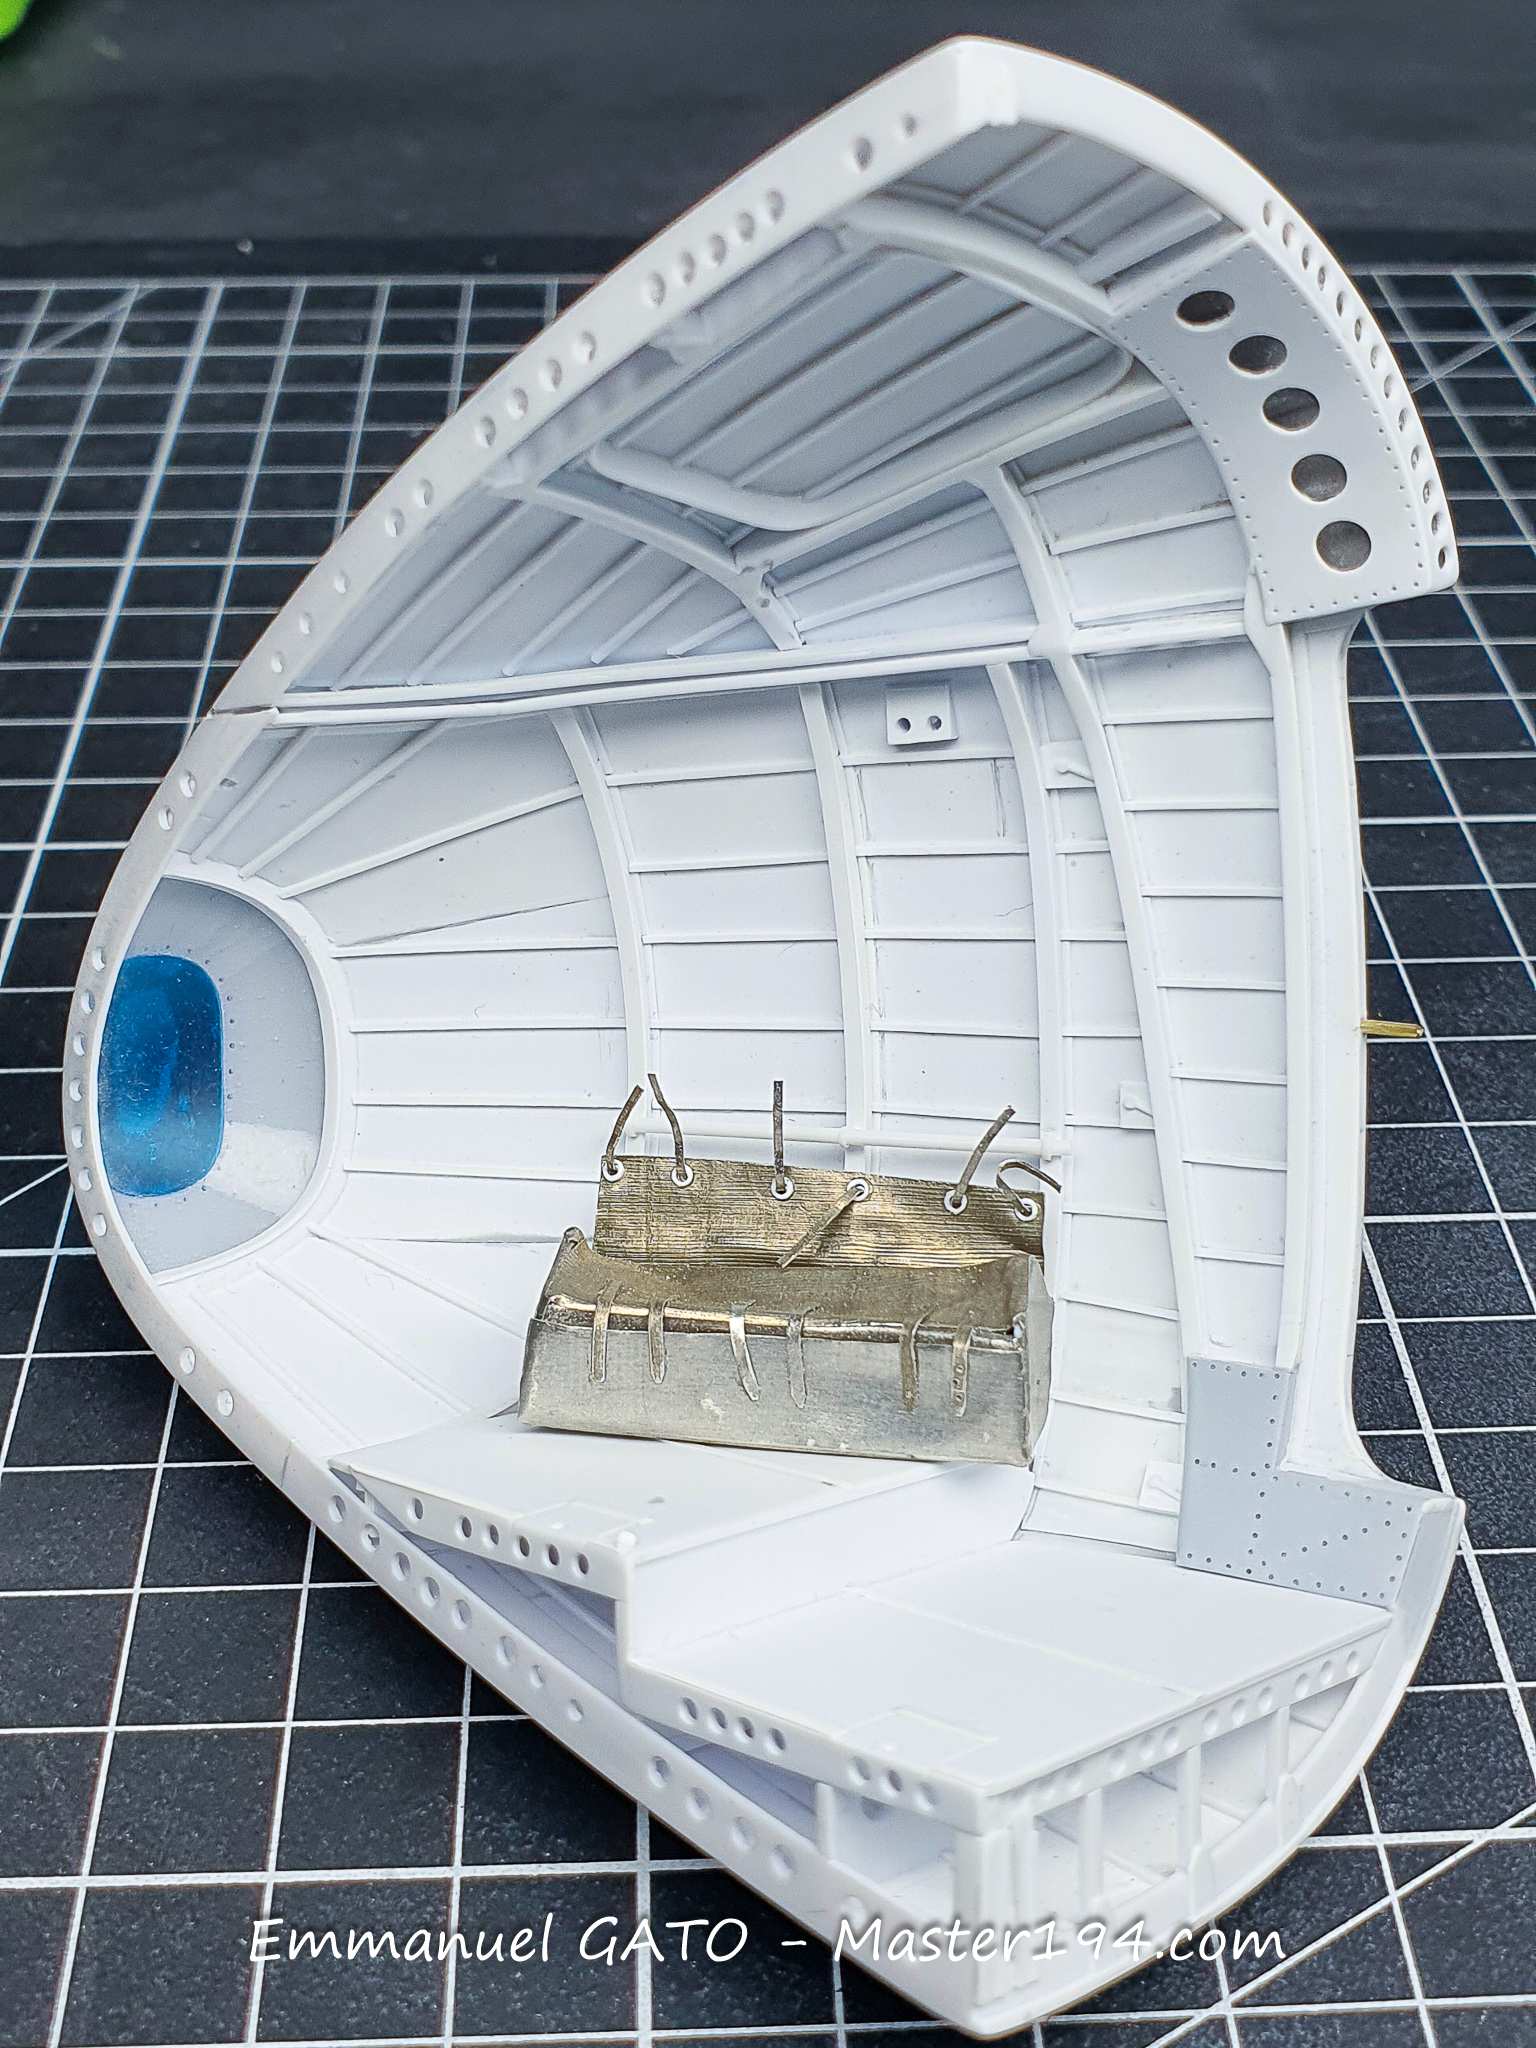
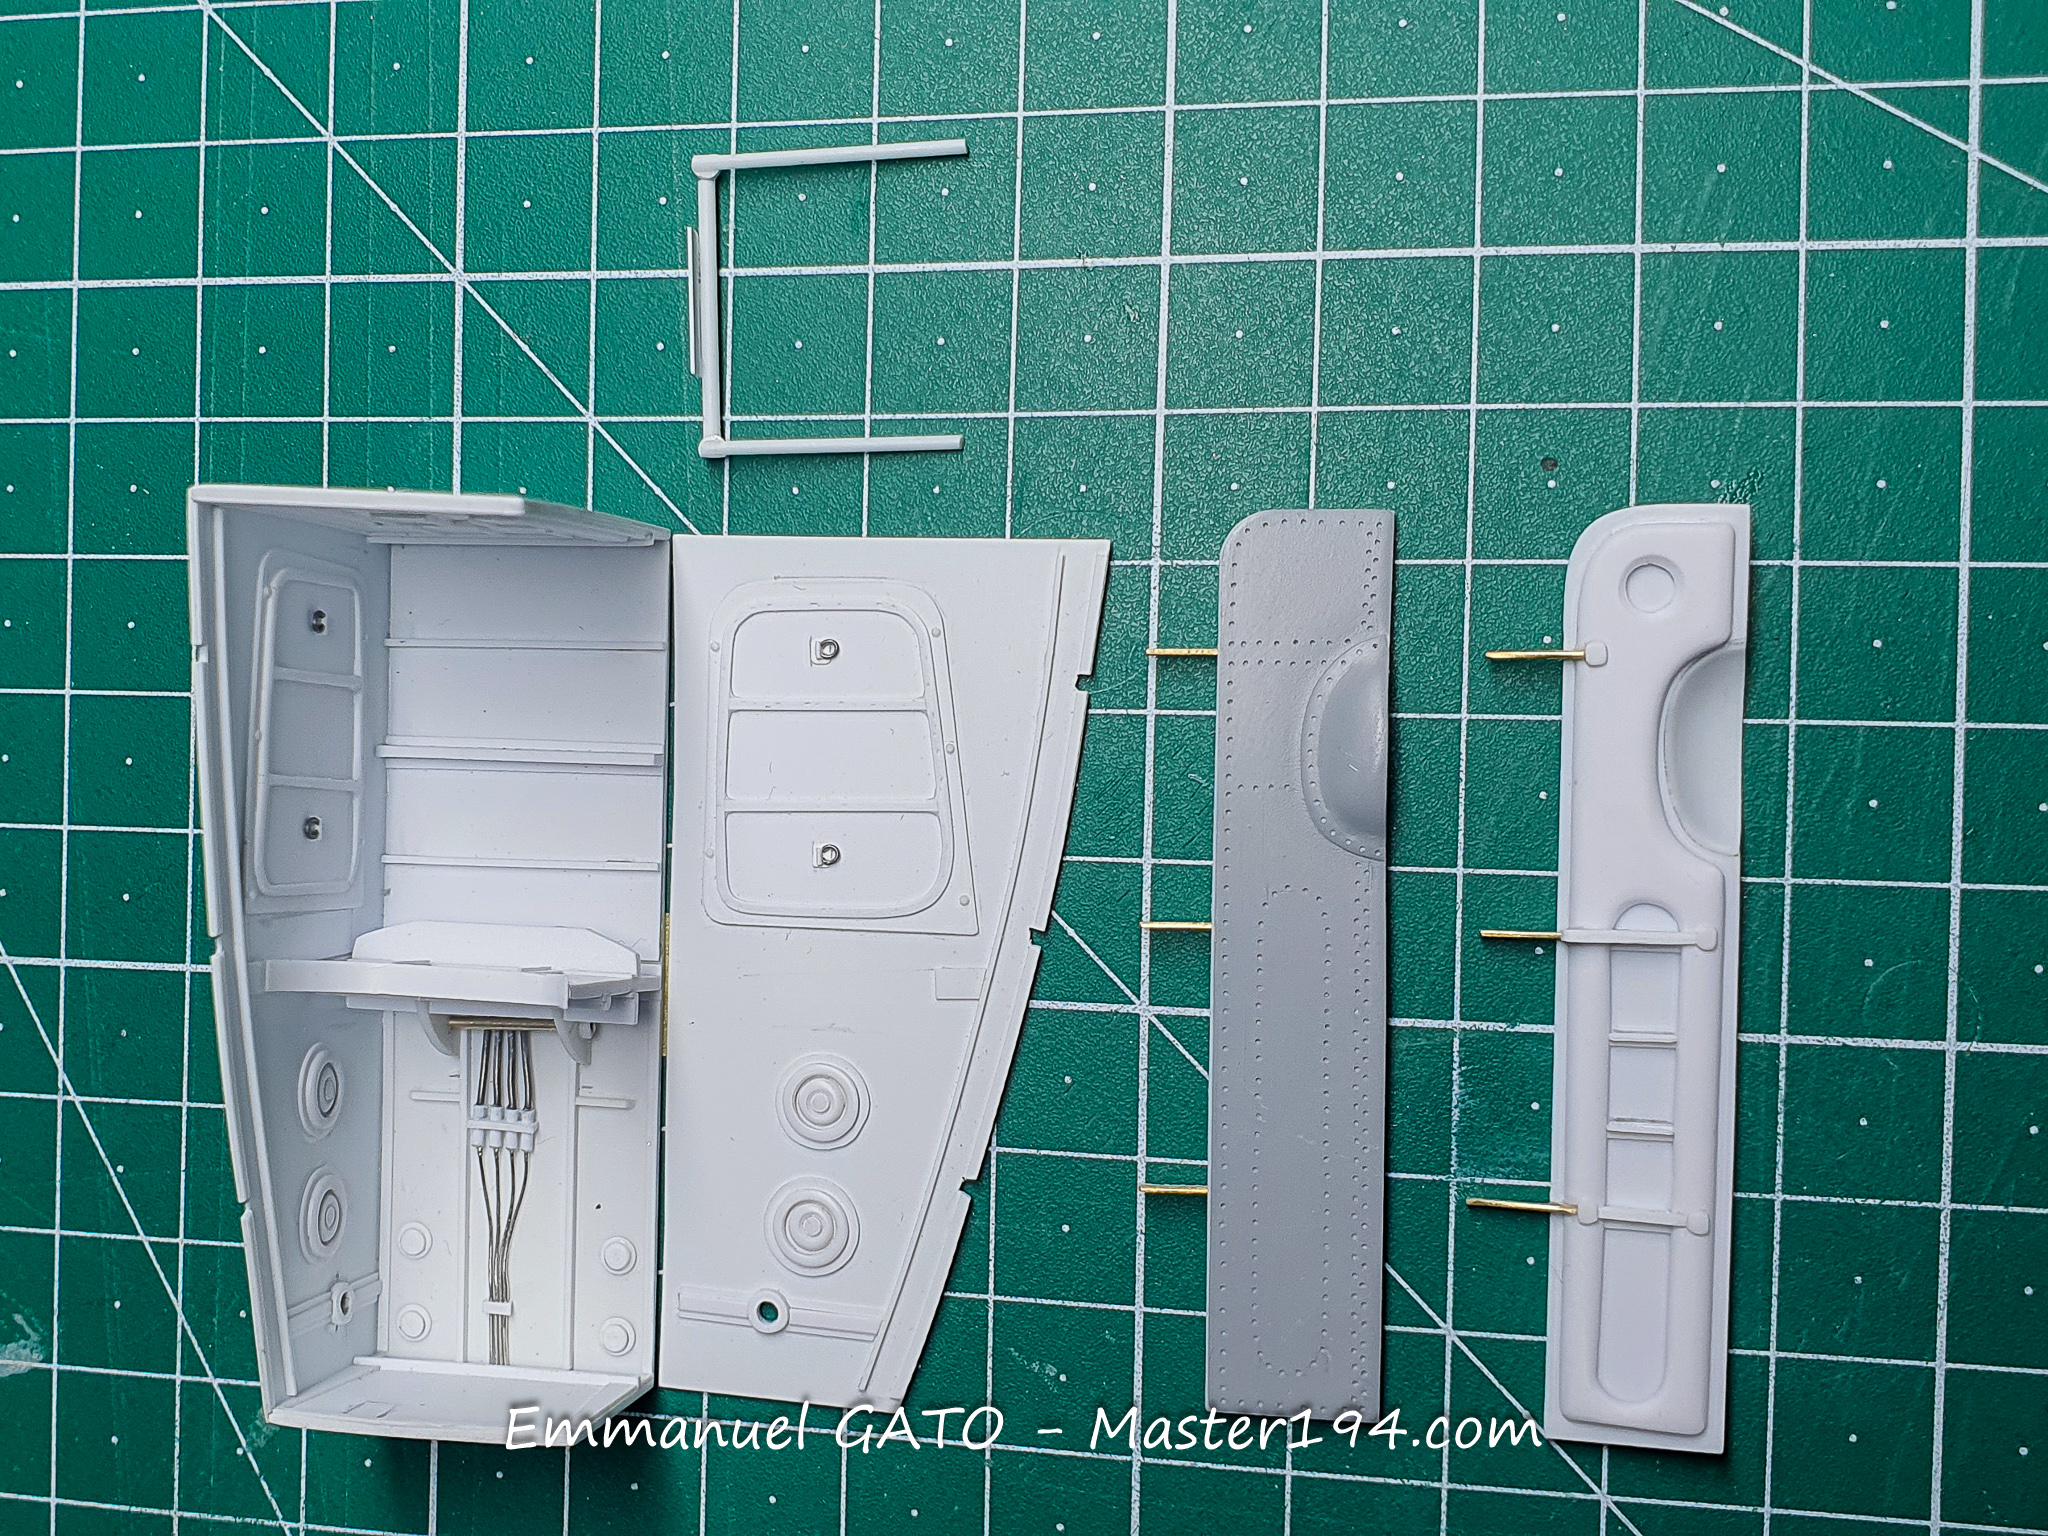
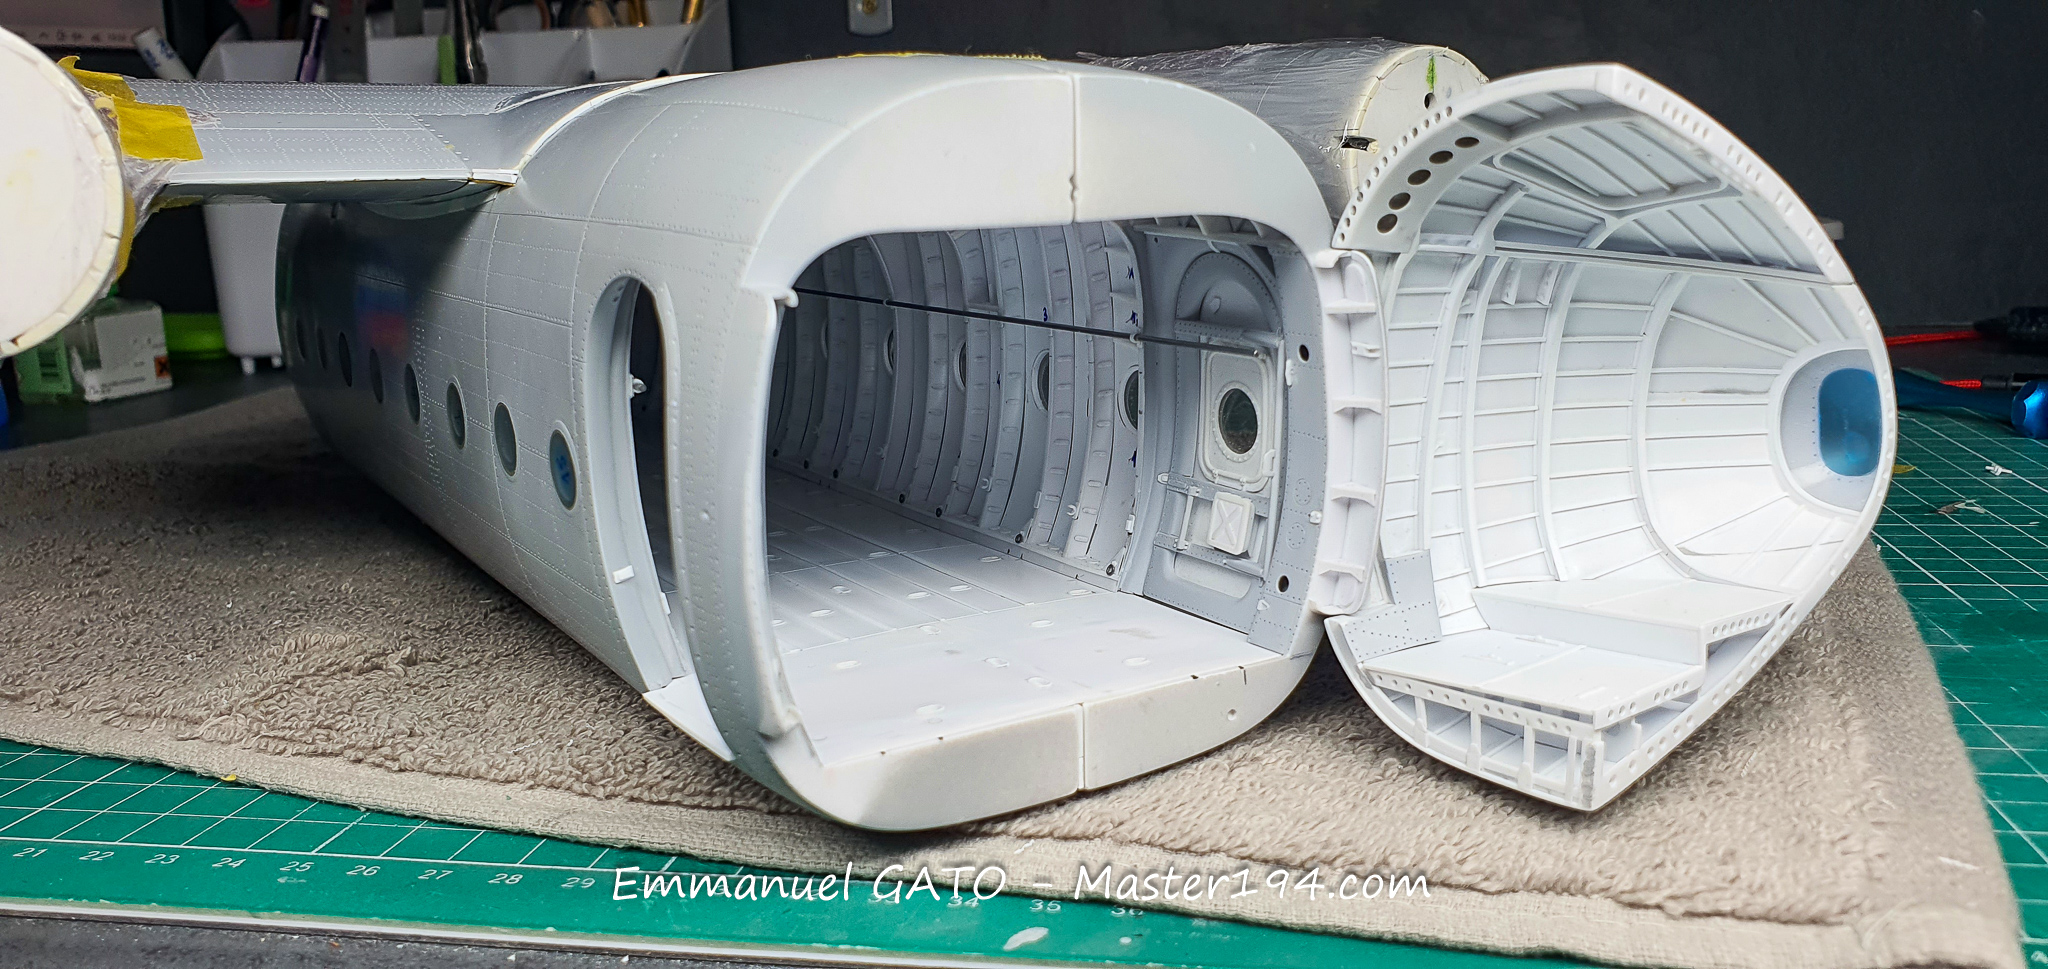
After another period of interruption, I finally have the pleasure of presenting the two rear clamshell doors of the Noratlas.
On the real aircraft, they can open up to 90 degrees to allow the loading of various cargo hauled by this true workhorse of the French Air Force. Naturally, that is how I want to represent them, since the model will feature a Mirage engine being loaded inside.
The main difficulty with this section lies in the frames and stringers, whose shapes evolve in three dimensions. With a little care, you get there, but it often requires referring back to the documentation to understand their design and mounting.
The tail cone was thermoformed, as each fuselage half features a porthole window. The final fit was then blended using Sintofer body filler.
A quick anecdote: the right clamshell door houses a rather spartan toilet. My friend, a former Nord pilot, made sure nothing was missing in that department! I got his stamp of approval.
AD
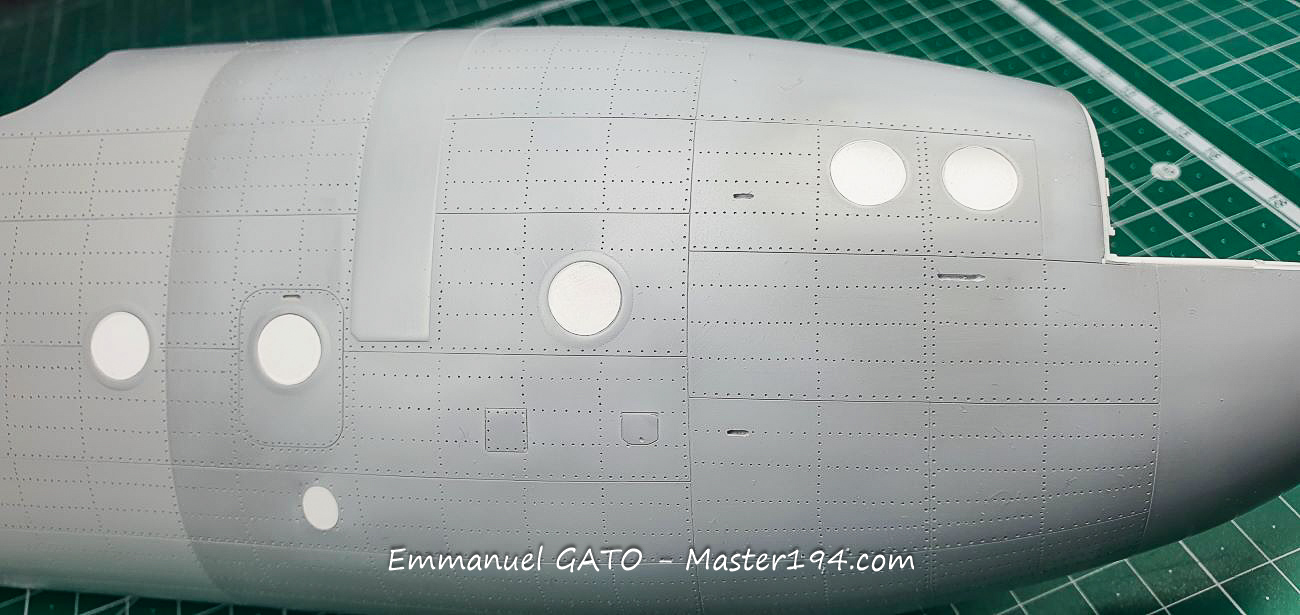
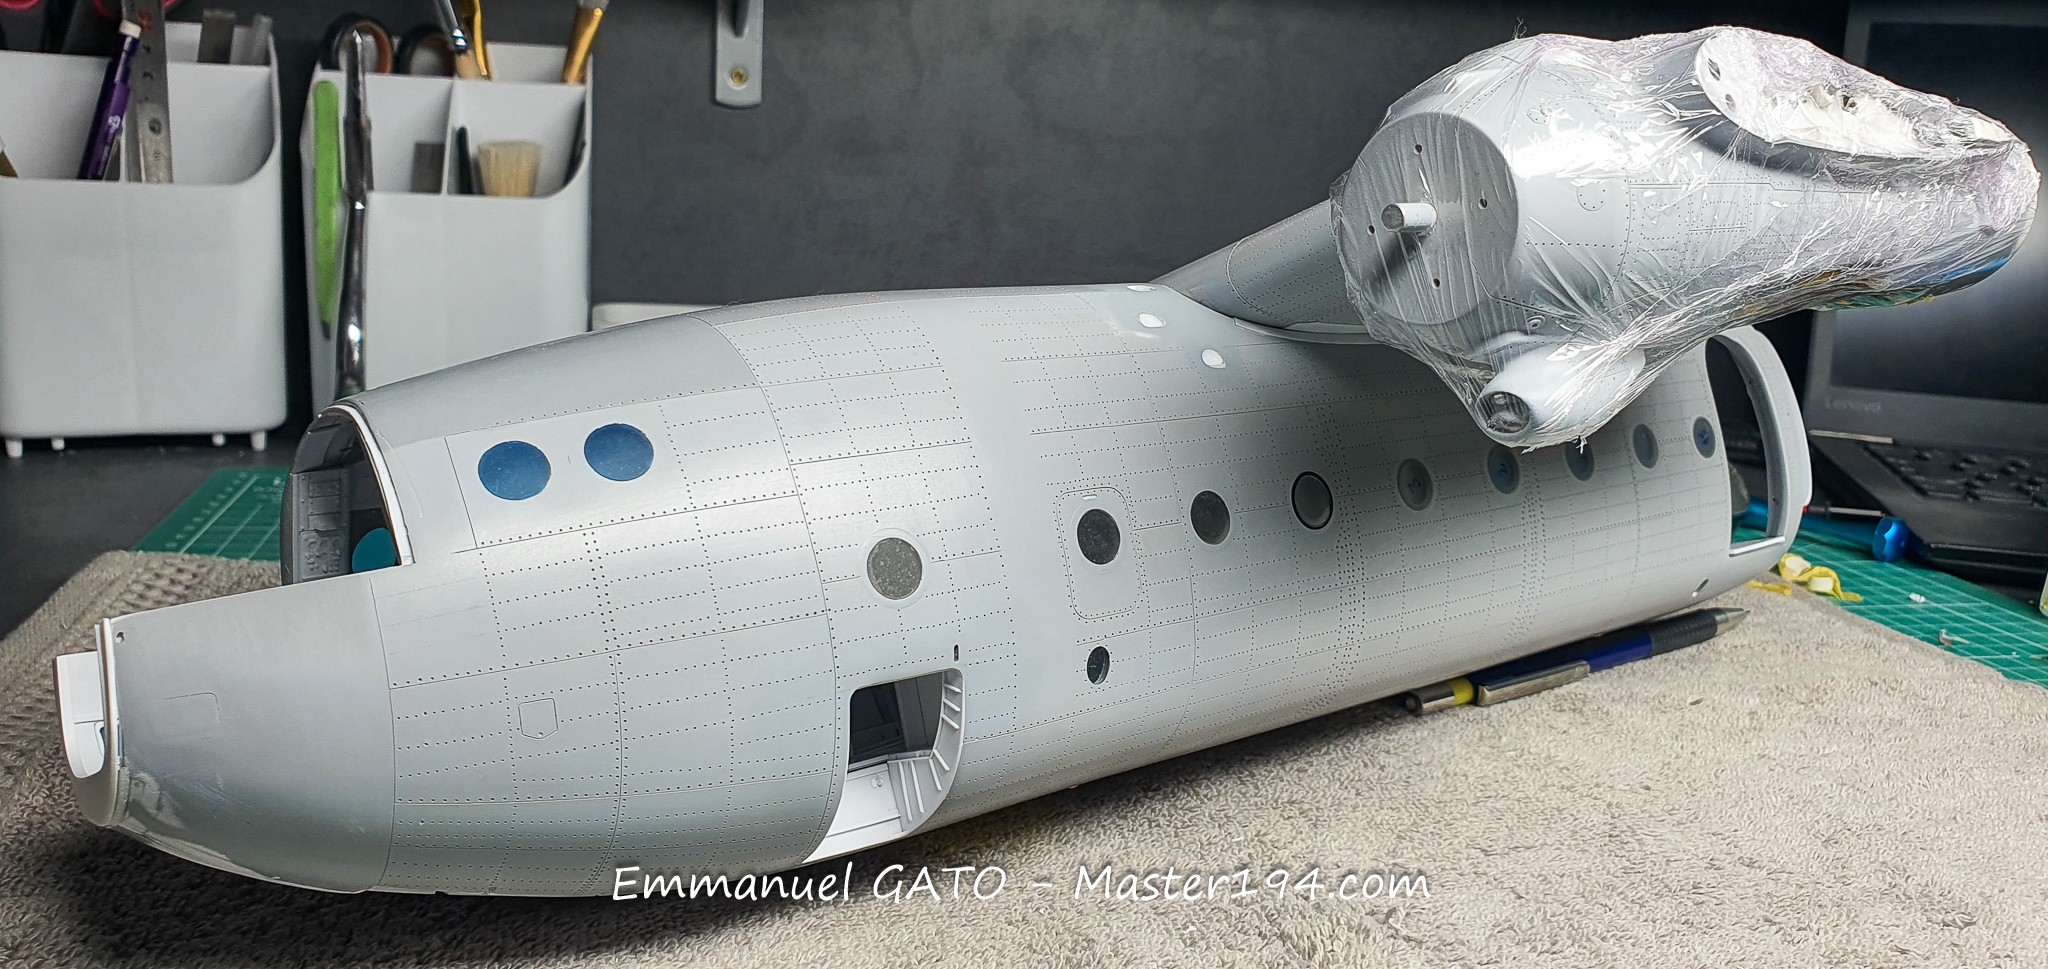
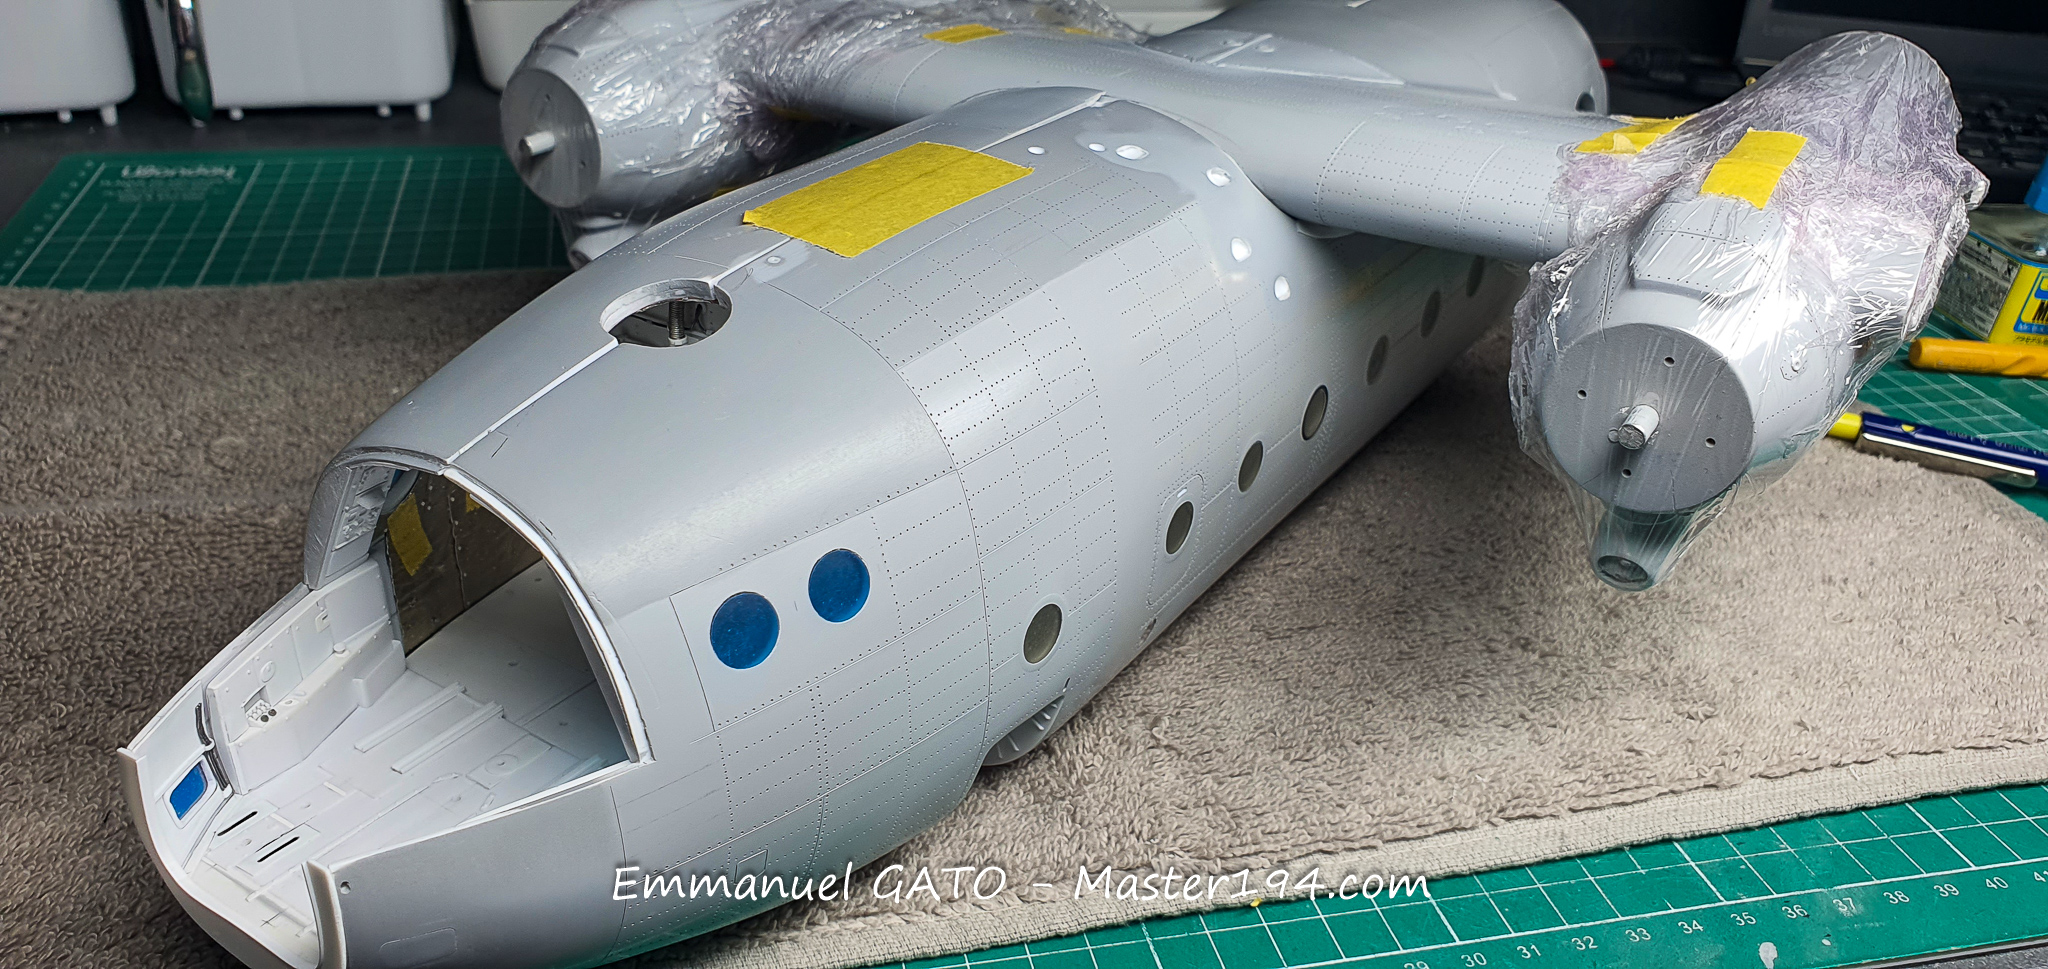
As is my usual habit, I then applied a fairly thick coat of automotive primer to the exterior, sprayed with an airbrush rather than a rattle can. This thickness makes it easier to scribe panel lines and drill the tiny 0.3 mm rivet holes.
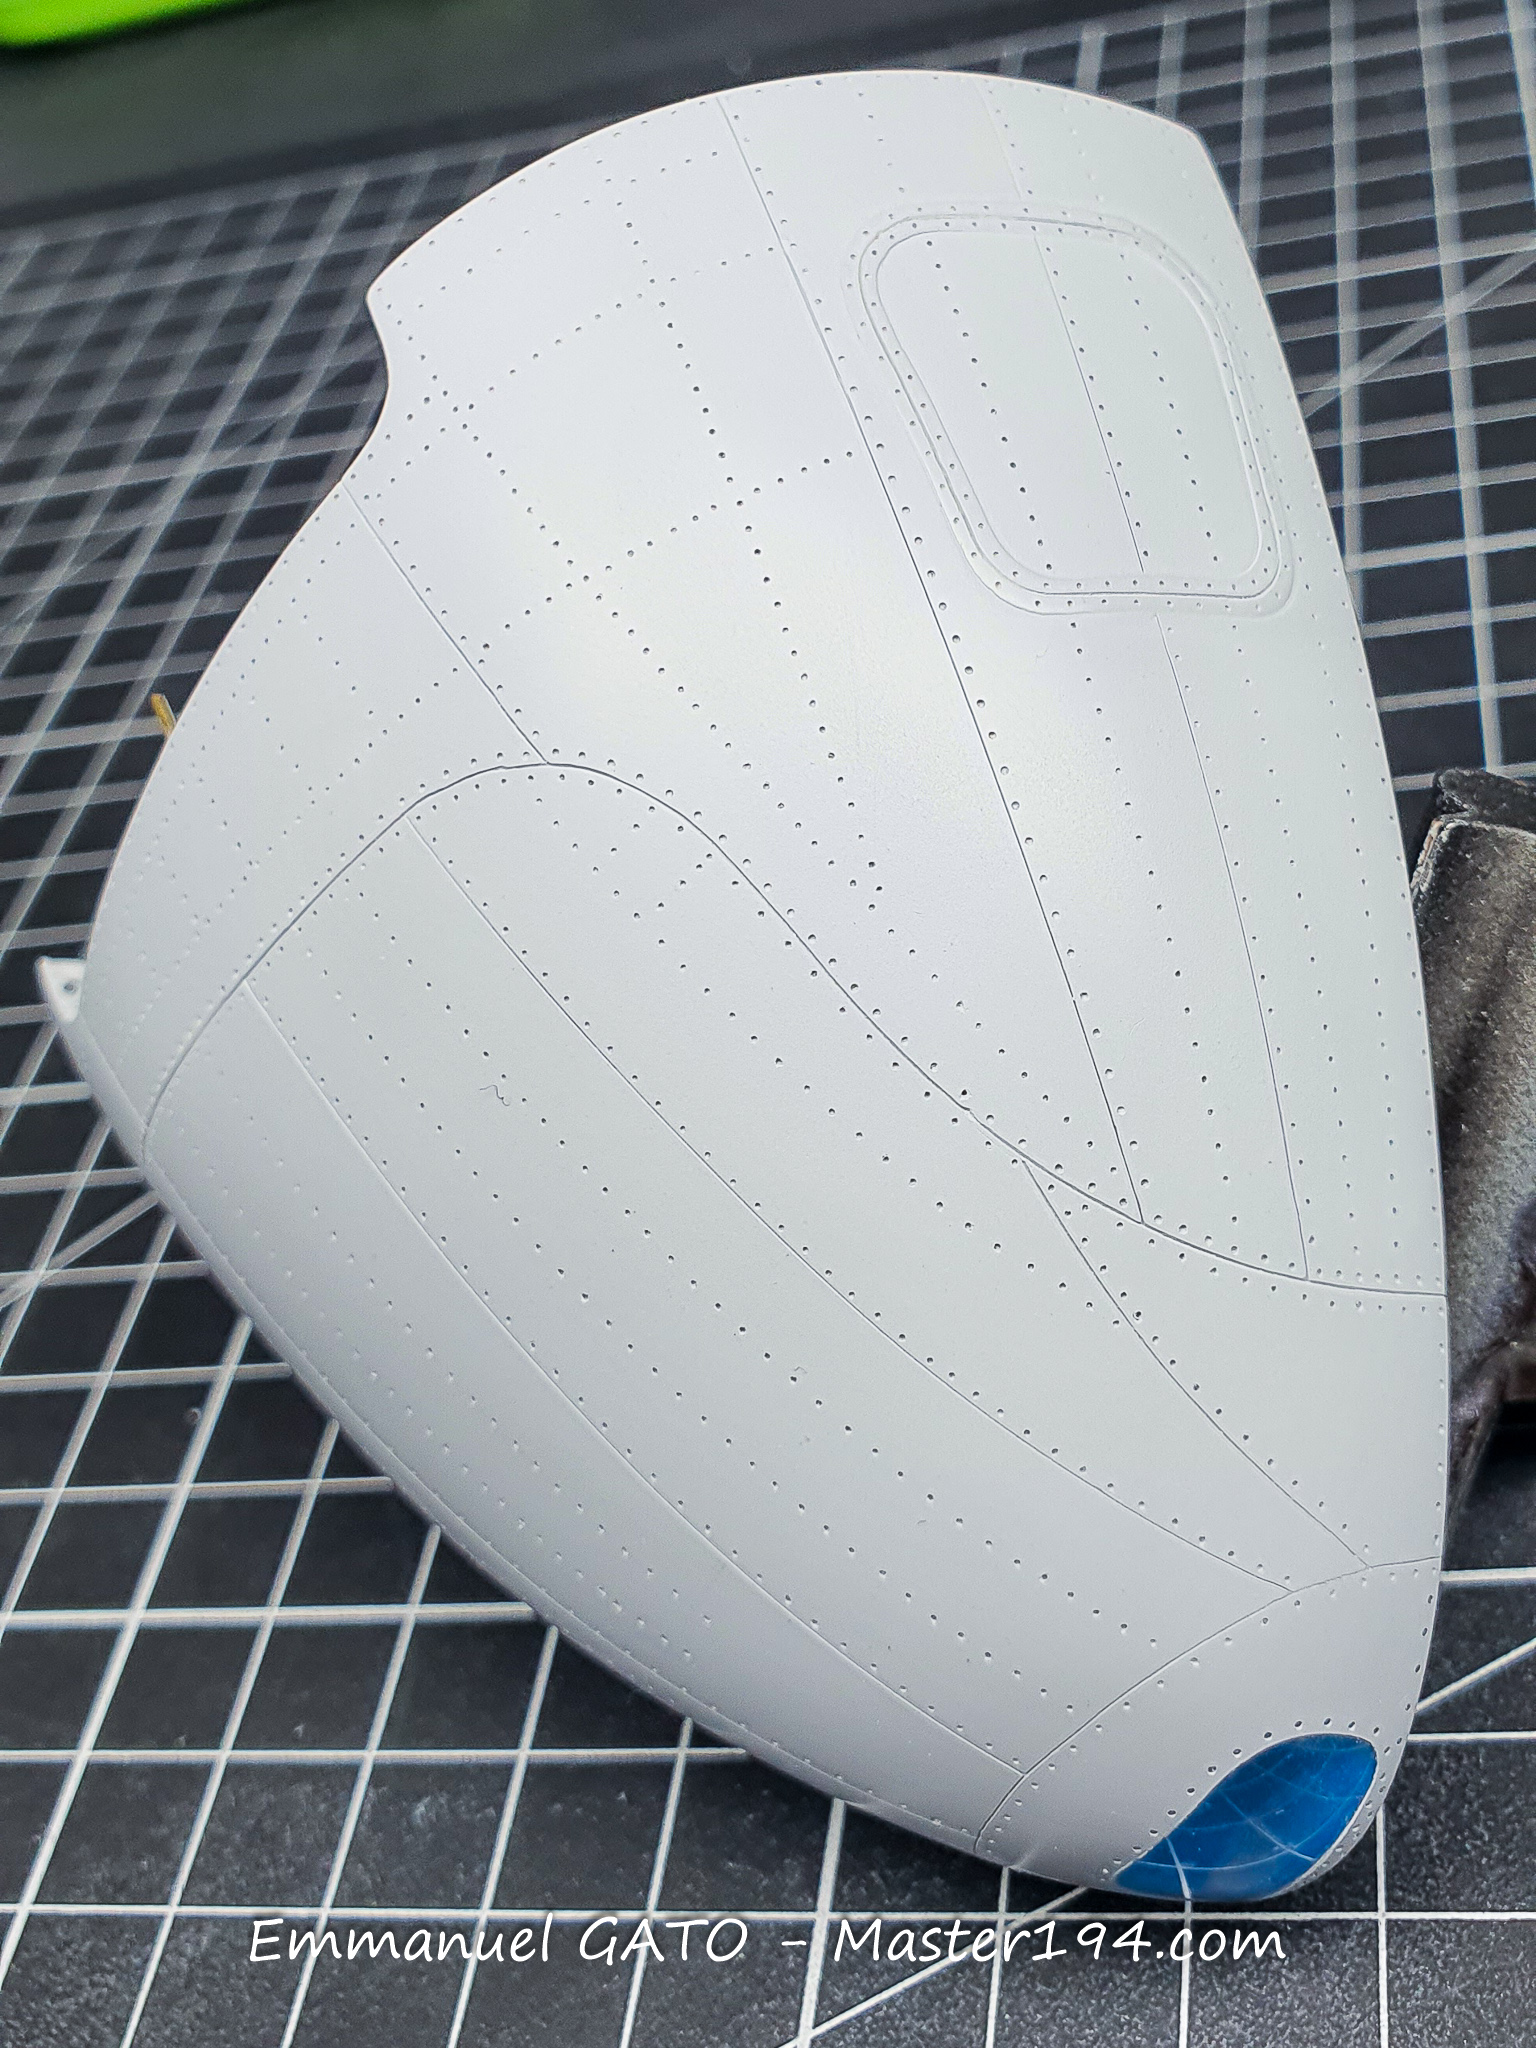
The emergency exit features reinforced edges on its outer face. I replicated these using extra layers of primer applied through stencils cut with the Silhouette plotter.
I have now applied the same process to both fuselage halves. The model is finally getting close to the painting stage, even though the gestation period turned out to be much longer than I initially imagined.
Next, I present the nose landing gear, complete with its bay, strut, and wheel. Two key requirements guided its construction: structural strength—again, due to the sheer mass of the model—and designing a complete bay that would fit neatly into the housing already integrated into the fuselage.
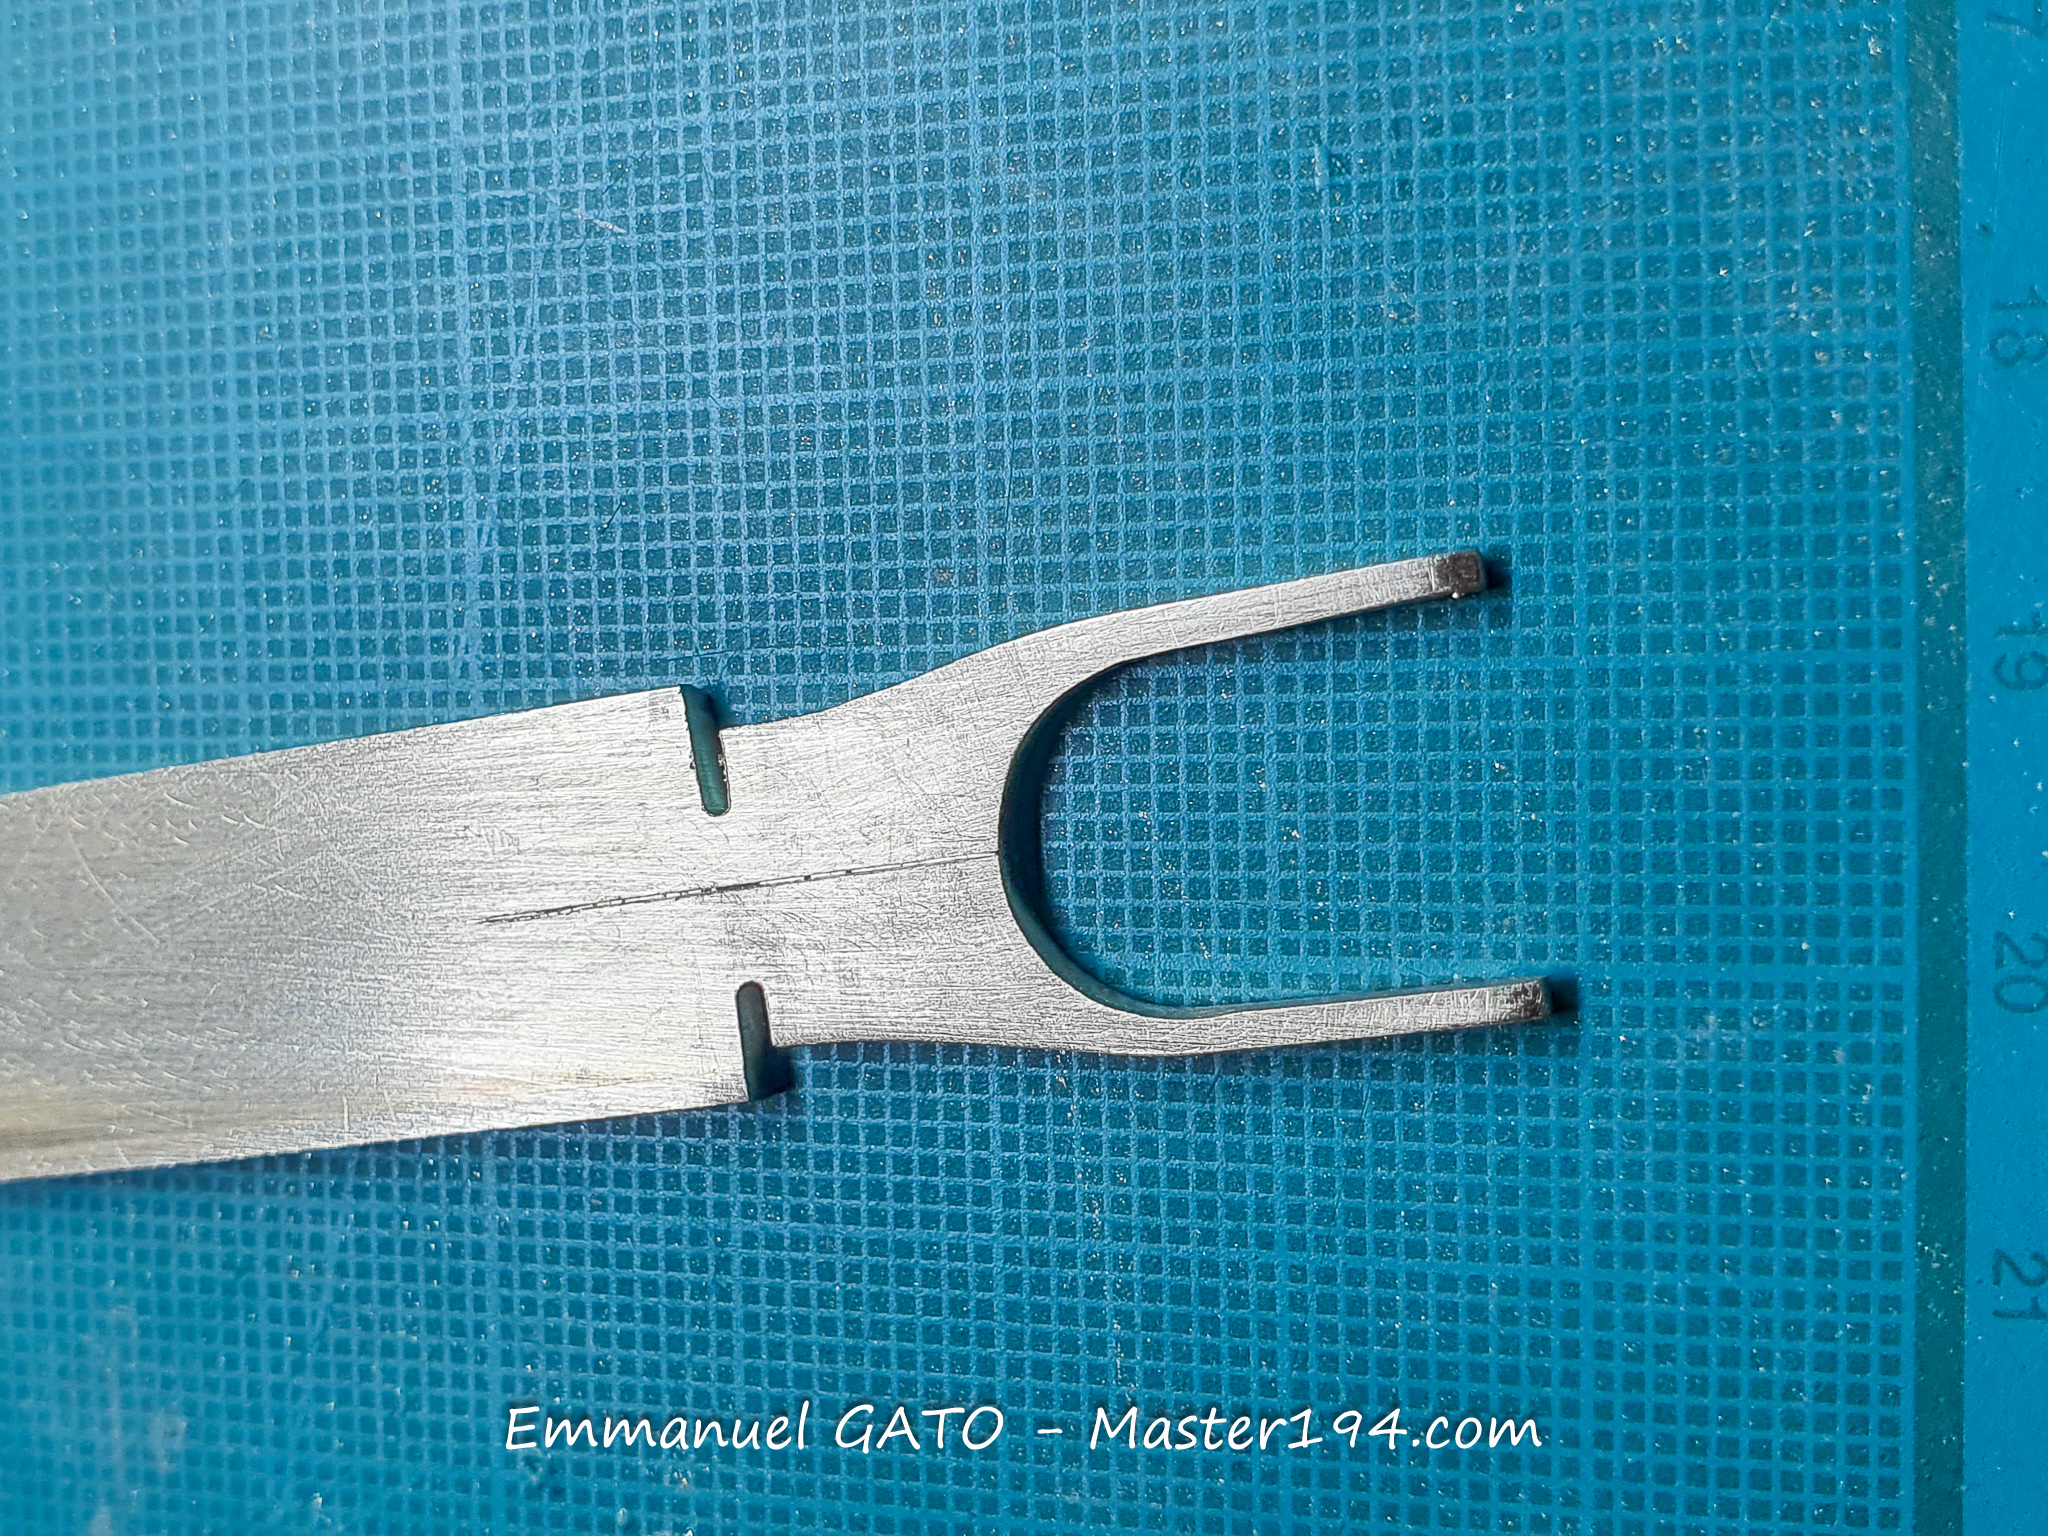
The fork is the critical element for strength. I machined it out of a solid 2 mm brass profile, which is exceptionally sturdy.
Here is the rough part machined using my Proxxon drill press and a Dremel grinding stone. You simply have to let the tool cool down occasionally, as it naturally gets hot. With a bit of patience, you end up with the desired part.
The bay is now complete. The landing gear clips onto two pivot pins: the strut’s pin, which is also metallic, and the drag strut’s pin.
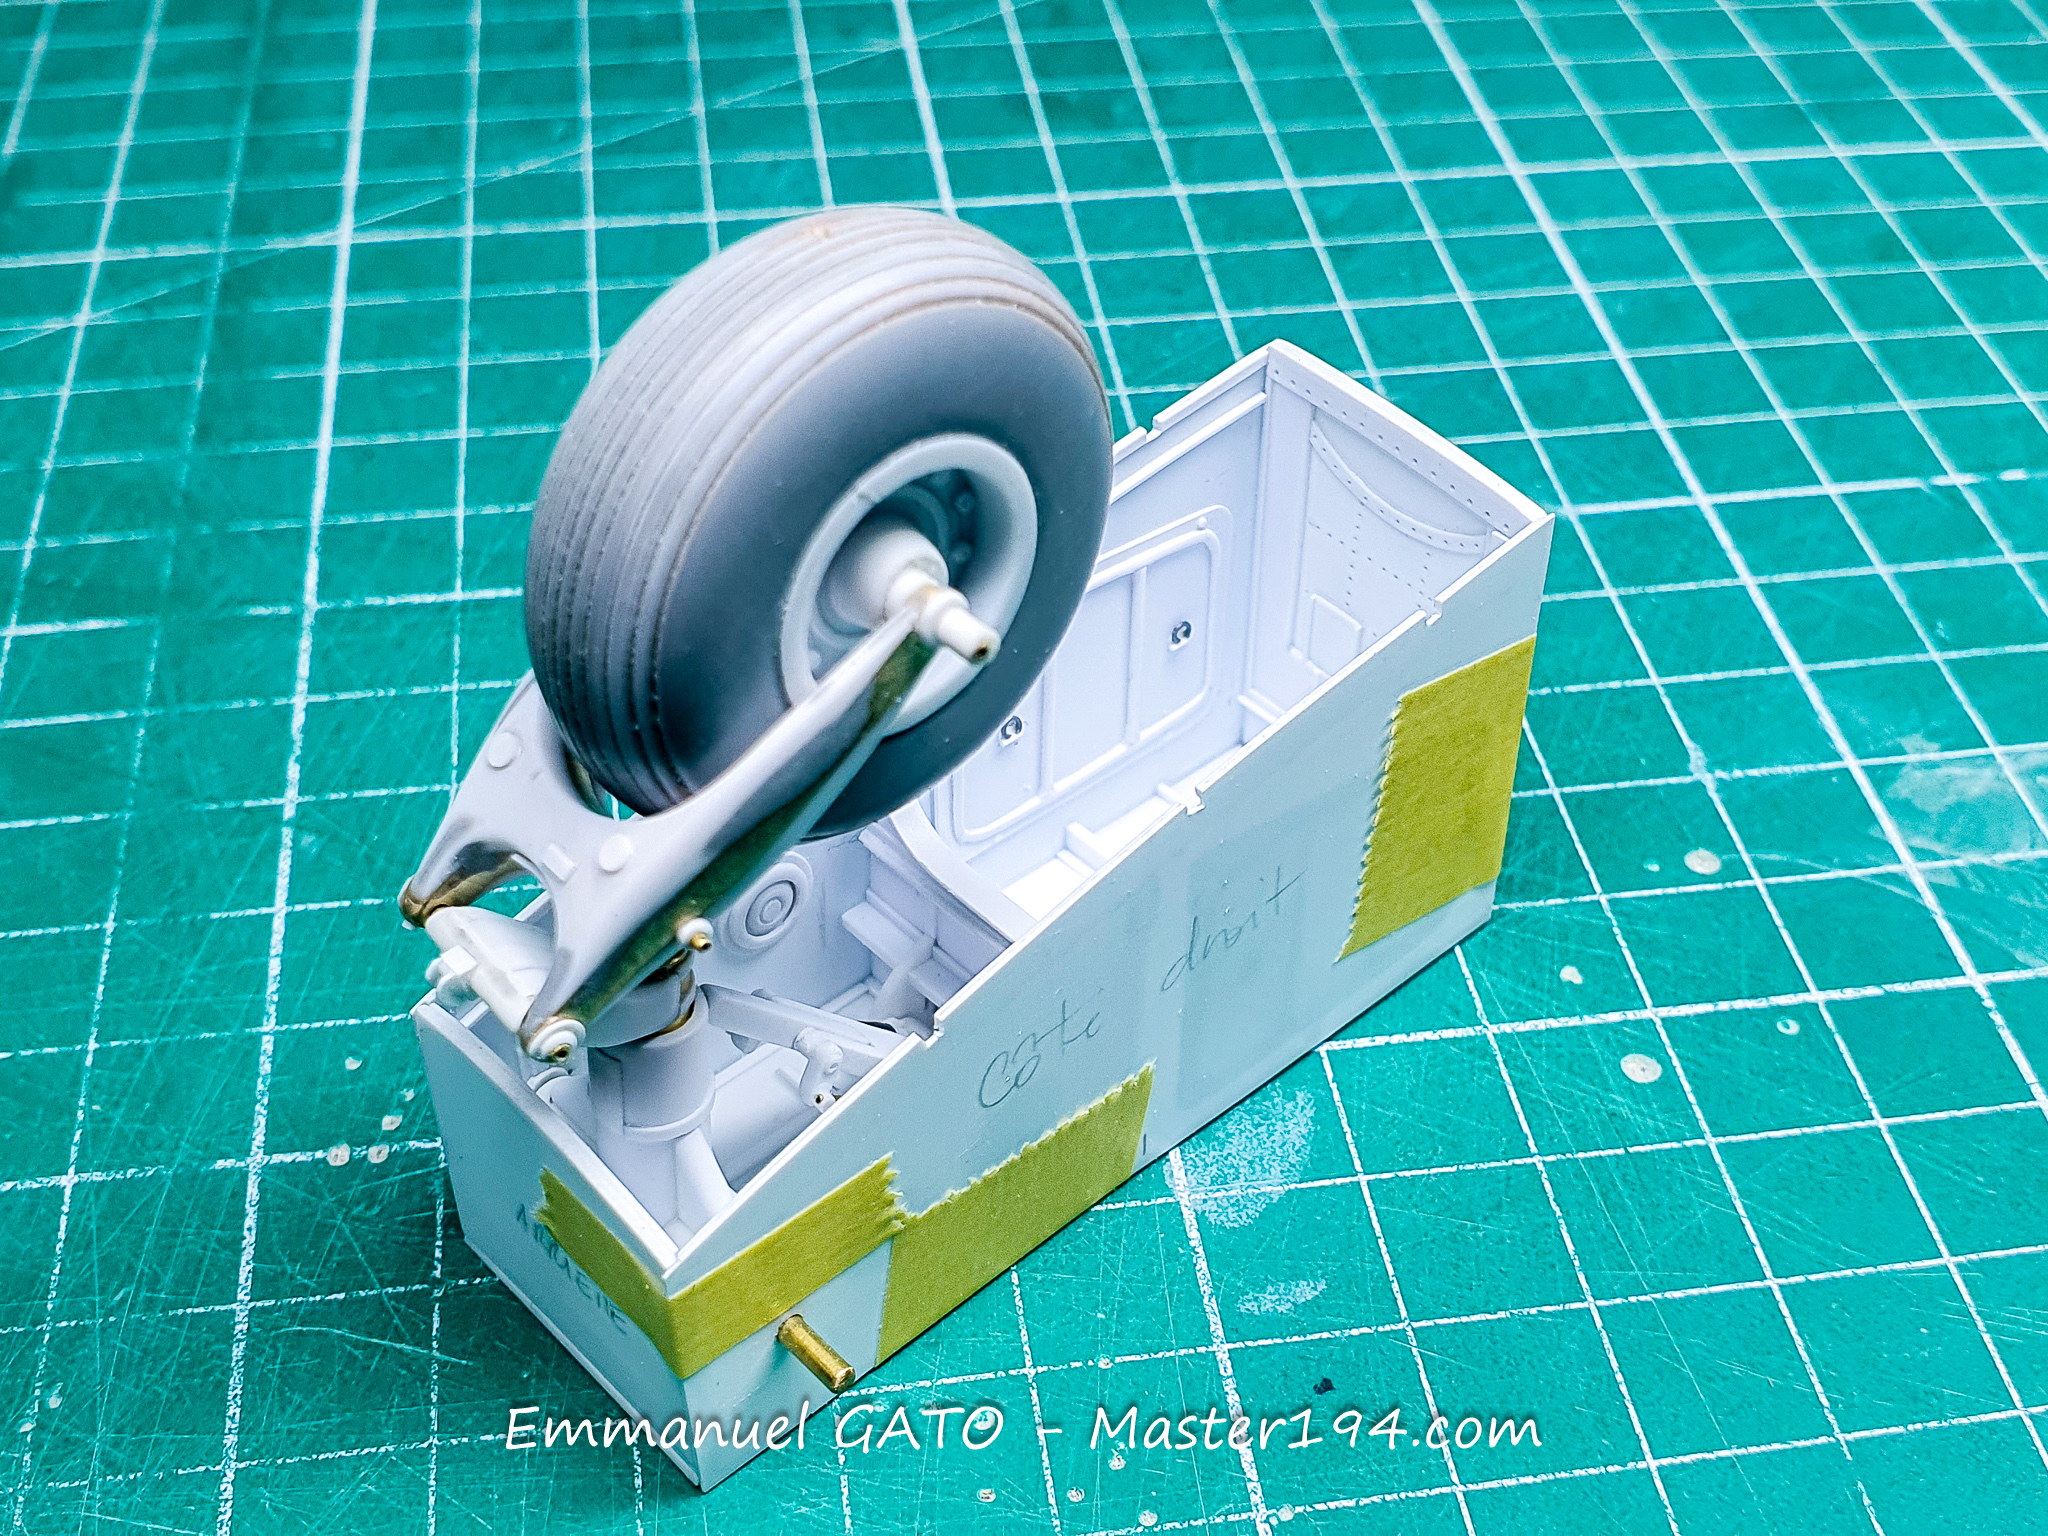
After priming and filling, the hybrid composition of the part—mixing metal and plastic—vanishes into a single, seamless assembly. There is still a bit of sanding to be done with an abrasive sponge and a fiberglass pen to achieve a perfectly smooth surface finish. All critical load-bearing parts are made of brass tubing; only the exterior fairings are plastic.
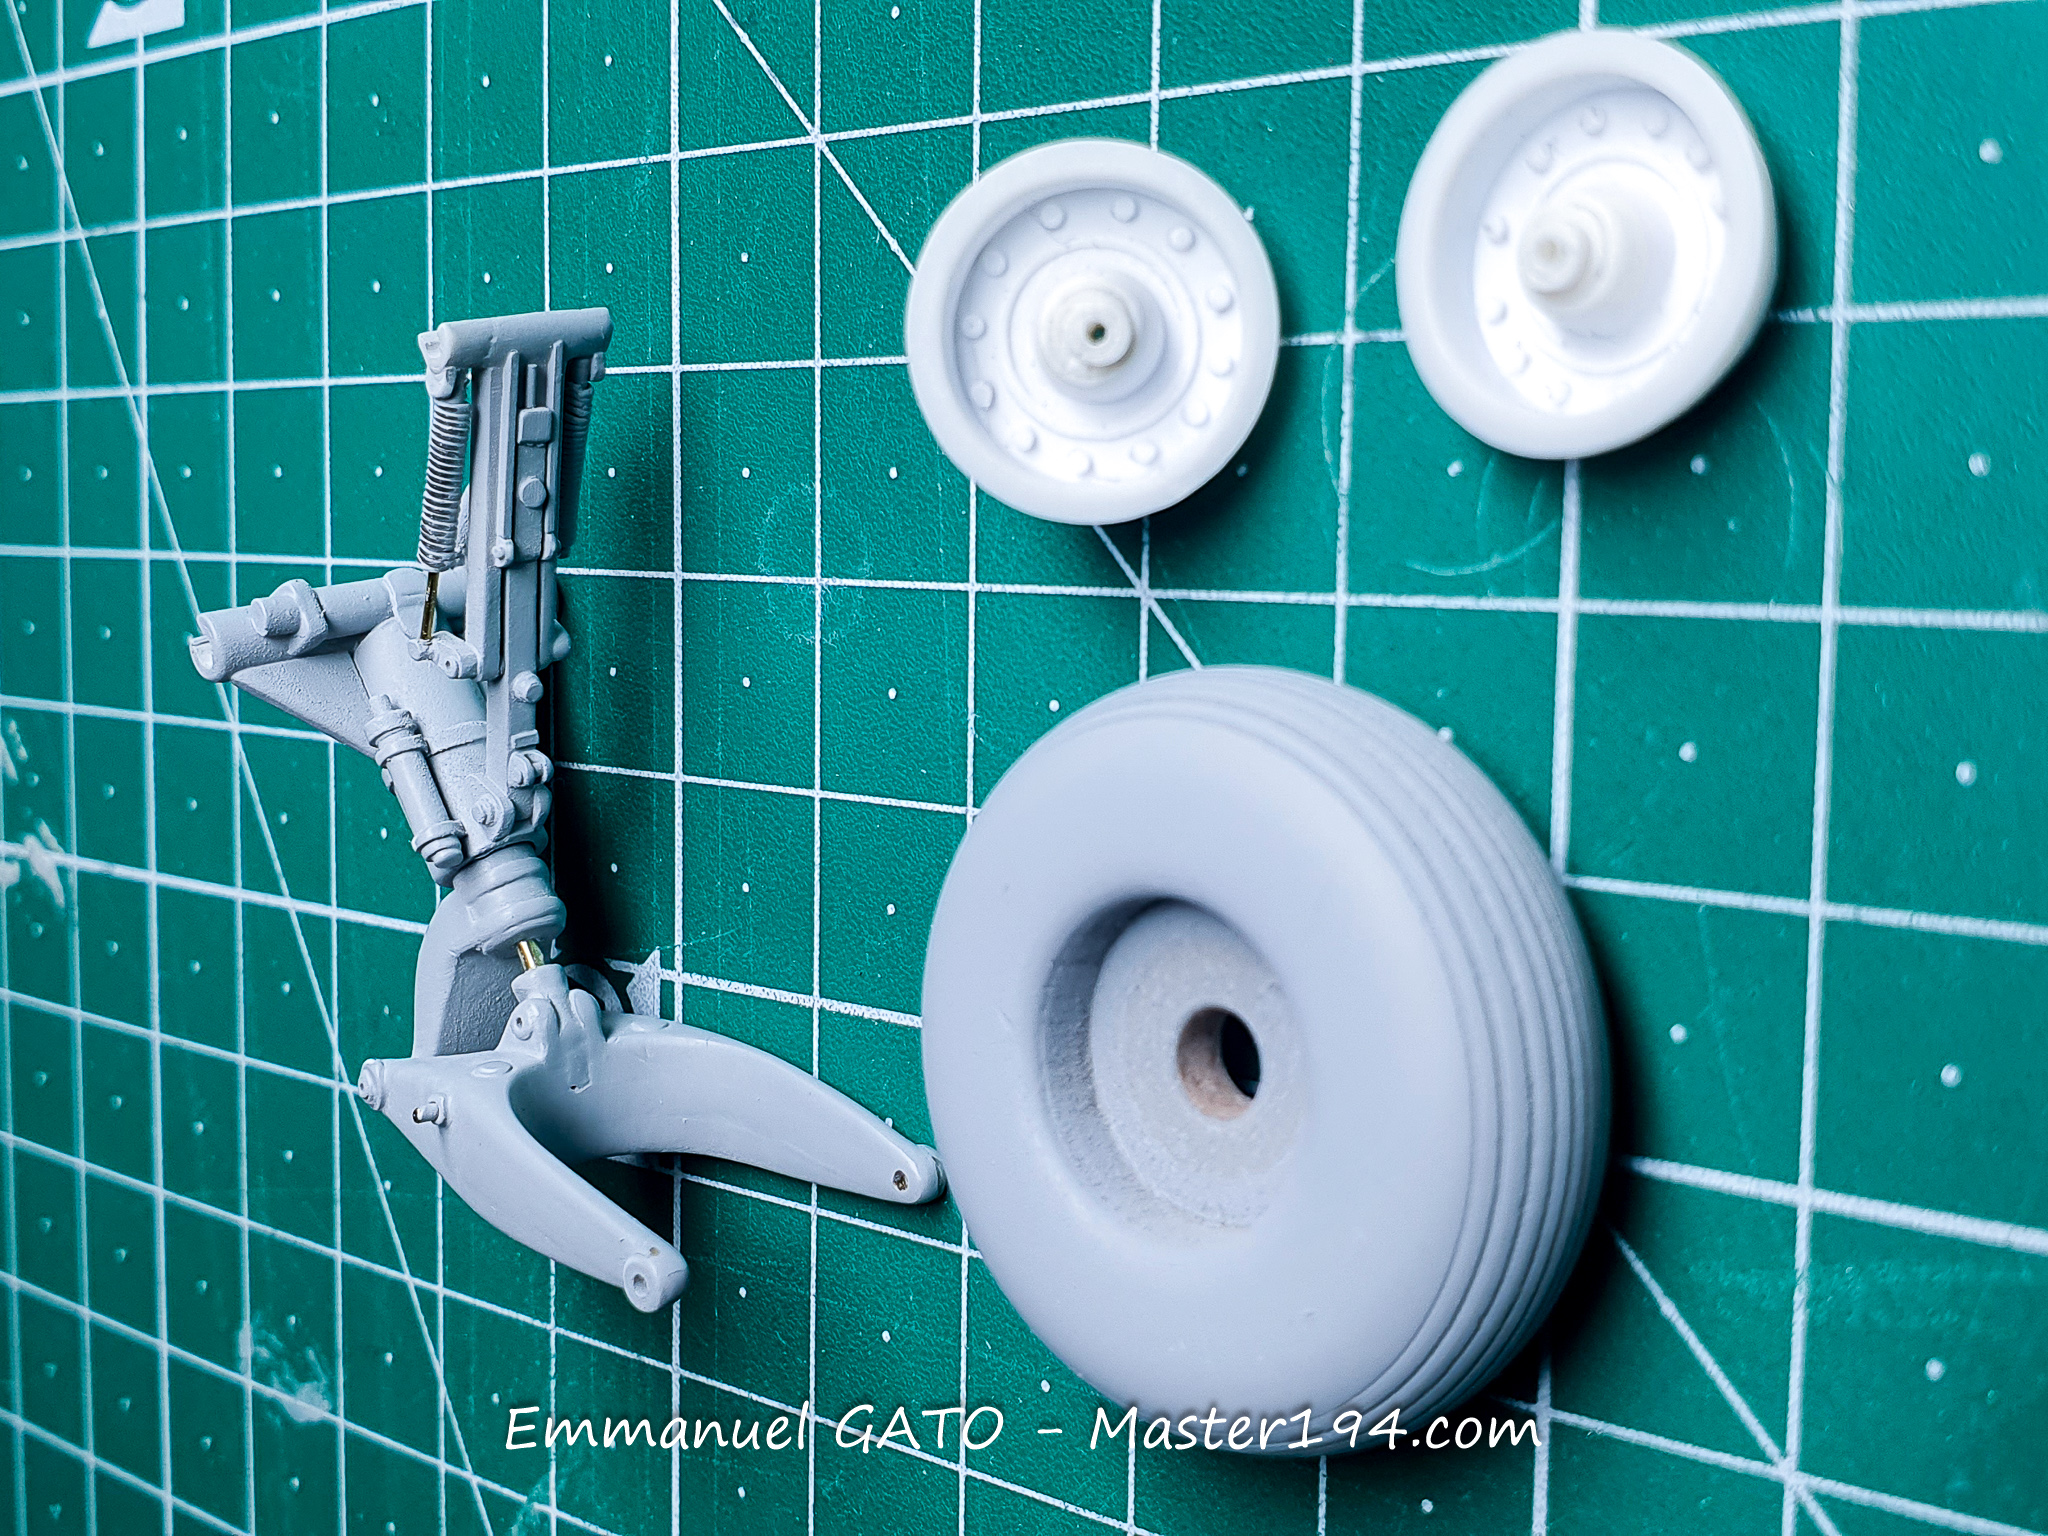
The final view shows the exploded wheel bay and the nose doors. This is the long version, as the Noratlas used two different types of doors.
Exterior details, engines, and cargo hold
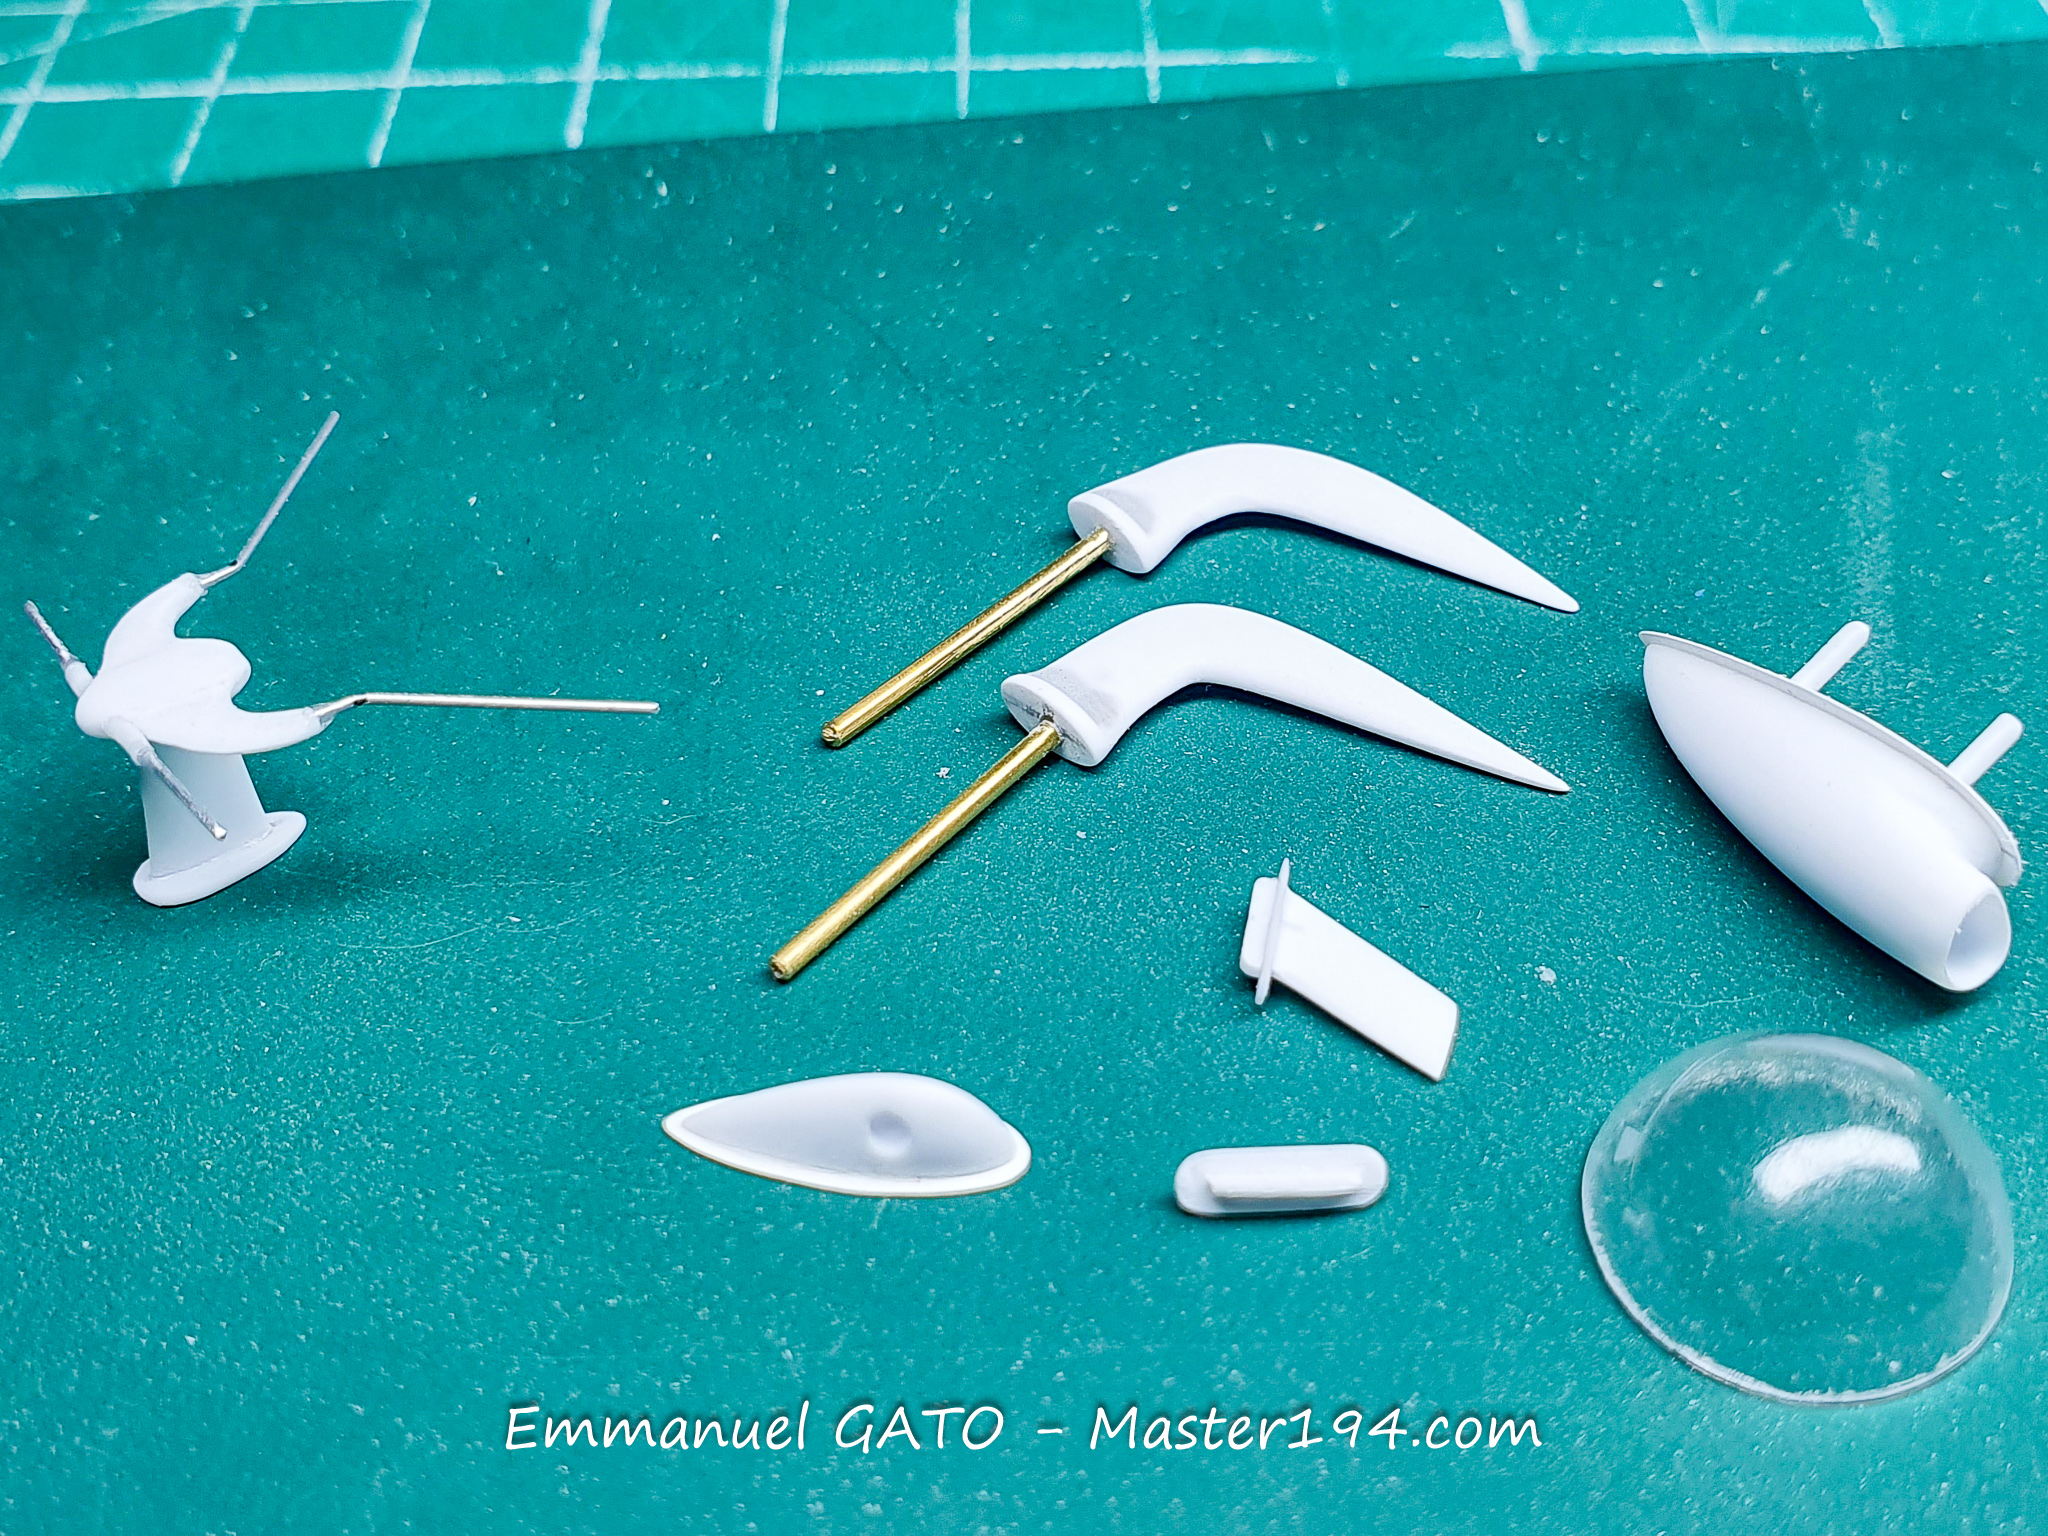
The Noratlas is now getting close to painting. I can show you a few exterior parts that will be fitted after the two fuselage halves are joined: antennas, astrodome, drift sight, and various other accessories.
Among these items, I am quite pleased with the upper air scoop, carved directly from solid material using my little Proxxon rotary tool.
The fuselage has been fully rescribed and heavily “pocked” with holes to represent the riveting. Once the two fuselage halves are glued together, I’ll just need to touch up the panel lines.
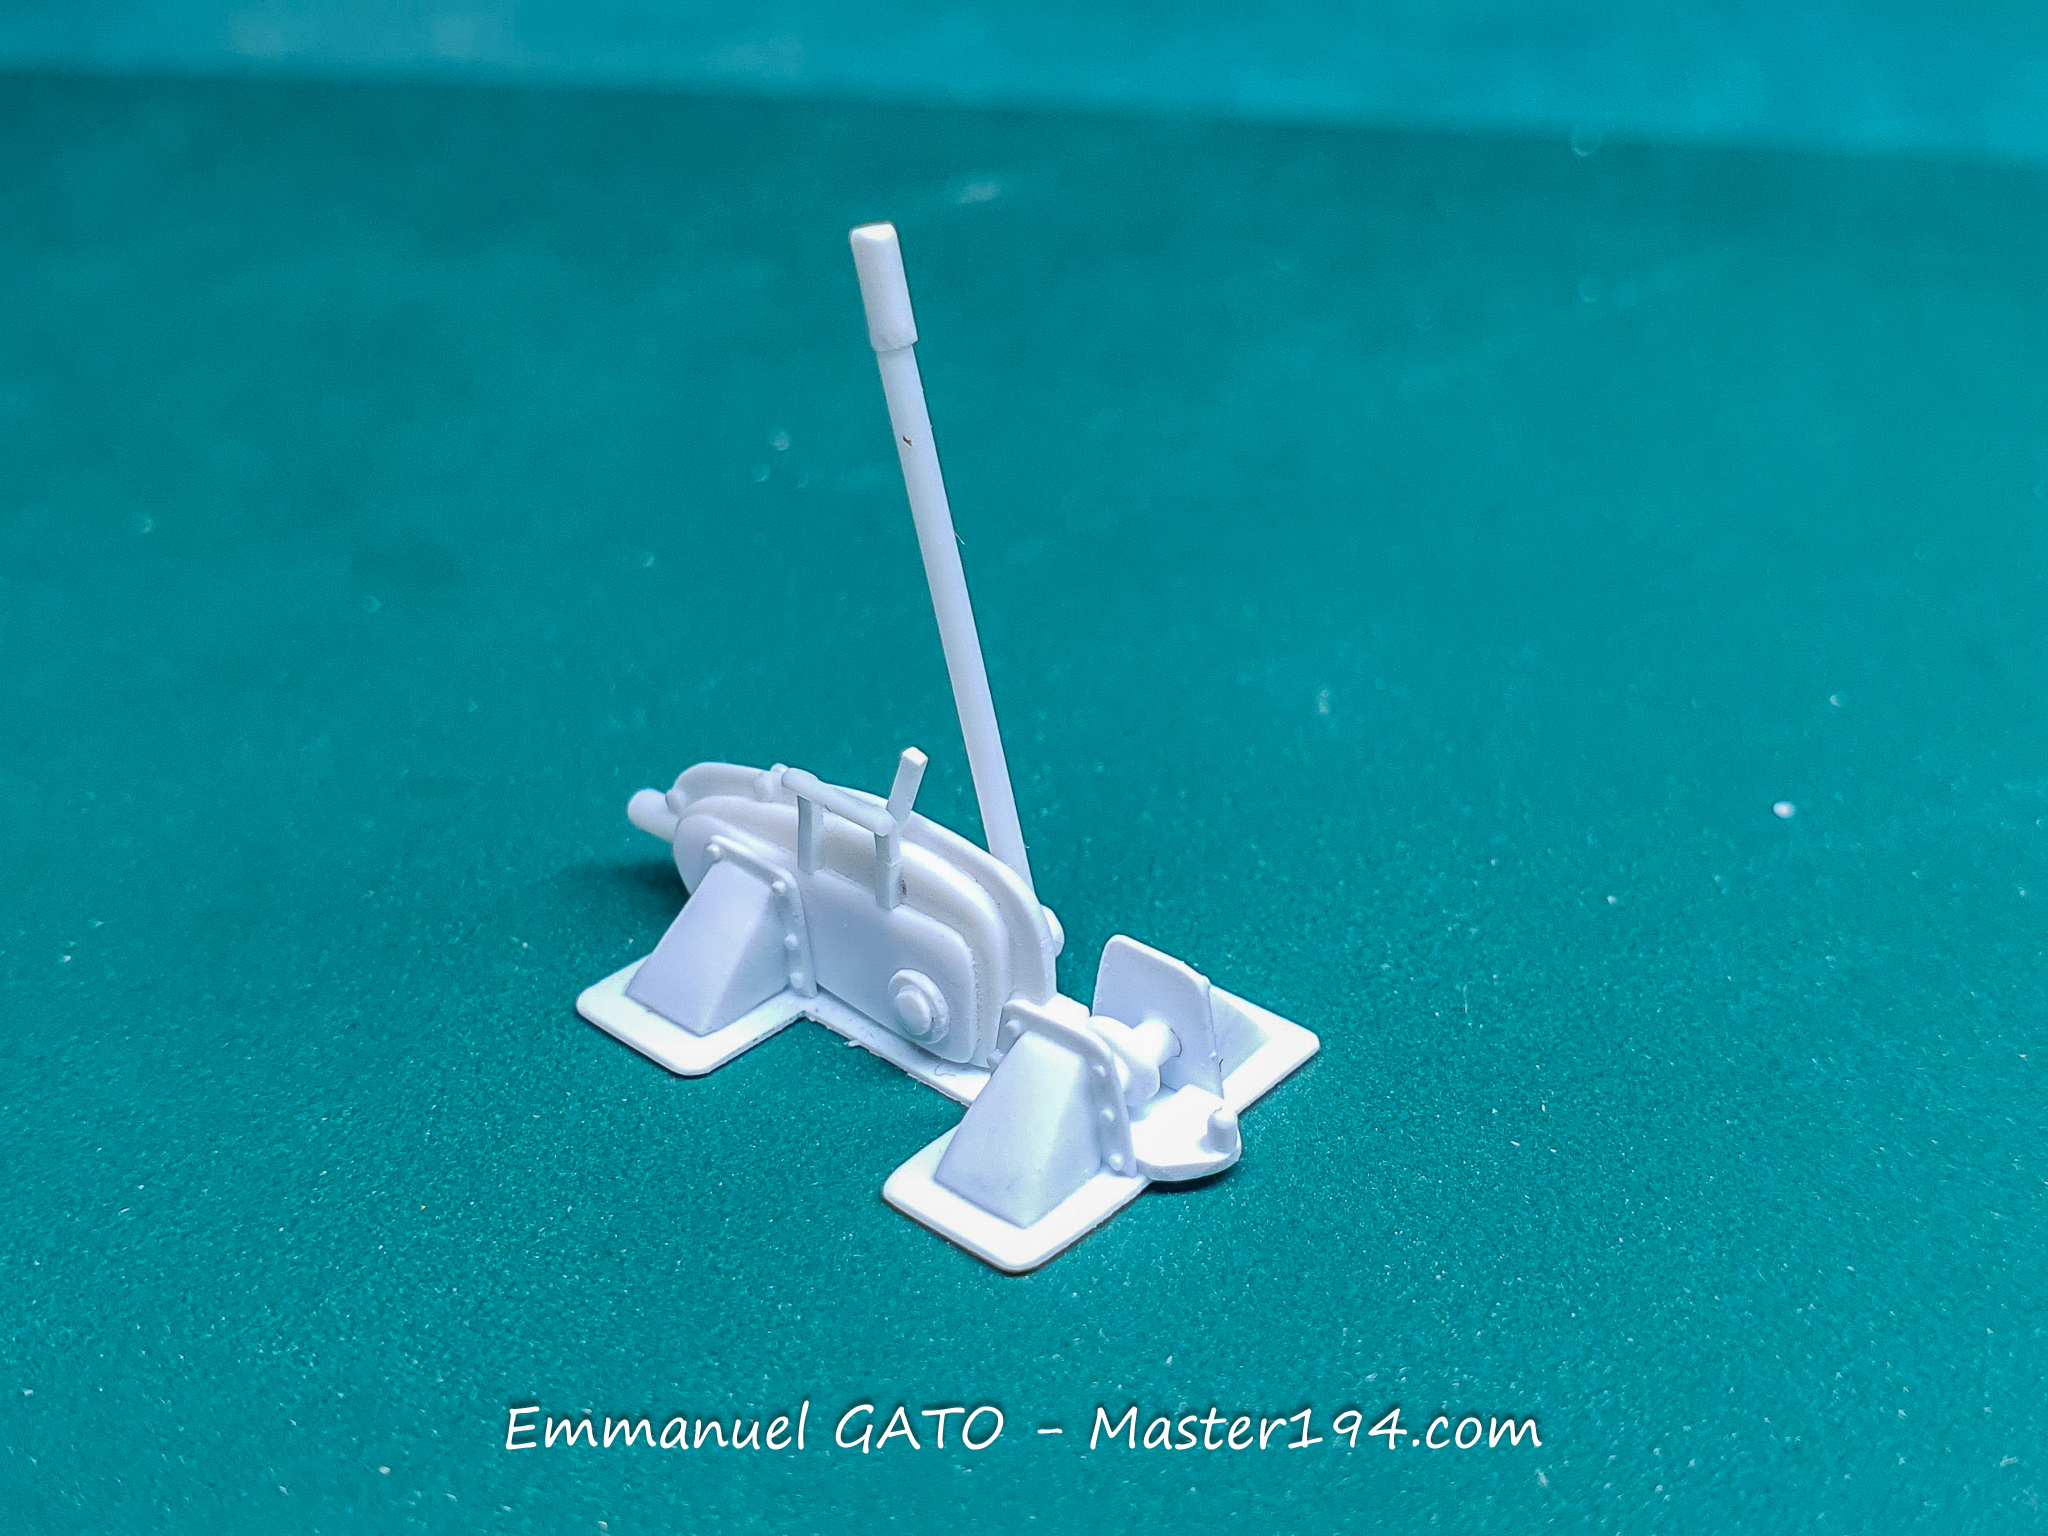
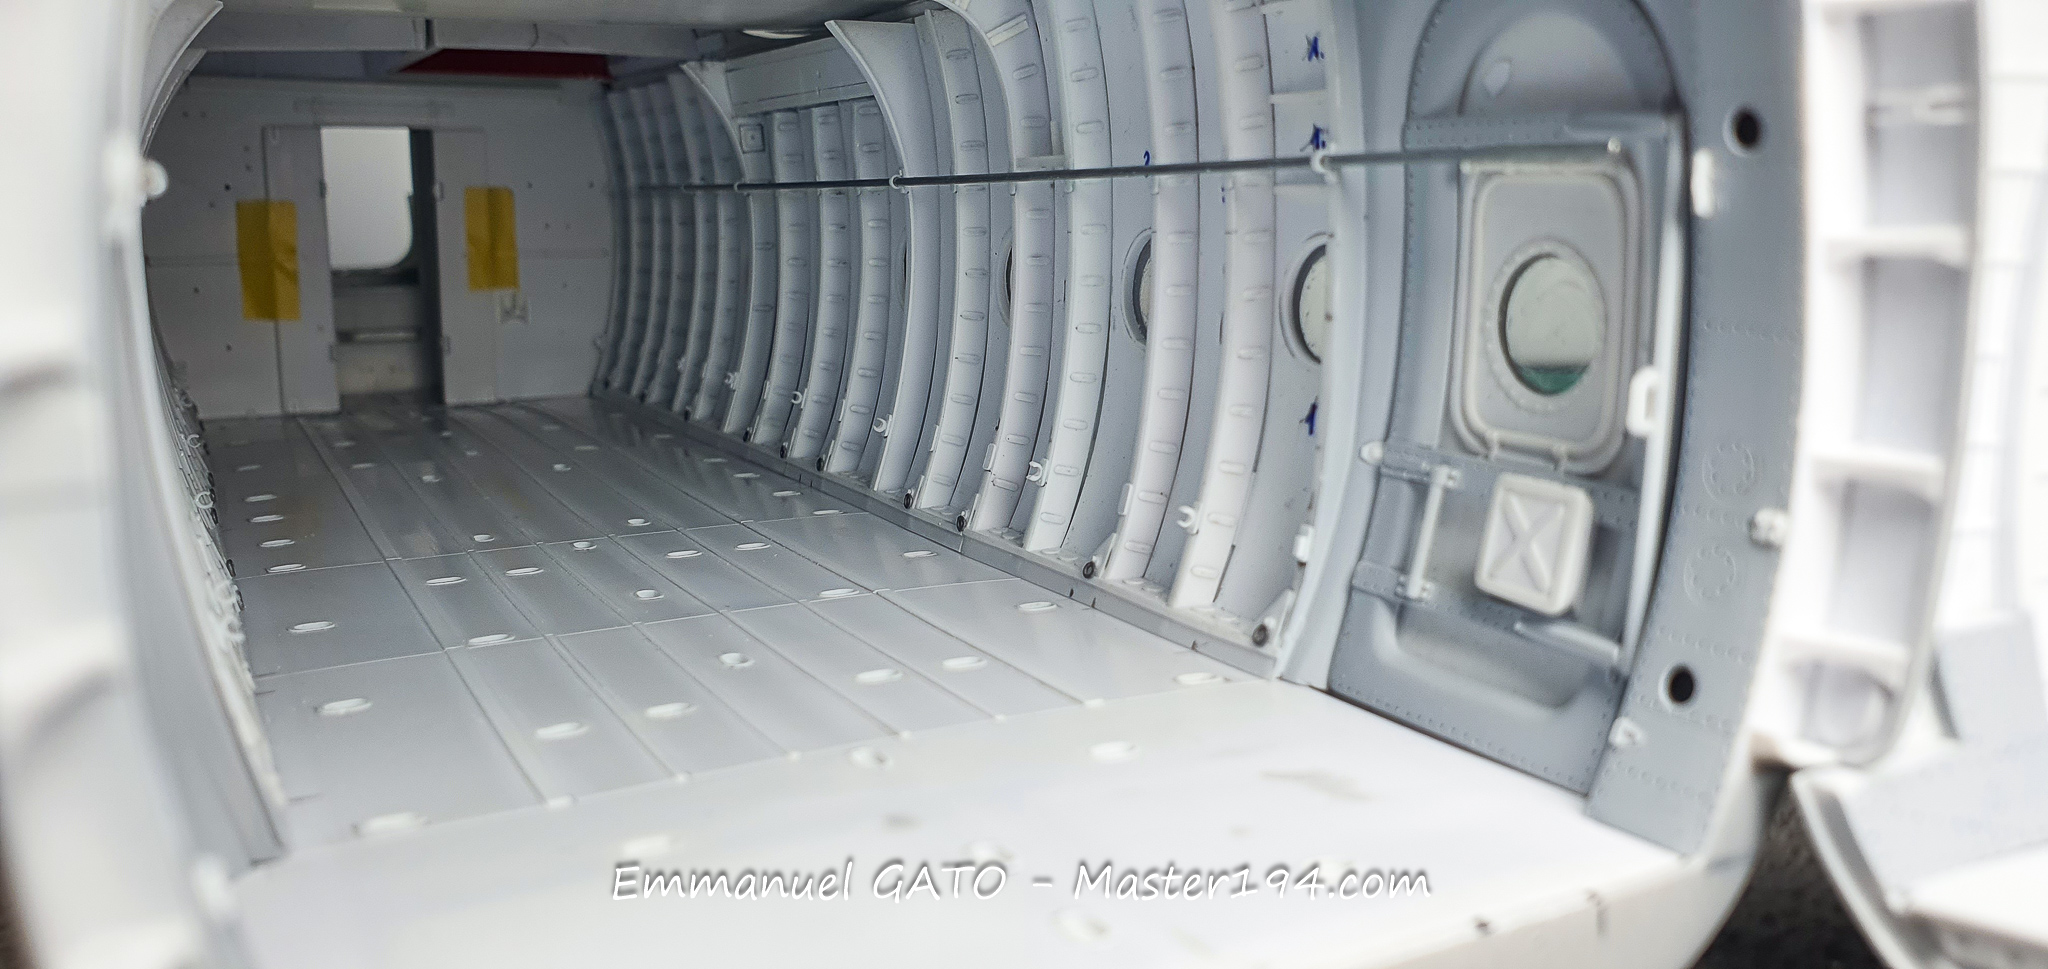
The cargo hold equipment is now fully completed. More photographs will follow. Among the various accessories is the “tirefort”—the manual winch used to haul heavy cargo up inside the aircraft. A workout fit for Superman!
I wrap up this step with the two rear clamshell doors, which will of course be displayed open. They will reveal the interior of the aircraft, built following the demanding recommendations of my friend Michel, a former Noratlas “driver.”
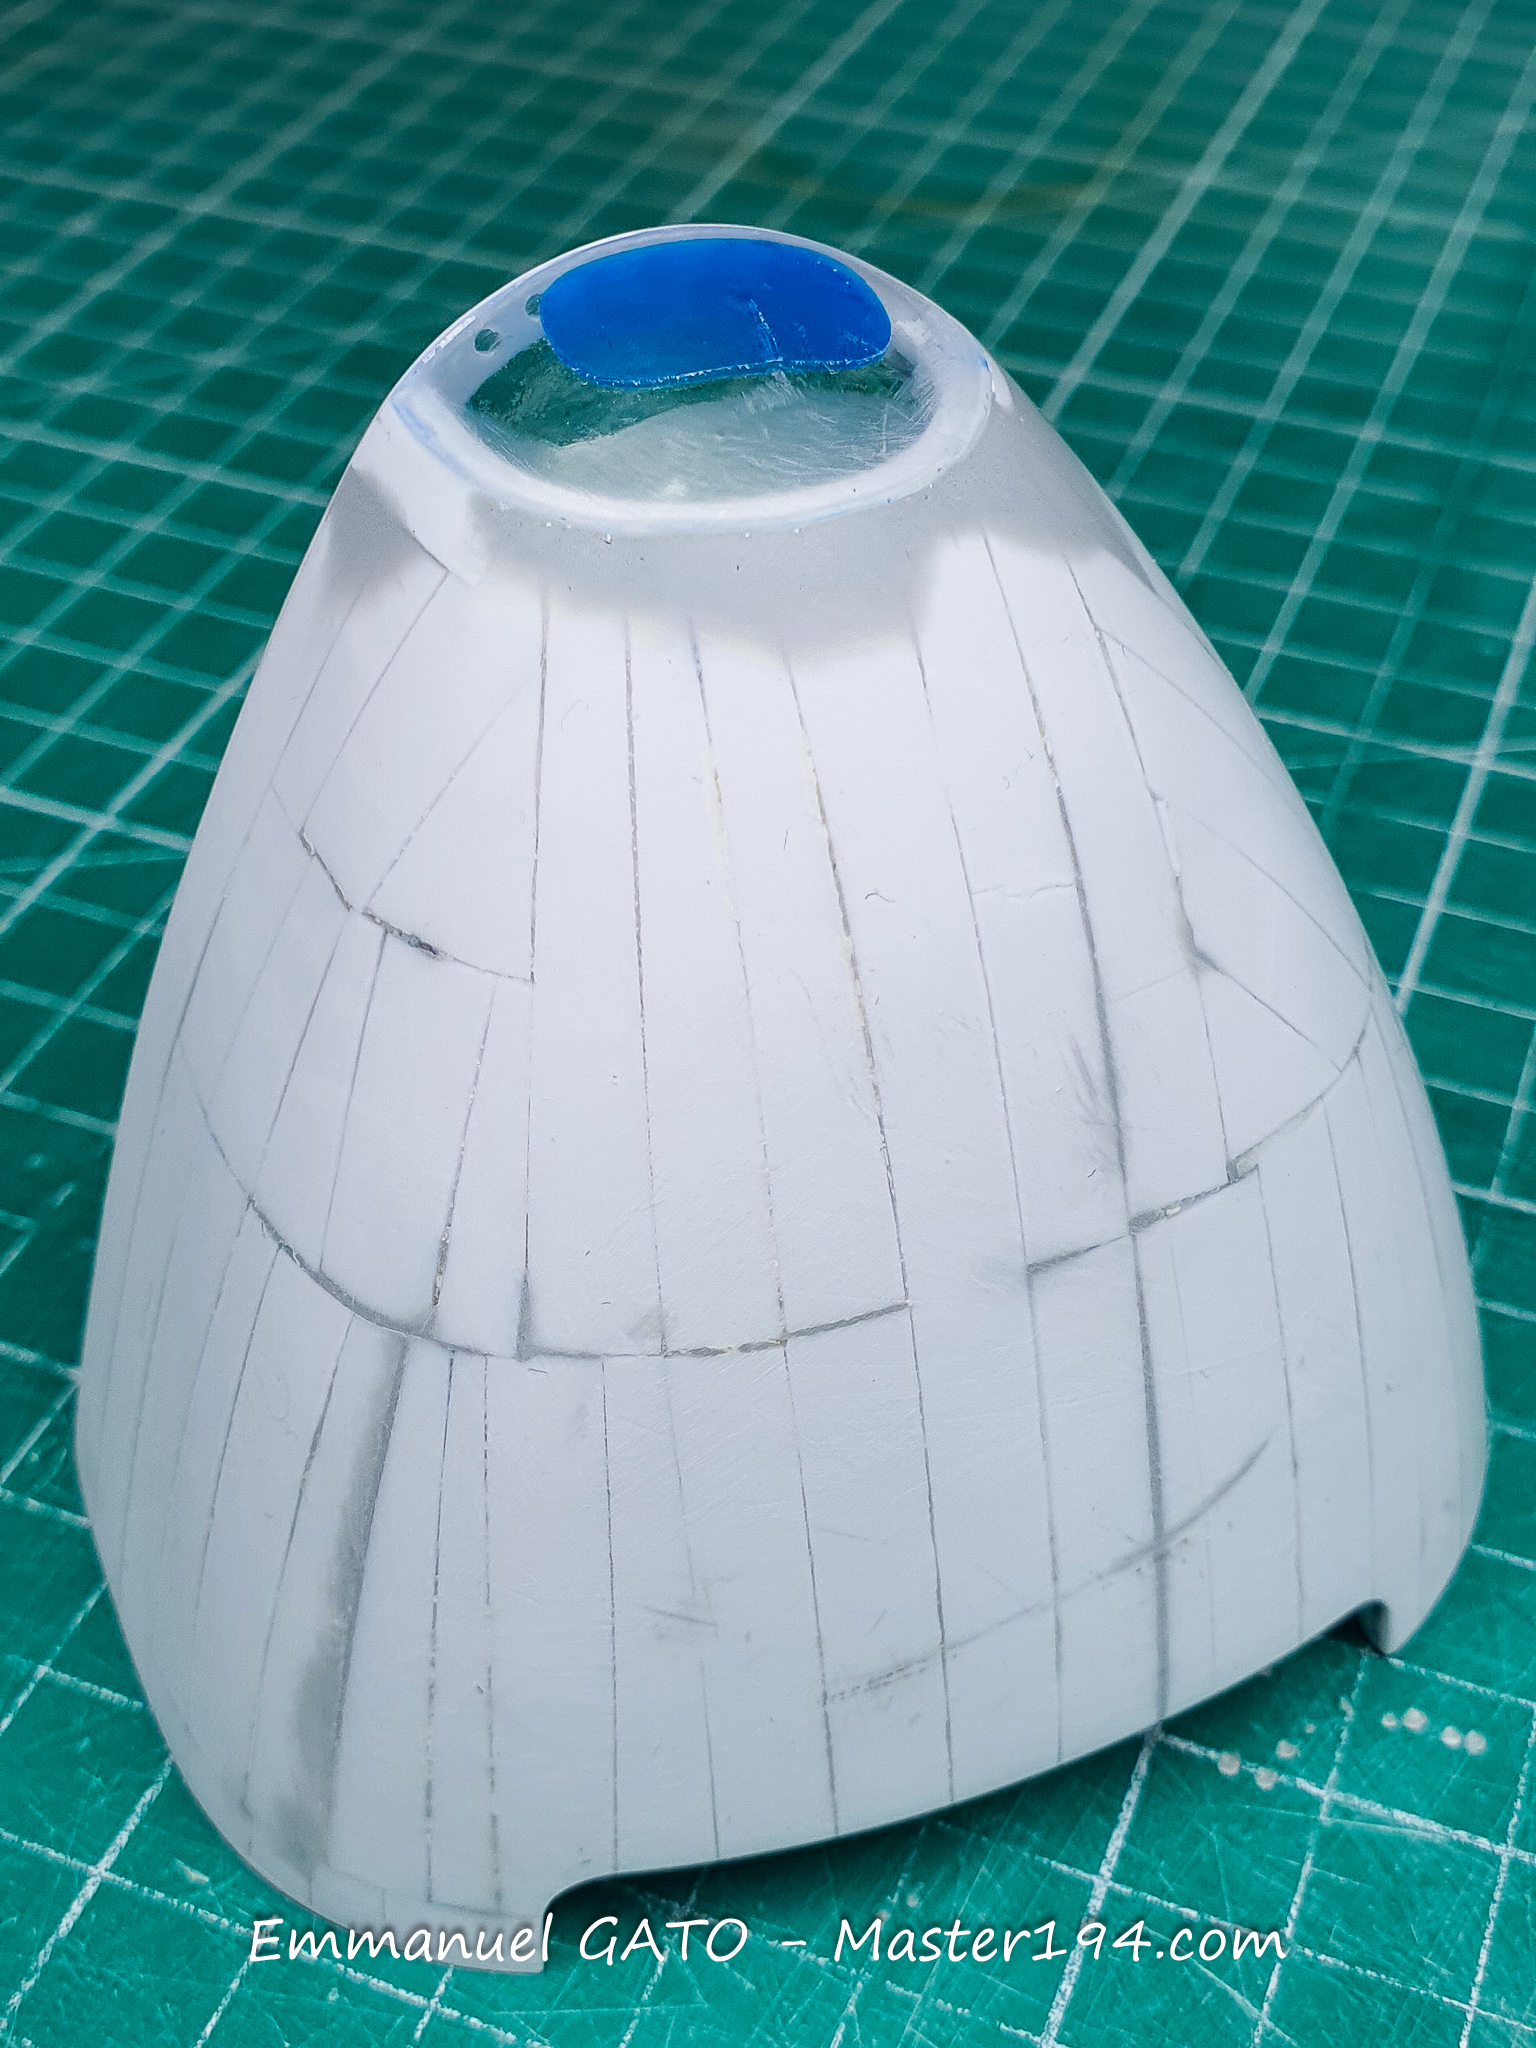
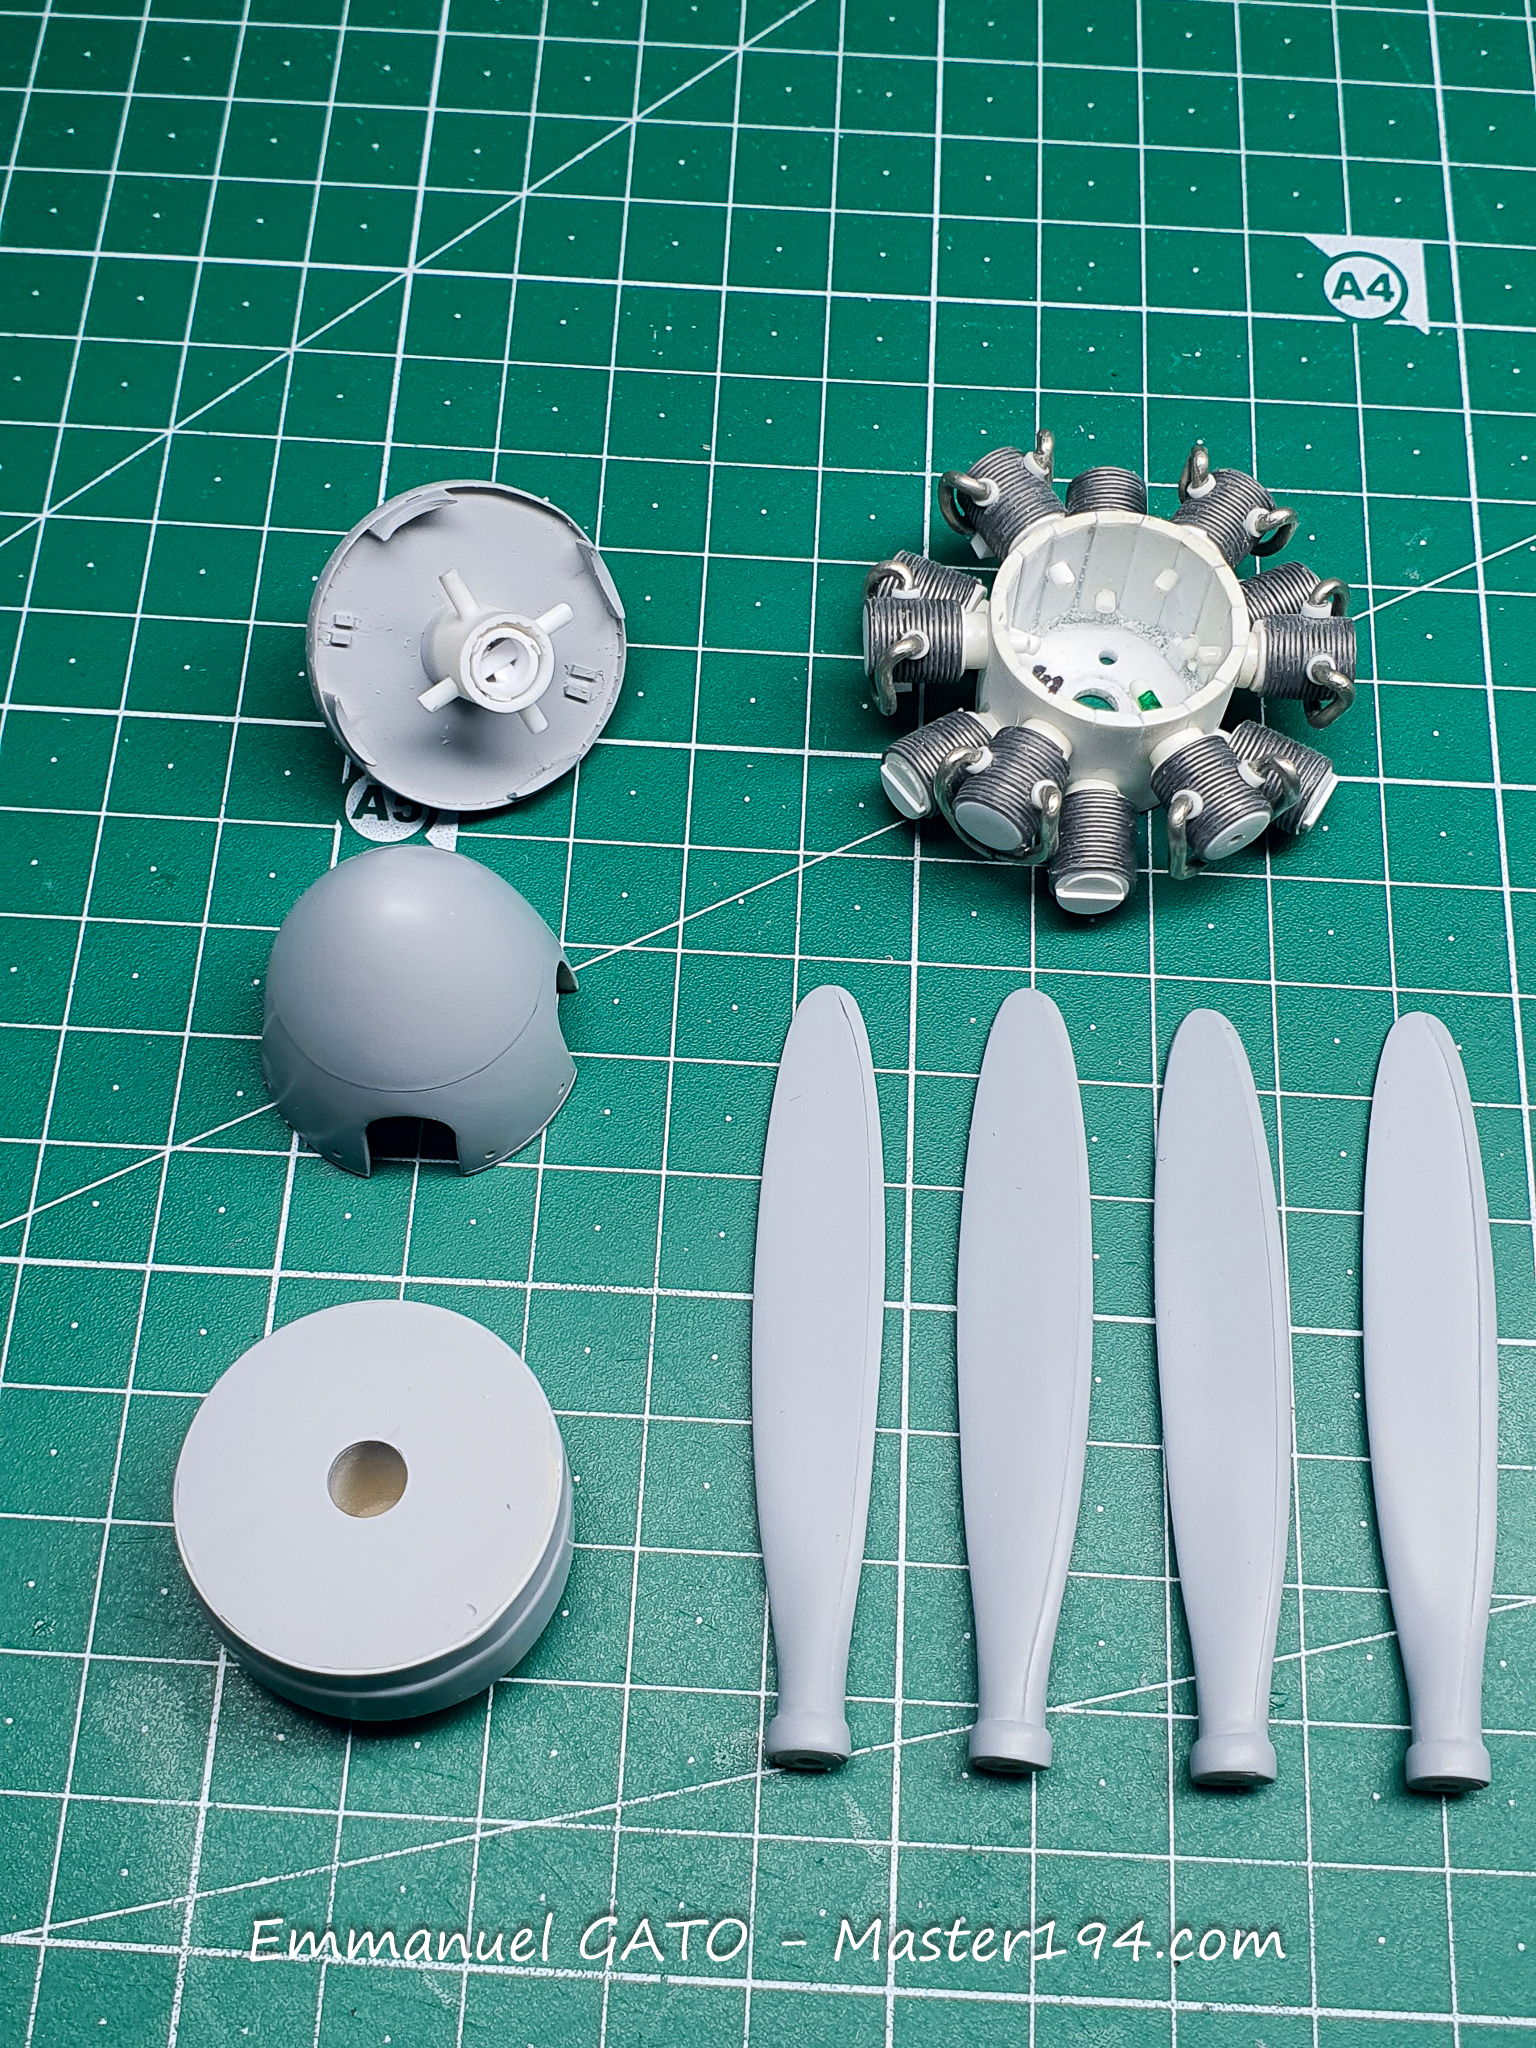
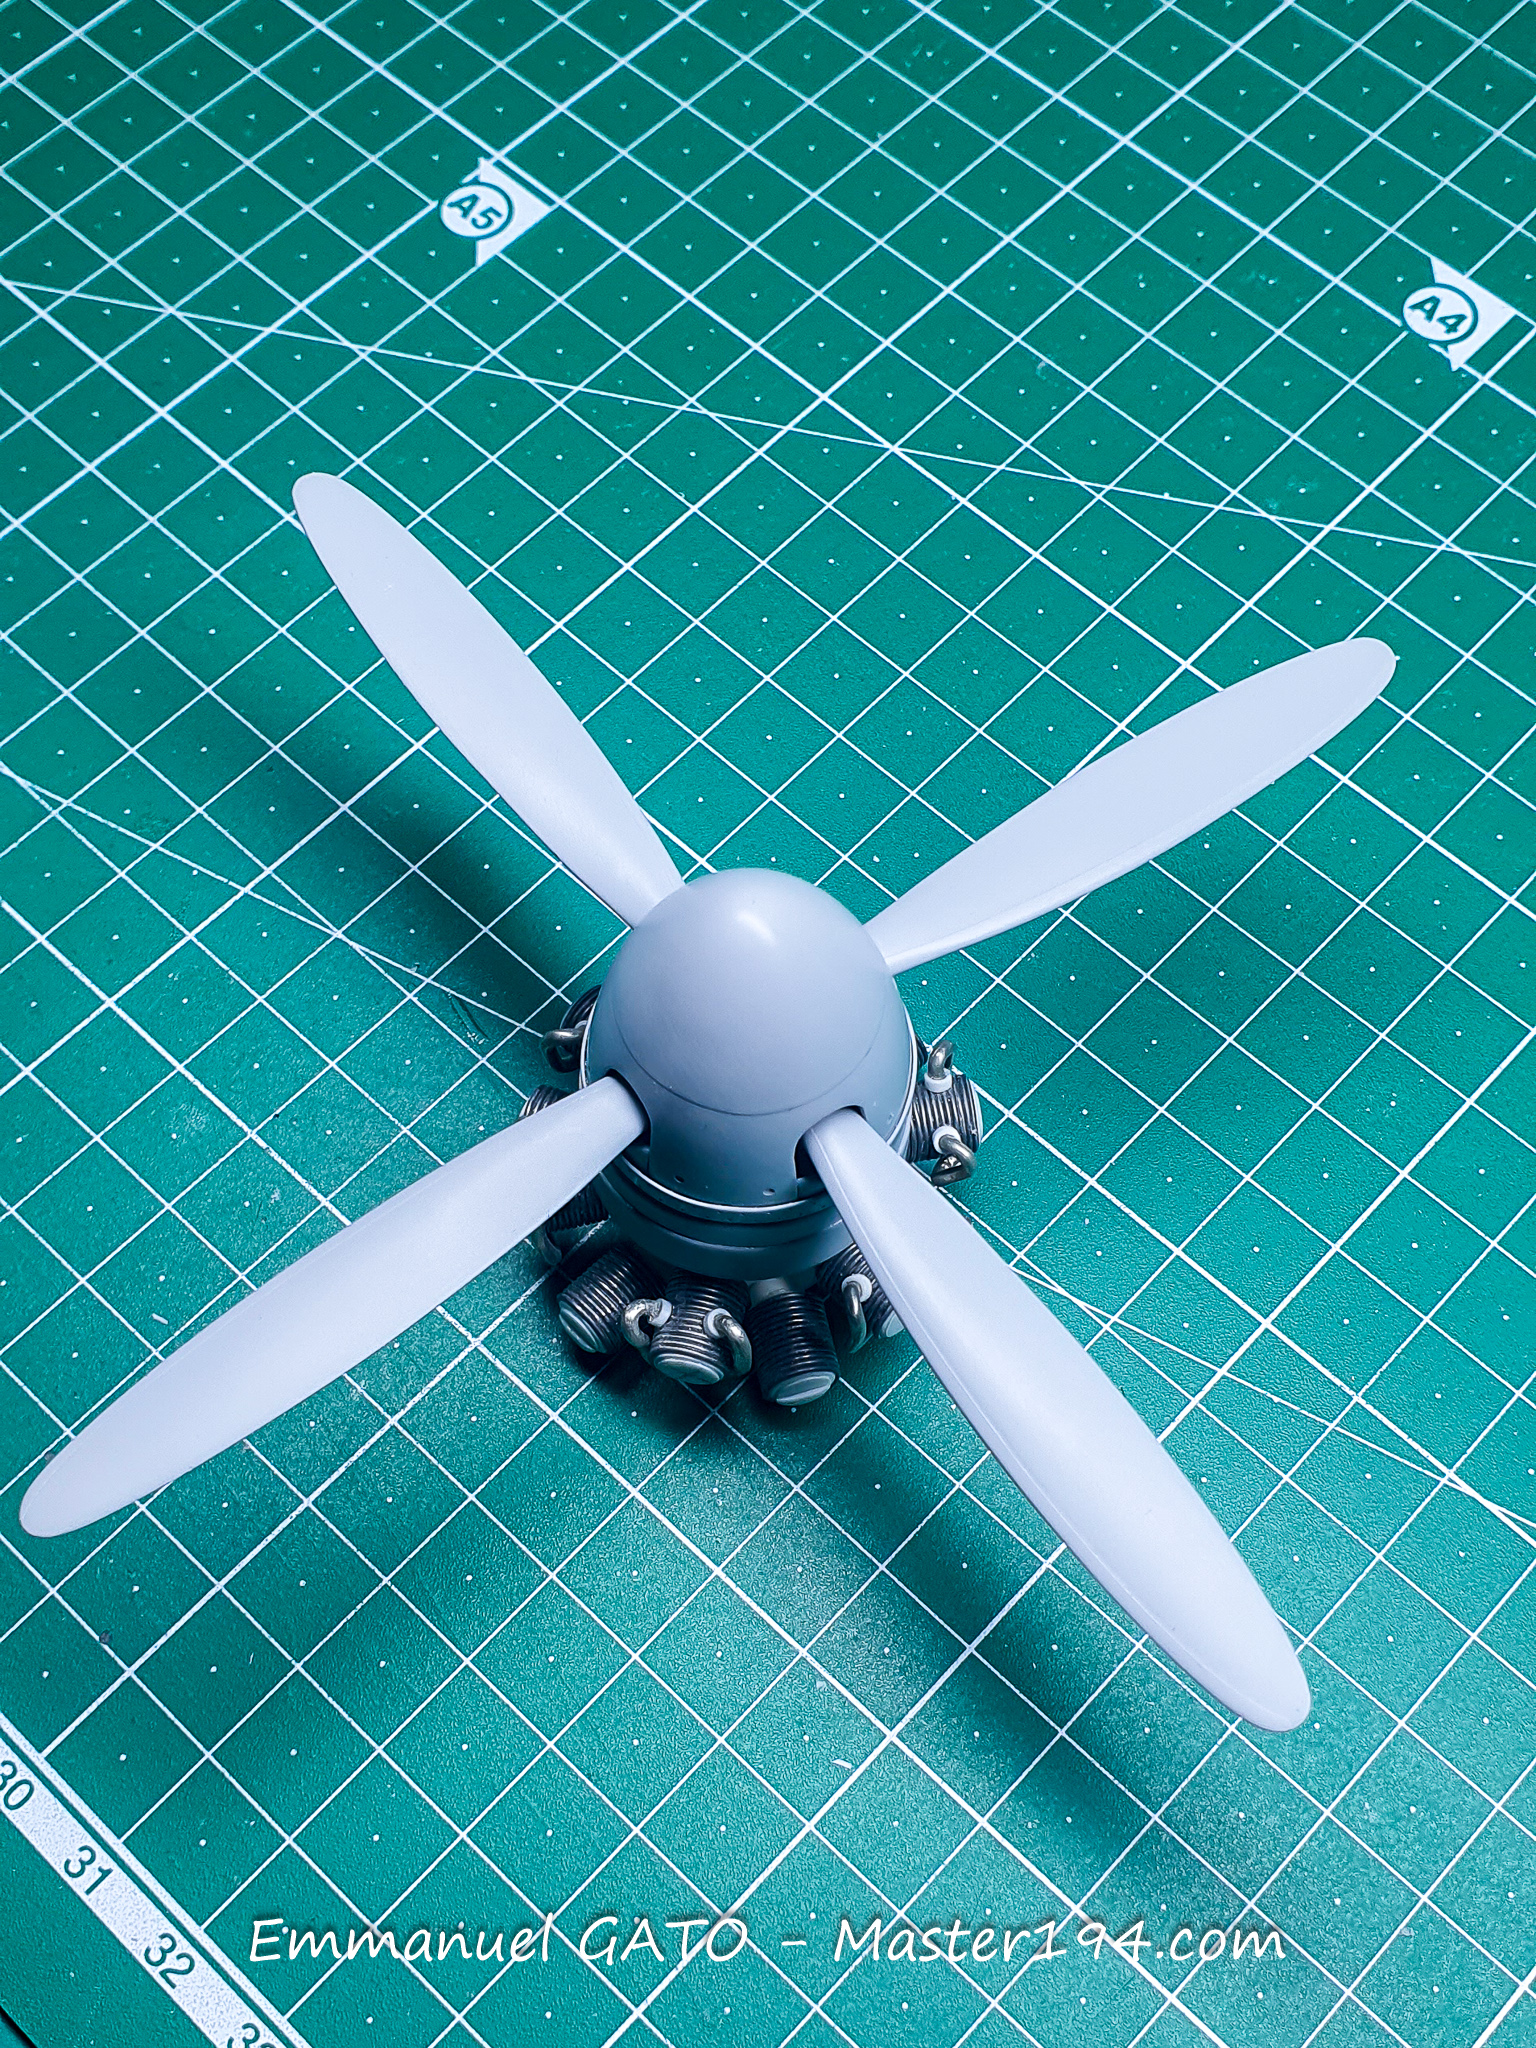
I then return to the engines, propeller blades, and the two spinners. I made extensive use of cellulose sanding sealer sprayed through the airbrush to build up subtle raised details. This is notably the case for the blade de-icing boots, which feature a very low-profile relief. I hope the effect will look convincing once painted.
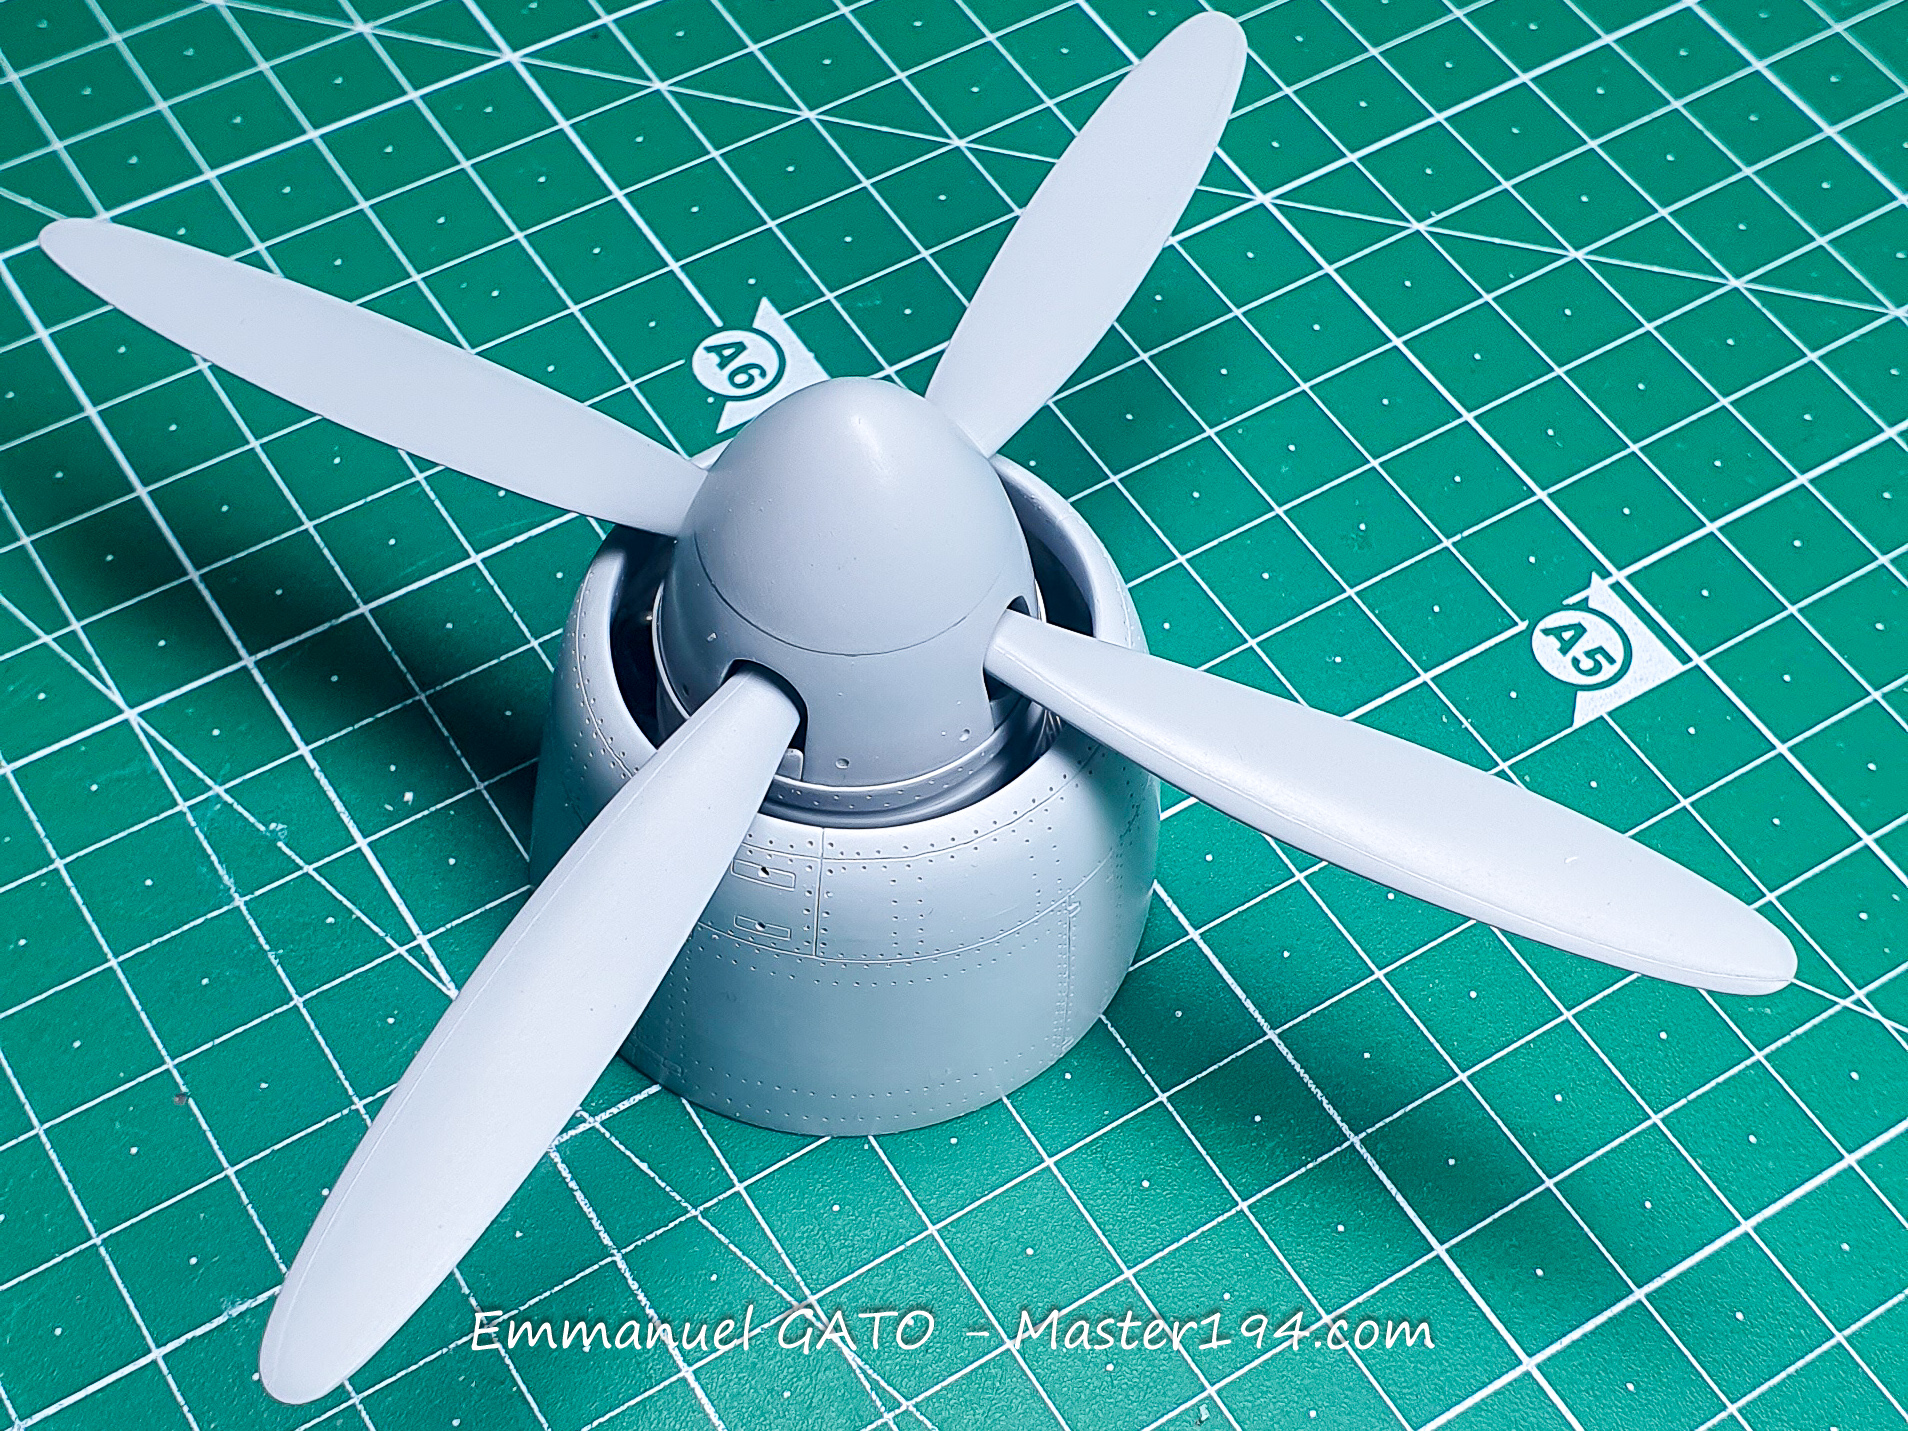
The exact same method was used on the propeller spinner, where the front section overlaps the rear section. This allows you to achieve very fine and consistent stepped thicknesses.
The final photograph also shows the engine cowling and the tight gap remaining between the spinner and the leading-edge lips of the cowling. In the end, you will barely be able to see the cylinders of the Hercules engines.
Furthermore, the Silhouette plotter makes it possible to reproduce masks infinitely, whether for identical or symmetrical parts.
To illustrate the process, here is the fuselage with several applications:
- masks meant for the portholes;
- their framing, with a very slight raised thickness—there are fourteen in total;
- a protective fuselage strip against ice debris kicked up by the propeller blades;
- a slightly raised access panel;
- a riveted patch plate meant to conceal damage presumably sustained by the fuselage.
In short, the Silhouette is a miracle worker!