 by
Landing gear, propellers, and balance check
Before stepping away from the workshop for a good month, I put in one final push on the model. For personal schedule reasons related to the move, I ultimately won’t be able to attend Telford this year with the Noratlas as I had planned. So I have a bit more breathing room than expected.
Here are two distinct parts I worked on: the propellers and the main landing gear.
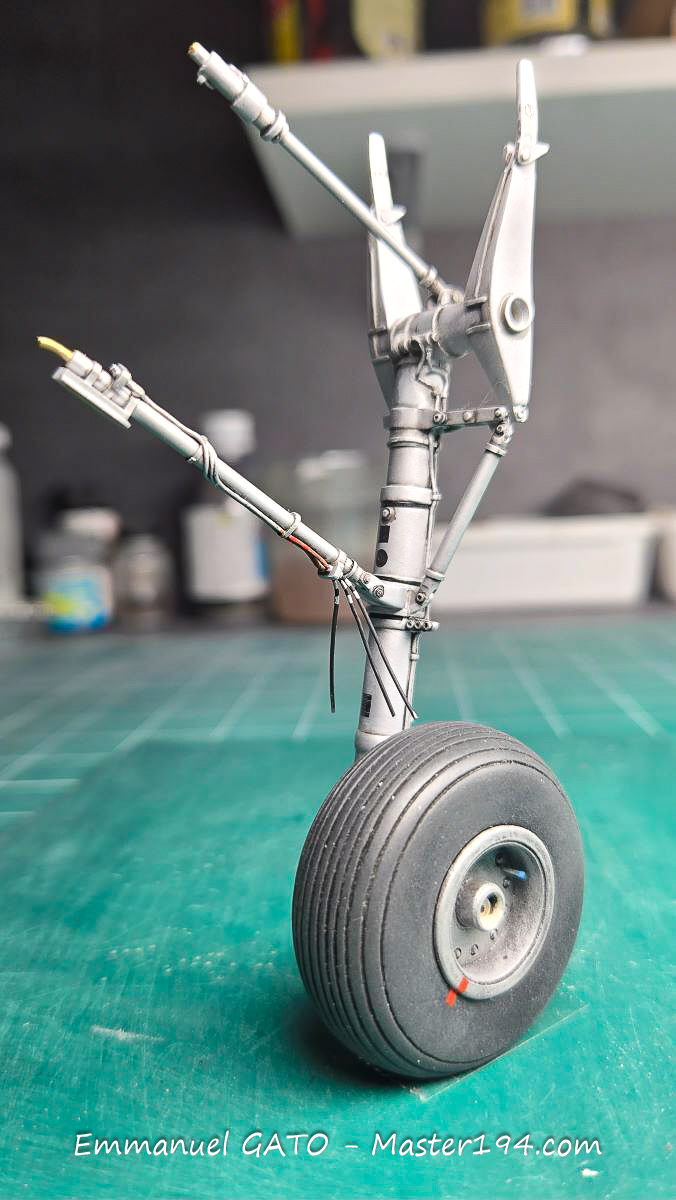
The latter is made primarily of metal, using Albion Alloys brass. The sliding section is made of aluminum; after polishing, it takes on the characteristic chromed look of oleo struts. The entire assembly measures a little over 11 cm. It needs to be sturdy so it doesn’t buckle under the weight of the finished model.
AD
A few details are still missing, notably the hydraulic lines, which won’t be connected until the struts are permanently secured into the fuselage.
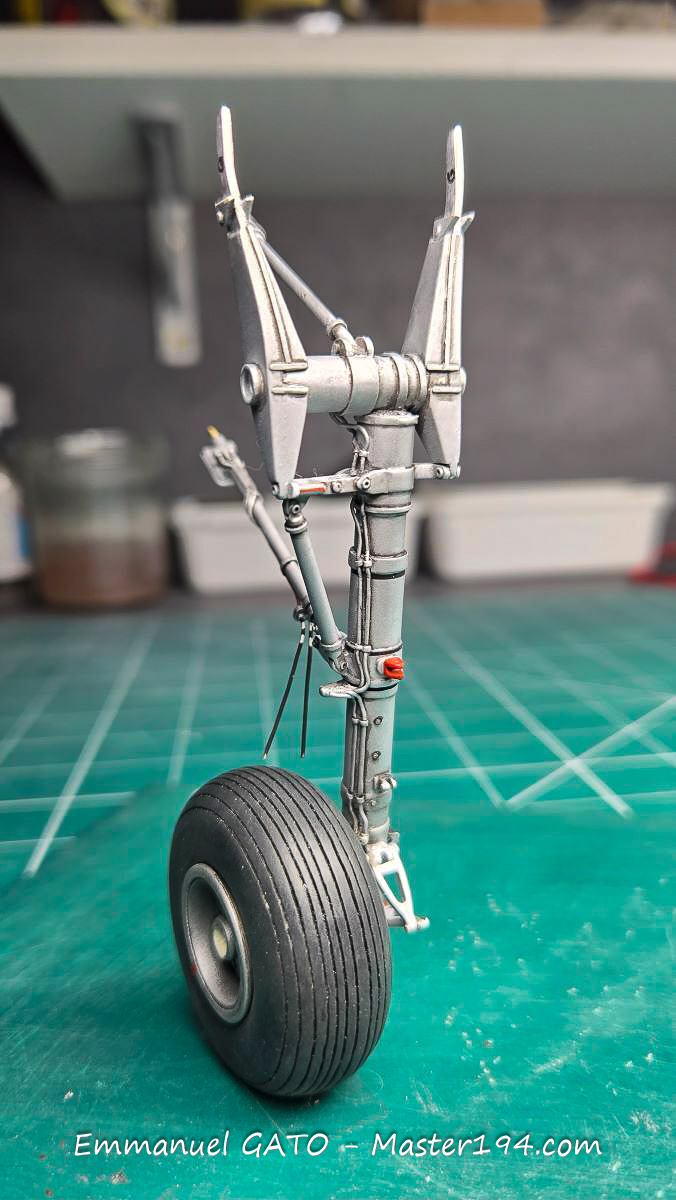
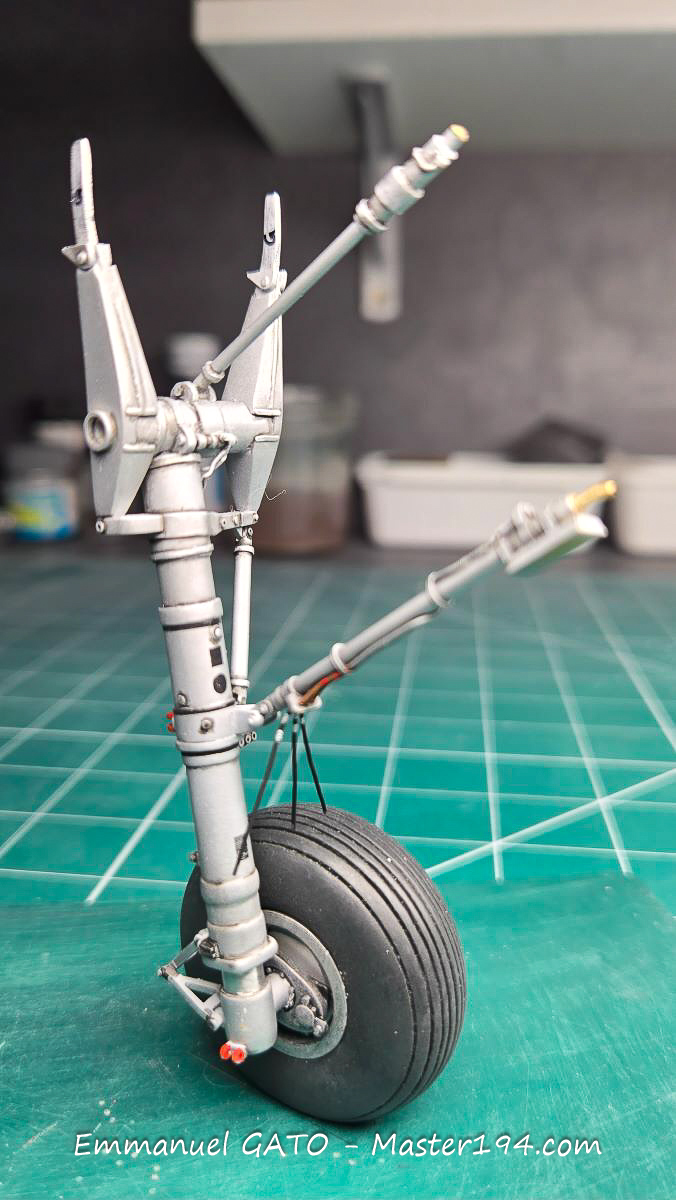
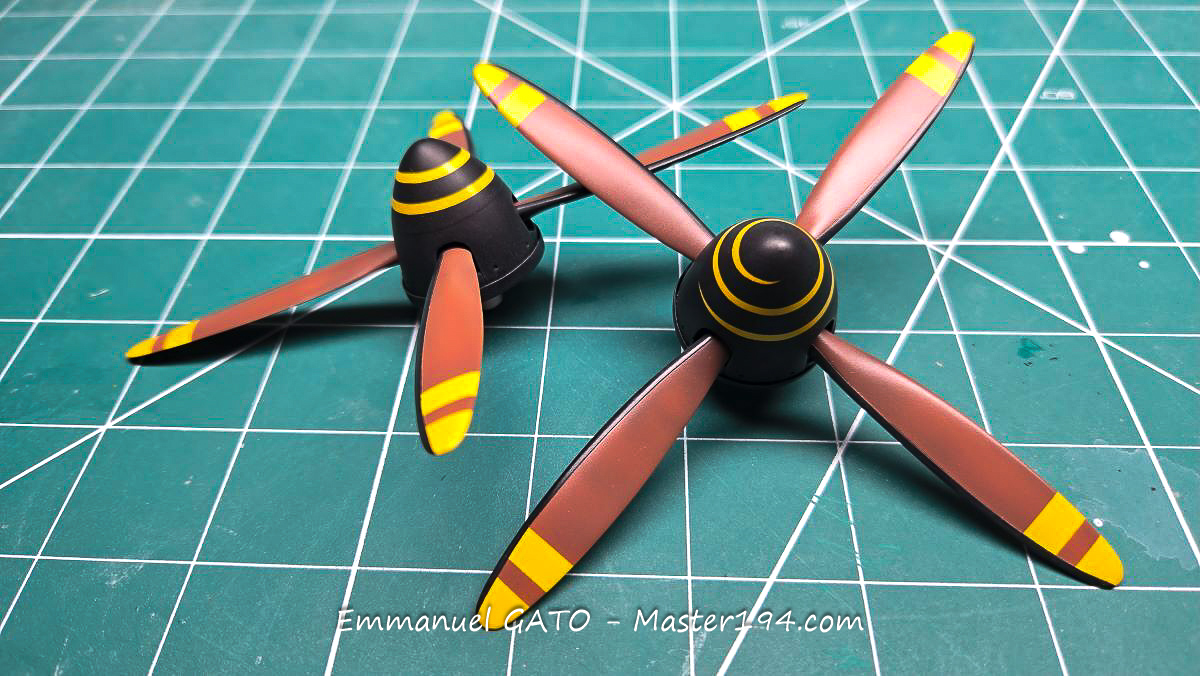
The propellers have received their base coat of paint, but haven’t been weathered yet. The technical stencils are not installed either. The blade color is the result of a fairly empirical mix, until achieving that particular brownish shade that corresponds to the anti-corrosion protective foam found on the real blades.
The gloss finish is achieved using X-22, which the host of the Plastikdream YouTube channel regularly recommends. I have to admit he won me over.
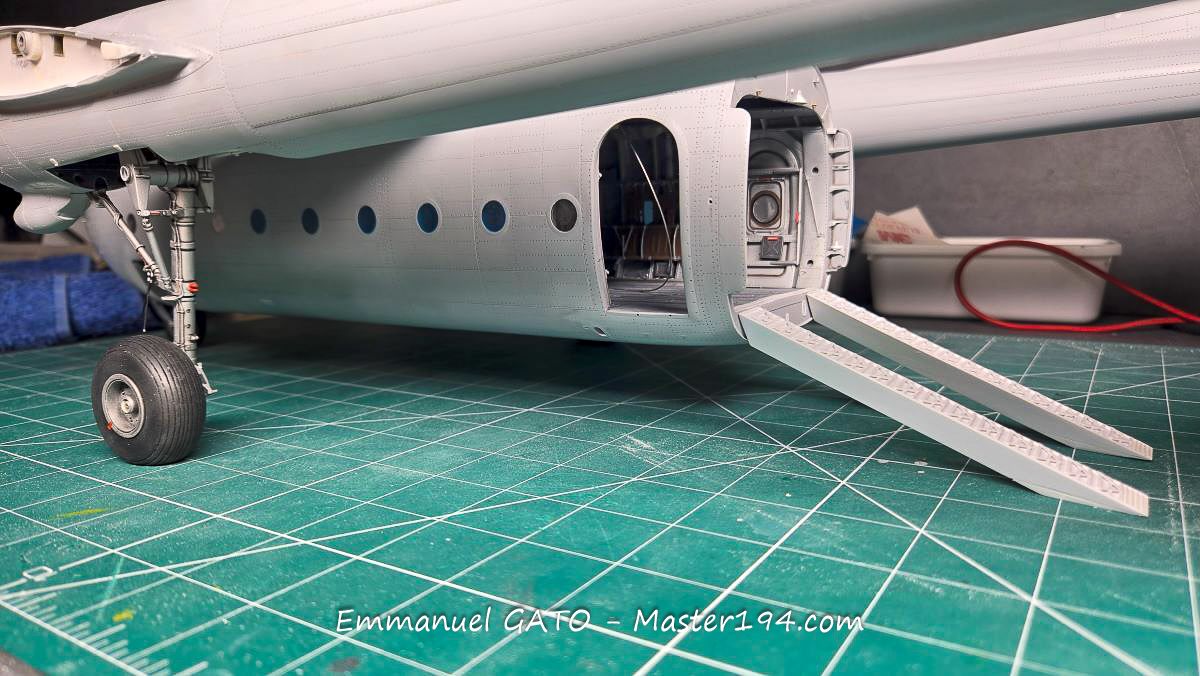
After installing the landing gear without gluing them, I wanted to check an important point: the Noratlas is a bit tail-heavy, and the weight of the engines on the real aircraft is obviously not replicated on the model.
I had considered adding nose ballast, but stopped after several hundred grams. That solution would have required further reinforcing the nose gear—which is already metallic—while unnecessarily increasing the overall weight.
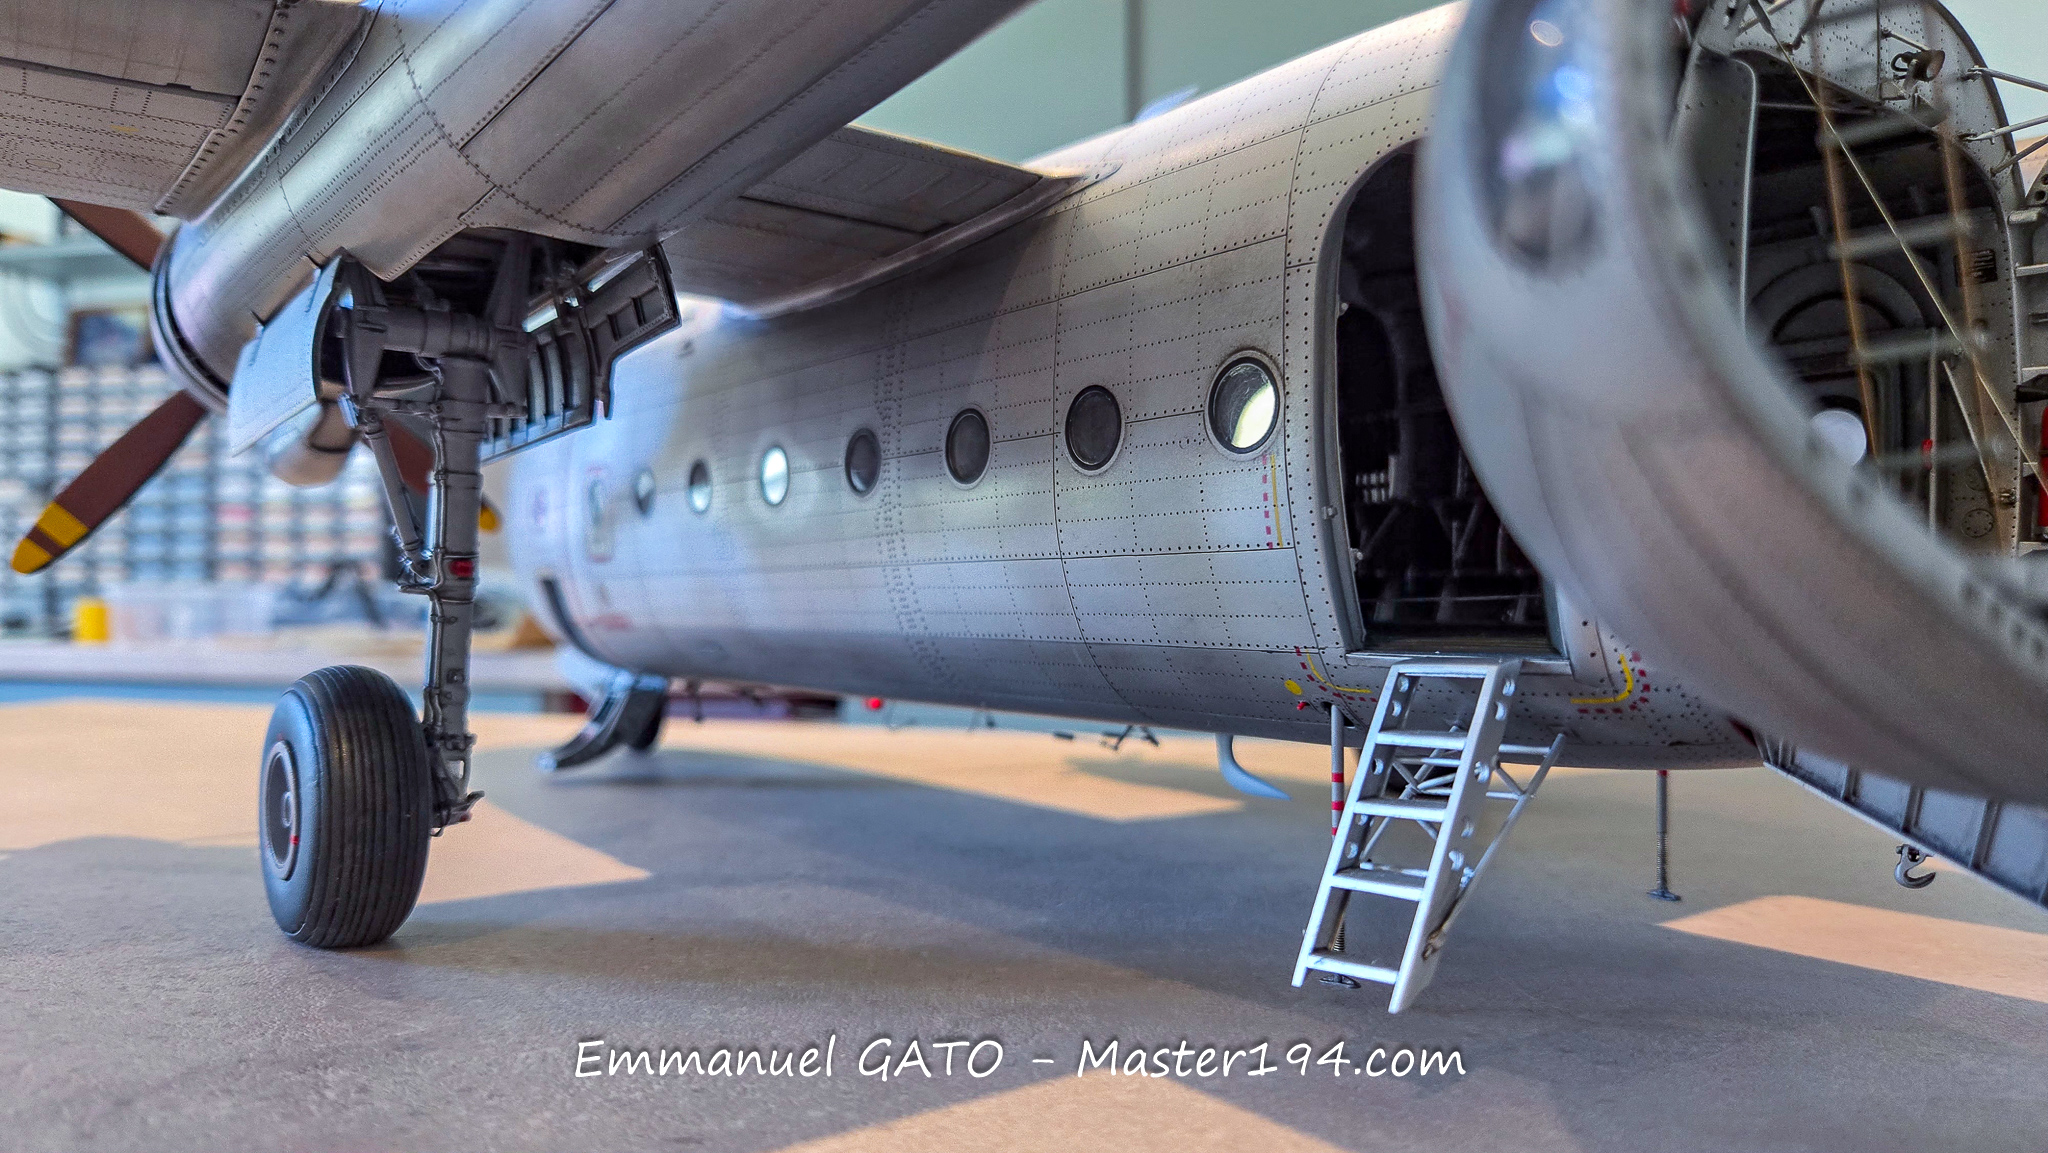
I therefore imagined that the loading ramps could act as props, as mentioned in a previous post. I was able to verify that it works: the model rests properly on all three wheels thanks to this setup.
I’ll take this opportunity to answer Logan about the spinner spiral. After performing some clever calculations and cutting the mask with the Silhouette, I realized the result was completely wrong. I tweaked the settings, but without any more success. Spirals are definitely tricky geometric shapes to calculate, at least for me!
In the end, a flexible masking tape meant for curved lines did the job much more honestly. The “dummies’ guide” to spirals!
Regarding X-22, which forms the common base for many Tamiya paints to which pigments are added to obtain different shades, I use Mr. Color leveling thinner diluted 50-50, following Plastikdream’s advice. It offers a dual benefit: it provides a gloss finish, which is handy for applying decals, and it holds up extremely well against washes and weathering.
It’s a fairly universal product that works particularly well across the various acrylic paints I’ve tested. I swear by it now!
Final work on the wings and cargo preparation
After another period during which moving kept me away from the workbench, I finally found a few moments to get back to the Noratlas.
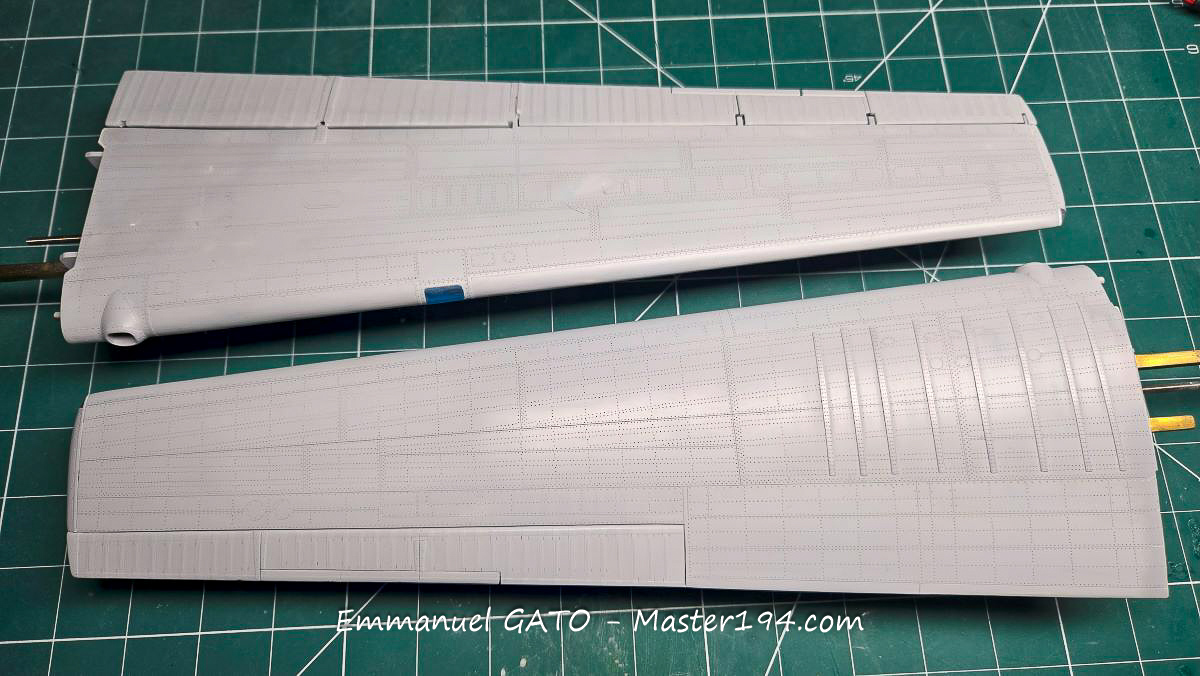
I put the finishing touches on the wings. Here are the two sections, one shown with the upper surface and the other with the lower surface. They are ready to receive their aluminum paint as soon as my schedule allows.
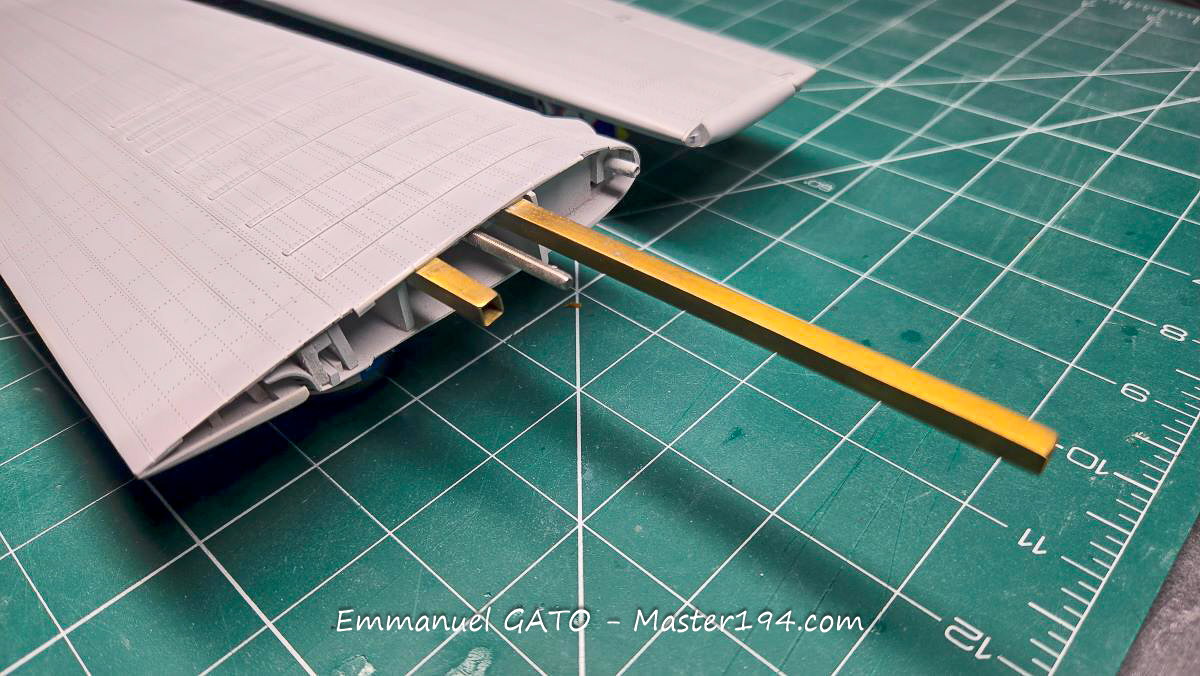
As a reminder, here is the wing root of the detachable wing, complete with its two spars and the threaded rod that will secure it to the tail booms.
After several months of interruption due to renovation work in my new house, things are finally back to normal. Before diving straight back into the Noratlas, I preferred to ease back into modeling by working on the cargo it will carry: a Mirage III turbojet engine.
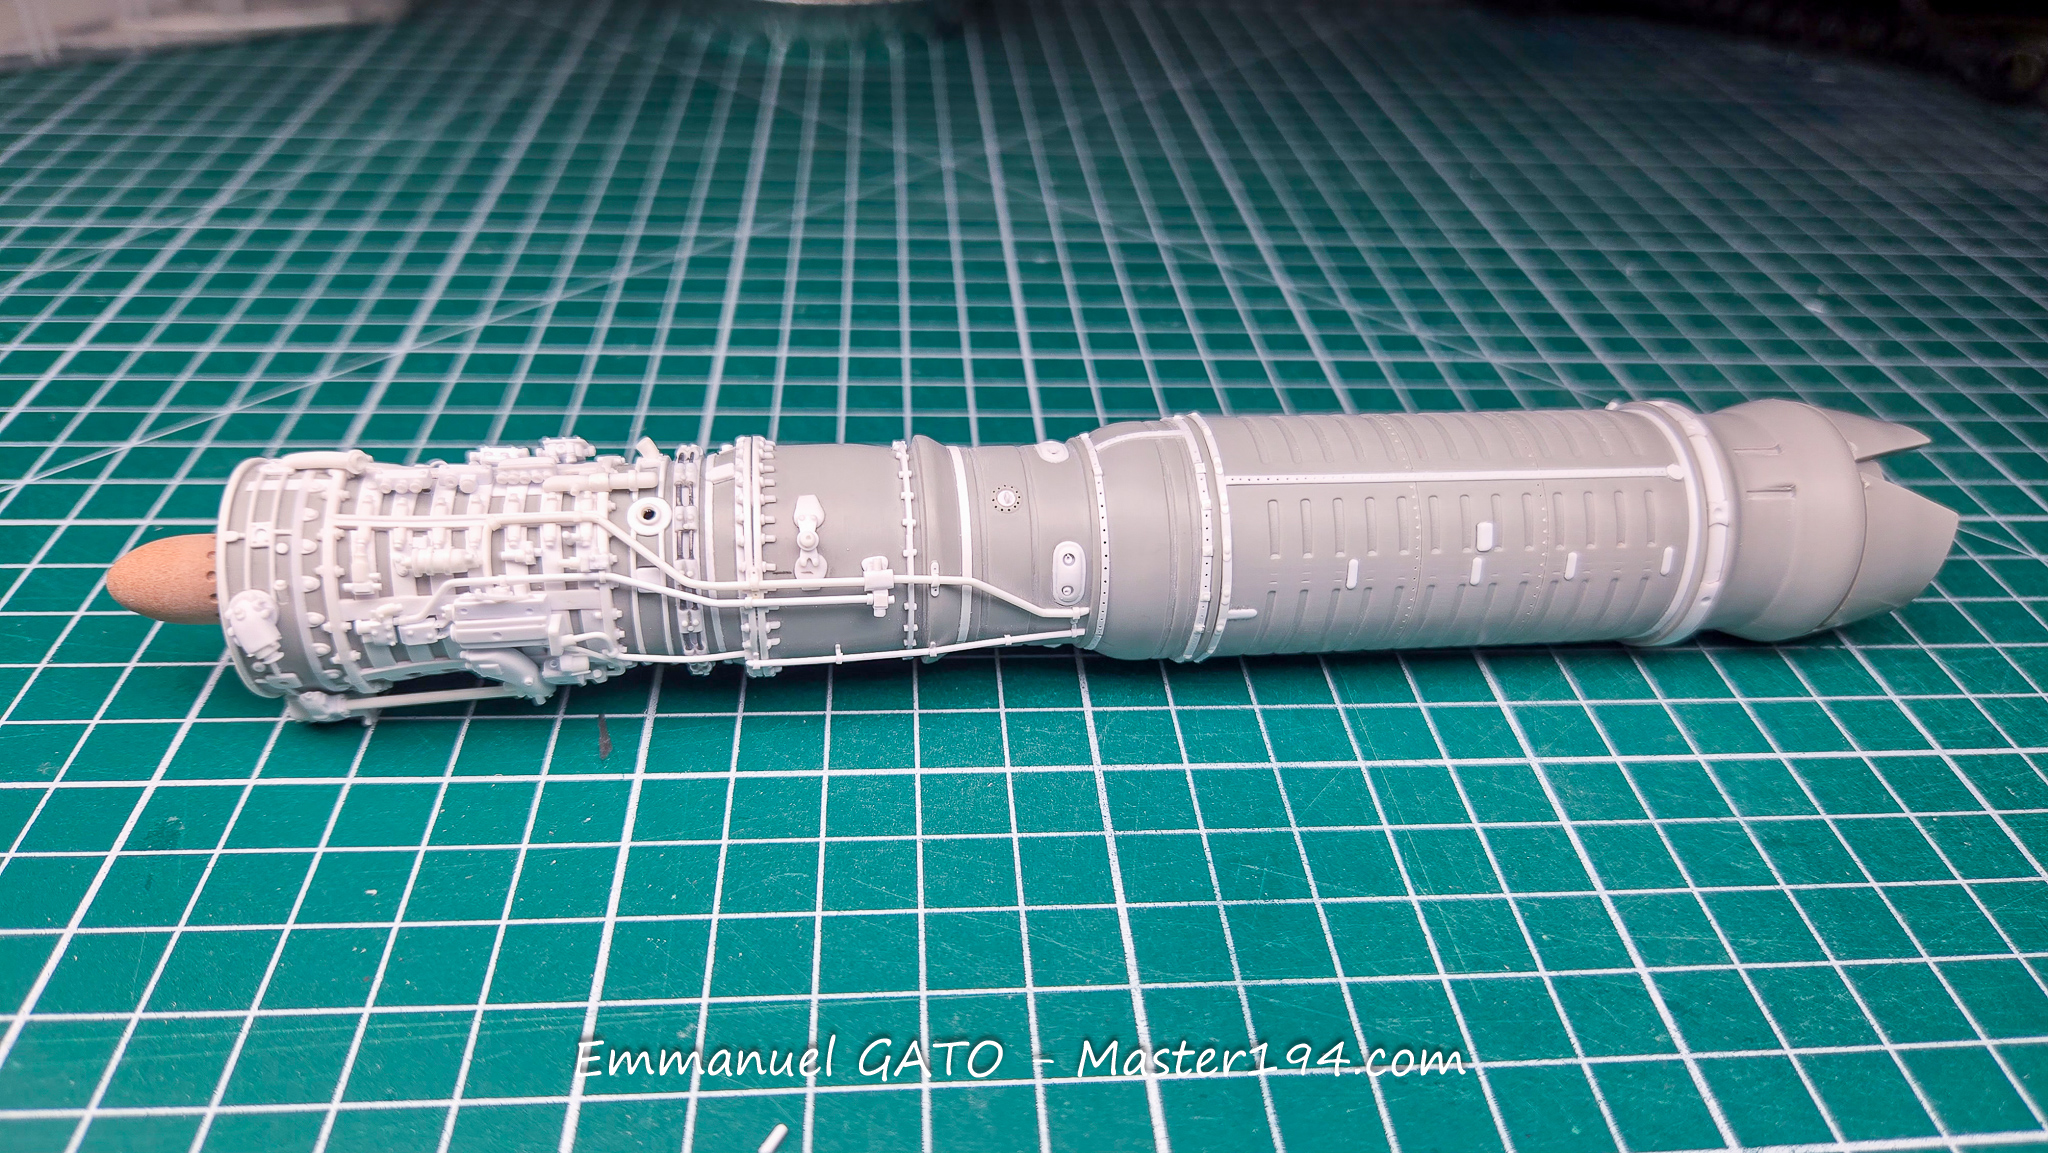
This was a classic mission for the “Grises,” as I mentioned in a previous post. Rather than building everything from scratch, a friend kindly gave me a jet engine salvaged from an Italeri kit. The base is solid, but several details bothered me: the level of detail on the accessories was insufficient, the plumbing was also too basic and molded directly onto the engine body, giving it a half-round cross-section. Finally, the air inlet cone had the wrong shape.
I also had a major scare when I discovered that the transport trailer wouldn’t fit into my model’s cargo hold. After fearing an error in the Noratlas’s dimensions—after two years of work, no less!—I finally discovered that the cart itself had incorrect dimensions. Phew!
Here is the progress on the cargo. Just like with the aircraft, achieving this level of detail takes time. Many pipes and cables are still missing, which will be added at the end to make painting the engine easier.
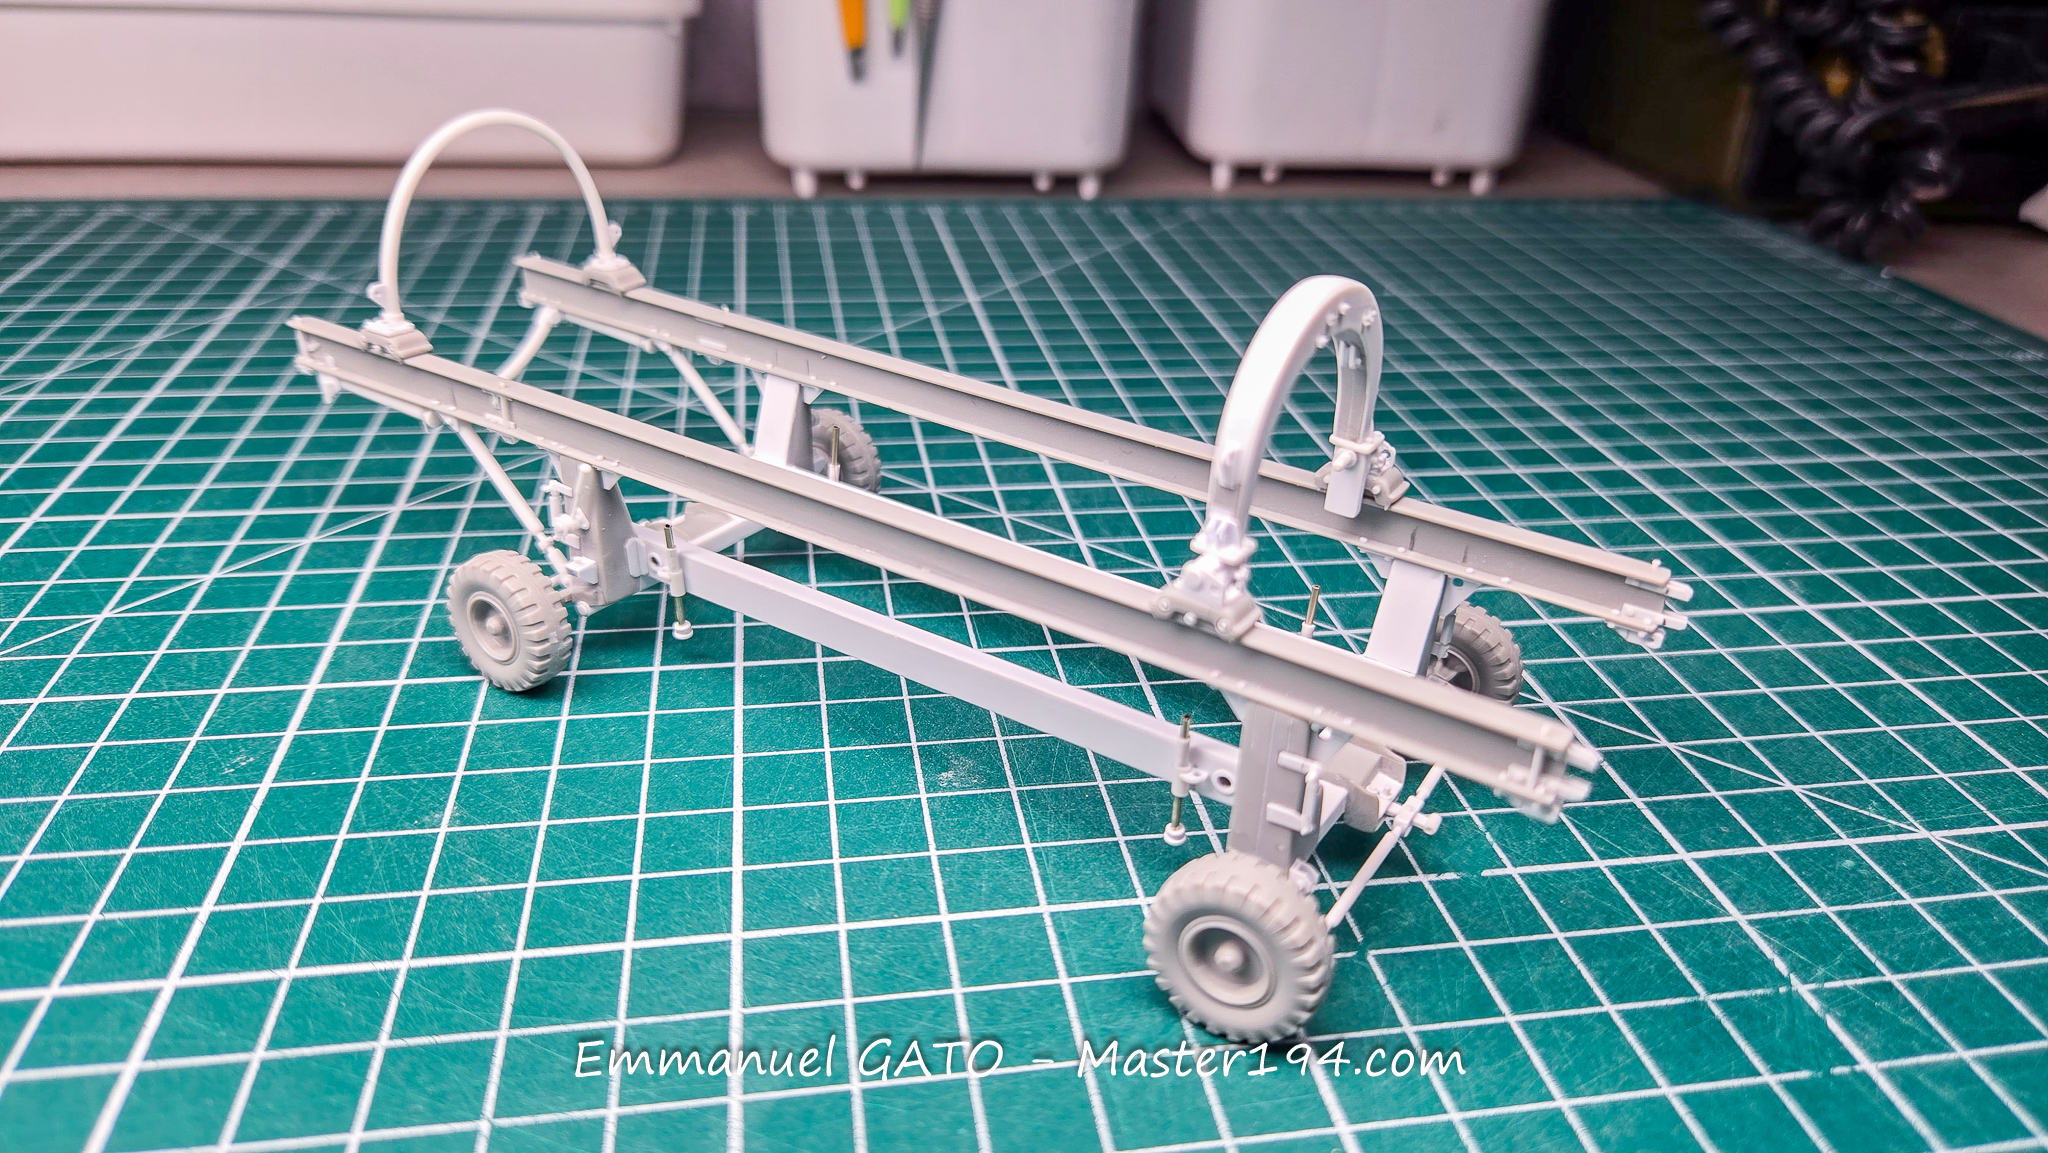
To answer a few questions, the engines indeed came with a wheeled transport dolly. Italeri represented it pretty well, even though its wheelbase is nearly 7 mm too wide. That’s not nitpicking: the dolly actually has to be able to roll up the access ramp into the cargo hold.
The cone was turned on a lathe from “lab” [urethane tooling board]. Since this material is quite porous, I will need to apply a cellulose primer, such as Surfacer, to fill the micro-holes and achieve a smooth surface.
For the rest: patience and documentation. Just like everything else in scale modeling!
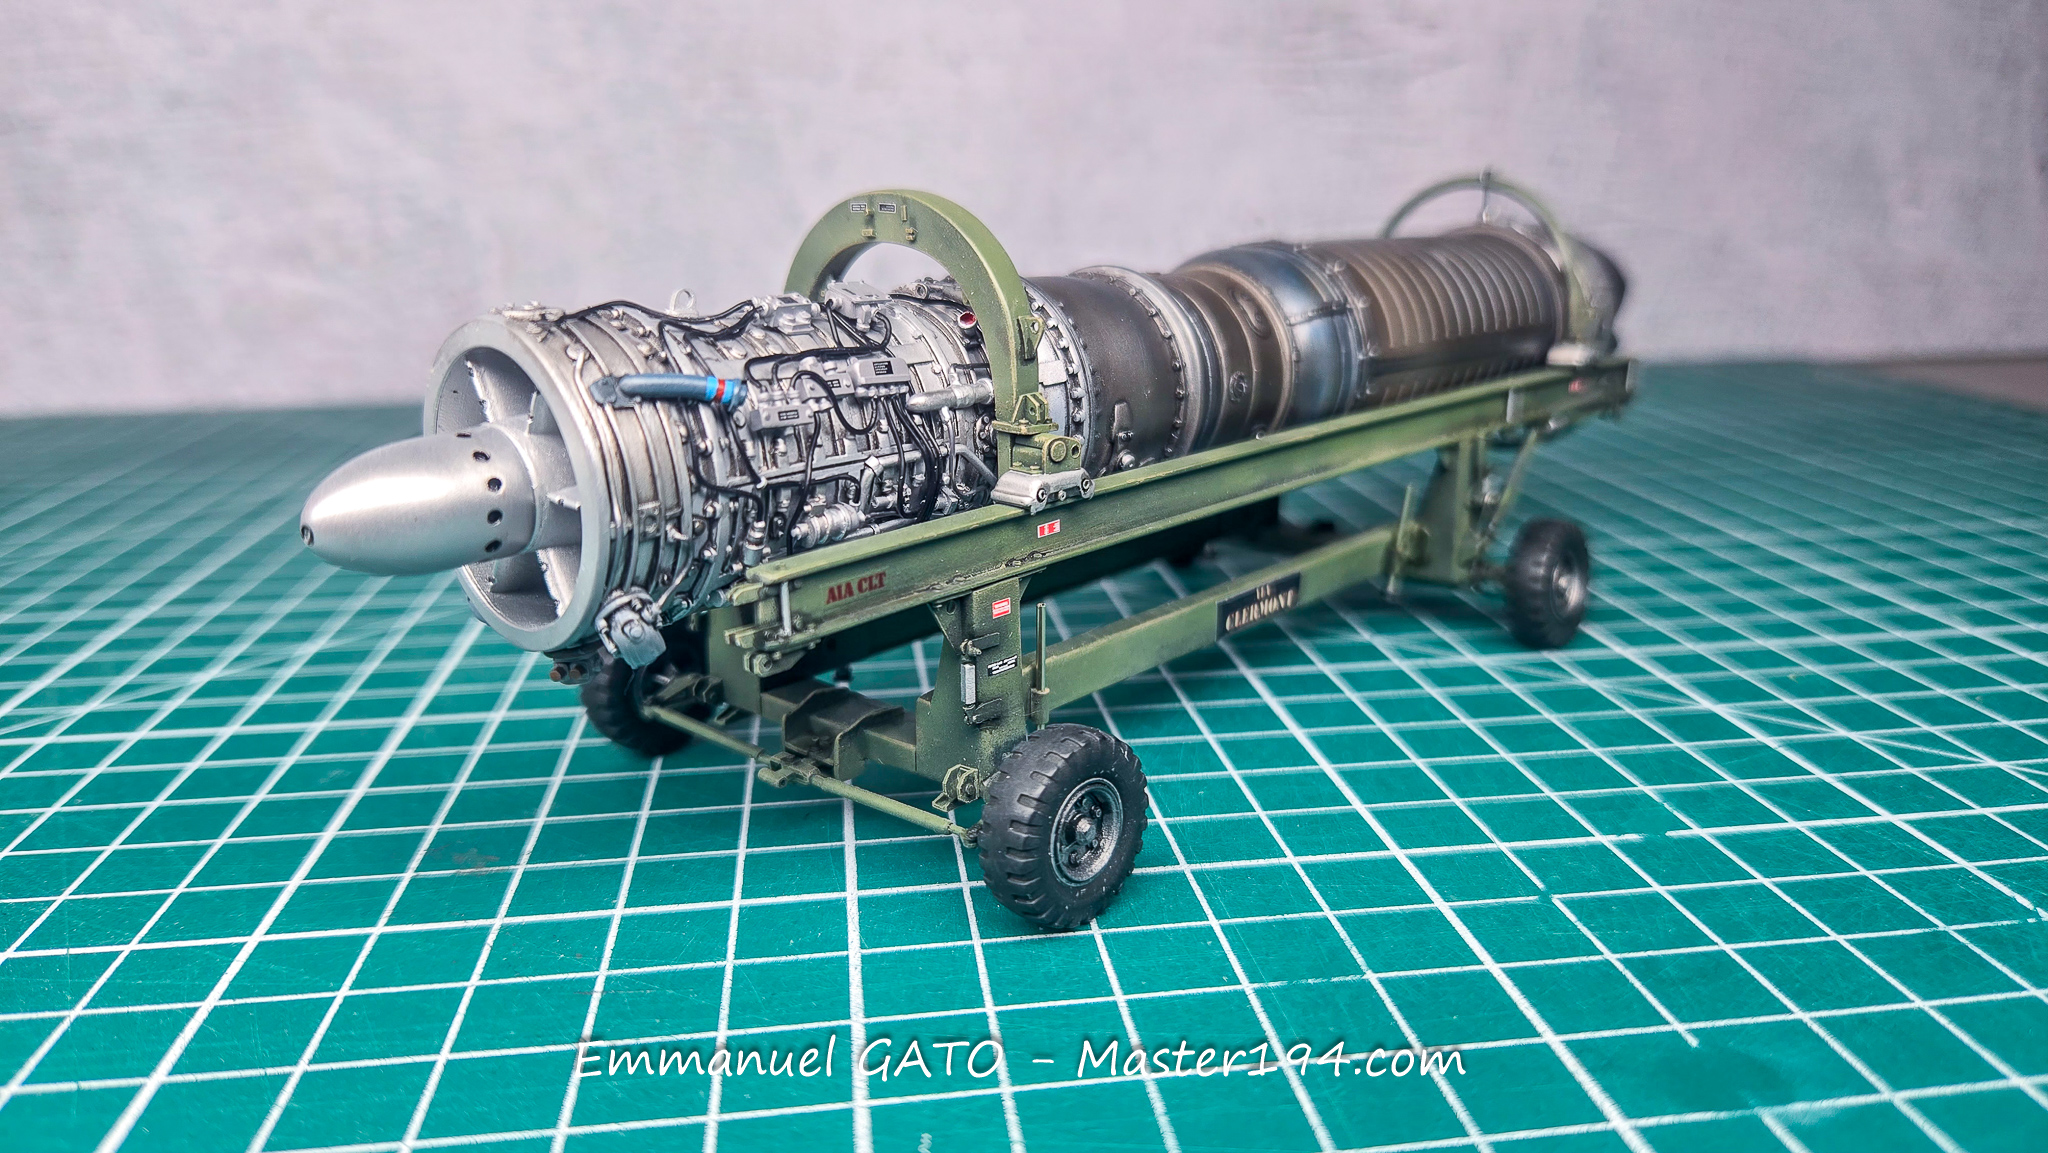
The Noratlas cargo is now practically complete. Once painted, the engine will still receive its control boxes and various wiring harnesses.
The engine shapes are fairly close to reality, but the transport dolly is oversized in both width and height. Italeri probably assumed that few modelers would assemble this part and that, in the context of a potential diorama, a few extra millimeters wouldn’t matter much.
In my case, the dimensions of the cargo hold impose much stricter constraints. I therefore had to significantly modify the beams, steering links, and mounting frames because the wheelbases no longer matched.
I was greatly helped by a personal walkaround photo gallery shot at the Corbas museum in the suburbs of Lyon. It’s a very interesting museum that I highly recommend. This documentation allowed me to add numerous scratch-built details and make the whole assembly much more credible.
Here is the result before painting.
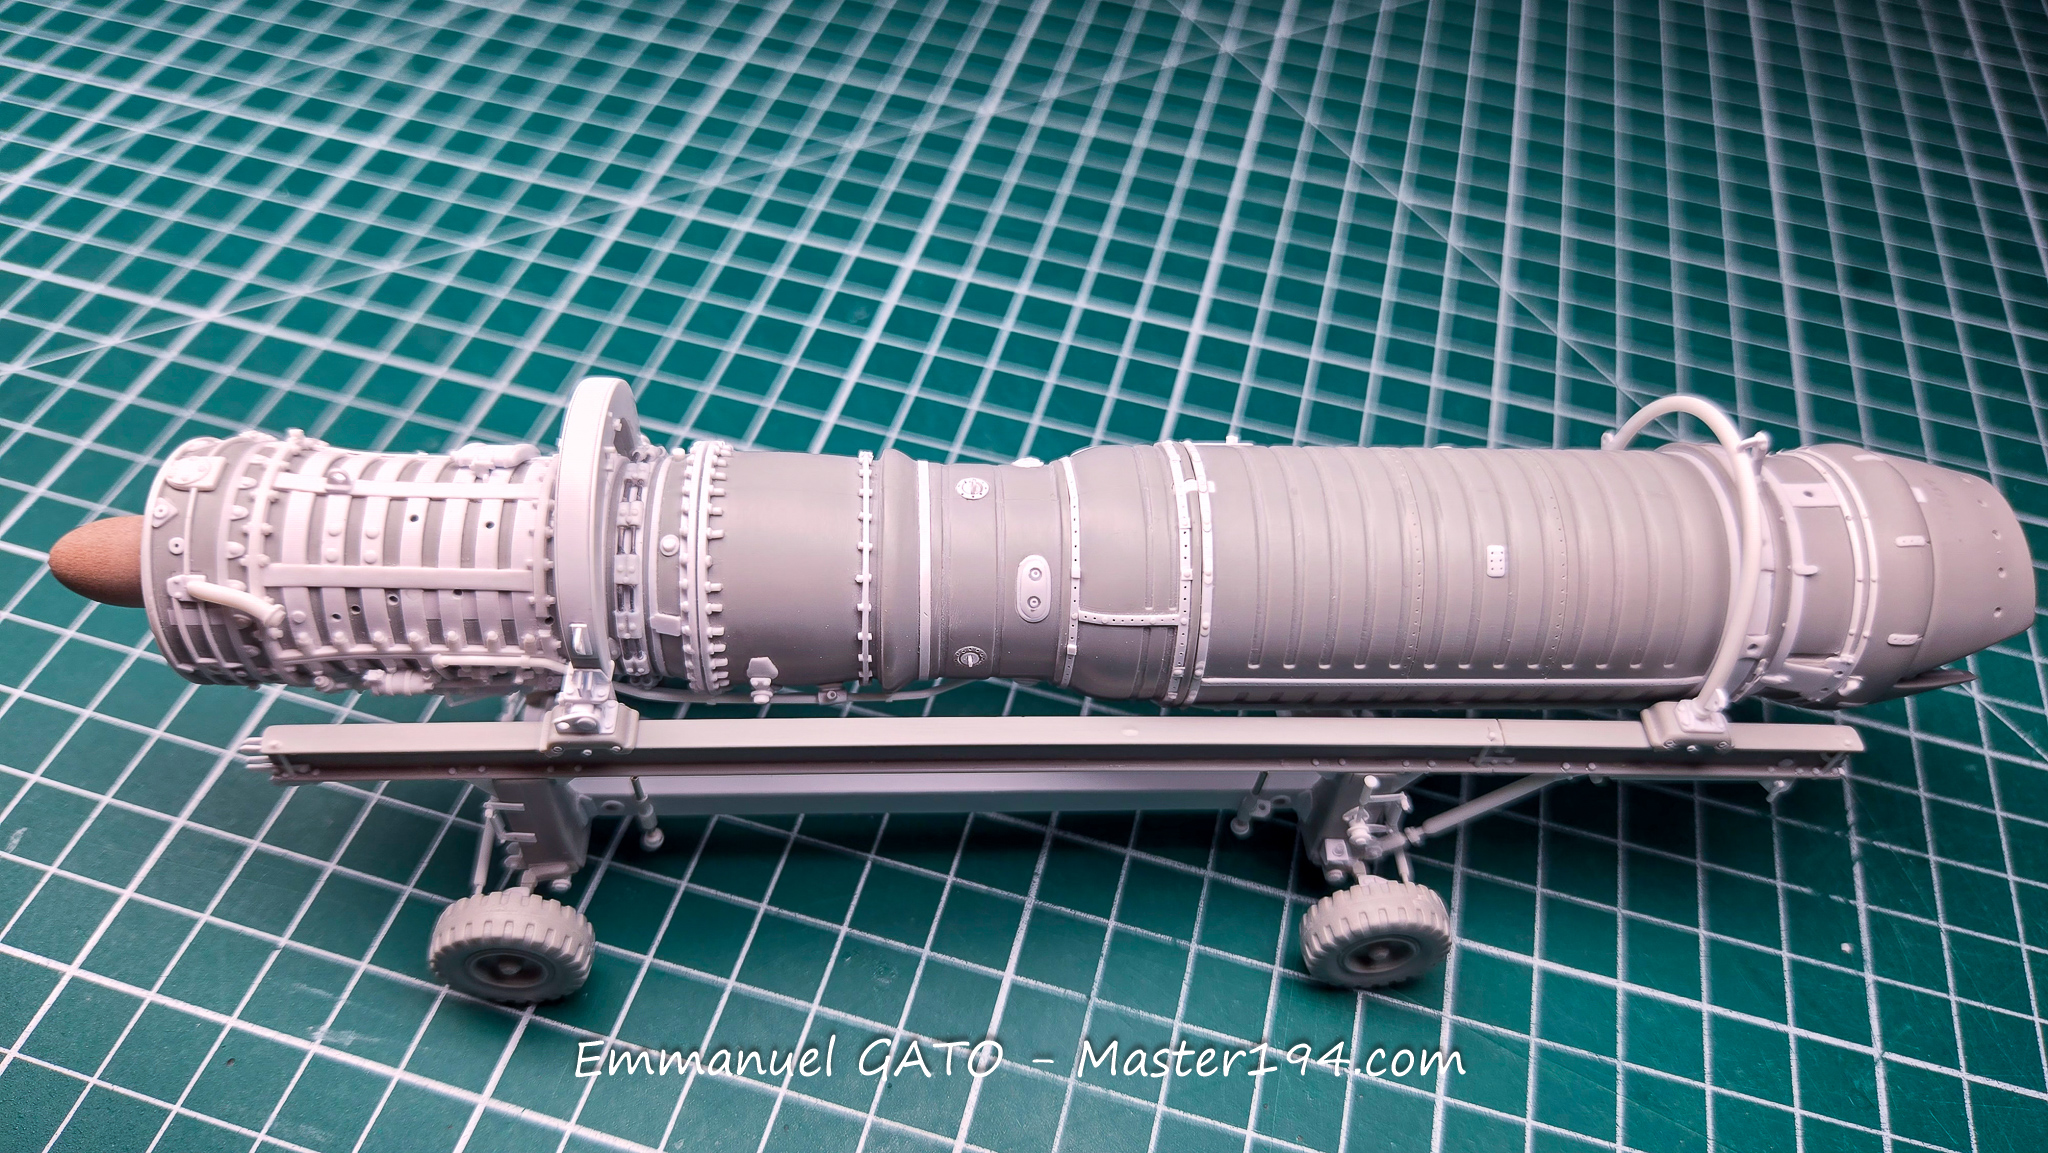
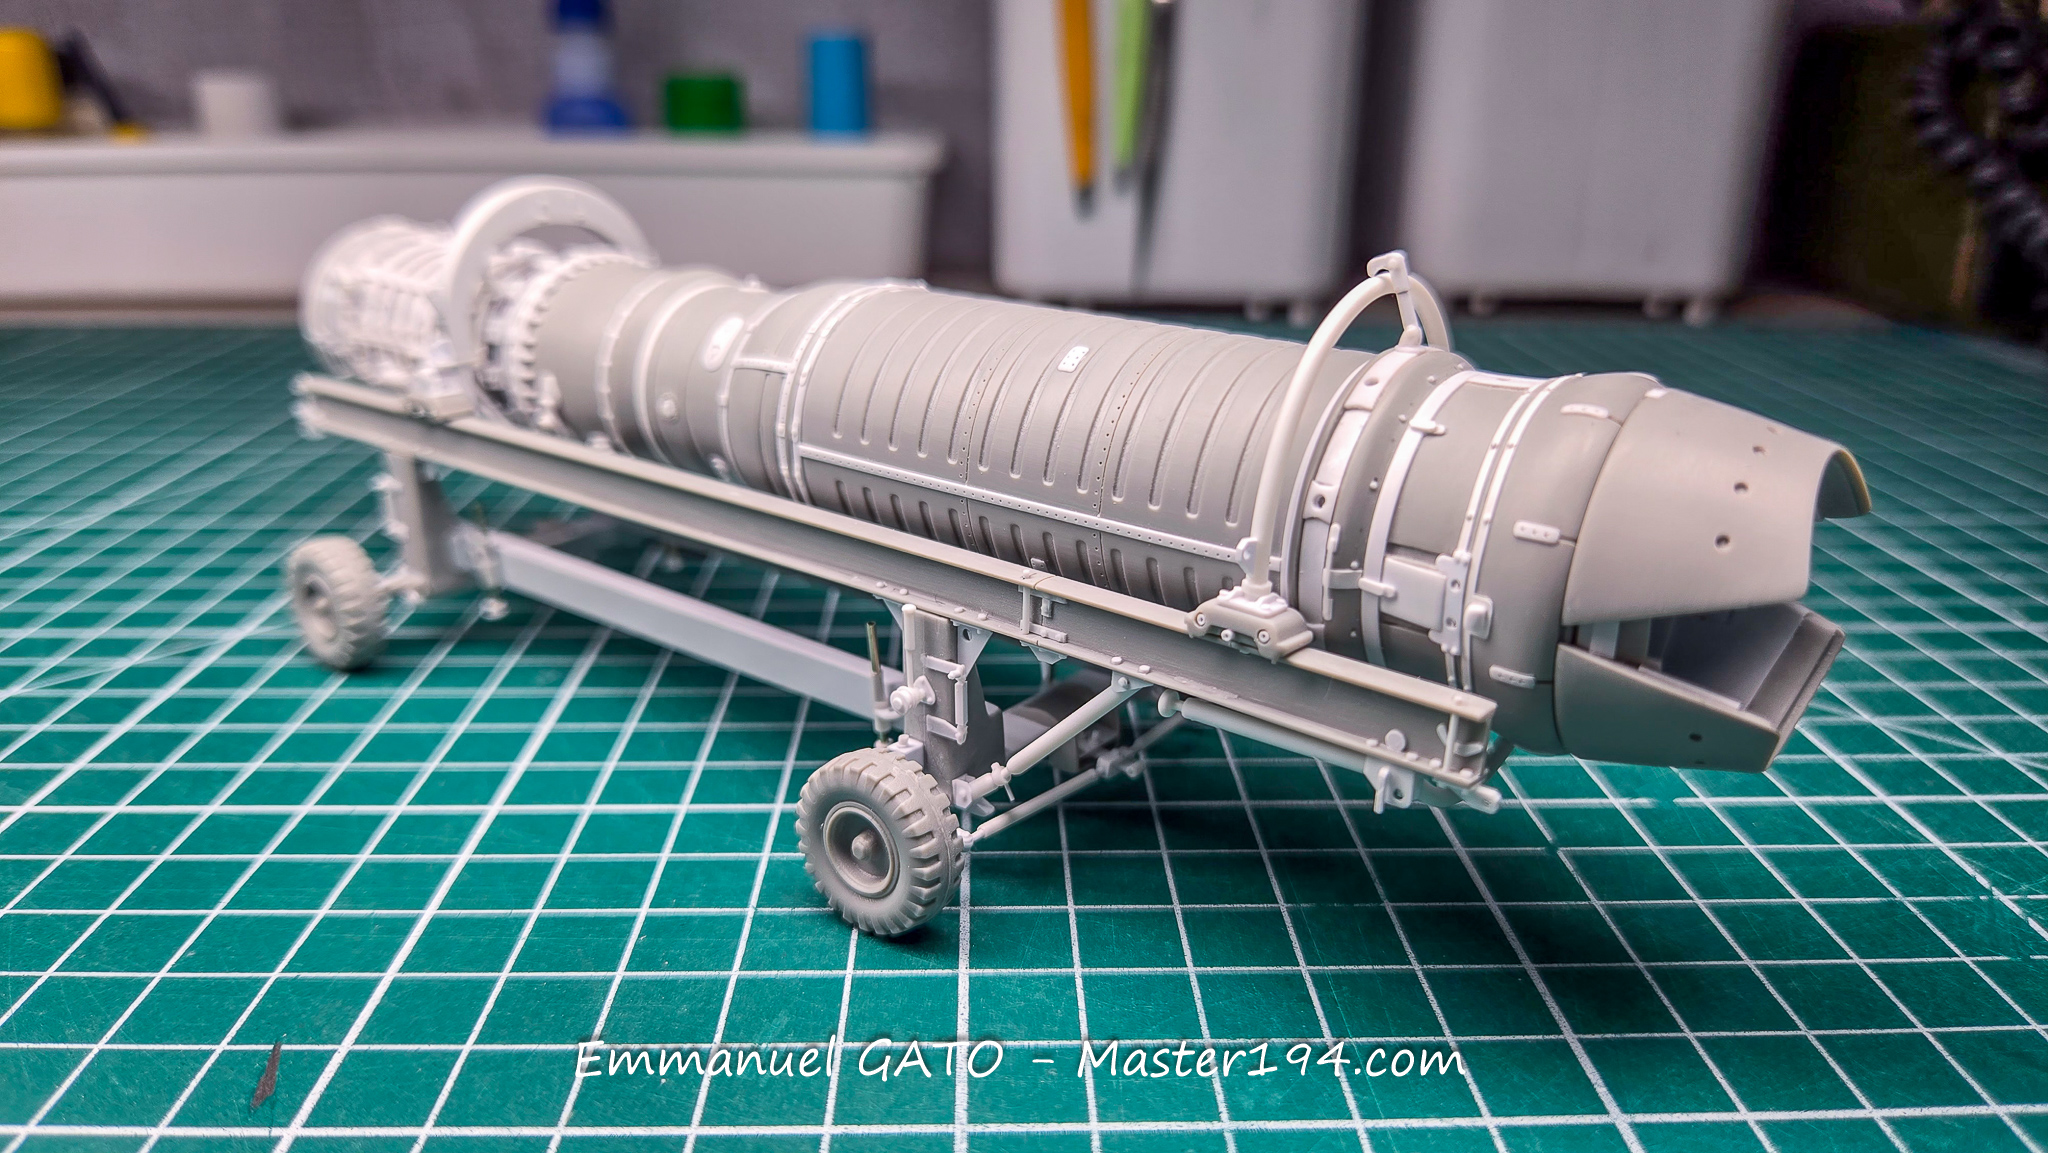
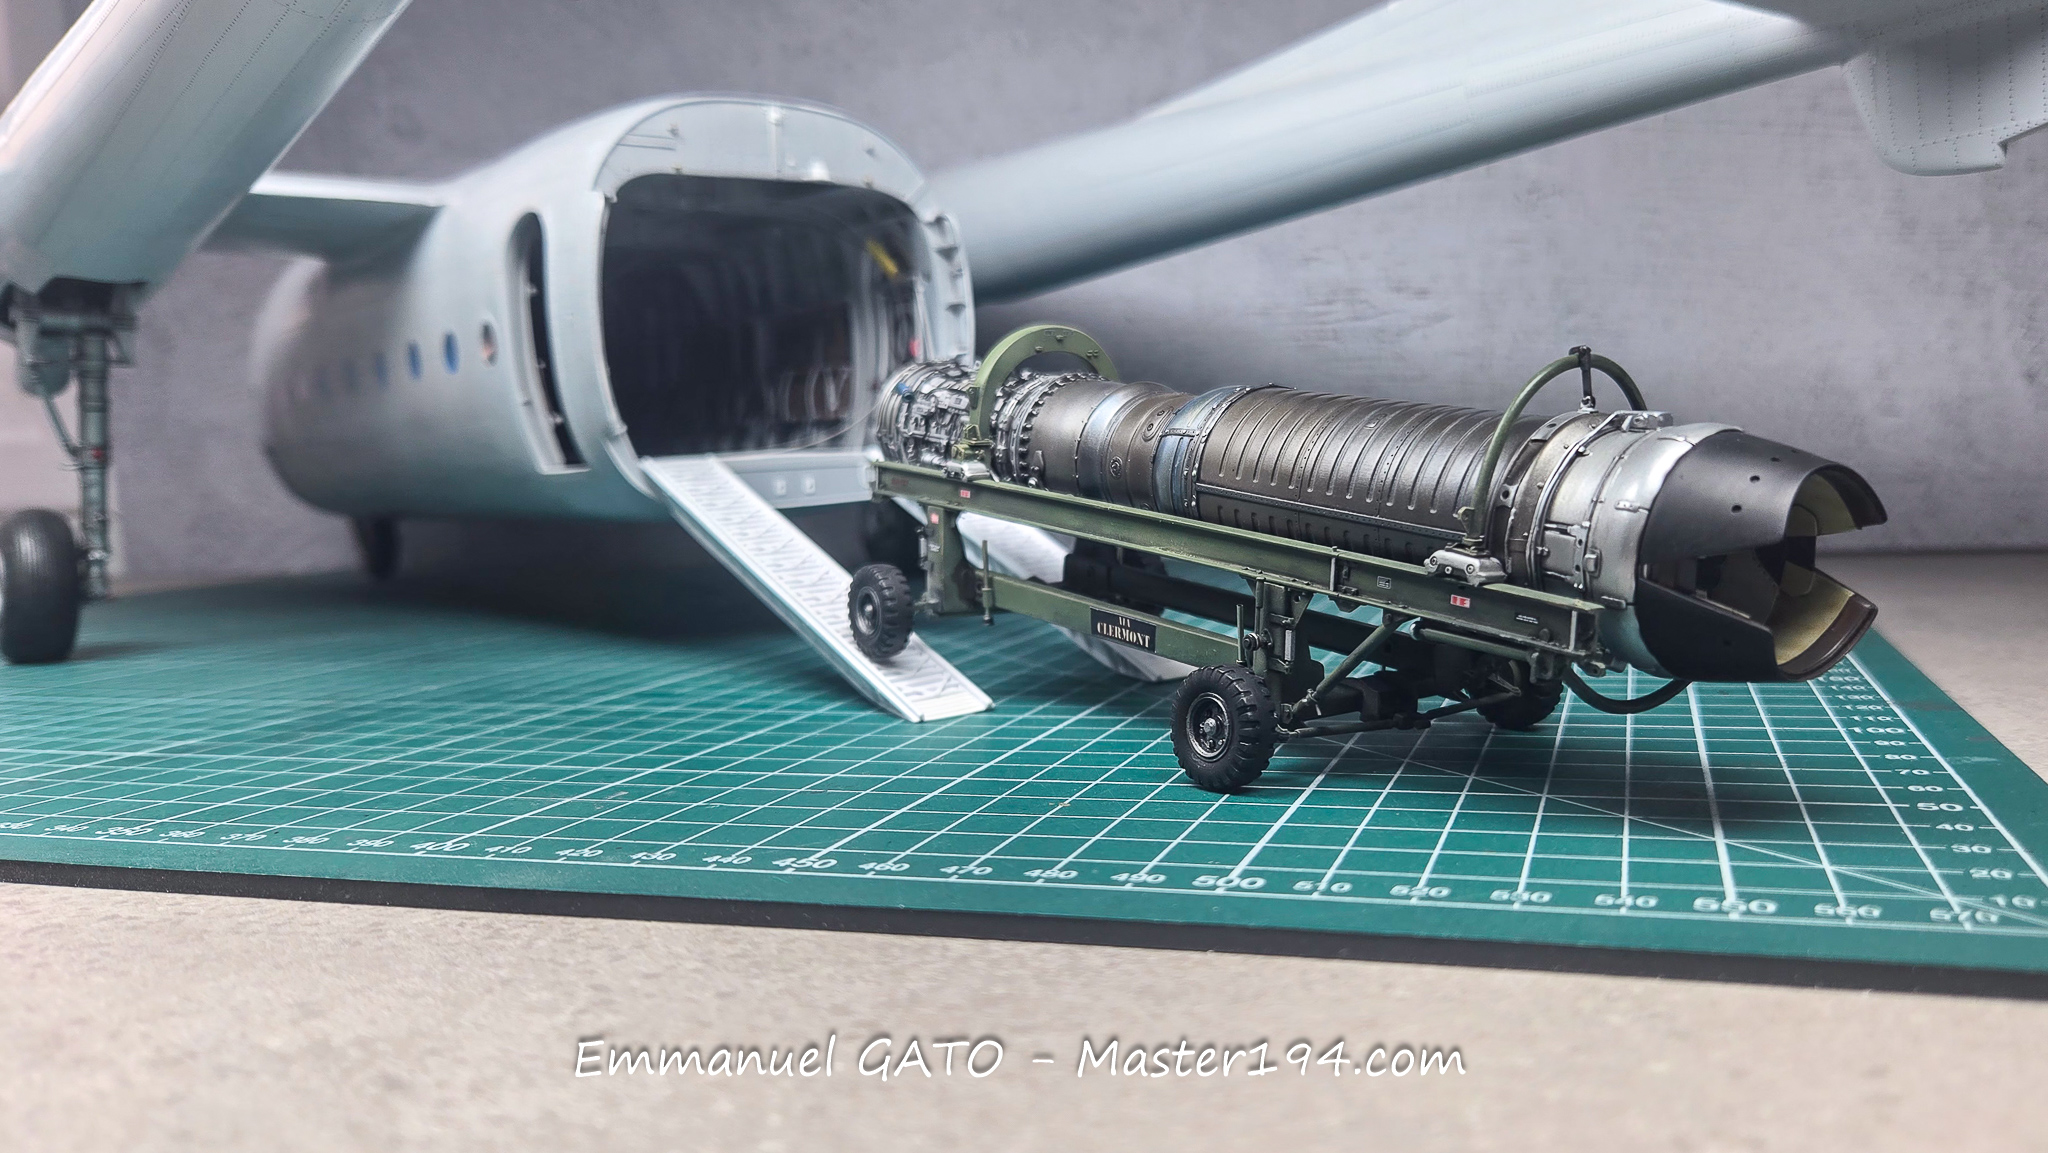
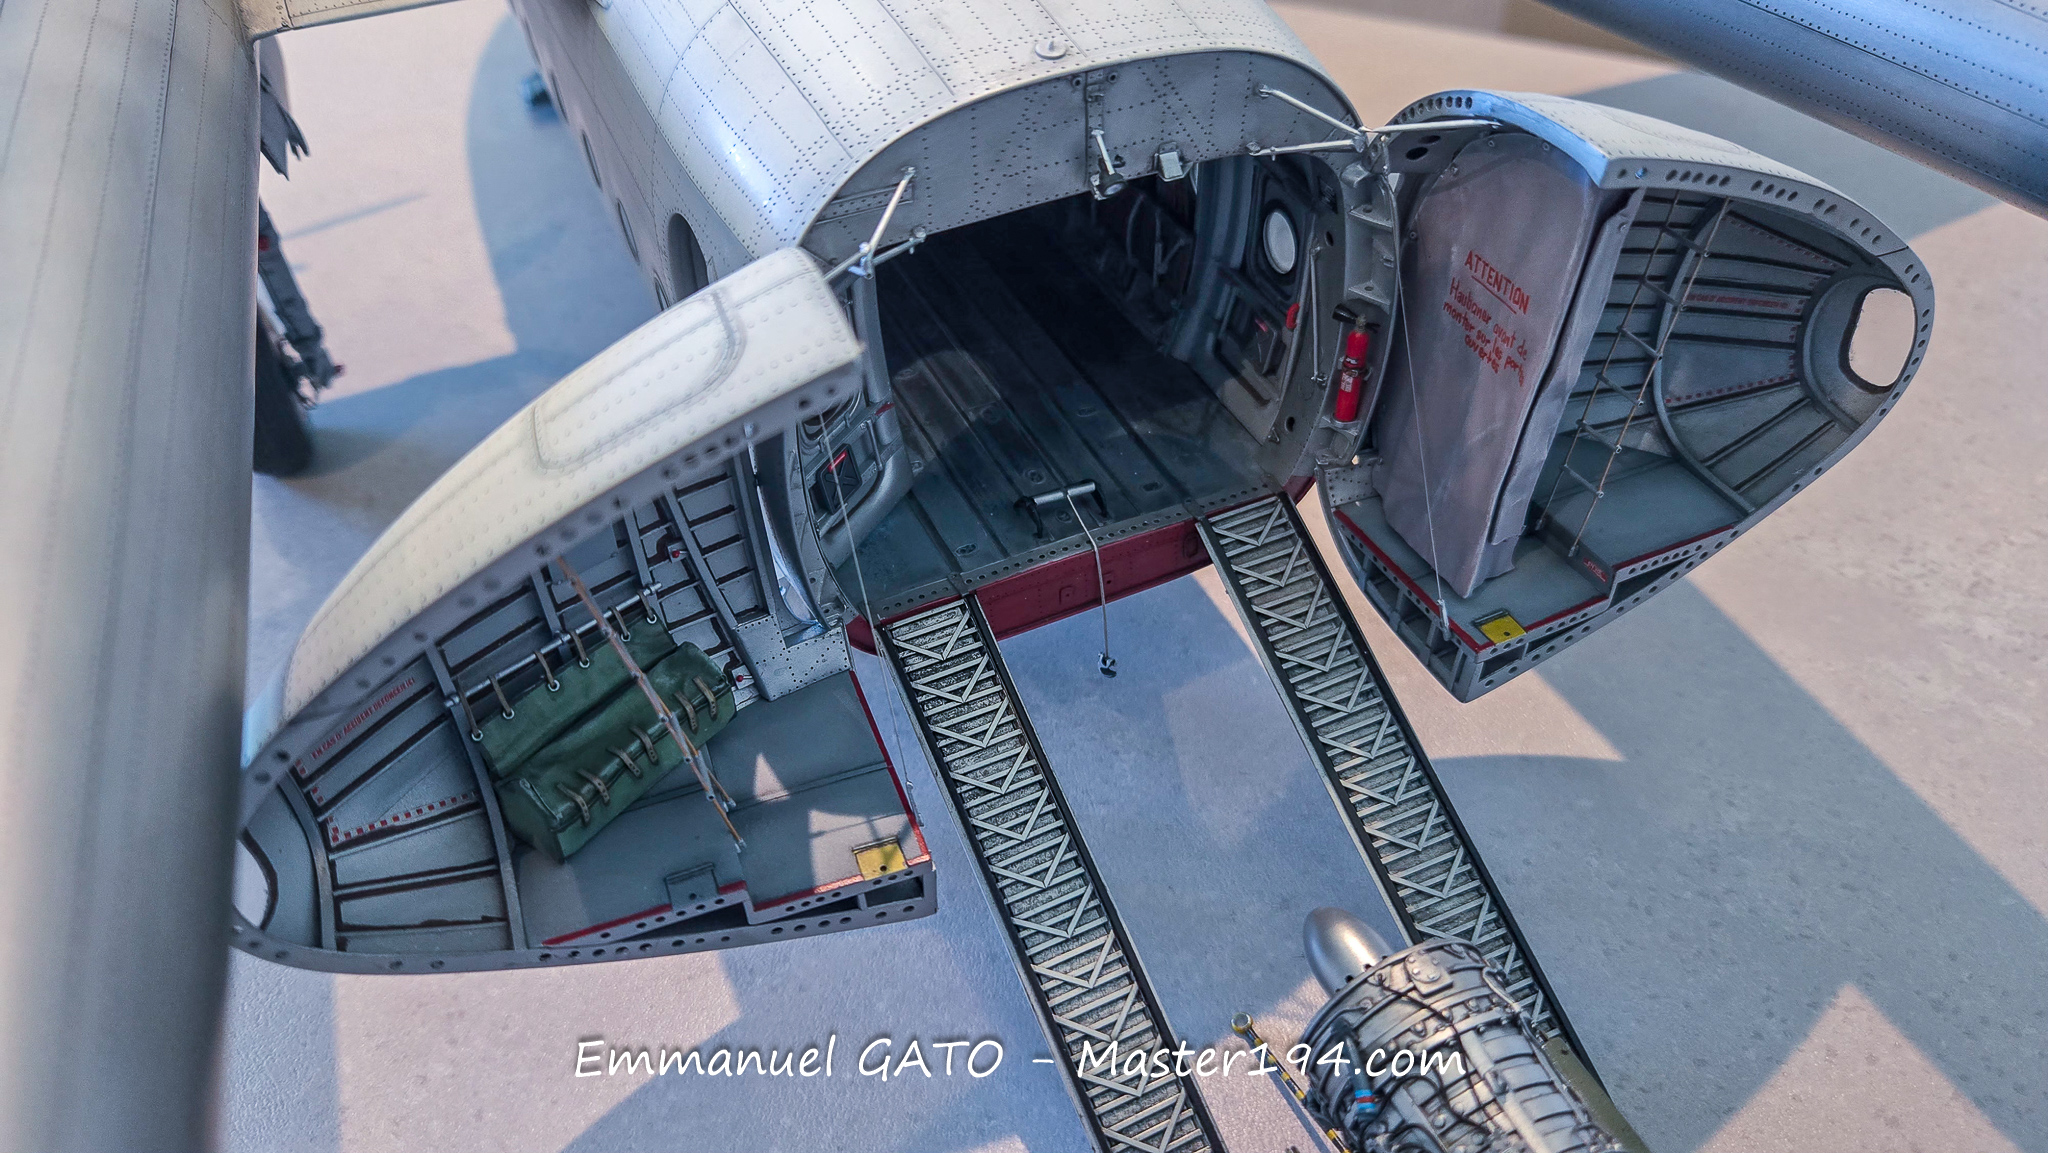
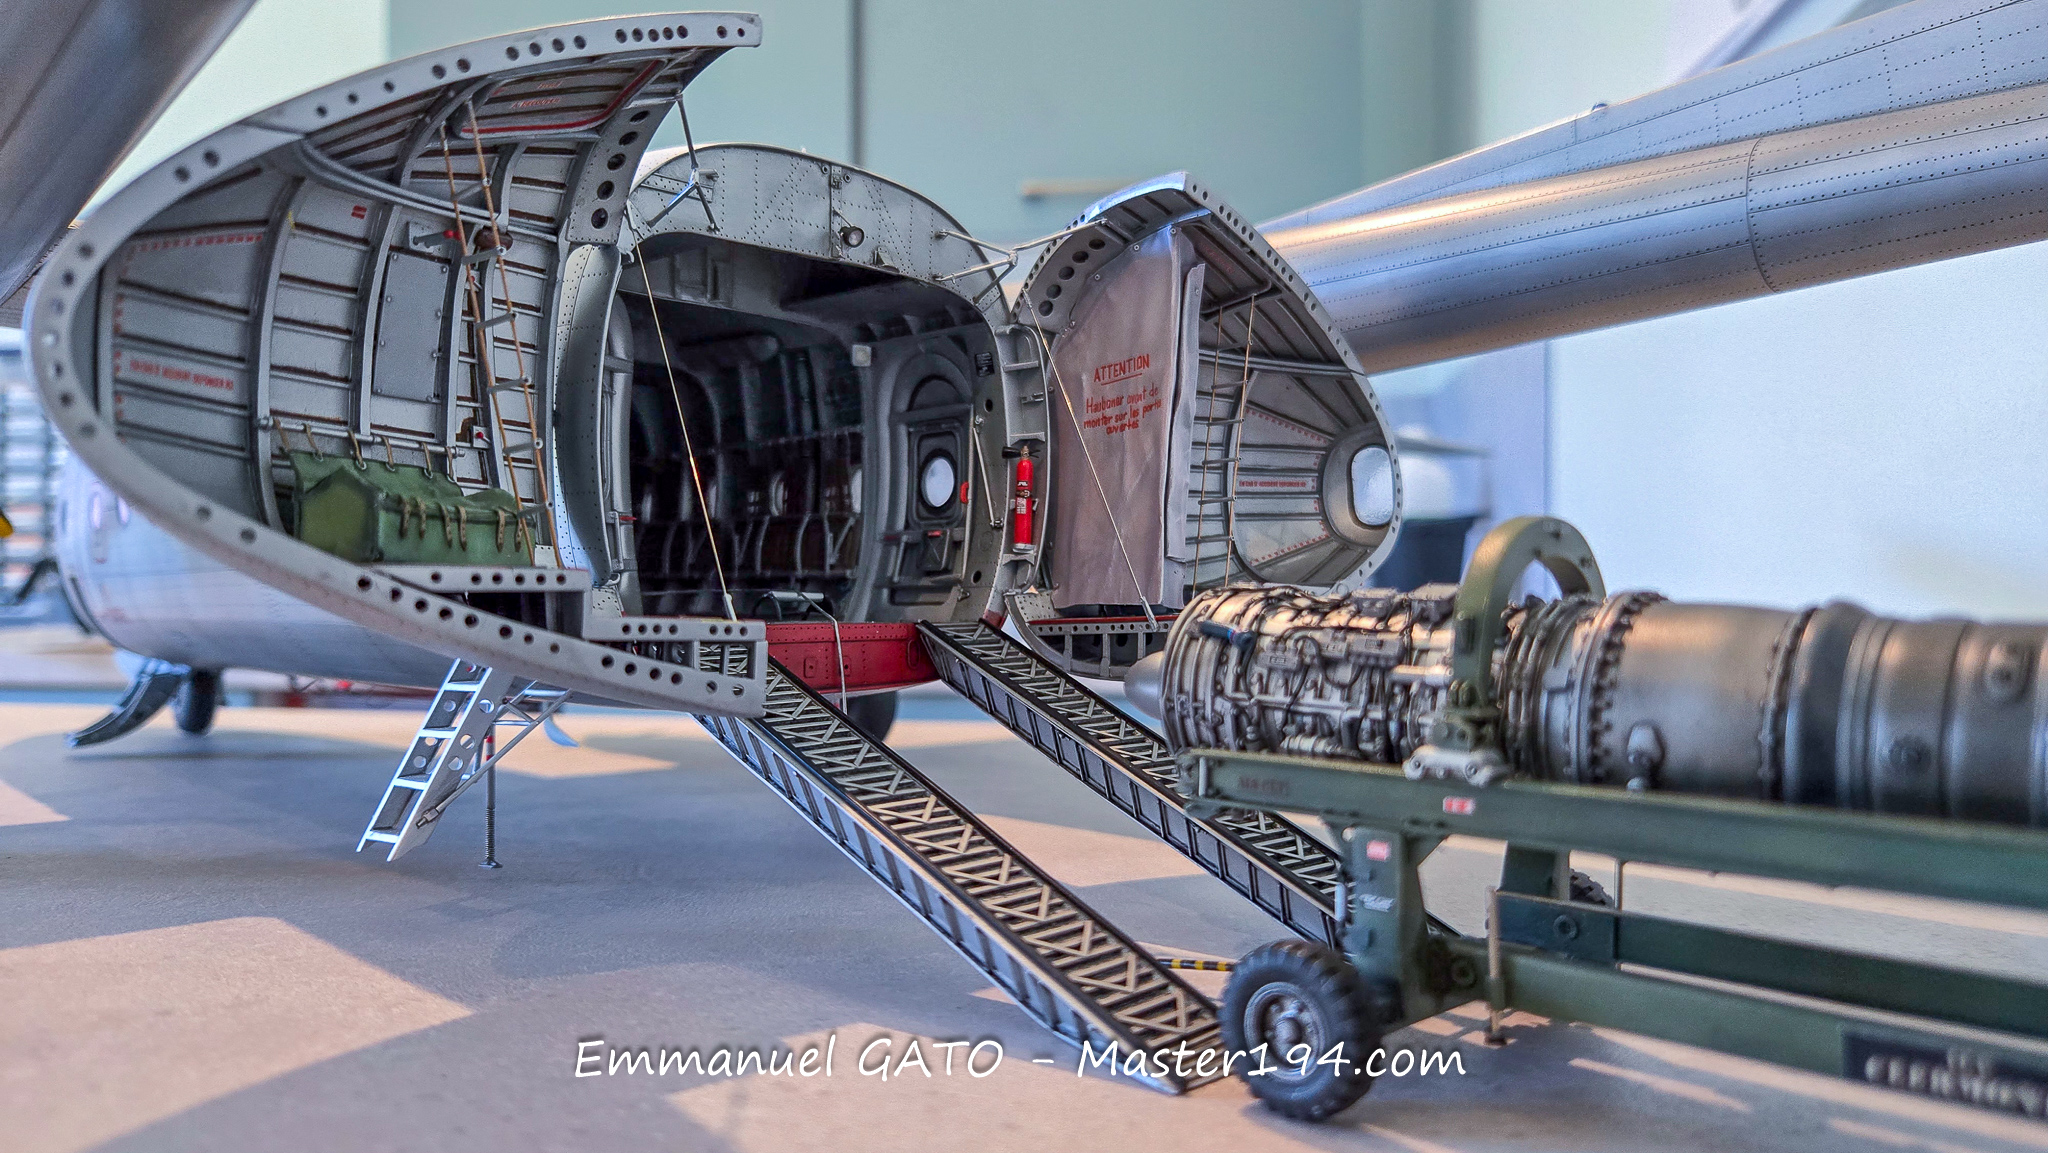
The mounting frame and the Mirage IIIC/B turbojet engine are now finished. After taking a few photographs of this assembly, I had some fun positioning it at the rear of the Noratlas, just as it will be in the final model. It gives a good idea of the result.
According to information passed on to me directly by my friend Michel, this transport mission required hoisting the engine into the cargo hold using a simple hand winch. I wonder how much elbow grease that took!
Normally, wooden extension ramps were installed at the end of the aircraft’s loading ramps to reduce the slope angle and make hoisting easier. I didn’t reproduce them for two reasons. First, these elements were rather rudimentary and I found them particularly unesthetic. Second, their absence allows me to use the standard ramps to keep the aircraft resting on its nose landing gear without adding ballast.
Let’s just say this constitutes a license I wouldn’t dare call “poetic”!
Painting and completion
The Noratlas has been in the painting booth for a while now, starting with the tail booms. The fuselage was carefully masked off to prevent accidental overspray and dreaded paint splatters.
The arrival of my new Silhouette 4 plotter encouraged me to tackle certain markings using stencils: the roundels, codes, and aircraft serial number, to start with.
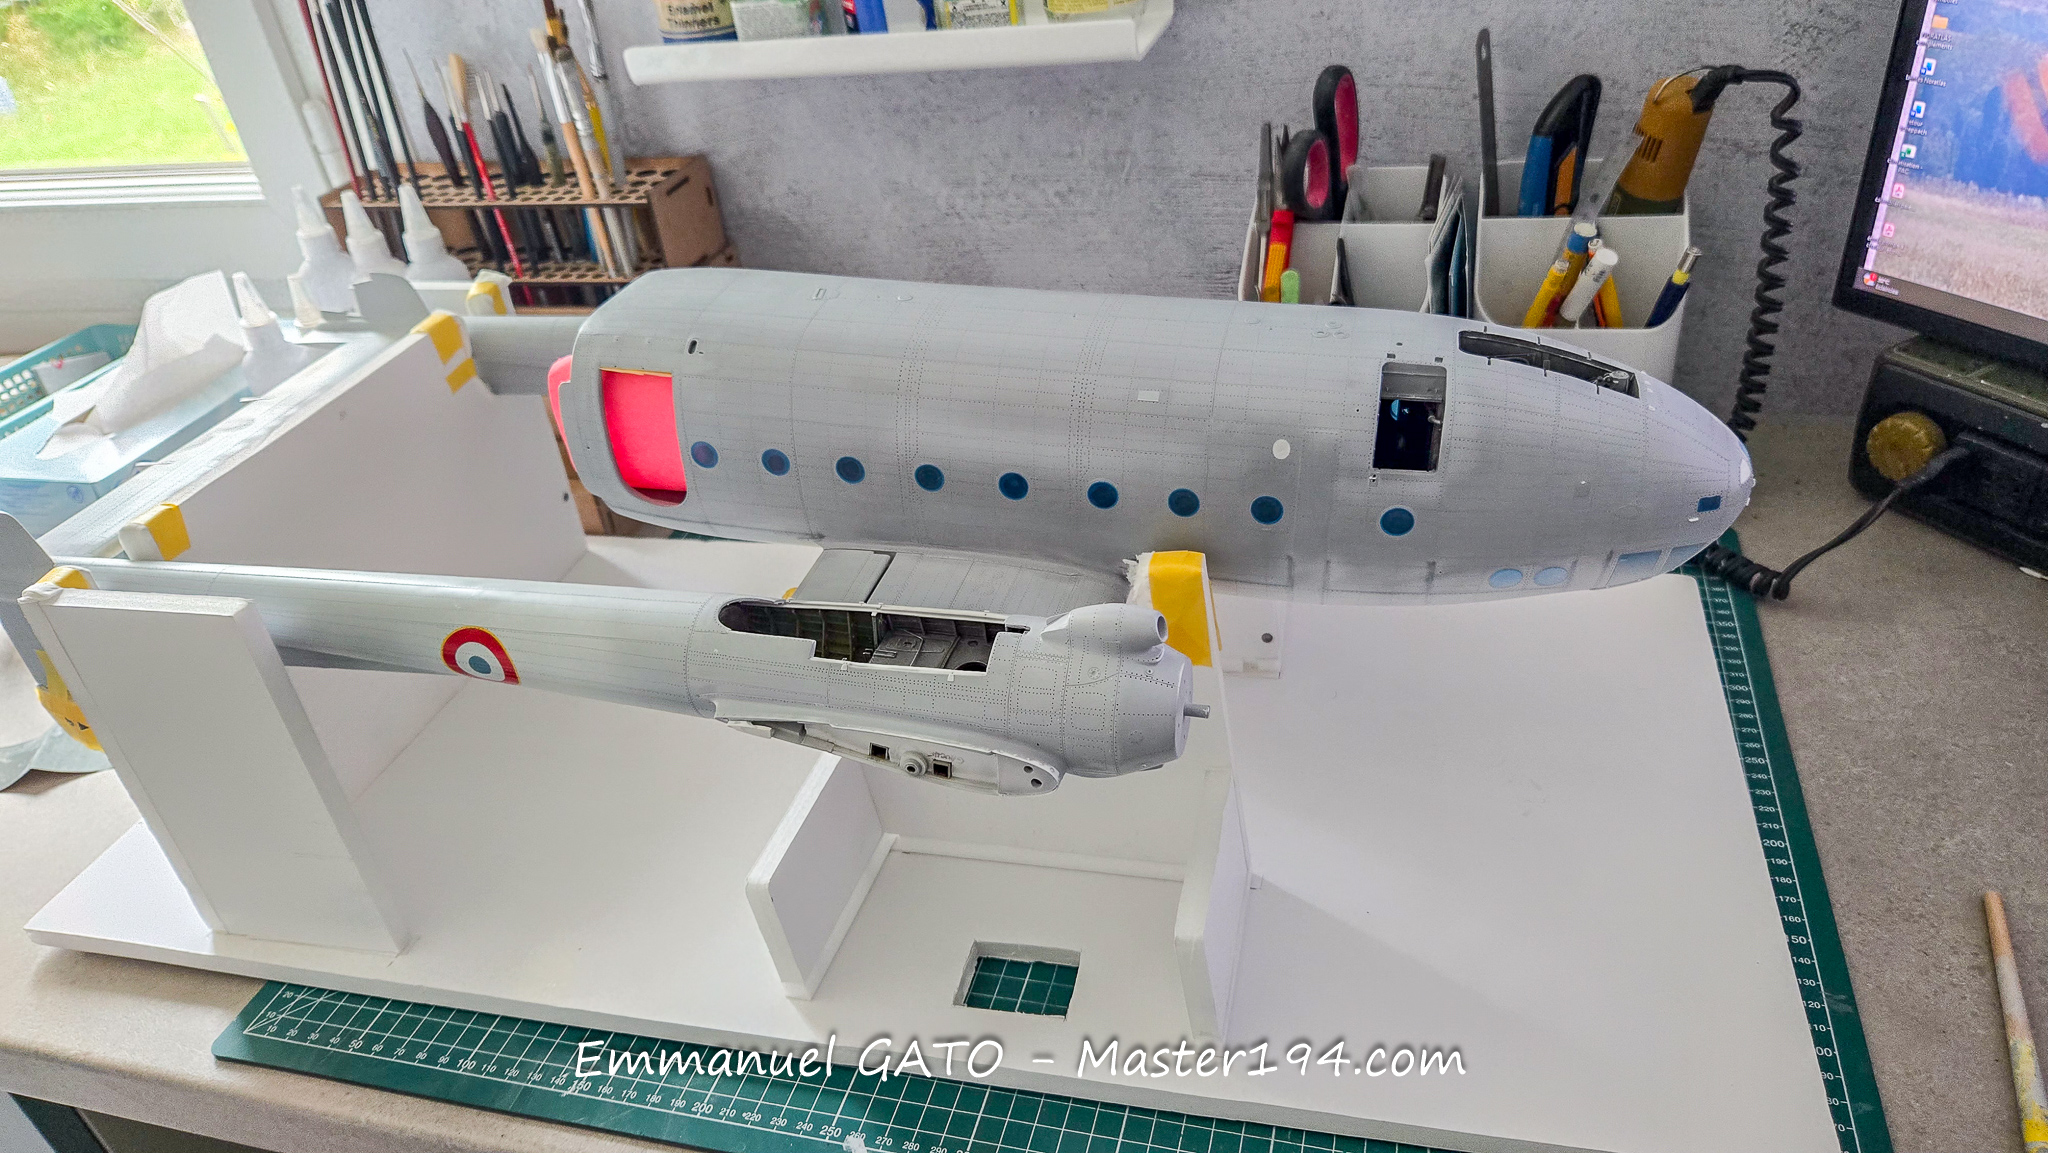
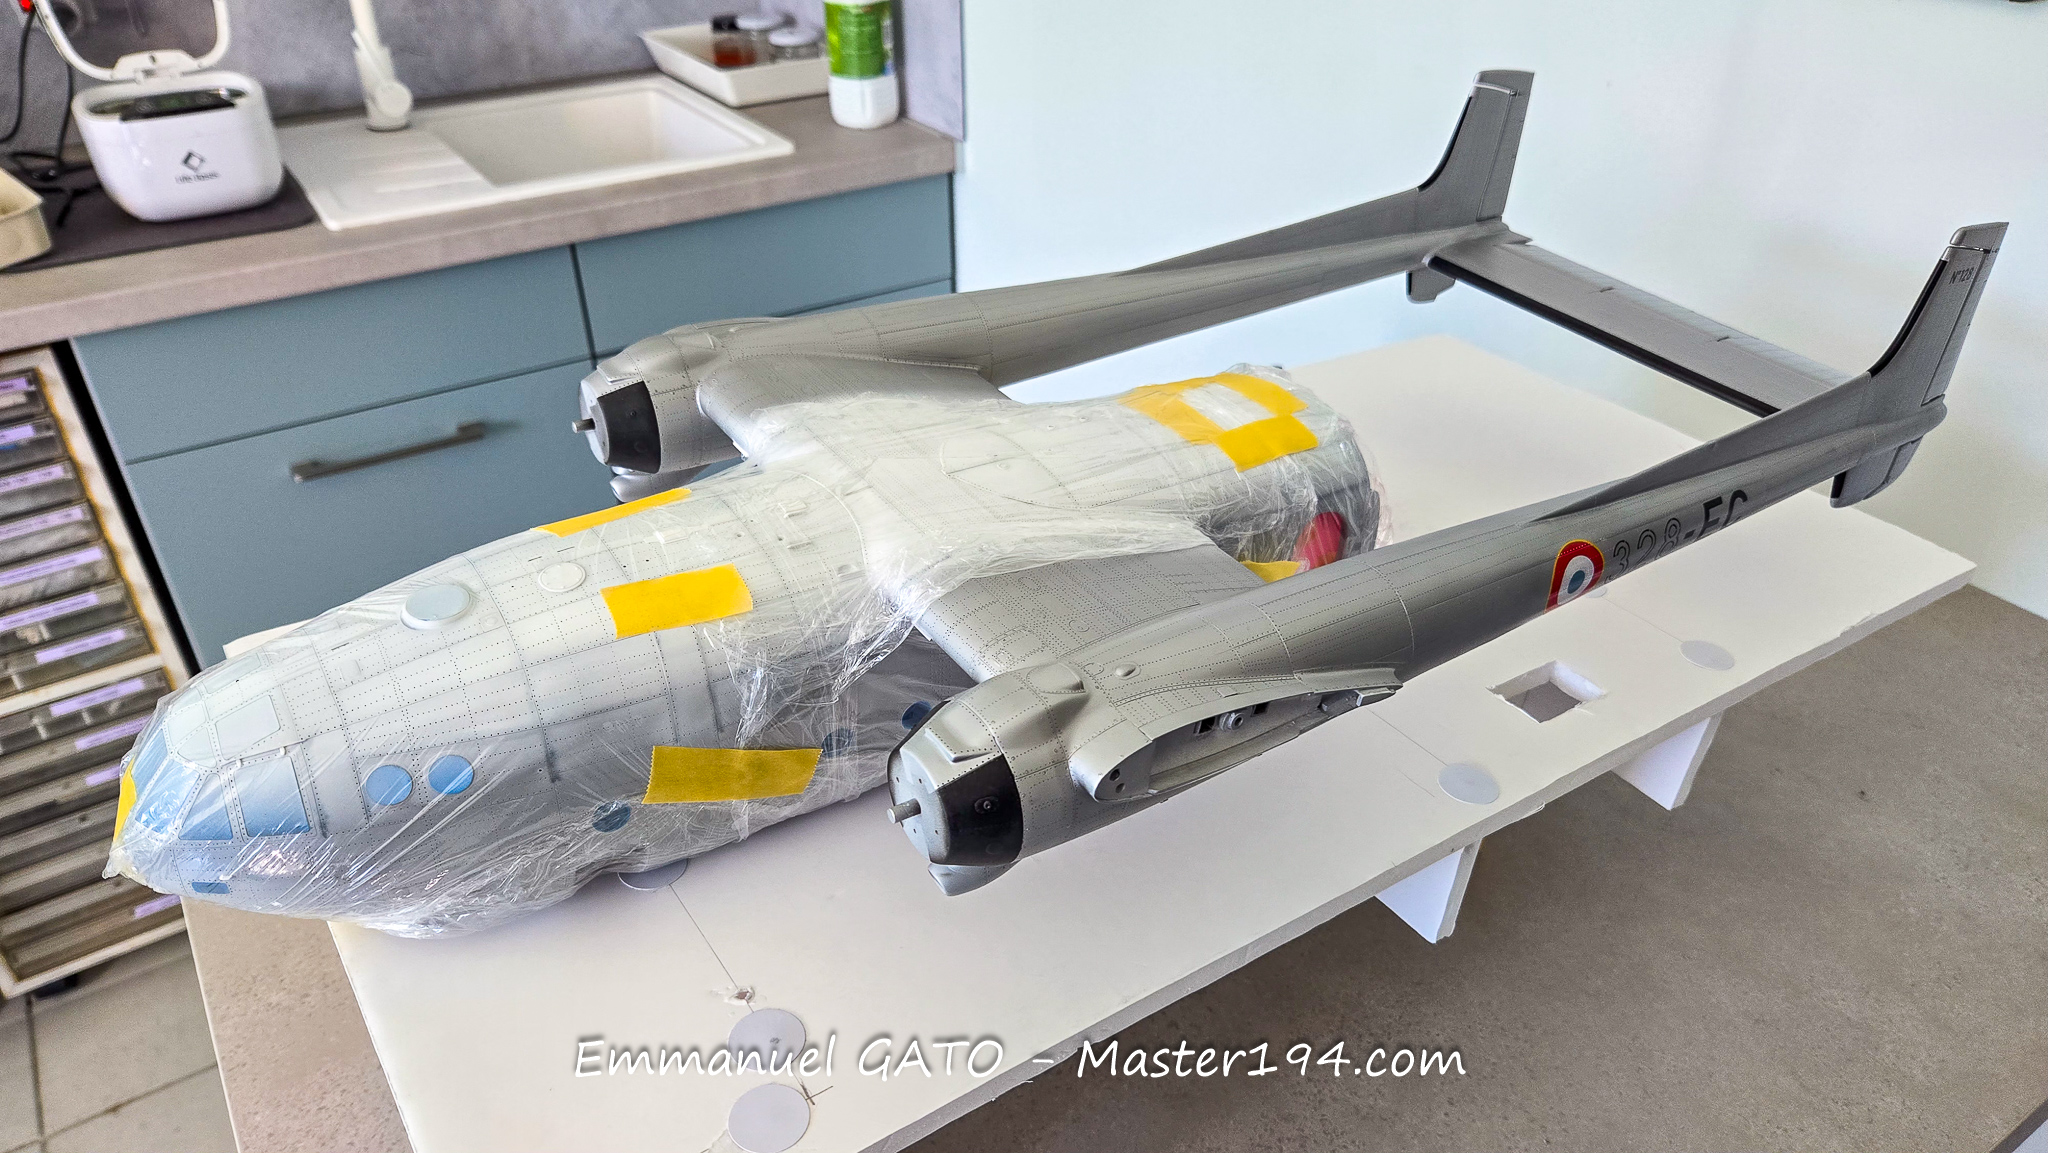
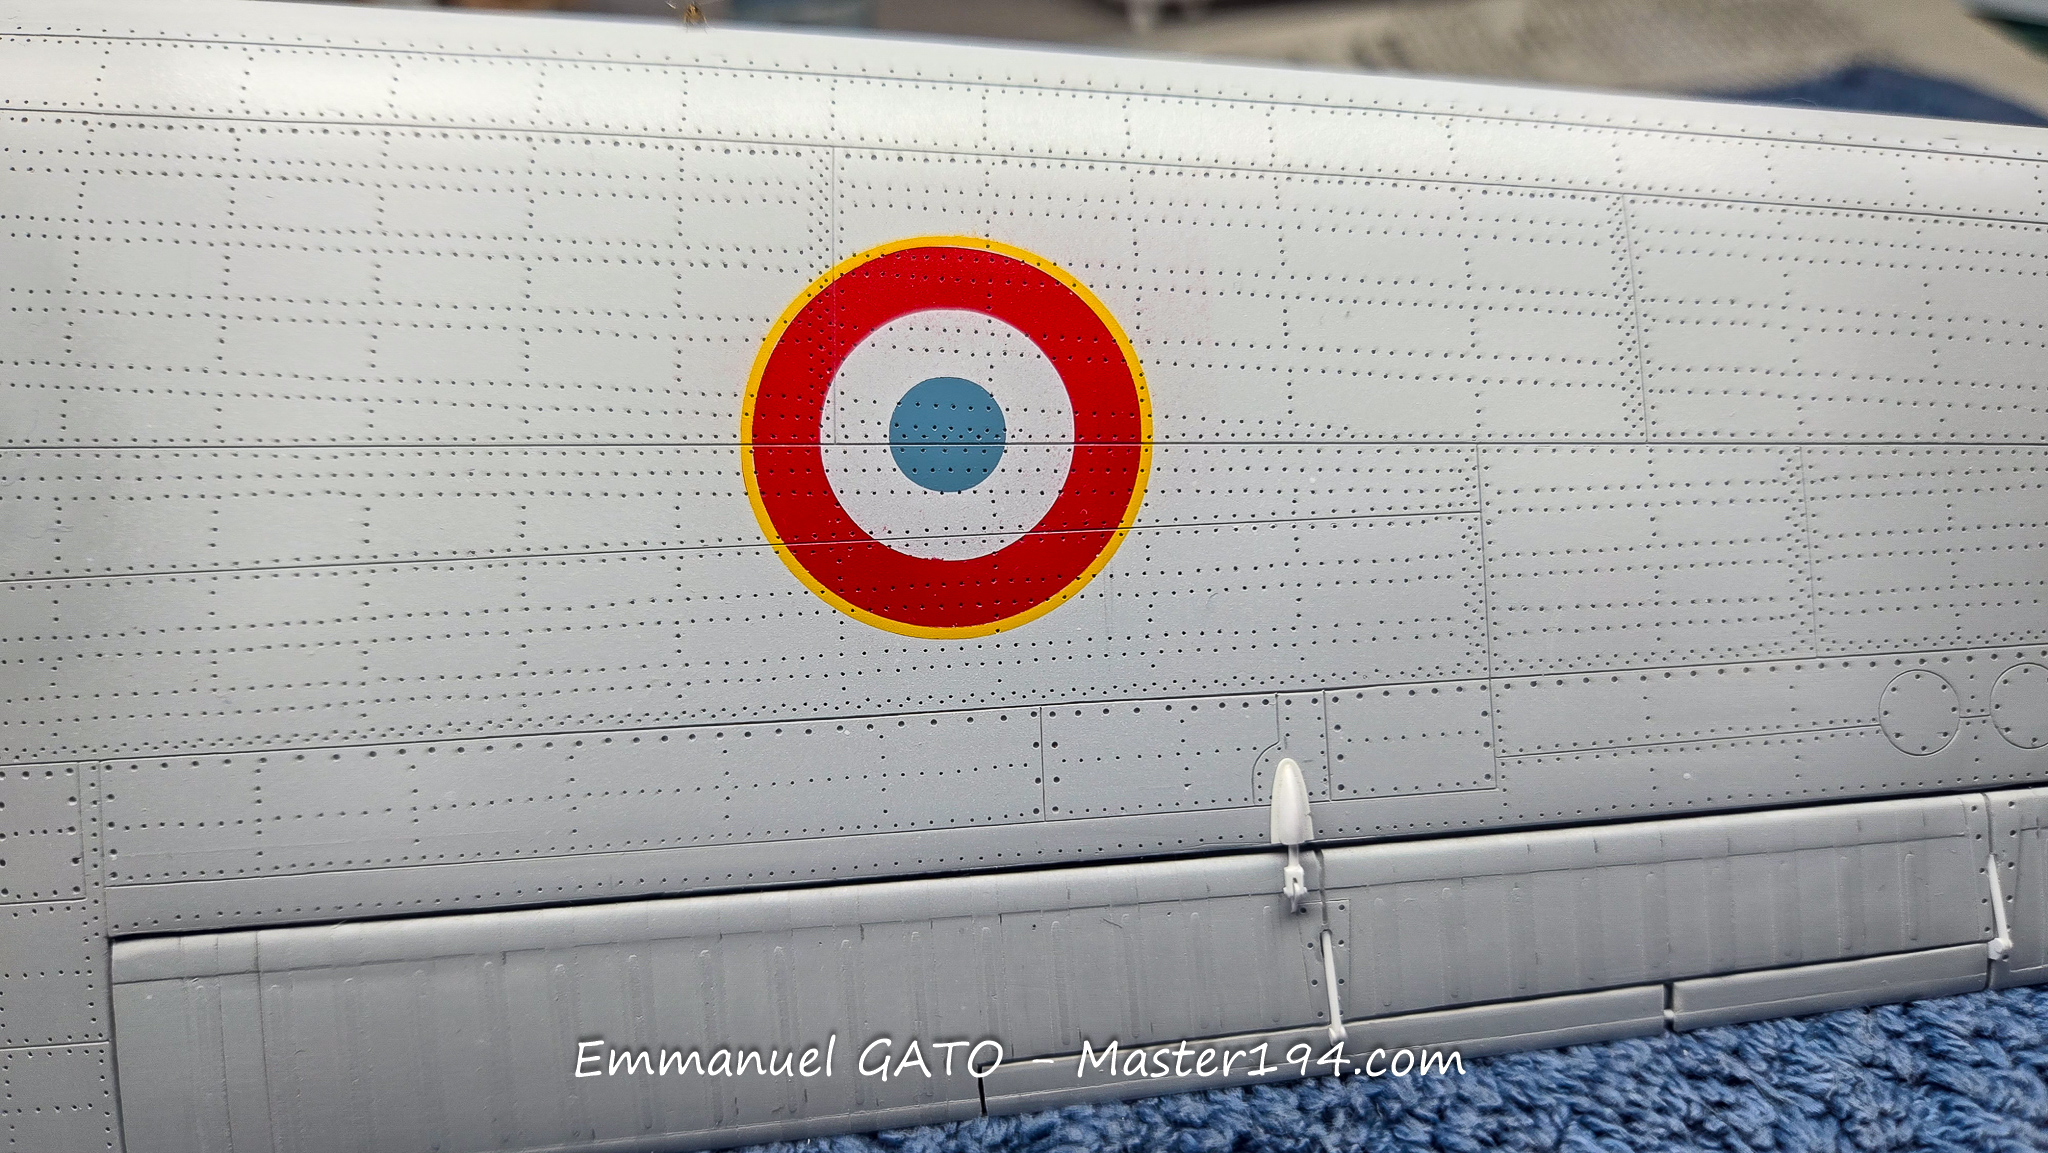
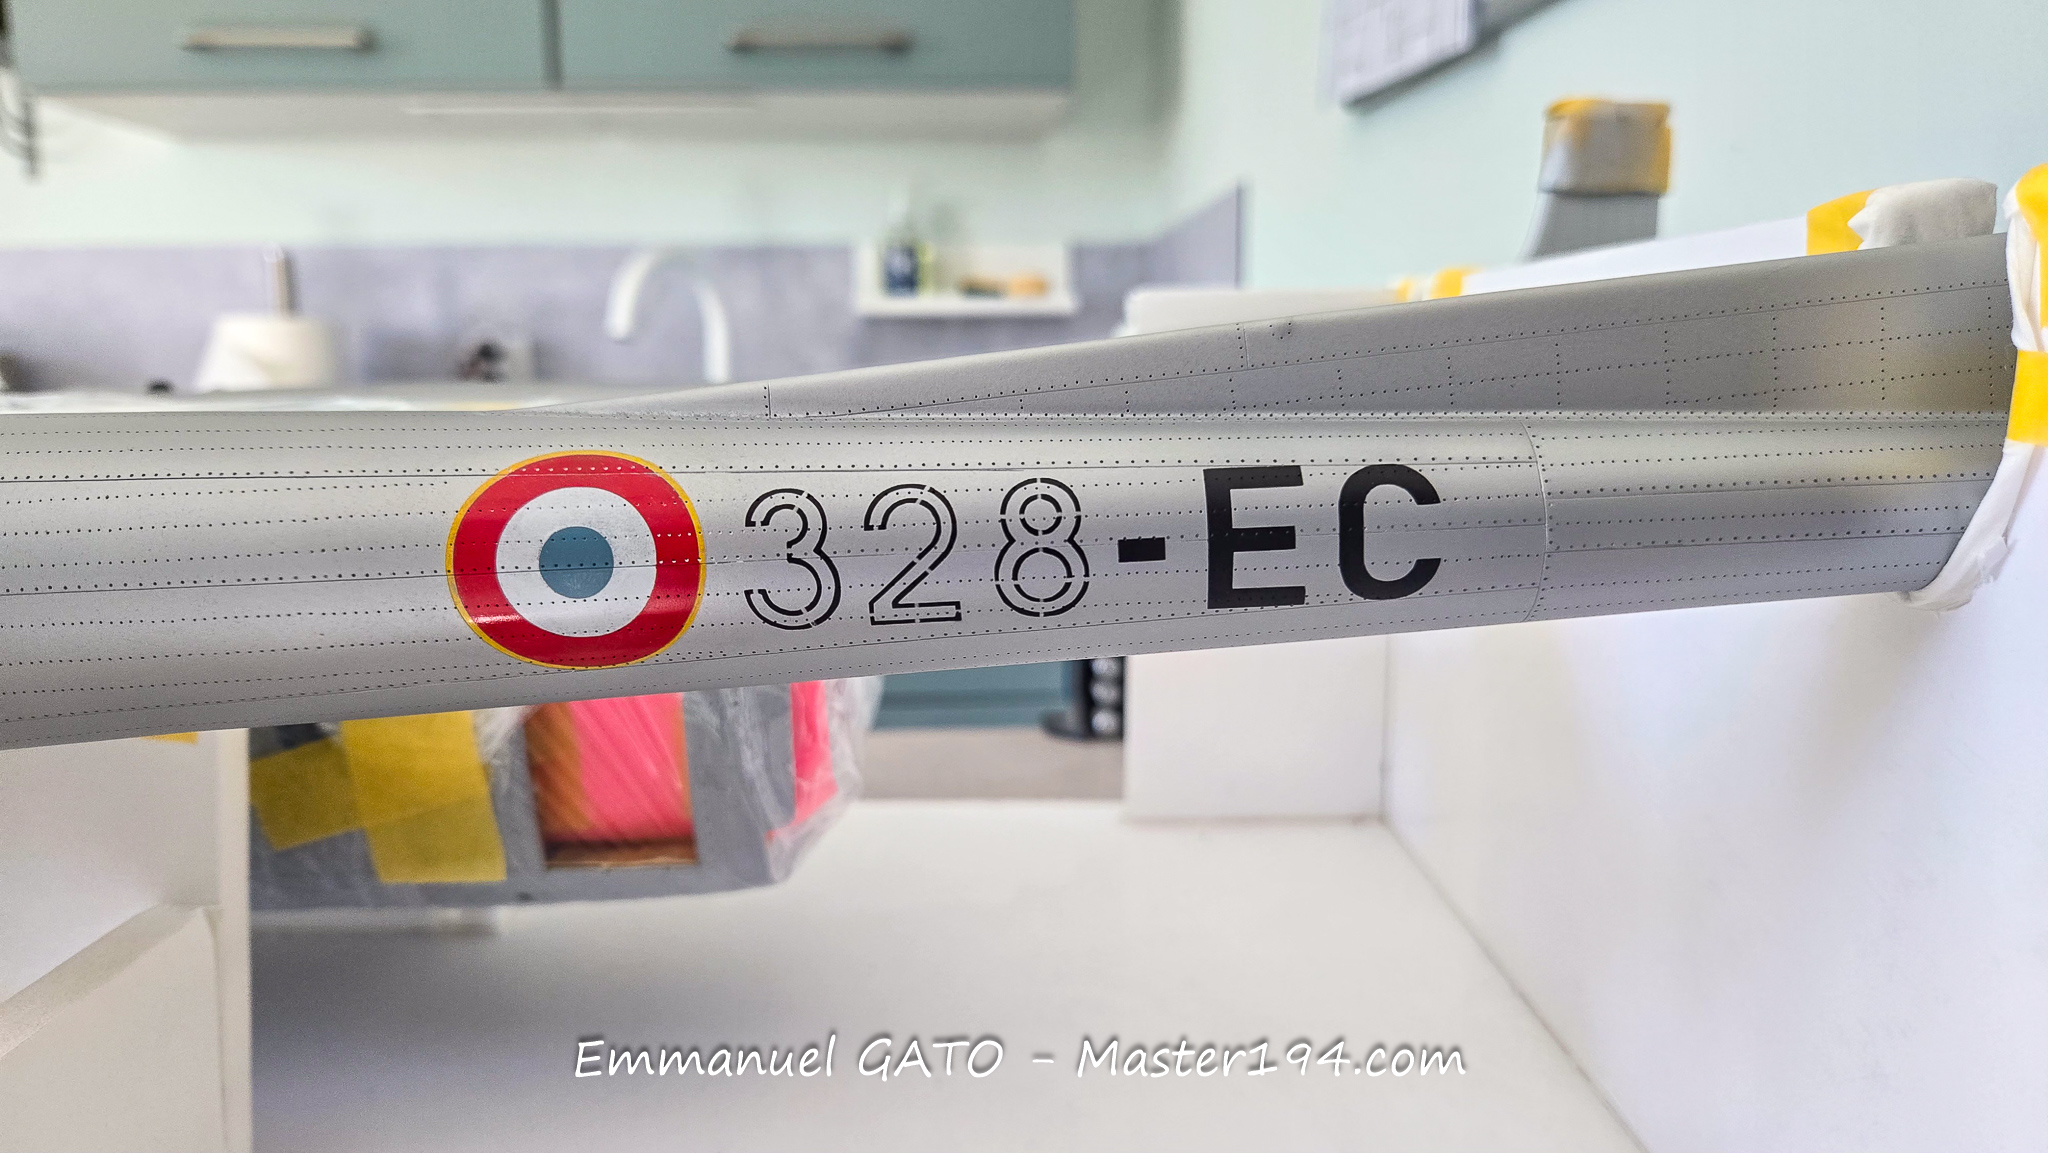
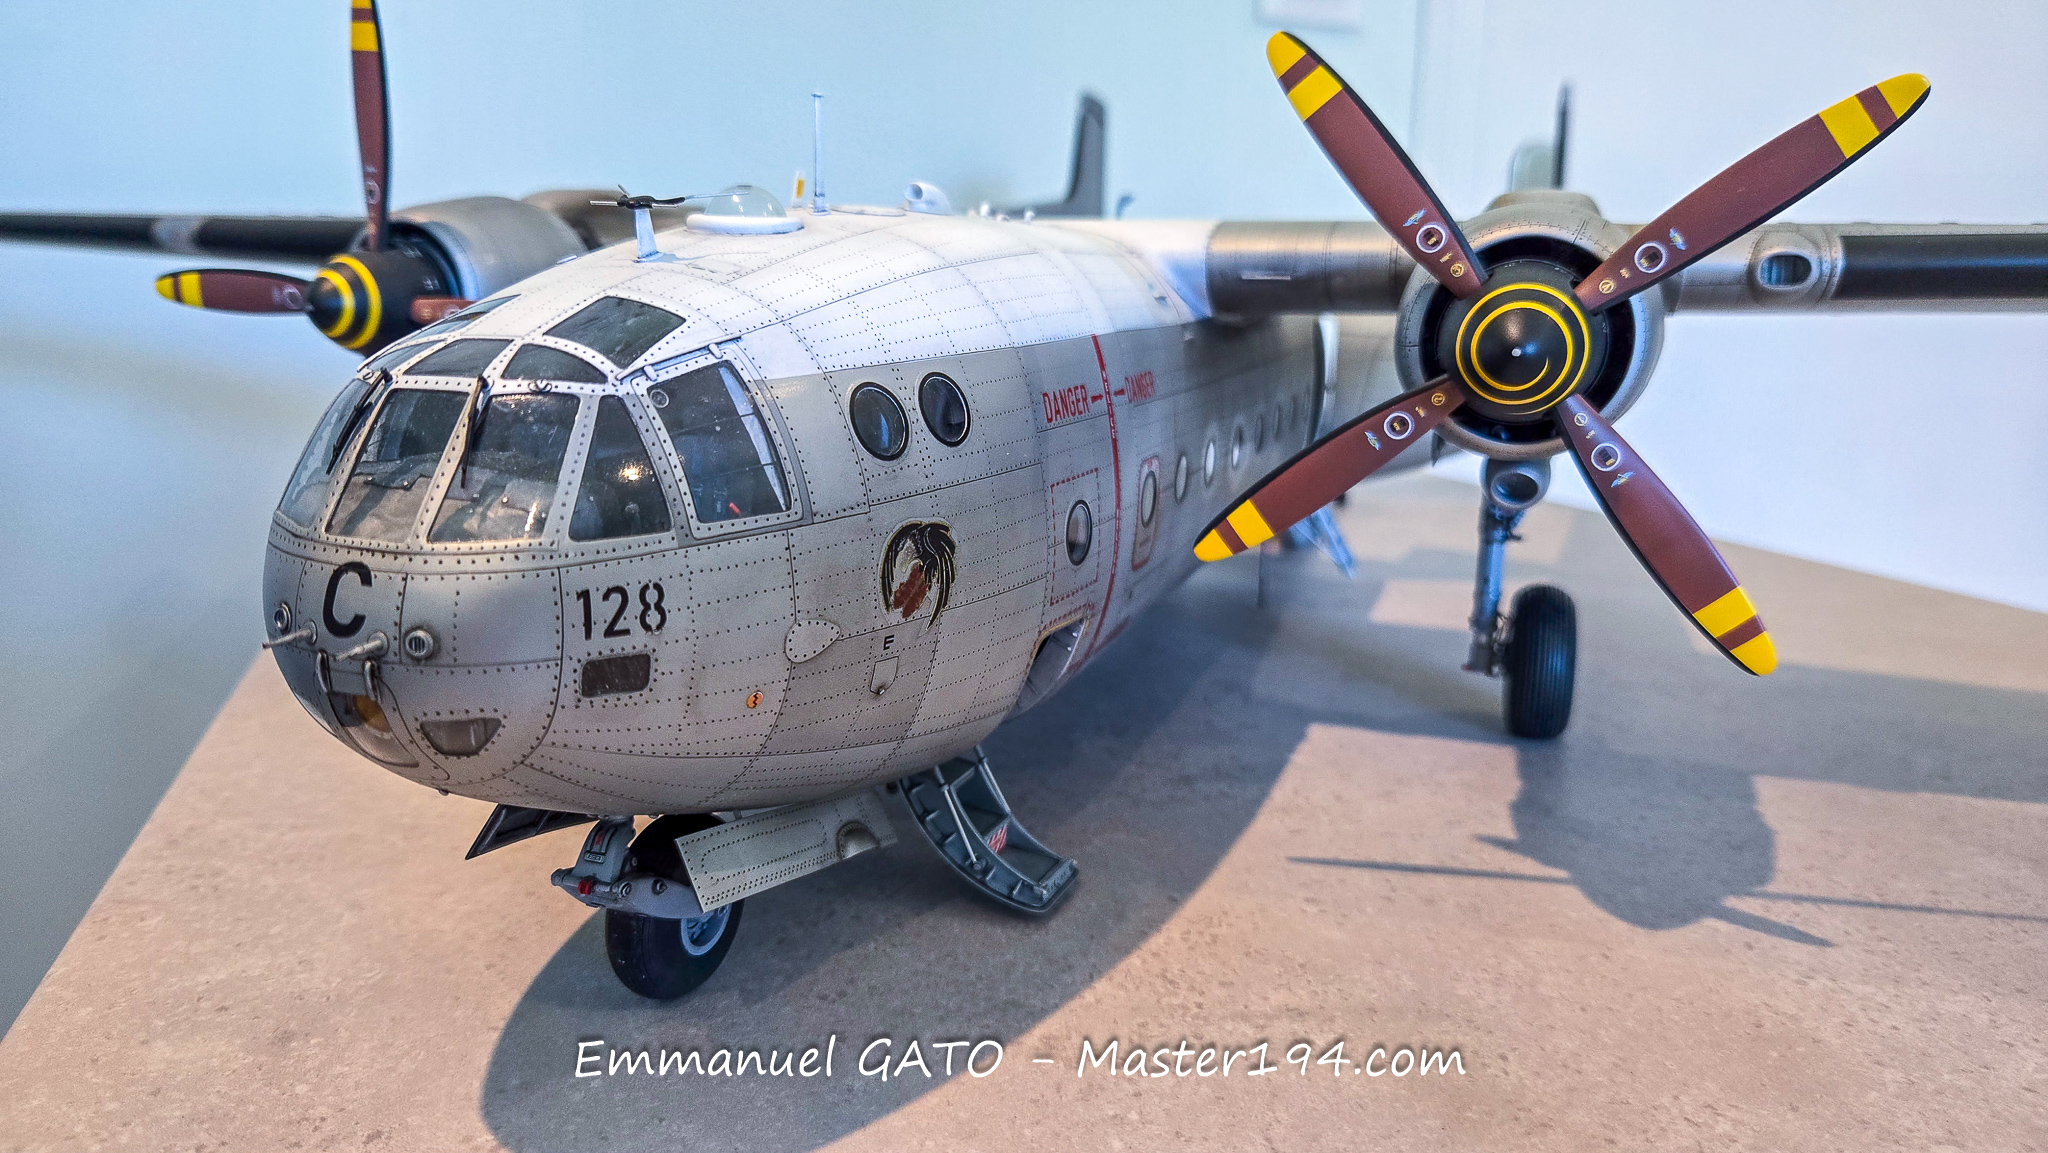
We are nearing the end of this long saga! The bulk of the model, namely the fuselage and wings, is practically finished. What’s still missing is the satin clear coat and, of course, the exhaust stain streaks that the Noratlas was particularly fond of.
I learned that it consumed ten liters of oil per flight hour per engine. Those streaks will therefore need to be made sufficiently greasy, while still avoiding going overboard.
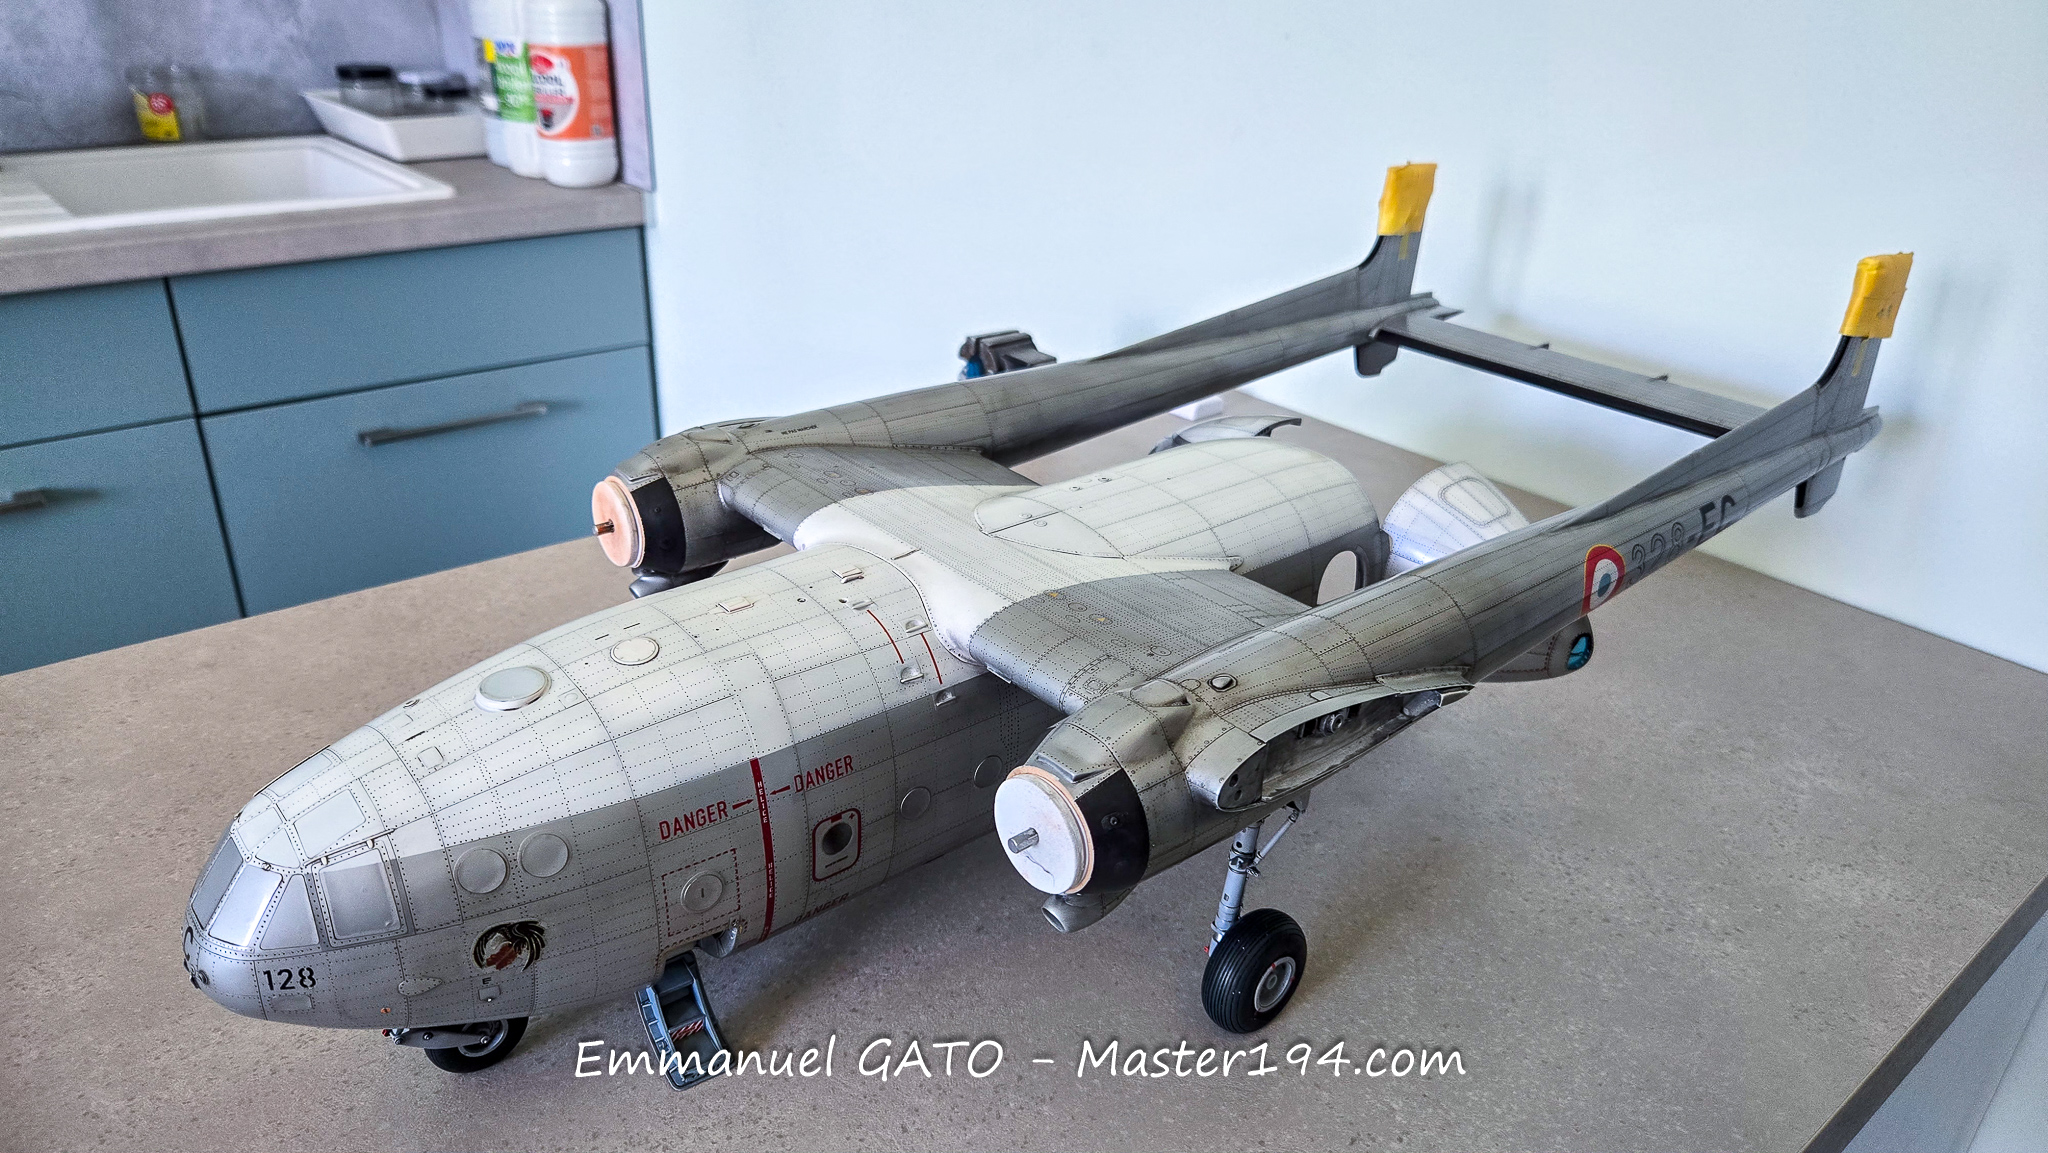
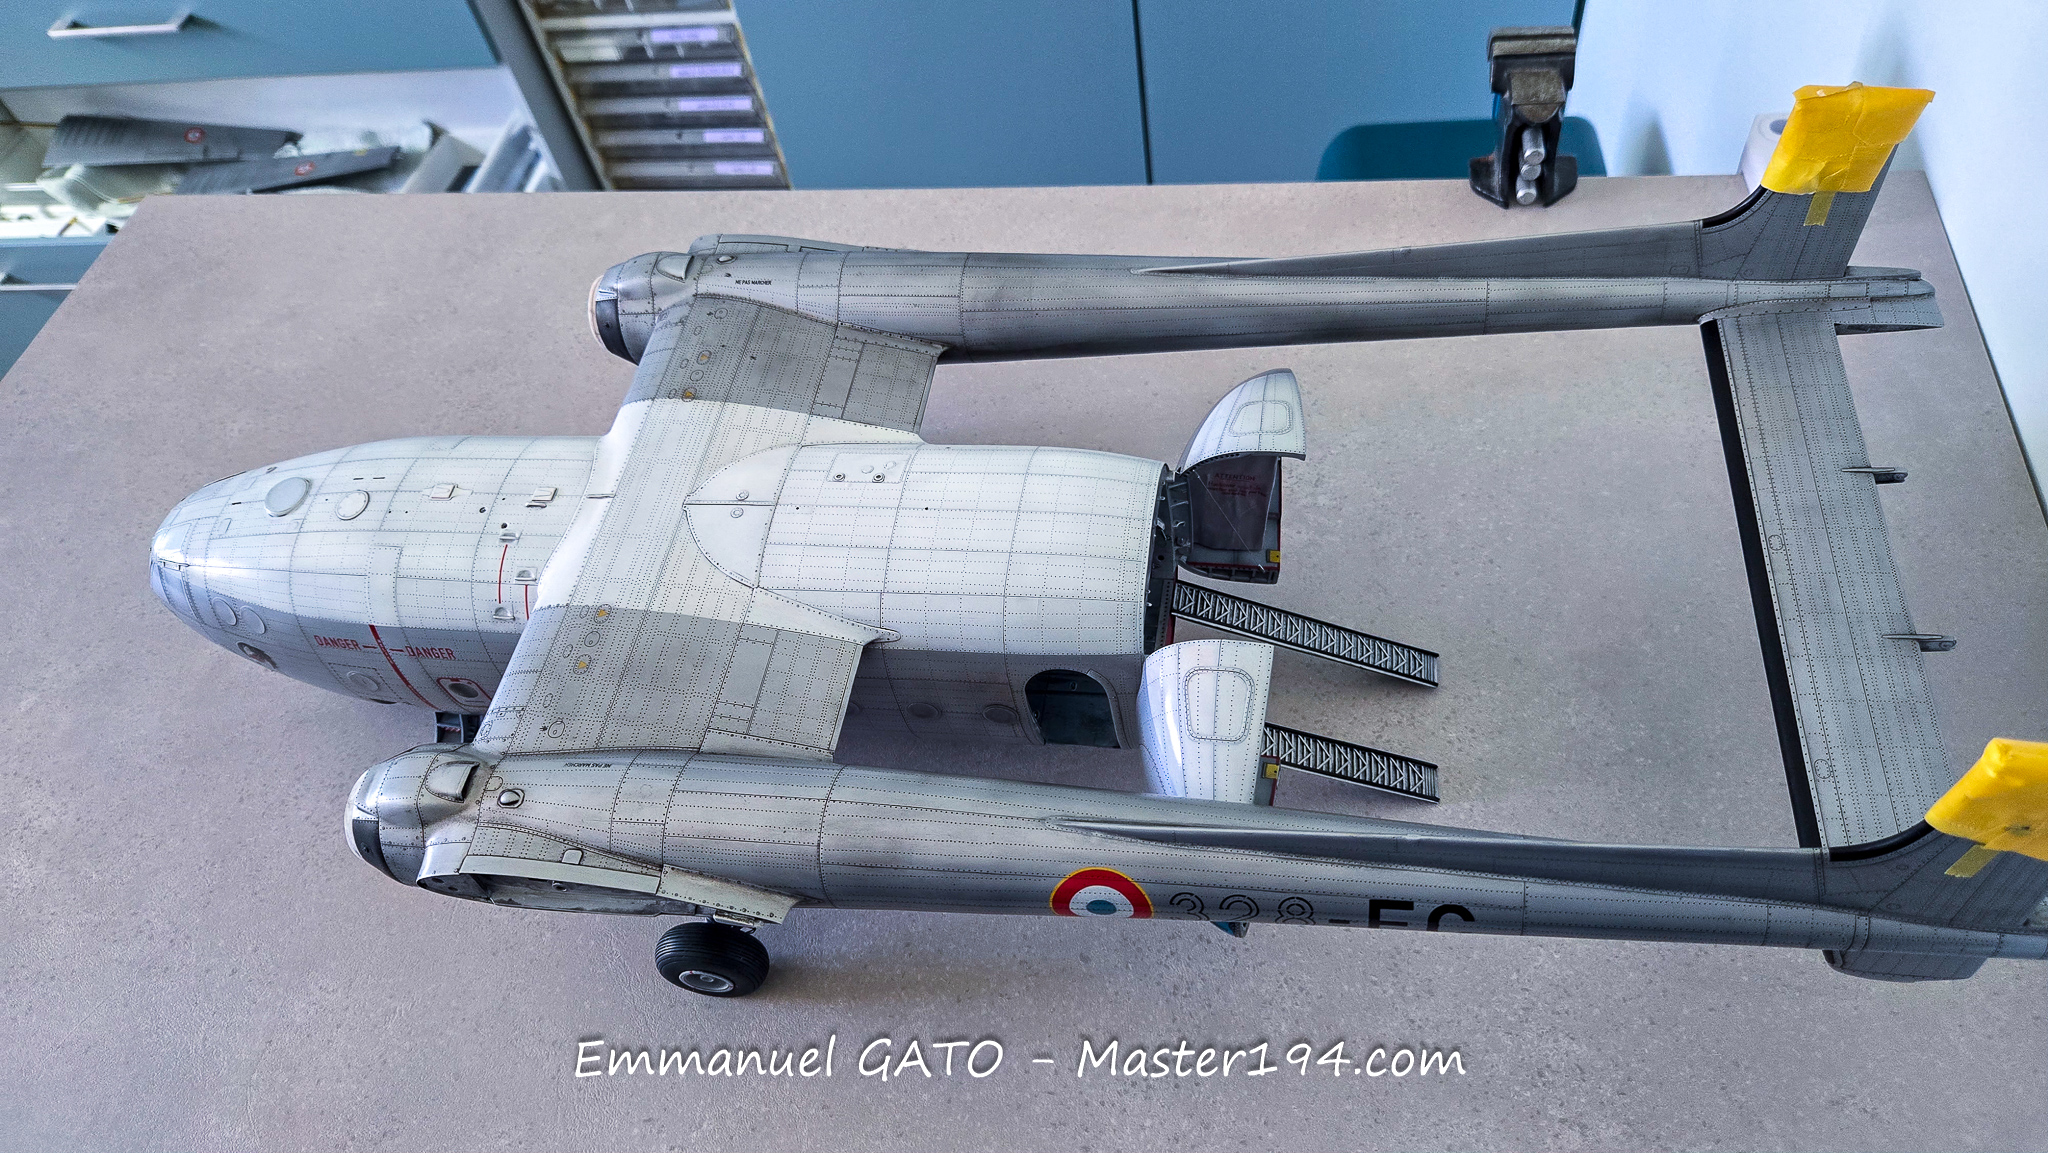
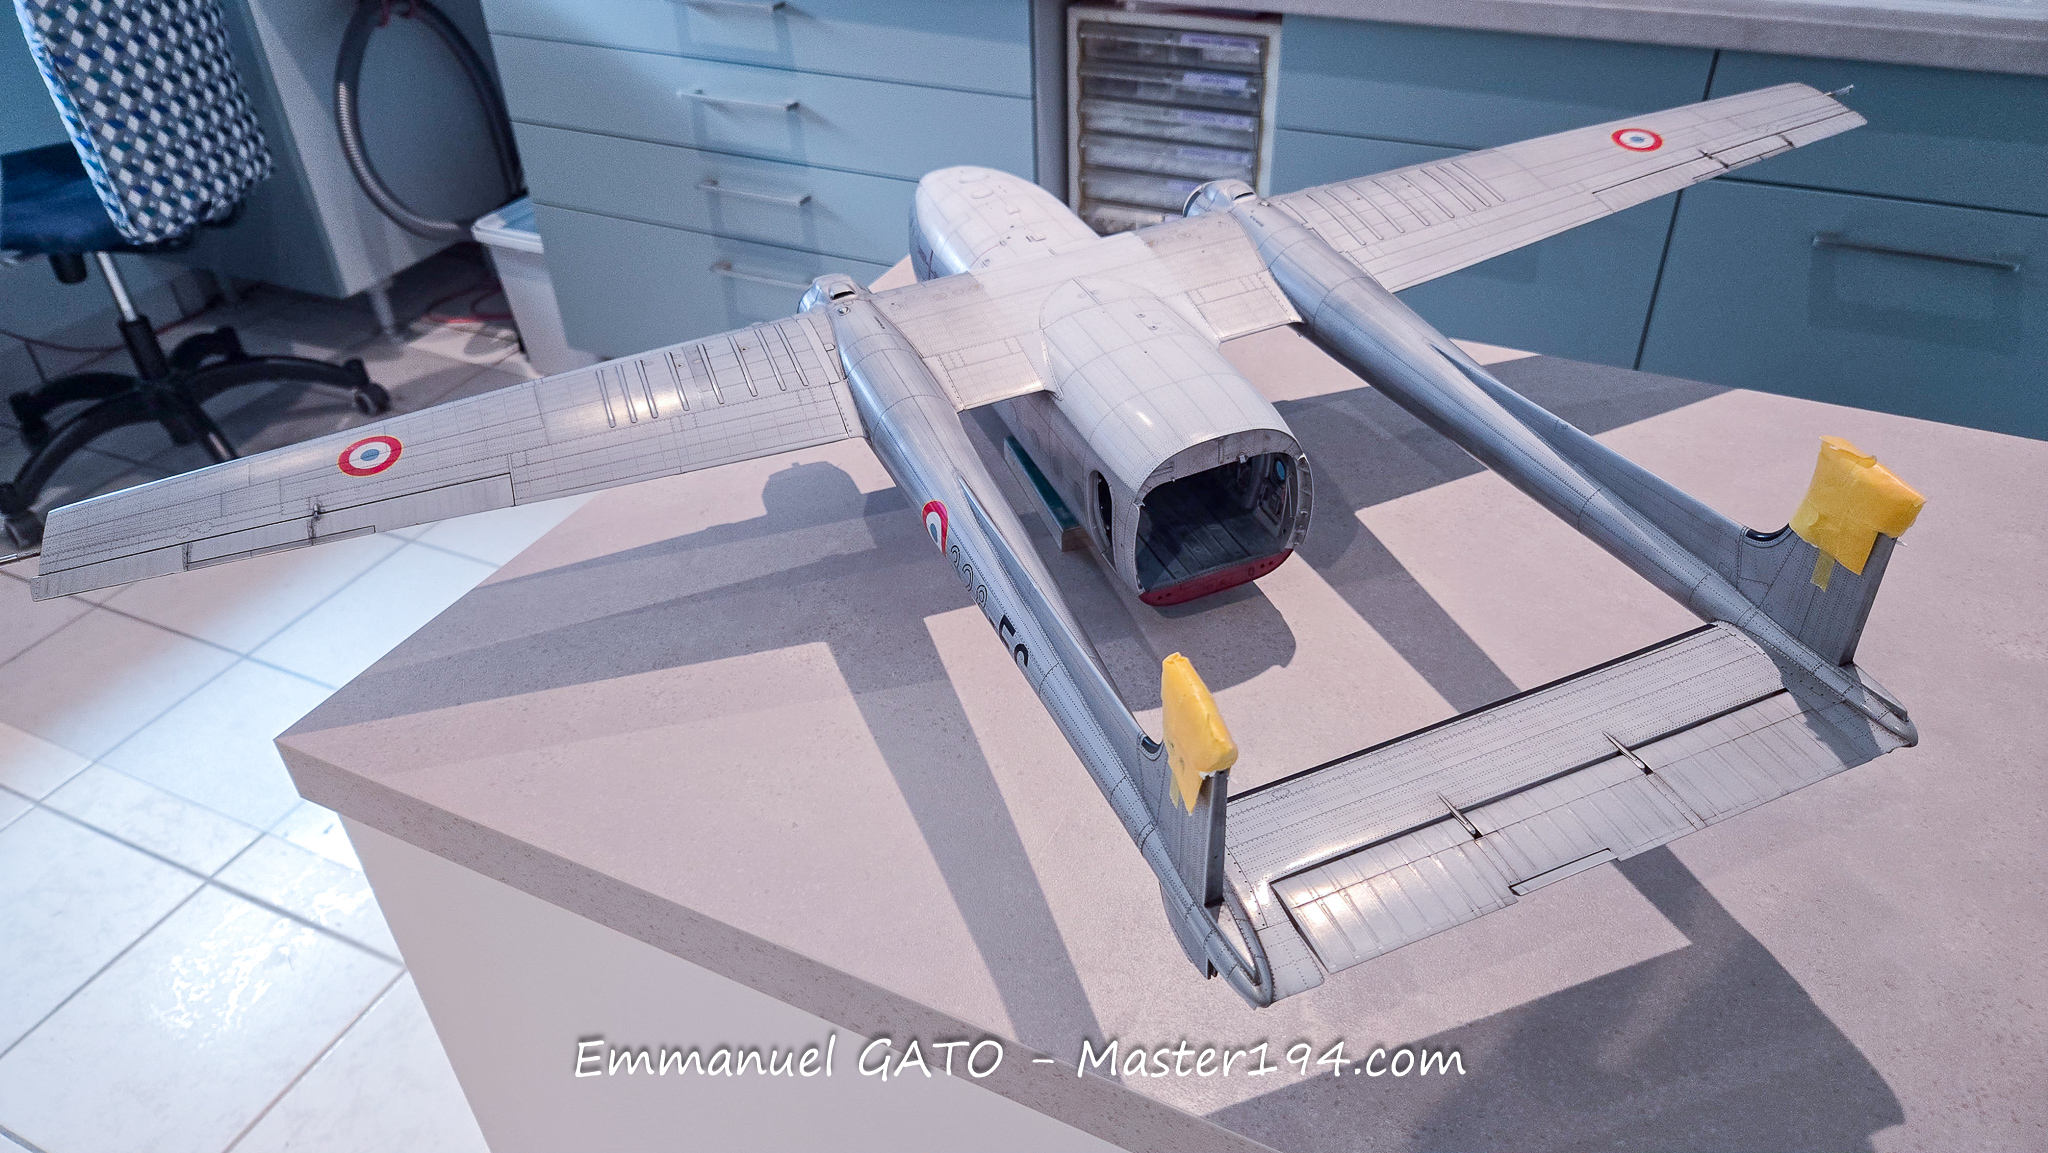
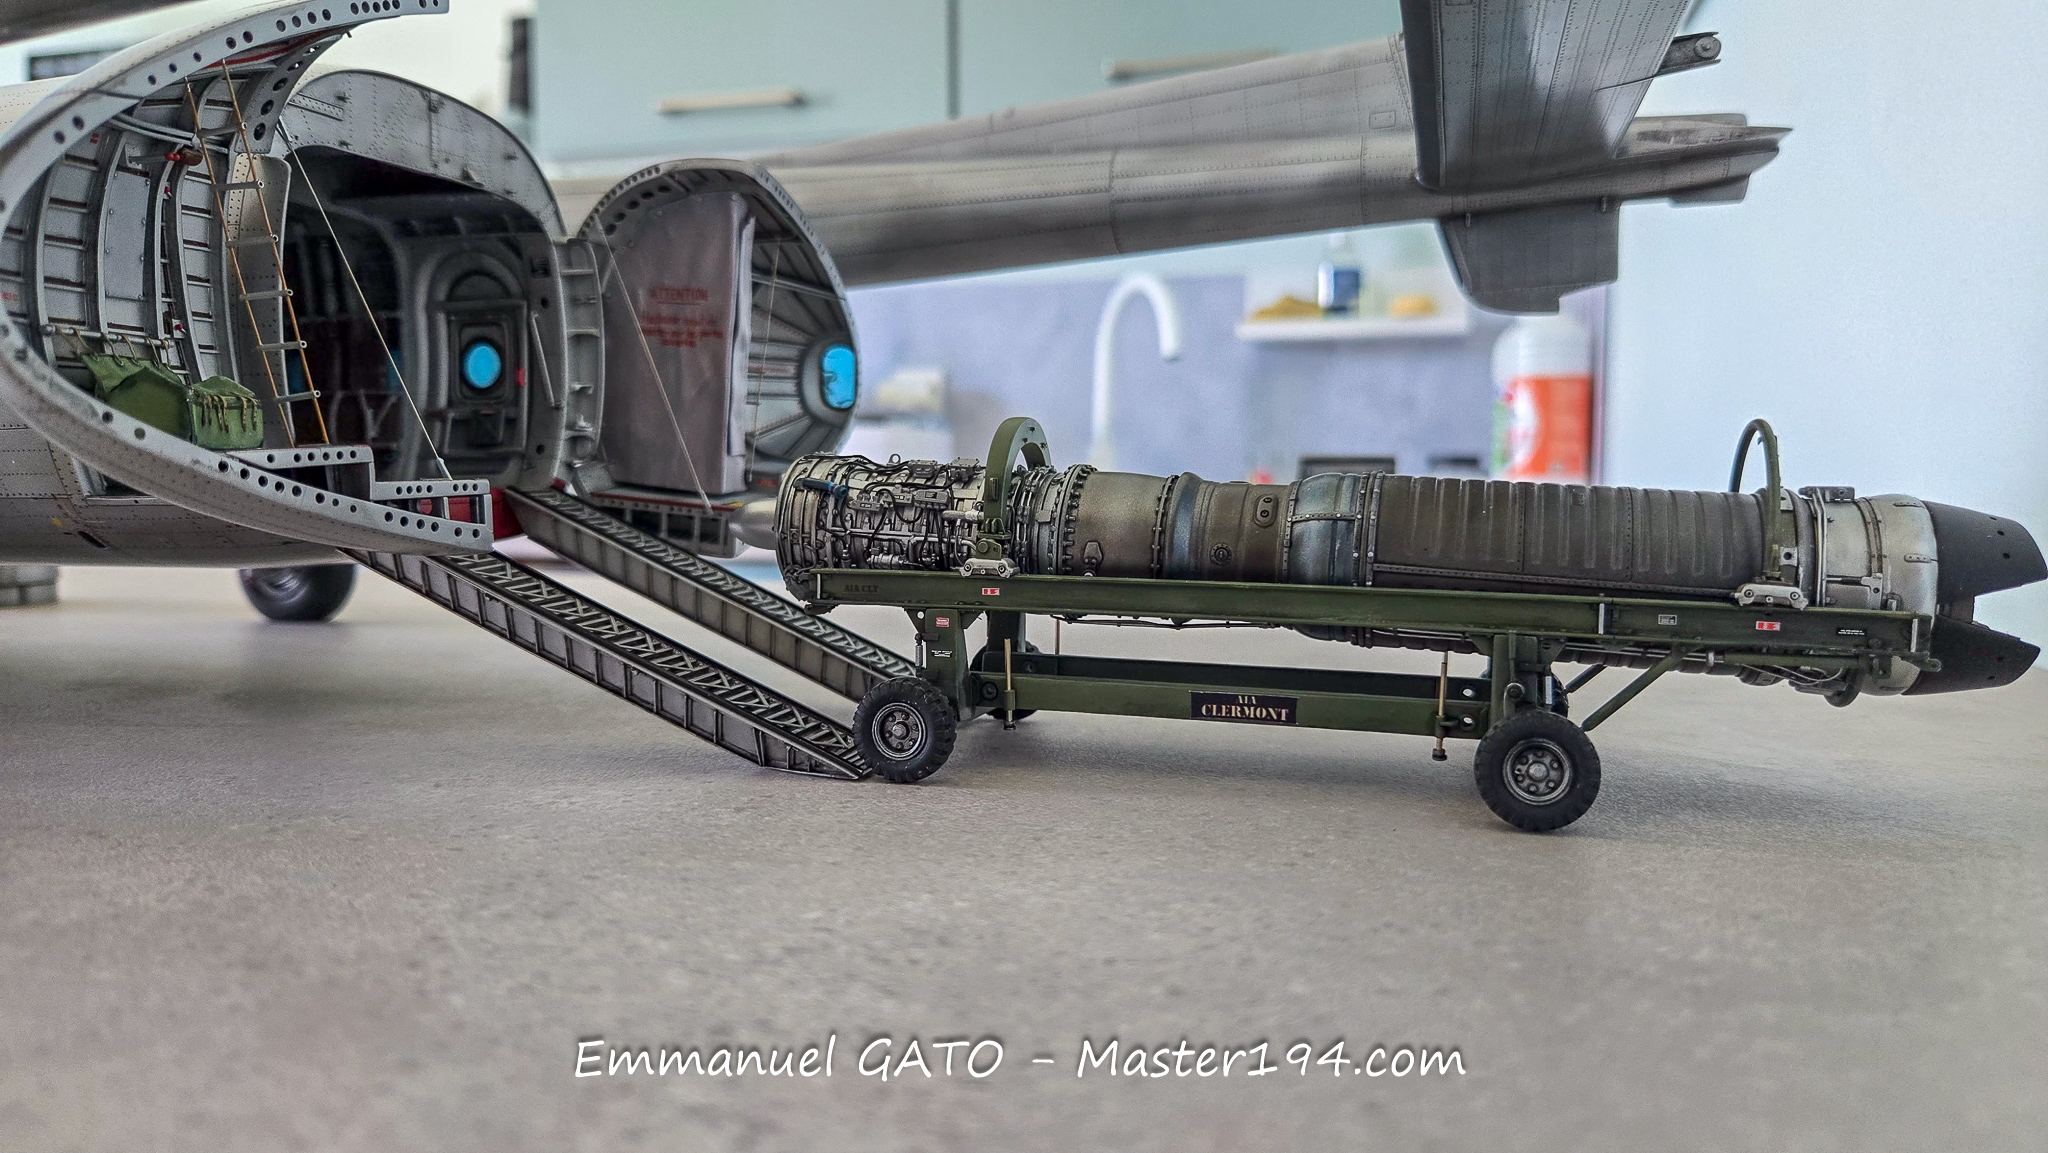
There is also a host of small details left to paint and attach. Above all, I’ll need to avoid rushing and breaking anything in the process. Once this step is done, it will be time to think about the next build, but that’s another story.
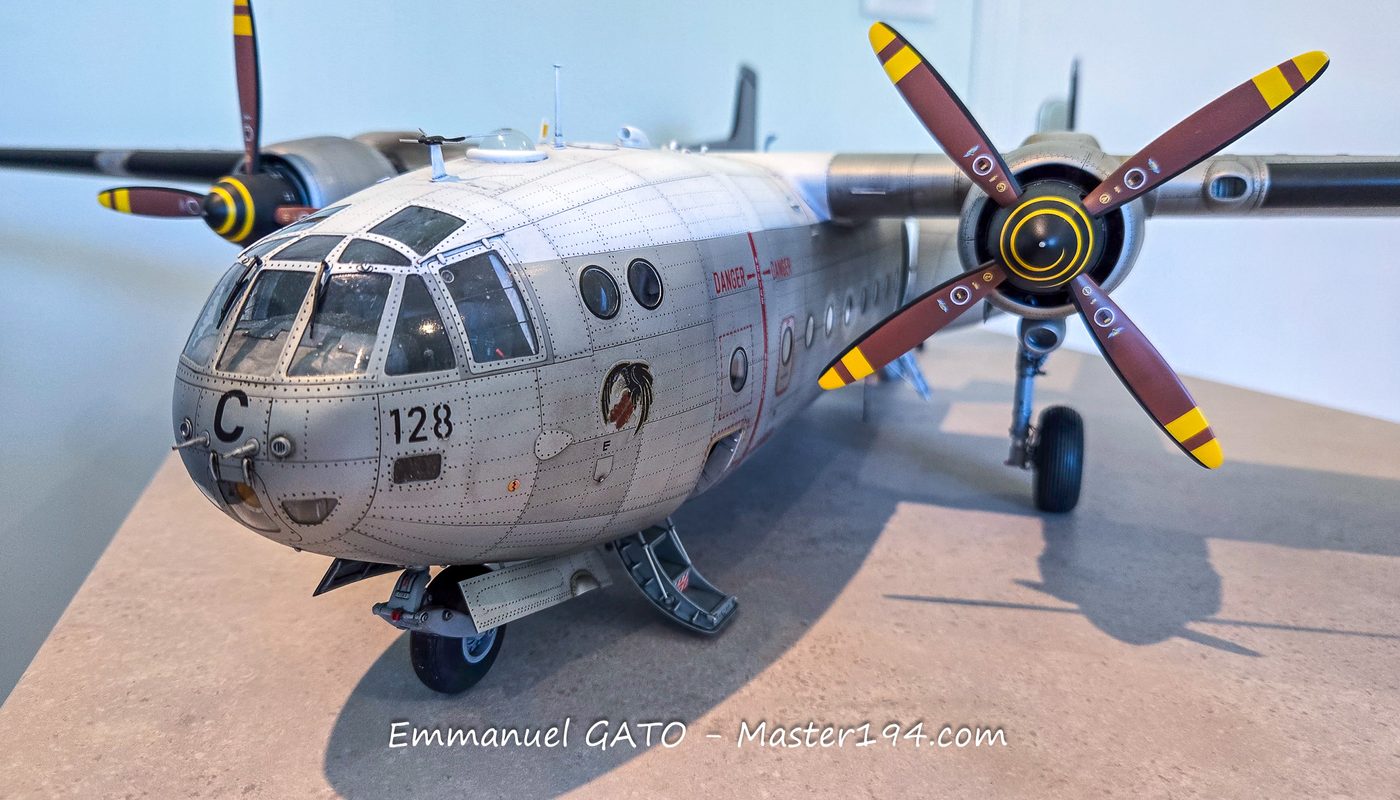
Here is the bird in its current state, with the window masking removed. The exhaust streaks are not done yet. I’ll keep them reasonable: I wouldn’t want to turn the Nord into a Skyraider!
There is also a multitude of parts left to assemble, from the blade antenna to the open rear fuselage half-shell. But we’re getting there!
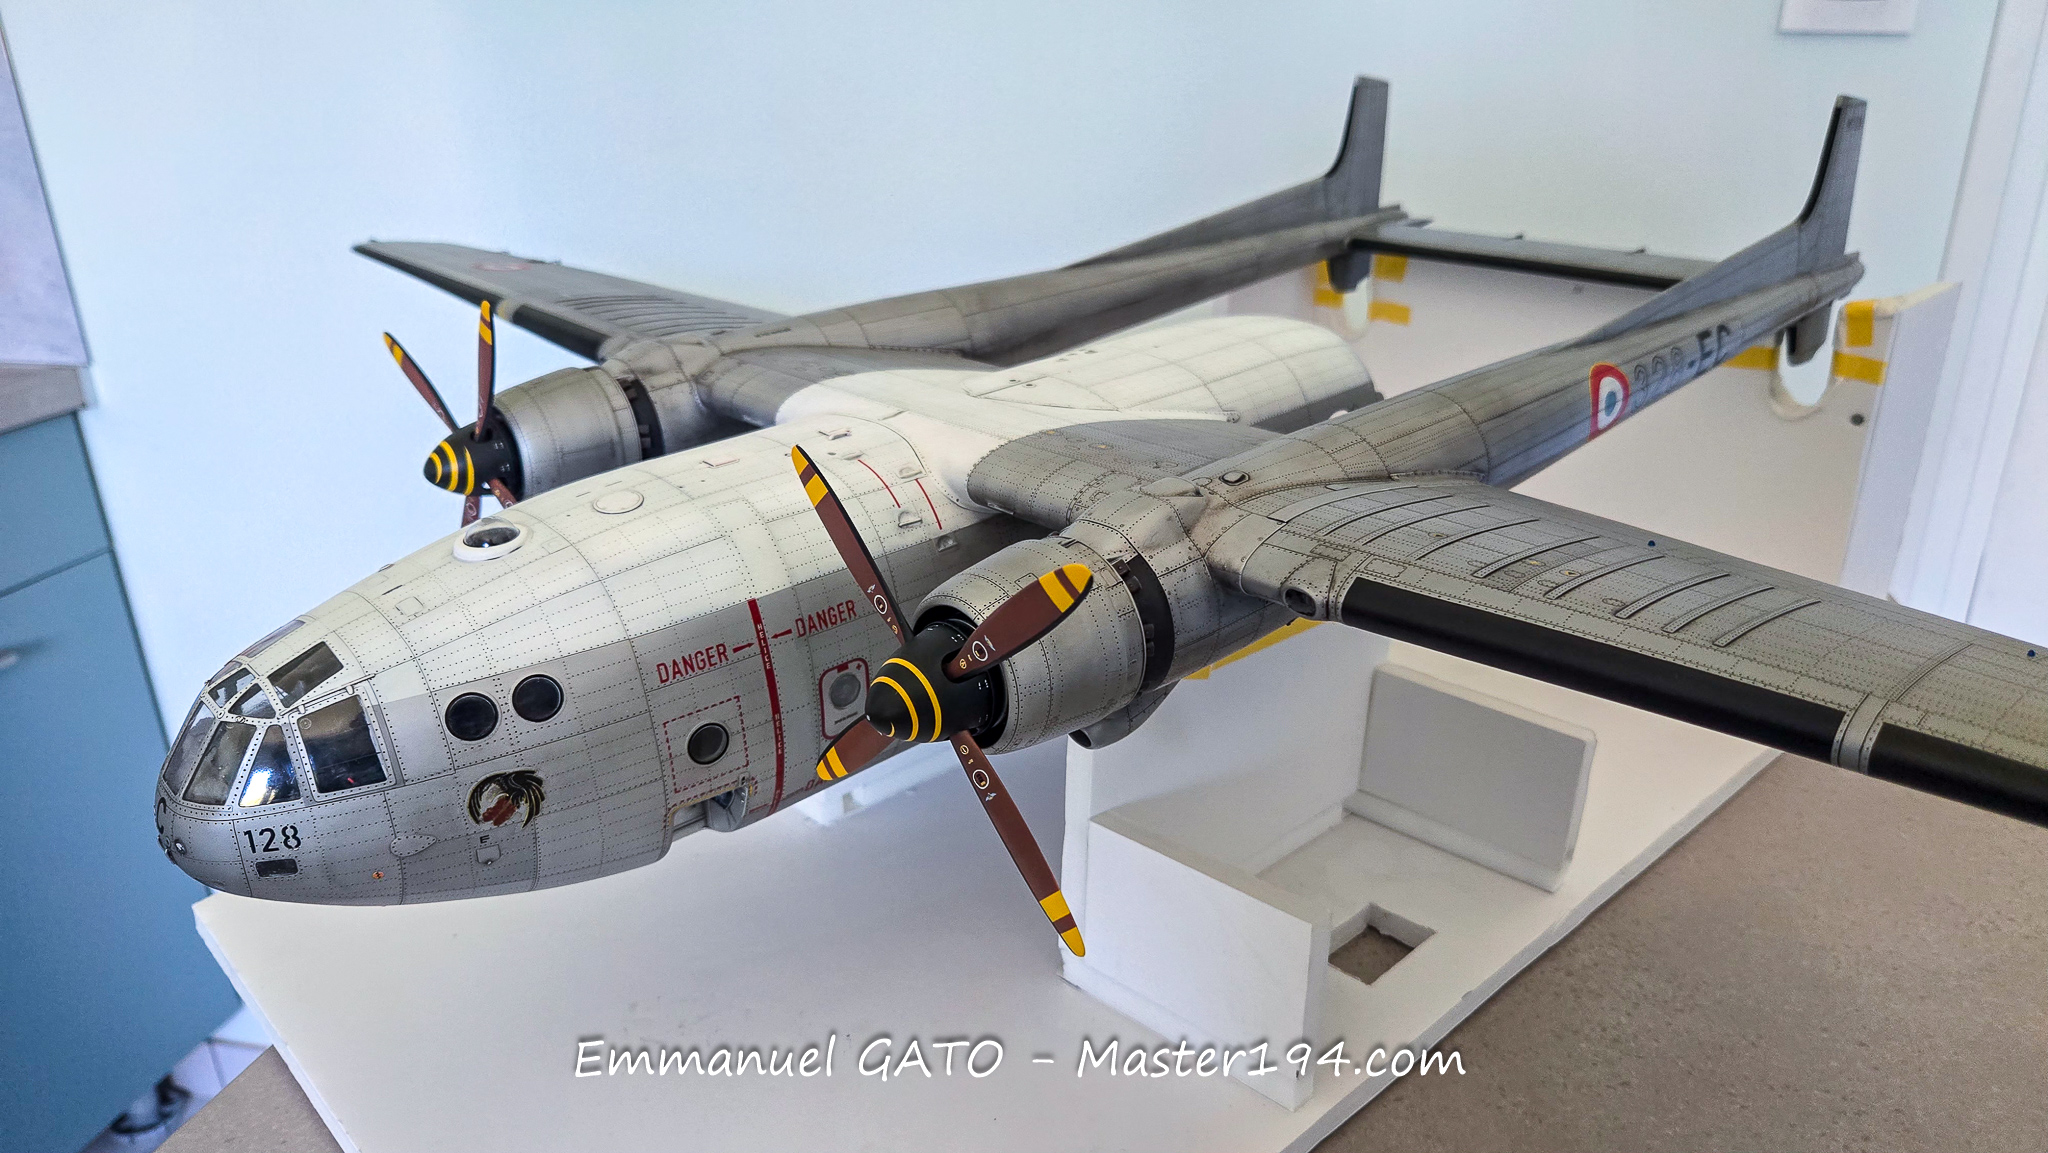
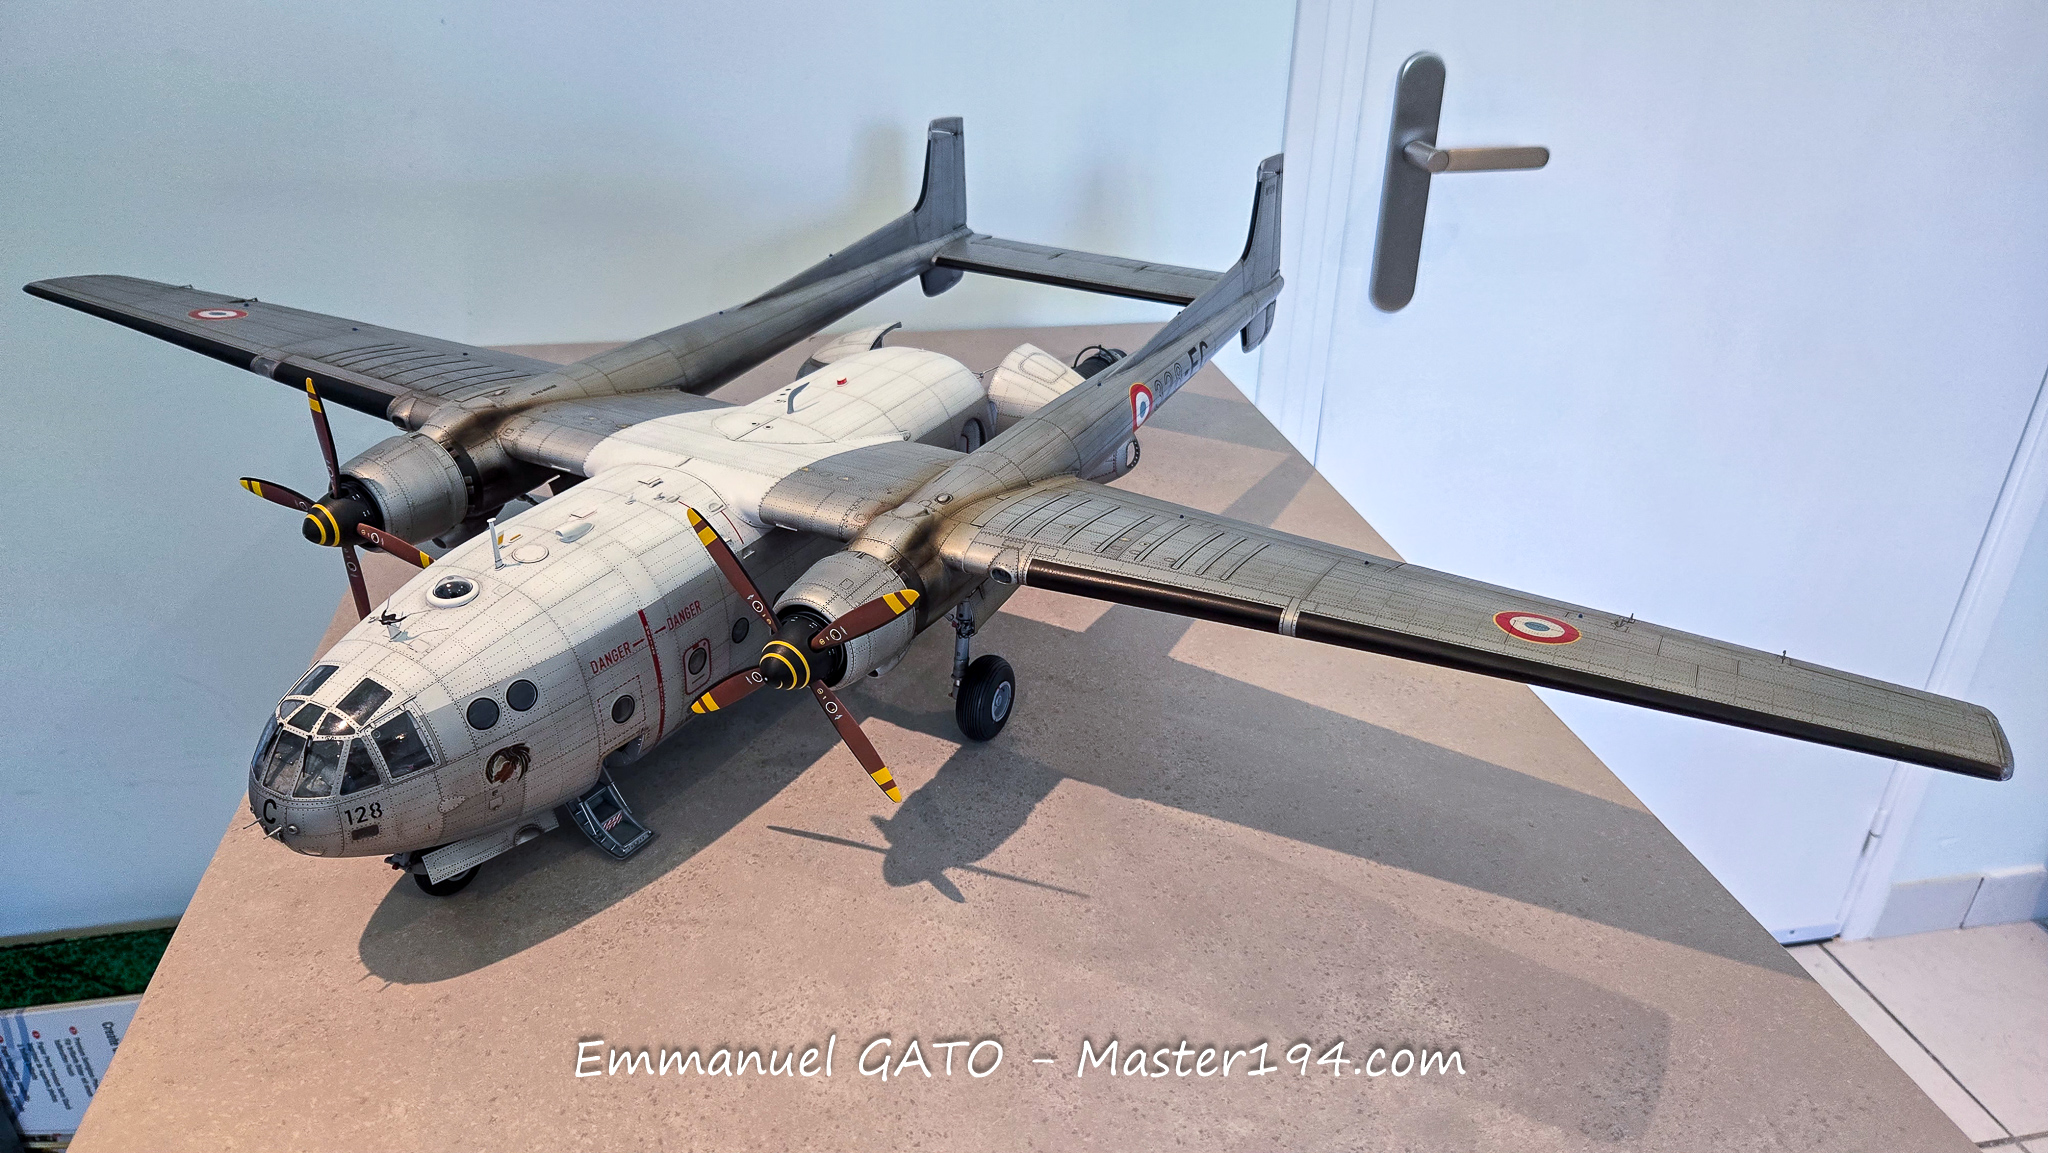
Well, there you have it, the Noratlas is finished… in theory anyway! The model is packed up and ready for the 1,400 kilometers that separate me from Telford and Scale Model World.
This adventure, which was meant to wrap up the building thread on Master194, would not have been possible without the help of numerous people. An individual build of this magnitude desperately needs a collective effort to cross the finish line.
Acknowledgements
First of all, I want to thank my friend Michel, a former Noratlas pilot, who suggested I embark on this project and provided me with the insights that only those who intimately knew the aircraft can master. His knowledge and advice were also invaluable for verifying the realism of the interior layouts down to the most unexpected details!
A big thank you to Renaud “Black Cat,” who supplied me with numerous drawings and dimension measurements made for his superb 1/48 scale model. These documents saved me a tremendous amount of time throughout the drafting and construction phases.
I also want to thank Hugues Quintard, who completed this documentation by taking missing measurements directly from the real aircraft. When you claim to build a model of this size from scratch, that kind of contribution is particularly precious.
Thanks to Alain Saccoccio, who agreed to cast several parts, notably the resin wheels and propeller blades. His craftsmanship allowed me to reproduce these elements without having to remake everything for every single copy.
A big thank you to Chris Queyroi (from FFSMC Productions)for producing the original 1/32 decal sheet. The crispness and quality of these decals contributed heavily to the result, especially for the instruments and interior equipment.
I must not forget Christian “Logan,” whose models and figures are a source of inspiration, Denis VDB for his particularly polished 3D creations, and ATAR 93, whose upgrades to his Mirage are equally impressive.
Finally, thank you to all the forum members who provided occasional help, shared documentation, took the time to answer my questions, or simply followed the project’s progress. I’m thinking in particular of those who helped track down photographs, dimensions, or technical info. Thanks also to all the visitors who honored me with their encouragement and kind comments.
I could try to list you all, but the list would inevitably be too long and incomplete. Your messages have been a source of motivation throughout all these years. I regularly visit this forum, and the builds you share are so many avenues for progress for me. No one is omniscient, and your work is also a wonderful source of inspiration.
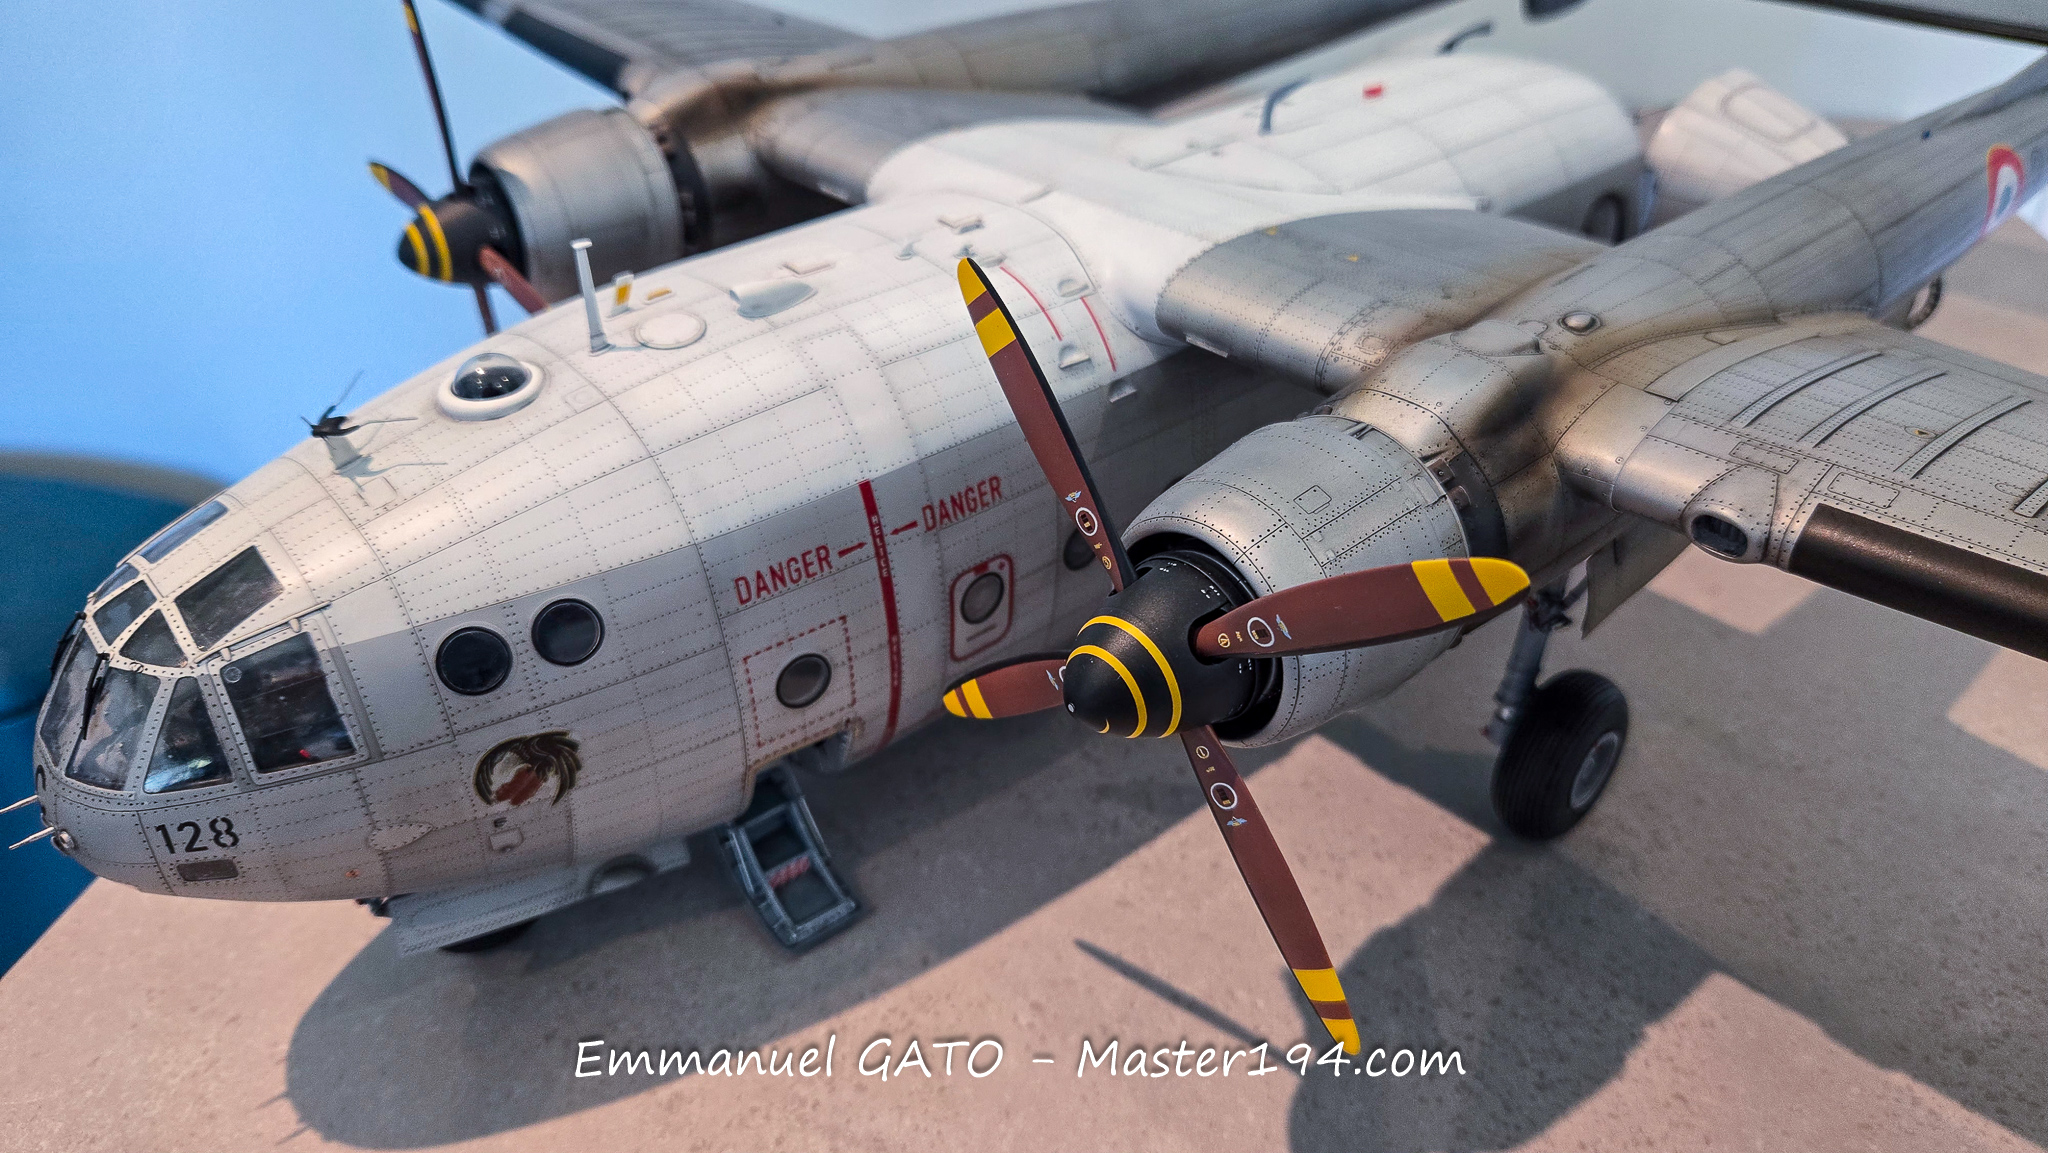
This model will therefore remain an individual adventure that could not have reached the end without all these contributions. Whether technical, documentary, or simply friendly, they all mattered.
See you very soon online and at upcoming exhibitions.
Best regards to all!
Emmanuel GATO